Ford F-53 Motorhome Chassis (2017) Bruksanvisning
Läs nedan 📖 manual på svenska för Ford F-53 Motorhome Chassis (2017) (164 sidor) i kategorin Bil. Denna guide var användbar för 12 personer och betygsatt med 4.5 stjärnor i genomsnitt av 2 användare
Sida 1/164

2017 F-Series Super Duty Class A Motorhome
and Commercial Chassis Owner’s Manual
owner.ford.com ford.ca
HU9J 19A321 AA
March 2016
First Printing
Owner’s Manual
Motorhome
Litho in U.S.A.
2017 F-SERIES SUPER DUTY CLASS A MOTORHOME AND COMMERCIAL CHASSIS Owner’s Manual

The information contained in this publication was correct at the time of going to print. In the interest of
continuous development, we reserve the right to change specifications, design or equipment at any time
without notice or obligation. No part of this publication may be reproduced, transmitted, stored in a
retrieval system or translated into any language in any form by any means without our written permission.
Errors and omissions excepted.
© Ford Motor Company 2016
All rights reserved.
Part Number: 20160315104807


Introduction
About This Manual 3...........................................
Symbols Glossary 3.............................................
California Proposition 65 5...............................
Perchlorate 5..........................................................
Ford Credit 5...........................................................
Replacement Parts
Recommendation 6........................................
Special Notices 6.................................................
Mobile Communications
Equipment 7.......................................................
Export Unique Options 7...................................
Environment
Protecting the Environment 9.........................
Steering Wheel
Adjusting the Steering Wheel 10....................
Cruise Control 10...................................................
Wipers and Washers
Windshield Wipers 11...........................................
Windshield Washers 11.......................................
Lighting
Lighting Control 12................................................
Instrument Lighting Dimmer 12.......................
Daytime Running Lamps 13..............................
Direction Indicators 13.........................................
Instrument Cluster
Gauges 14................................................................
Warning Lamps and Indicators 16..................
Audible Warnings and Indicators 18..............
Information Displays
General Information 19.......................................
Information Messages 20.................................
Starting and Stopping the
Engine
General Information 23......................................
Ignition Switch 23.................................................
Starting a Gasoline Engine 23.........................
Engine Block Heater 25......................................
Fuel and Refueling
Safety Precautions 26........................................
Fuel Quality 27.......................................................
Running Out of Fuel 27.......................................
Refueling 27............................................................
Fuel Consumption 29.........................................
Emission Control System 30...........................
Transmission
Automatic Transmission 33.............................
Brakes
General Information 36......................................
Hints on Driving With Anti-Lock
Brakes 36.............................................................
Parking Brake 37...................................................
Cruise Control
Principle of Operation 38..................................
Using Cruise Control 38.....................................
Load Carrying
Load Limit 39.........................................................
Towing
Towing a Trailer 45...............................................
Recommended Towing Weights 46..............
Essential Towing Checks 48............................
Towing the Vehicle on Four Wheels 50.......
Driving Hints
Breaking-In 51........................................................
1
Motorhome (TY3) Canada/United States of America, enUSA, First Printing
Table of Contents

Reduced Engine Performance 51...................
Economical Driving 51.........................................
Driving Through Water 52..................................
Roadside Emergencies
Roadside Assistance 53.....................................
Hazard Warning Flashers 54............................
Jump Starting the Vehicle 54...........................
Transporting the Vehicle 56.............................
Customer Assistance
Getting the Services You Need 58.................
In California (U.S. Only) 59...............................
The Better Business Bureau (BBB) Auto
Line Program (U.S. Only) 60.......................
Utilizing the Mediation/Arbitration
Program (Canada Only) 61...........................
Getting Assistance Outside the U.S. and
Canada 61...........................................................
Ordering Additional Owner's
Literature 62.......................................................
Reporting Safety Defects (U.S.
Only) 63...............................................................
Reporting Safety Defects (Canada
Only) 63...............................................................
Fuses
Fuse Specification Chart 65.............................
Changing a Fuse 83.............................................
Maintenance
General Information 85.....................................
Under Hood Overview - Commercial
Chassis 86..........................................................
Under Hood Overview - Motorhome
Chassis 87...........................................................
Engine Oil Dipstick 88........................................
Engine Oil Check 88............................................
Oil Change Indicator Reset 89........................
Engine Coolant Check 89.................................
Automatic Transmission Fluid
Check 93..............................................................
Brake Fluid Check 95..........................................
Power Steering Fluid Check 97.......................
Fuel Filter 98..........................................................
Changing the 12V Battery 98...........................
Changing the Engine Air Filter 100.................
Vehicle Care
General Information 101.....................................
Cleaning the Exterior 101....................................
Cleaning the Engine 102.....................................
Cleaning the Alloy Wheels 102........................
Vehicle Storage 103.............................................
Wheels and Tires
Tire Care 105...........................................................
Using Snow Chains 120......................................
Changing a Road Wheel 121.............................
Technical Specifications 124............................
Capacities and Specific-
ations
Engine Specifications 125..................................
Motorcraft Parts 125............................................
Vehicle Identification Number 127.................
Vehicle Certification Label 127.........................
Transmission Code Designation 128.............
Capacities and Specifications 129.................
Ford Protect
Ford Protect 134....................................................
Scheduled Maintenance
General Maintenance Information 136........
Normal Scheduled Maintenance 139...........
Special Operating Conditions Scheduled
Maintenance 141...............................................
Scheduled Maintenance Record 143............
Appendices
Type Approvals 154.............................................
2
Motorhome (TY3) Canada/United States of America, enUSA, First Printing
Table of Contents

ABOUT THIS MANUAL
Thank you for choosing Ford. We
recommend that you take some time to
get to know your vehicle by reading this
manual. The more that you know about
your vehicle, the greater the safety and
pleasure you will get from driving it.
WARNING
Driving while distracted can result in
loss of vehicle control, crash and
injury. We strongly recommend that
you use extreme caution when using any
device that may take your focus off the
road. Your primary responsibility is the safe
operation of your vehicle. We recommend
against the use of any hand-held device
while driving and encourage the use of
voice-operated systems when possible.
Make sure you are aware of all applicable
local laws that may affect the use of
electronic devices while driving.
Note: This manual describes product
features and options available throughout
the range of available models, sometimes
even before they are generally available. It
may describe options not fitted to the
vehicle you have purchased.
Note: Some of the illustrations in this
manual may show features as used in
different models, so may appear different
to you on your vehicle.
Note: Always use and operate your vehicle
in line with all applicable laws and
regulations.
Note: Pass on this manual when selling
your vehicle. It is an integral part of your
vehicle.
Note: Either Ford Motor Company or an
authorized Ford dealer may have originally
sold this incomplete vehicle to a vehicle
modifier who upfitted it. As a result, it may
have different options and features than
described in this manual.
This manual may qualify the location of a
component as left-hand side or right-hand
side. The side is determined when facing
forward in the seat.
E154903
Right-hand side.A
Left-hand side.B
SYMBOLS GLOSSARY
These are some of the symbols you may
see on your vehicle.
Safety alert
See Owner's Manual
E162384
Air conditioning system
Anti-lock braking system
3
Motorhome (TY3) Canada/United States of America, enUSA, First Printing
Introduction

Avoid smoking, flames or sparks
Battery
Battery acid
Brake fluid - non petroleum
based
Brake system
Cabin air filter
Check fuel cap
Child safety door lock or unlock
Child seat lower anchor
Child seat tether anchor
E71340
Cruise control
Do not open when hot
Engine air filter
Engine coolant
Engine coolant temperature
Engine oil
Explosive gas
Fan warning
Fasten seatbelt
Front airbag
Front fog lamps
Fuel pump reset
Fuse compartment
Hazard warning flashers
Heated rear window
Heated windshield
Interior luggage compartment
release
Jack
E161353
Keep out of reach of children
Lighting control
4
Motorhome (TY3) Canada/United States of America, enUSA, First Printing
Introduction

Low tire pressure warning
Maintain correct fluid level
Note operating instructions
Panic alarm
E139213
Parking aid
Parking brake
Power steering fluid
Power windows front/rear
Power window lockout
Service engine soon
Side airbag
Shield the eyes
E138639
Stability control
Windshield wash and wipe
CALIFORNIA PROPOSITION 65
WARNINGS
Some constituents of engine
exhaust, certain vehicle components,
certain fluids contained in vehicles
and certain products of component wear
contain or emit chemicals known to the
State of California to cause cancer and
birth defects or other reproductive harm.
Battery posts, terminals and related
accessories contain lead and lead
compounds, chemicals known to the
State of California to cause cancer and
reproductive harm. Batteries also contain
other chemicals known to the State of
California to cause cancer. Wash your
hands after handling.
PERCHLORATE
Certain components in your vehicle such
as airbag modules, seatbelt pretensioners
and remote control batteries may contain
perchlorate material. Special handling
may apply for service or vehicle end of life
disposal.
For more information visit:
Web Address
www.dtsc.ca.gov/hazard-
ouswaste/perchlorate
FORD CREDIT
US Only
Ford Credit offers a full range of financing
and lease plans to help you acquire your
vehicle. If you have financed or leased your
vehicle through Ford Credit, thank you for
your business.
5
Motorhome (TY3) Canada/United States of America, enUSA, First Printing
Introduction

We offer a number of convenient ways for
you to contact us and help to manage your
account.
Call 1-800-727-7000.
For more information about Ford Credit
and access to the Account Manager, go to
www.fordcredit.com.
REPLACEMENT PARTS
RECOMMENDATION
We have built your vehicle to the highest
standards using quality parts. We
recommend that you demand the use of
genuine Ford and Motorcraft parts
whenever your vehicle requires scheduled
maintenance or repair. You can clearly
identify genuine Ford and Motorcraft parts
by looking for the Ford, FoMoCo or
Motorcraft branding on the parts or their
packaging.
Scheduled Maintenance and
Mechanical Repairs
One of the best ways for you to make sure
that your vehicle provides years of service
is to have it maintained in line with our
recommendations using parts that
conform to the specifications detailed in
this Owner s Manual. Genuine Ford and’
Motorcraft parts meet or exceed these
specifications.
Collision Repairs
We hope that you never experience a
collision, but accidents do happen.
Genuine Ford replacement collision parts
meet our stringent requirements for fit,
finish, structural integrity, corrosion
protection and dent resistance. During
vehicle development we validate that
these parts deliver the intended level of
protection as a whole system. A great way
to know for sure you are getting this level
of protection is to use genuine Ford
replacement collision parts.
Warranty on Replacement Parts
Genuine Ford and Motorcraft replacement
parts are the only replacement parts that
benefit from a Ford Warranty. The Ford
Warranty may not cover damage caused
to your vehicle as a result of failed
non-Ford parts. For additional information,
refer to the terms and conditions of the
Ford Warranty.
SPECIAL NOTICES
New Vehicle Limited Warranty
For a detailed description of what is
covered and what is not covered by your
vehicle s New Vehicle Limited Warranty,’
refer to the Warranty Manual that is
provided to you along with your Owner s’
Manual.
Special Instructions
For your added safety, your vehicle is fitted
with sophisticated electronic controls.
WARNINGS
You risk death or serious injury to
yourself and others if you do not
follow the instruction highlighted by
the warning symbol. Failure to follow the
specific warnings and instructions could
result in personal injury.
Never place front seat mounted
rear-facing child or infant seats in
front of an active passenger airbag.
6
Motorhome (TY3) Canada/United States of America, enUSA, First Printing
Introduction

On Board Diagnostics Data Link
Connector
WARNING
Use of wireless plug-in devices in the
OBD Data Link Connector (DLC) may
allow unauthorized third parties to
gain access to vehicle systems and data
which could impair the function of various
vehicle systems, including safety-related
systems. The DLC should only be used by
a repair facility that operates in accordance
with Ford s service and repair instructions.’
Your vehicle has an OBD Data Link
Connector (DLC) that is used in
conjunction with a diagnostic scan tool for
vehicle diagnostics, repairs and
reprogramming services. Installing an
aftermarket device that uses the DLC
during normal driving for purposes such as
remote insurance company monitoring,
transmission of vehicle data to other
devices or entities, or altering the
performance of the vehicle, may cause
interference with or even damage to
vehicle systems. We do not recommend
or endorse the use of aftermarket plug-in
devices unless approved by Ford. The
vehicle Warranty will not cover damage
caused by an aftermarket plug-in device.
MOBILE COMMUNICATIONS
EQUIPMENT
WARNING
Driving while distracted can result in
loss of vehicle control, crash and
injury. We strongly recommend that
you use extreme caution when using any
device that may take your focus off the
road. Your primary responsibility is the safe
operation of your vehicle. We recommend
against the use of any hand-held device
while driving and encourage the use of
voice-operated systems when possible.
Make sure you are aware of all applicable
local laws that may affect the use of
electronic devices while driving.
Using mobile communications equipment
is becoming increasingly important in the
conduct of business and personal affairs.
However, you must not compromise your
own or others safety when using such’
equipment. Mobile communications can
enhance personal safety and security when
appropriately used, particularly in
emergency situations. Safety must be
paramount when using mobile
communications equipment to avoid
negating these benefits. Mobile
communication equipment includes, but
is not limited to, cellular phones, pagers,
portable email devices, text messaging
devices and portable two-way radios.
EXPORT UNIQUE OPTIONS
For your particular global region, your
vehicle may be equipped with features and
options that are different from the features
and options that are described in this
Owner s Manual. A market unique’
supplement may be supplied that
complements this book. By referring to the
market unique supplement, if provided,
you can properly identify those features,
7
Motorhome (TY3) Canada/United States of America, enUSA, First Printing
Introduction

recommendations and specifications that
are unique to your vehicle. This Owner s’
Manual is written primarily for the U.S. and
Canadian Markets. Features or equipment
listed as standard may be different on units
built for Export. Refer to this Owner s’
Manual for all other required
information and warnings.
8
Motorhome (TY3) Canada/United States of America, enUSA, First Printing
Introduction

PROTECTING THE
ENVIRONMENT
You must play your part in protecting the
environment. Correct vehicle usage and
the authorized disposal of waste, cleaning
and lubrication materials are significant
steps toward this aim.
9
Motorhome (TY3) Canada/United States of America, enUSA, First Printing
Environment

ADJUSTING THE STEERING
WHEEL
WARNING
Do not adjust the steering wheel
when your vehicle is moving.
E161517
1
2
1. Pull and hold the steering wheel
release lever.
2. Adjust the steering wheel to the desired
position then release the lever.
CRUISE CONTROL
E161518
See Cruise Control (page 38).
10
Motorhome (TY3) Canada/United States of America, enUSA, First Printing
Steering Wheel

WINDSHIELD WIPERS
Note: Fully defrost the windshield before
switching on the windshield wipers.
Note: Make sure the windshield wipers are
switched off before entering a car wash.
Note: Clean the windshield and wiper
blades if they begin to leave streaks or
smears. If that doesn't resolve the issue,
install new wiper blades.
Note: Do not operate the wipers on a dry
windshield. This may scratch the glass,
damage the wiper blades or cause the wiper
motor to burn out. Always use the
windshield washers before wiping a dry
windshield.
E161461
Rotate the end of the control:
•away from you to increase the wiper
speed
•toward you to decrease the wiper
speed
WINDSHIELD WASHERS
Note: Do not operate the wipers on a dry
windshield. This may scratch the glass,
damage the wiper blades or cause the wiper
motor to burn out. Always use the
windshield washer before wiping a dry
windshield.
Note: Do not operate the washers when
the washer reservoir is empty. This may
cause the washer pump to overheat.
Press the end of the stalk to activate the
washer.
•A brief press causes a single wipe
without washer fluid.
•A quick press and hold causes the
wipers to swipe three times with
washer fluid.
•A long press and hold will activate the
wipers and washer fluid for up to 10
seconds.
E161462
11
Motorhome (TY3) Canada/United States of America, enUSA, First Printing
Wipers and Washers

LIGHTING CONTROL
E161456
A
B
C
P
Off.A
Parking lamps, instrument panel
lamps, license plate lamps and
tail lamps.
B
Headlamps.C
High Beams
E161457
Push the lever away from you to switch
the high beam on.
Push the lever forward again or pull the
lever toward you to switch the high beams
off.
Headlamp Flasher
E161458
Slightly pull the lever toward you and
release it to flash the headlamps.
INSTRUMENT LIGHTING
DIMMER
Note: If you disconnect the battery or it
becomes discharged, the dimmer switch
will require re-calibration. Rotate the
dimmer switch from the full dim position to
the full dome/on position to reset.
Note: Move the control to the full upright
position, past detent, to turn on the interior
lamps.
E161459
Move the control up or down to adjust the
intensity of the panel lighting.
12
Motorhome (TY3) Canada/United States of America, enUSA, First Printing
Lighting

DAYTIME RUNNING LAMPS (If
Equipped)
WARNING
The daytime running lamps system
does not activate the rear lamps and
may not provide adequate lighting
during low visibility driving conditions. Also,
the autolamps switch position may not
activate the headlamps in all low visibility
conditions, such as daytime fog. Make sure
the headlamps are switched to auto or on,
as appropriate, during all low visibility
conditions. Failure to do so may result in a
crash.
The system switches the low beam
headlamps on at a reduced intensity in
daylight conditions.
To switch the system on, switch the
ignition on, and switch the lighting control
to the off or parking lamp position.
DIRECTION INDICATORS
E161460
Push the lever up or down to use the
direction indicators.
Note: Tap the lever up or down to make the
direction indicators flash three times to
indicate a lane change.
13
Motorhome (TY3) Canada/United States of America, enUSA, First Printing
Lighting

GAUGES
E192271
Engine oil pressure gauge.A
Tachometer.B
Information display.C
Speedometer.D
Transmission fluid temperature gauge.E
Engine coolant temperature gauge.F
Fuel gauge.G
14
Motorhome (TY3) Canada/United States of America, enUSA, First Printing
Instrument Cluster

Engine Oil Pressure Gauge
Indicates engine oil pressure. The needle
should stay in the normal operating range
(between L and H). If the needle falls
below the normal range, stop the vehicle,
turn off the engine and check the engine
oil level. Add oil if needed. If the oil level is
correct, have your vehicle checked by your
authorized dealer.
Speedometer
Indicates vehicle speed. Vehicle speed is
limited to either 65 mph (105 km/h) or 75
mph (120 km/h).
Transmission Fluid Temperature
Gauge
Normal area
The transmission fluid is within the normal
operating temperature (between H and
C).
Yellow area
The transmission fluid is higher than
normal operating temperature. This can
be caused by special operation conditions
(i.e. snowplowing, towing or off-road use).
Operating the transmission for extended
periods of time with the gauge in the
yellow area may cause internal
transmission damage. Altering the severity
of the driving conditions is recommended
to lower the transmission temperature into
the normal range.
Red area
The transmission fluid is overheating. Stop
the vehicle to allow the temperature to
return to normal range.
If the gauge is operating in the yellow or
red area, stop the vehicle and verify the
airflow is not restricted such as snow or
debris blocking airflow through the grill. If
the gauge continues to show high
temperatures, see your authorized dealer.
Engine Coolant Temperature
Gauge
WARNING
Never remove the coolant reservoir
cap while the engine is running or hot.
At normal operating temperature, the
needle will remain in the center section.
Note: Do not restart the engine until the
cause of overheating has been resolved.
If the needle enters the red section, the
engine is overheating. Stop the engine,
switch the ignition off and determine the
cause once the engine has cooled down.
Fuel Gauge
Note: The fuel gauge may vary slightly
when your vehicle is moving or on a slope.
Switch the ignition on. The fuel gauge
indicates approximately how much fuel
you have left in the fuel tank. The arrow
adjacent to the fuel pump symbol
indicates on which side of your vehicle the
fuel filler door is located.
The needle should move toward F when
you refuel your vehicle. If the needle points
to E after adding fuel, have an authorized
dealer check the system soon.
After refueling, some variability in the
position of the needle is normal:
15
Motorhome (TY3) Canada/United States of America, enUSA, First Printing
Instrument Cluster

•It may take a short time for the needle
to reach F after leaving the gas station.
This is normal and depends upon the
slope of the pavement at the gas
station.
•The fuel amount dispensed into the
tank is a little less or more than the
gauge indicated. This is normal and
depends upon the slope of the
pavement at the gas station.
•If the gas station nozzle shuts off
before the tank is full, try a different
gas pump nozzle.
•There is a small reserve left in the tank
when the fuel gauge reaches empty.
Low Fuel Reminder
A low fuel reminder triggers when the fuel
gauge needle is at one-sixteenth or about
50 miles (80 km) to empty, whichever
occurs first.
Variations:
Note: The low fuel warning and distance-to-empty warning can appear at different fuel
gauge positions depending on fuel economy conditions. This variation is normal.
Distance-to-emptyFuel gauge positionDriving type (fuel economy
conditions)
30 miles to 80 miles (48 km
to 129 km)
1/16thHighway driving
10 miles to 35 miles (16 km
to 56 km)
1/16th-1/4Severe duty driving (trailer
towing, extended idle)
WARNING LAMPS AND
INDICATORS
The following warning lamps and
indicators will alert you to a vehicle
condition that may become serious. Some
lamps will illuminate when you start your
vehicle to make sure they work. If any
lamps remain on after starting your vehicle,
refer to the respective system warning
lamp for further information.
Note: Some warning indicators appear in
the information display and function the
same as a warning lamp but do not display
when you start your vehicle.
Anti-Lock Braking System
If it illuminates when you are
driving, this indicates a
malfunction. You will continue
to have the normal braking system
(without ABS) unless the brake system
warning lamp is also illuminated. Have the
system checked by your authorized dealer.
Battery
If it illuminates while driving, it
indicates a malfunction. Switch
off all unnecessary electrical
equipment and have the system checked
by your authorized dealer immediately.
16
Motorhome (TY3) Canada/United States of America, enUSA, First Printing
Instrument Cluster

Brake System
E144522
Illuminates when you engage the
parking brake with the ignition
on.
If it illuminates when you are driving, check
that the parking brake is not engaged. If
the parking brake is not engaged, this
indicates low brake fluid level or a brake
system malfunction. Have the system
checked immediately by your authorized
dealer.
WARNING
Driving your vehicle with the warning
lamp on is dangerous. A significant
decrease in braking performance
may occur. It will take you longer to stop
your vehicle. Have your vehicle checked by
your authorized dealer immediately. Driving
extended distances with the parking brake
engaged can cause brake failure and the
risk of personal injury.
Brake Reserve System (If Equipped)
E146190
Illuminates to indicate normal
hydromax booster reserve
system activation when the
engine is off and the service brake pedal is
applied.
This light may also illuminate momentarily
if the engine is running and the driver turns
the steering wheel fully in one direction
while braking.
If the light remains on while the engine is
running, this indicates inadequate hydraulic
booster pressure or reserve pump system
failure. Stop the vehicle as soon as
possible and seek service immediately by
your authorized dealer.
Cruise Control (If Equipped)
E71340
Illuminates when you switch this
feature on. See Using Cruise
Control (page 38).
Direction Indicator
Illuminates when the left or right
direction indicator or the hazard
warning flasher is turned on. If
the indicators stay on or flash faster, check
for a burned out bulb.
Electronic Throttle Control
Illuminates when the engine has
defaulted to a limp-home
operation. See your authorized
dealer as soon as possible.
Fasten Safety Belt
It will illuminate and a chime will
sound to remind you to fasten
your safety belt.
High Beam
Illuminates when you switch the
high beam headlamps on. It will
flash when you use the
headlamp flasher.
Service Engine Soon
If the service engine soon
indicator light stays illuminated
after the engine is started, it
indicates that the On-Board Diagnostics
(OBD-II) system has detected a
malfunction of the vehicle emissions
control system. Refer to On-Board
Diagnostics (OBD-II) in the Fuel and
Refueling chapter for more information
about having your vehicle serviced. See
Emission Control System (page 30).
17
Motorhome (TY3) Canada/United States of America, enUSA, First Printing
Instrument Cluster

If the light is blinking, engine misfire is
occurring which could damage your
catalytic converter. Drive in a moderate
fashion (avoid heavy acceleration and
deceleration) and have your vehicle
serviced immediately.
WARNING
Under engine misfire conditions,
excessive exhaust temperatures
could damage the catalytic
converter, the fuel system, interior floor
coverings or other vehicle components,
possibly causing a fire. Have your vehicle
serviced immediately.
The service engine soon indicator light
illuminates when the ignition is first turned
on prior to engine start to check the bulb
and to indicate whether the vehicle is ready
for Inspection/Maintenance (I/M) testing.
Normally, the service engine soon light will
stay on until the engine is cranked, then
turn itself off if no malfunctions are
present. However, if after 15 seconds the
service engine soon light blinks eight times,
it means that the vehicle is not ready for
I/M testing. See Emission Control
System (page 30).
Transmission Tow/Haul (If Equipped)
E161509
Illuminates when the tow/haul
feature has been activated. If the
light flashes steadily, have the
system serviced immediately, damage to
the transmission could occur.
AUDIBLE WARNINGS AND
INDICATORS
Fail-Safe Cooling Warning Chime
Sounds when the coolant gauge pointer
has moved to hot. There are three stages
of chimes:
•Stage 1 is a single chime when the
engine temperature begins to overheat.
•Stage 2 is multiple chimes and engine
power becomes limited in order to help
cool the engine.
•Stage 3 is multiple chimes and the
engine will shut down.
Headlamps On Warning Chime
Sounds when you remove the key from the
ignition and open the driver's door and you
have left the headlamps or parking lamps
on.
Key in Ignition Warning Chime
Sounds when you open the driver's door
and you have left the key in the ignition.
Parking Brake On Warning Chime
Sounds when you have left the parking
brake on and drive your vehicle. If the
warning chime remains on after you have
released the parking brake, have the
system checked by your authorized dealer
immediately.
Shift to Park Warning Chime
Sounds when you open the driver's door
and your vehicle is not in park.
18
Motorhome (TY3) Canada/United States of America, enUSA, First Printing
Instrument Cluster

GENERAL INFORMATION
WARNING
Driving while distracted can result in
loss of vehicle control, crash and
injury. We strongly recommend that
you use extreme caution when using any
device that may take your focus off the
road. Your primary responsibility is the safe
operation of your vehicle. We recommend
against the use of any hand-held device
while driving and encourage the use of
voice-operated systems when possible.
Make sure you are aware of all applicable
local laws that may affect the use of
electronic devices while driving.
Various systems on your vehicle can be
controlled using the information display
controls on the steering wheel.
Corresponding information is displayed in
the information display.
Information Display Controls
E197545
•Press the info button to scroll through
trip, outside air temperature, engine
hours and miles to empty.
•Press the setup button to scroll
through various vehicle feature
settings.
•Press the reset button to choose
settings, reset information and confirm
messages.
Info
E161507
Press the INFO button repeatedly to cycle
through the following features:
TRIP
Registers the distance of individual
journeys. Press and release the INFO
button until the TRIP appears in the
display. Press and hold the RESET button
to reset
XXX° (outside air temperature)
This displays the outside temperature.
MILES (km) TO E
This displays an estimate of approximately
how far you can drive with the fuel
remaining in your tank under normal driving
conditions. Remember to turn the ignition
off when refueling to allow this feature to
correctly detect the added fuel.
19
Motorhome (TY3) Canada/United States of America, enUSA, First Printing
Information Displays

The DTE function will display a message
in the information display when you have
approximately 50 miles (80 km), to empty.
Press RESET to clear this warning
message. It will return at approximately 25
miles (40 km), 10 miles (16 km) and 0
miles (0 km) miles to empty.
DTE is calculated using a running average
fuel economy, which is based on your
recent driving history of 500 miles (800
km).
ENG HRS
Registers the accumulated time the engine
has been running.
System check and vehicle feature
customization
E161508
Press the SETUP button repeatedly to
cycle the message center through the
following features:
Note: When returning to the SETUP menu
and a non-English language has been
selected, HOLD RESET FOR ENGLISH will
be displayed to change back to English.
Press and hold the RESET button to change
back to English.
PRESS RESET FOR SYS CHECK
When this message appears, press the
RESET button and the message center will
begin to cycle through the following
systems and provide a status of the item
if needed.
Note: Some systems show a message only
if a condition is present
•ENGINE TEMP
•TRANS TEMP
•OIL PRESSURE
•BRAKE FLUID LEVEL
•FUEL LEVEL (if equipped)
UNITS
Displays the current units English or Metric
Press the RESET button to change from
English to Metric.
ENGLISH RESET FOR NEW
Allows you to choose which language the
message center will display in. Selectable
languages are English, Spanish, or French.
Press the RESET button to cycle the
message center through English, Spanish
and French language choices. Press and
hold the RESET button for two seconds to
set the language choice.
INFORMATION MESSAGES
Note: Depending on the vehicle options
equipped with your vehicle, not all of the
messages will display or be available.
Certain messages may be abbreviated or
shortened depending upon which cluster
type you have.
Press the RESET button to acknowledge
and remove some messages from the
information display. Other messages will
be removed automatically after a short
time.
20
Motorhome (TY3) Canada/United States of America, enUSA, First Printing
Information Displays

Certain messages need to be confirmed before you can access the menus.
Engine
ActionMessage
The engine is overheating. Stop your vehicle as soon
as safely possible, turn off the engine. If the warning
stays on followed by an indicator chime or continues
to come on, contact an authorized dealer as soon as
possible. Never remove the coolant reservoir cap while
the engine is running or hot.
REDUCED ENGINE POWER
The engine is overheating. Stop your vehicle as soon
as safely possible, turn off the engine. If the warning
stays on followed by an indicator chime or continues
to come on, contact an authorized dealer as soon as
possible.
STOP ENGINE SAFELY
The engine coolant is overheating. Stop your vehicle
as soon as safely possible, turn off the engine and let
it cool. Check the coolant and coolant level. If the
warning stays on or continues to come on, contact an
authorized dealer as soon as possible.
CHECK ENGINE TEMPERATURE
A early reminder of a low fuel condition.FUEL LEVEL LOW
21
Motorhome (TY3) Canada/United States of America, enUSA, First Printing
Information Displays

Maintenance
ActionMessage
The engine oil pressure is low. Check the level of the
engine oil. If the oil level is OK and this warning persists,
shut down the engine immediately and contact an
authorized dealer as soon as possible. See Engine Oil
Check (page 88).
LOW OIL PRESSURE
The brake fluid level is low and the brake system
should be inspected immediately. See Brake Fluid
Check (page 95).
BRAKE FLUID LEVEL LOW
The fuel cap is loose, not seated properly or off. Stop
your vehicle when convenient, turn off the engine and
check that you inserted the fuel cap properly. Rotate
the cap until you hear a click. The warning message
switches off after a proper drive cycle is completed.
See Emission Control System (page 30). If the
warning message remains on or continues to comes
back on, see an authorized dealer as soon as possible.
CHECK FUEL CAP
Transmission
ActionMessage
The transmission fluid is overheating. This warning
may appear when towing heavy loads or when driving
in a low gear at a high speed for an extended period
of time. Stop your vehicle as soon as safely possible,
turn off the engine and let the transmission cool.
CHECK TRANS TEMPERATURE
A reminder to apply the brakes, then shift to park.SHIFT TO PARK
22
Motorhome (TY3) Canada/United States of America, enUSA, First Printing
Information Displays

GENERAL INFORMATION
WARNINGS
Extended idling at high engine
speeds can produce very high
temperatures in the engine and
exhaust system, creating the risk of fire or
other damage.
Do not park, idle or drive your vehicle
on dry grass or other dry ground
cover. The emission system heats up
the engine compartment and exhaust
system, creating the risk of fire.
Do not start the engine in a closed
garage or in other enclosed areas.
Exhaust fumes can be toxic. Always
open the garage door before you start the
engine.
If you smell exhaust fumes inside
your vehicle, have your vehicle
checked by an authorized dealer
immediately. Do not drive your vehicle if
you smell exhaust fumes.
If you disconnect the battery, your vehicle
may exhibit some unusual driving
characteristics for approximately 5 miles
(8 kilometers) after you reconnect it. This
is because the engine management system
must realign itself with the engine. You can
disregard any unusual driving
characteristics during this period.
The powertrain control system meets all
Canadian interference-causing equipment
standard requirements regulating the
impulse electrical field or radio noise.
When you start the engine, avoid pressing
the accelerator pedal before and during
operation. Only use the accelerator pedal
when you have difficulty starting the
engine.
IGNITION SWITCH
E161572
D
E
C
B
A
A (accessory) - Allows the electrical
accessories, such as the radio, to operate
while the engine is not running.
Note: Do not leave the ignition key in this
position for too long. This could cause your
vehicle battery to lose charge.
B (lock) - Locks the gearshift lever and
allows key removal.
C (off) - The ignition is off.
Note: When you switch the ignition off and
leave your vehicle, do not leave your key in
the ignition. This could cause your vehicle
battery to lose charge.
D (on) - All electrical circuits are
operational and the warning lamps and
indicators illuminate.
E (start) - Cranks the engine.
STARTING A GASOLINE
ENGINE
When you start the engine, the idle speed
increases, this helps to warm up the
engine. If the engine idle speed does not
slow down automatically, have your
vehicle checked by an authorized dealer.
23
Motorhome (TY3) Canada/United States of America, enUSA, First Printing
Starting and Stopping the Engine

Before starting the engine check the
following:
•Make sure all occupants have fastened
their safety belts.
•Make sure the headlamps and
electrical accessories are off.
•Make sure the parking brake is on.
•Make sure the transmission is in park
(P) or neutral (N).
•Turn the ignition key to the on position.
Note: Do not touch the accelerator pedal.
1. Fully press the brake pedal.
2. Turn the key to the start position to
start the engine. Release the key when
the engine starts.
Note: The engine may continue cranking
for up to 15 seconds or until it starts.
Note: If you cannot start the engine on the
first try, wait for a short period and try again.
Failure to Start
If you cannot start the engine after three
attempts, wait 10 seconds and follow this
procedure:
1. Fully press the brake pedal.
2. Fully press the accelerator pedal and
hold it there.
3. Start the engine.
Stopping the Engine When Your
Vehicle is Stationary
1. Shift into park (P) or neutral (N).
2. Turn the key to the off position.
3. Apply the parking brake.
Stopping the Engine When Your
Vehicle is Moving
WARNING
Switching off the engine when the
vehicle is still moving will result in a
loss of brake and steering assistance.
The steering will not lock, but higher effort
will be required. When the ignition is
switched off, some electrical circuits,
including air bags, warning lamps and
indicators may also be off. If the ignition
was turned off accidentally, you can shift
into neutral (N) and re-start the engine.
1. Put the transmission into neutral (N)
and use the brakes to bring your vehicle
to a safe stop.
2. When your vehicle has stopped, shift
into park (P) or neutral (N) and switch
the ignition off.
3. Apply the parking brake.
Guarding Against Exhaust Fumes
WARNING
If you smell exhaust fumes inside
your vehicle, have your vehicle
checked by your authorized dealer
immediately. Do not drive your vehicle if
you smell exhaust fumes. Carbon
monoxide is present in exhaust fumes.
Take precautions to avoid its dangerous
effects.
Important Ventilating Information
If you stop your vehicle and then leave the
engine idling for long periods of time, we
recommend that you do one of the
following:
•Open the windows at least 1 in (3 cm).
•Set your climate control to outside air.
24
Motorhome (TY3) Canada/United States of America, enUSA, First Printing
Starting and Stopping the Engine

ENGINE BLOCK HEATER (If
Equipped)
WARNINGS
Failure to follow engine block heater
instructions could result in property
damage or serious personal injury.
Do not use your heater with
ungrounded electrical systems or
two-pronged adapters. There is a risk
of electrical shock.
Do not fully close the hood, or allow
it to drop under its own weight when
using the engine block heater. This
could damage the power cable and may
cause an electrical short resulting in fire,
injury and property damage.
Note: The heater is most effective when
outdoor temperatures are below 0°F
(-18°C).
The heater acts as a starting aid by
warming the engine coolant. This allows
the climate control system to respond
quickly. The equipment includes a heater
element (installed in the engine block) and
a wire harness. You can connect the
system to a grounded 120-volt AC
electrical source.
We recommend that you do the following
for a safe and correct operation:
•Use a 16-gauge outdoor extension cord
that is product certified by
Underwriter s Laboratory (UL) or’
Canadian Standards Association
(CSA). This extension cord must be
suitable for use outdoors, in cold
temperatures, and be clearly marked
Suitable for Use with Outdoor
Appliances. Do not use an indoor
extension cord outdoors. This could
result in an electric shock or become a
fire hazard.
•Use as short an extension cord as
possible.
•Do not use multiple extension cords.
•Make sure that when in operation, the
extension cord plug and heater cord
plug connections are free and clear of
water. This could cause an electric
shock or fire.
•Make sure your vehicle is parked in a
clean area, clear of combustibles.
•Make sure the heater, heater cord and
extension cord are firmly connected.
•Check for heat anywhere in the
electrical hookup once the system has
been operating for approximately 30
minutes.
•Make sure the system is unplugged and
properly stowed before starting and
driving your vehicle. Make sure the
protective cover seals the prongs of the
block heater cord plug when not in use.
•Make sure the heater system is
checked for proper operation before
winter.
Using the Engine Block Heater
Make sure the receptacle terminals are
clean and dry prior to use. Clean them with
a dry cloth if necessary.
The heater uses 0.4 to 1.0 kilowatt-hours
of energy per hour of use. The system does
not have a thermostat. It achieves
maximum temperature after
approximately three hours of operation.
Using the heater longer than three hours
does not improve system performance and
unnecessarily uses electricity.
25
Motorhome (TY3) Canada/United States of America, enUSA, First Printing
Starting and Stopping the Engine

SAFETY PRECAUTIONS
WARNINGS
Do not overfill the fuel tank. The
pressure in an overfilled tank may
cause leakage and lead to fuel spray
and fire.
The fuel system may be under
pressure. If you hear a hissing sound
near the fuel filler inlet, do not refuel
until the sound stops. Otherwise, fuel may
spray out, which could cause serious
personal injury.
Fuels can cause serious injury or
death if misused or mishandled.
Flow of fuel through a fuel pump
nozzle can produce static electricity.
This can cause a fire if you are filling
an ungrounded fuel container.
Fuel may contain benzene, which is
a cancer-causing agent.
When refueling always shut the
engine off and never allow sparks or
open flames near the fuel tank filler
valve. Never smoke or use a cell phone
while refueling. Fuel vapor is extremely
hazardous under certain conditions. Avoid
inhaling excess fumes.
Observe the following guidelines when
handling automotive fuel:
•Extinguish all smoking materials and
any open flames before refueling your
vehicle.
•Always turn off the vehicle before
refueling.
•Automotive fuels can be harmful or
fatal if swallowed. Fuel such as
gasoline is highly toxic and if
swallowed can cause death or
permanent injury. If fuel is swallowed,
call a physician immediately, even if no
symptoms are immediately apparent.
The toxic effects of fuel may not be
visible for hours.
•Avoid inhaling fuel vapors. Inhaling too
much fuel vapor of any kind can lead
to eye and respiratory tract irritation.
In severe cases, excessive or prolonged
breathing of fuel vapor can cause
serious illness and permanent injury.
•Avoid getting fuel liquid in your eyes. If
fuel is splashed in the eyes, remove
contact lenses (if worn), flush with
water for 15 minutes and seek medical
attention. Failure to seek proper
medical attention could lead to
permanent injury.
•Fuels can also be harmful if absorbed
through the skin. If fuel is splashed on
the skin, clothing or both, promptly
remove contaminated clothing and
wash skin thoroughly with soap and
water. Repeated or prolonged skin
contact with fuel liquid or vapor causes
skin irritation.
•Be particularly careful if you are taking
Antabuse or other forms of Disulfiram
for the treatment of alcoholism.
Breathing gasoline vapors could cause
an adverse reaction, serious personal
injury or sickness. If fuel is splashed on
the skin, wash the affected areas
immediately with plenty of soap and
water. Consult a physician immediately
if you experience any adverse reactions.
26
Motorhome (TY3) Canada/United States of America, enUSA, First Printing
Fuel and Refueling
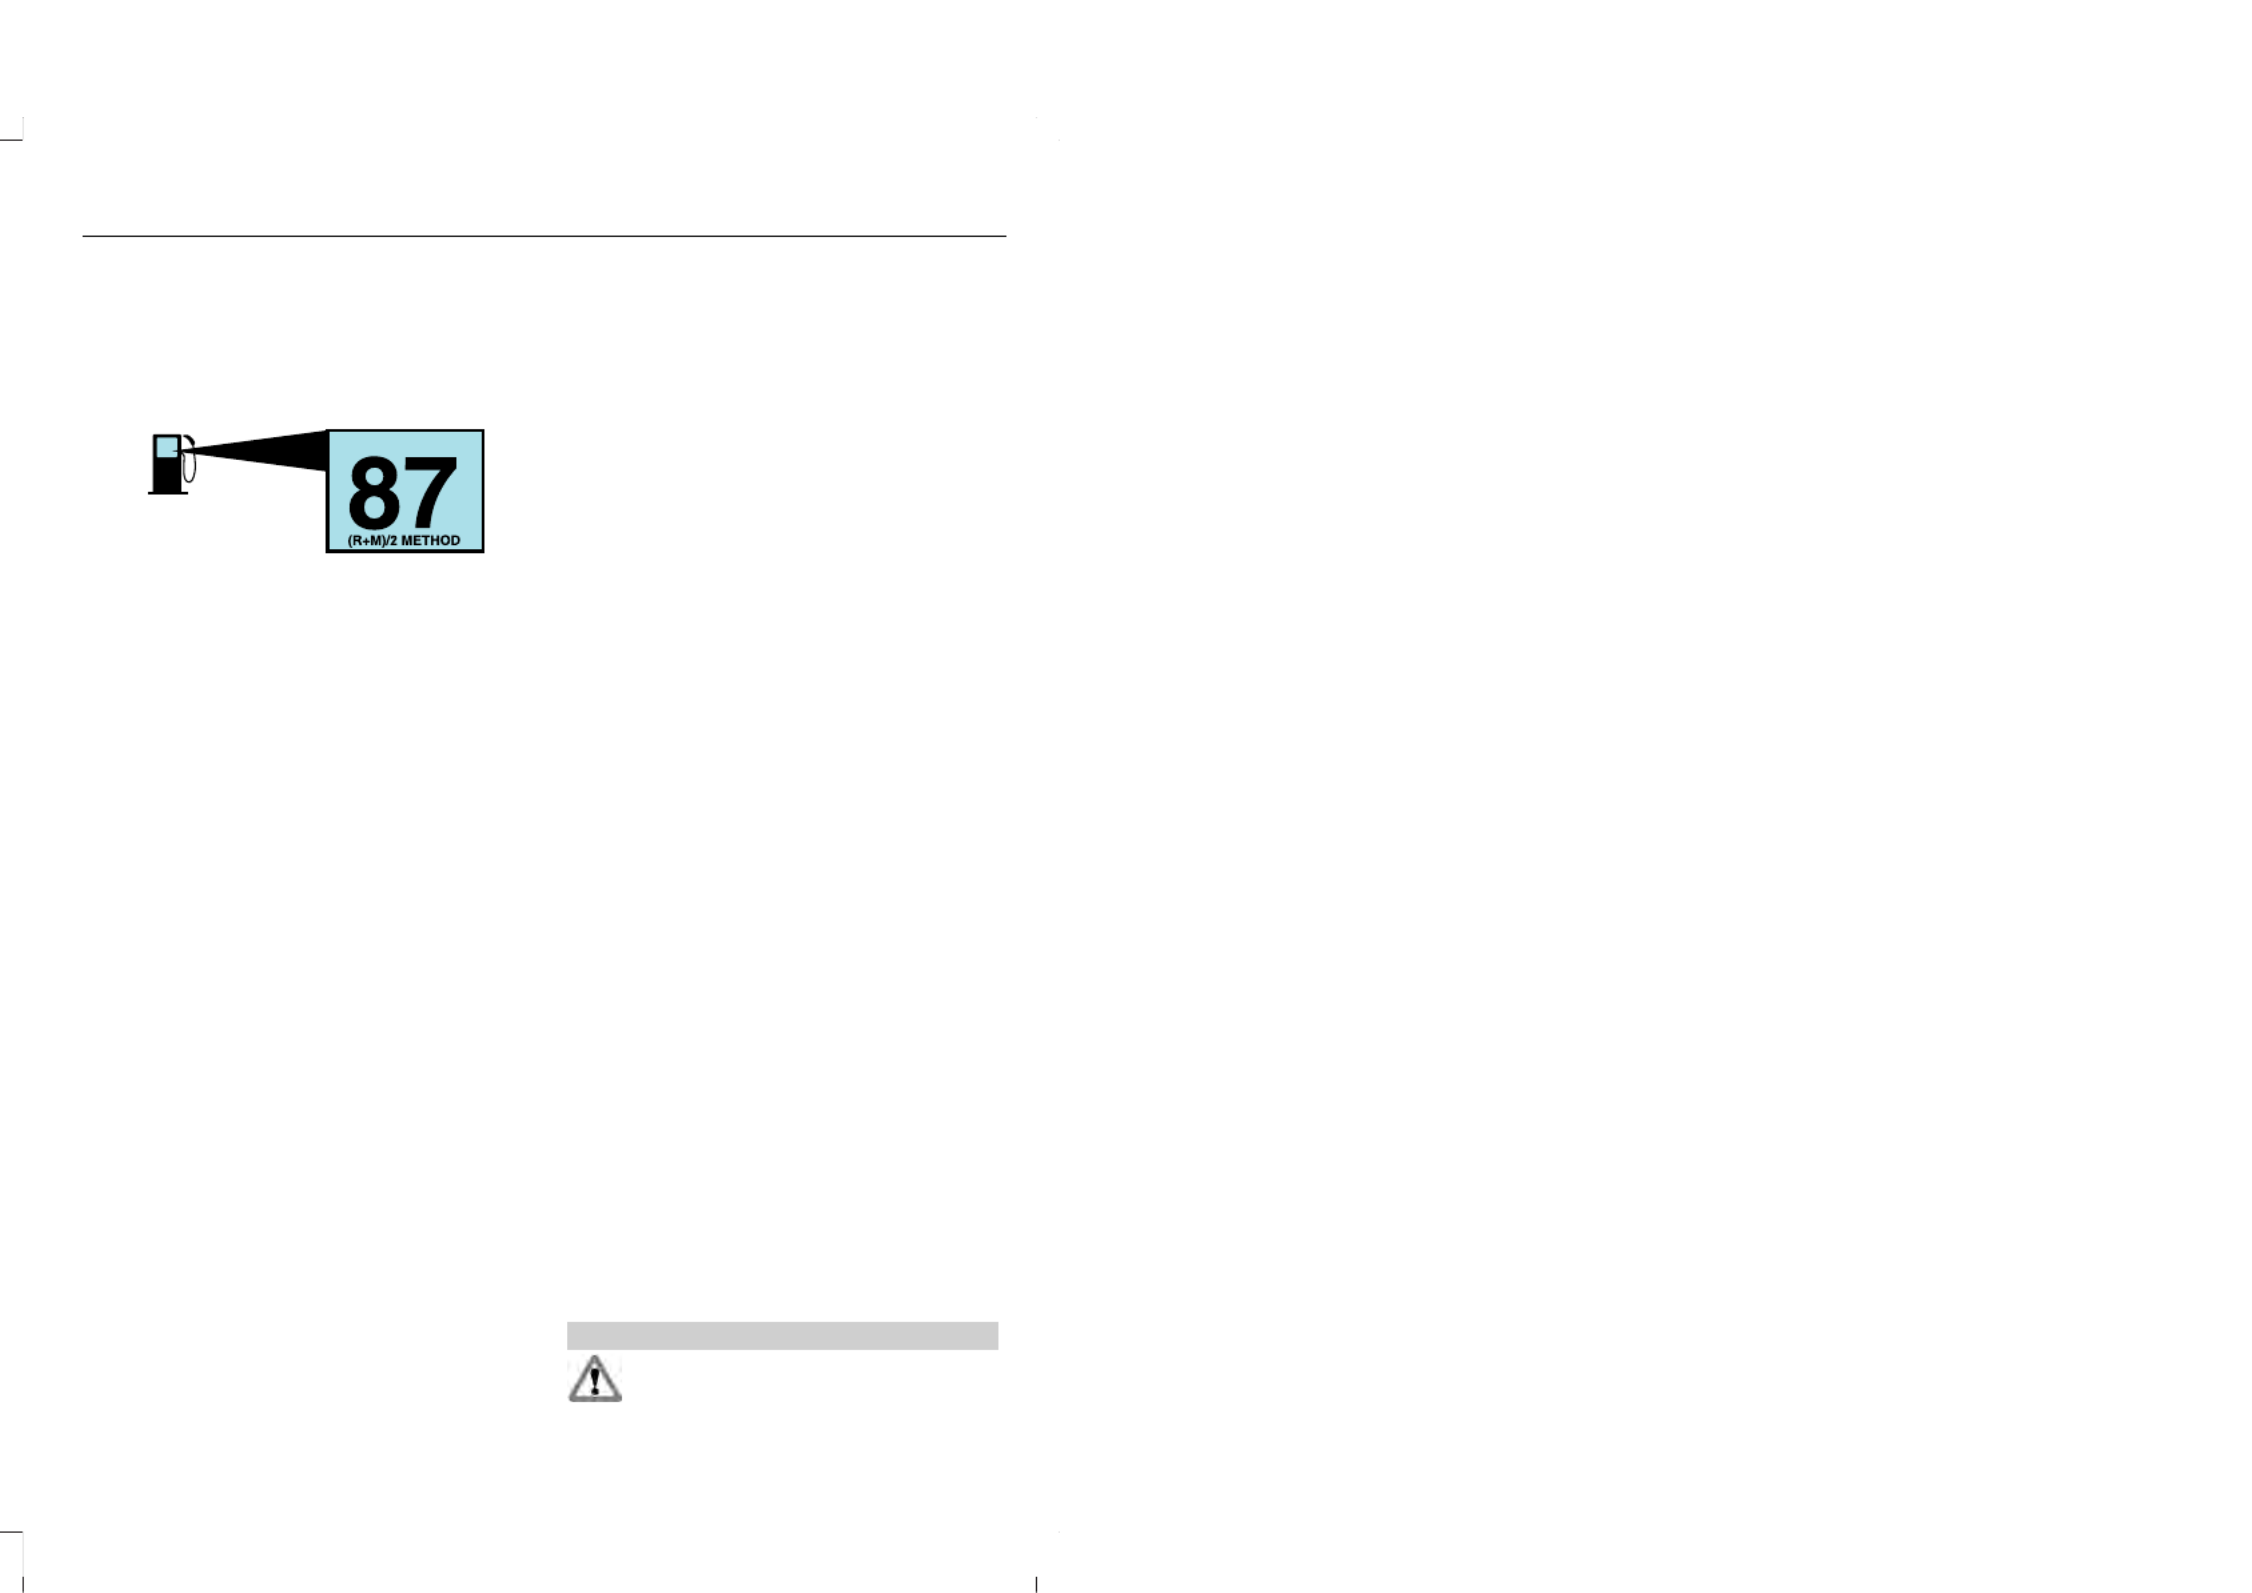
FUEL QUALITY
Choosing the Right Fuel
E161513
We recommend regular unleaded gasoline
with a minimum pump (R+M)/2 octane
rating of 87. Some fuel stations offer fuels
posted as regular unleaded gasoline with
an octane rating below 87, particularly in
high altitude areas. We do not recommend
fuels with an octane rating below 87.
Do not use any fuel other than those
recommended because they could lead to
engine damage that may not be covered
by the vehicle Warranty.
Note: Use of any fuel other than those
recommended can impair the emission
control system and cause a loss of vehicle
performance.
Do not use:
•Diesel fuel.
•Fuels containing kerosene or paraffin.
•Fuel containing more than 15% ethanol
or E85 fuel.
•Fuels containing methanol.
•Fuels containing metallic-based
additives, including manganese-based
compounds.
•Fuels containing the octane booster
additive, methylcyclopentadienyl
manganese tricarbonyl (MMT).
•Leaded fuel (using leaded fuel is
prohibited by law).
The use of fuels with metallic compounds
such as methylcyclopentadienyl
manganese tricarbonyl (commonly known
as MMT), which is a manganese-based
fuel additive, will impair engine
performance and affect the emission
control system.
Do not be concerned if the engine
sometimes knocks lightly. However, if the
engine knocks heavily while using fuel with
the recommended octane rating, contact
an authorized dealer to prevent any engine
damage.
RUNNING OUT OF FUEL
Avoid running out of fuel because this
situation may have an adverse effect on
powertrain components.
If you have run out of fuel:
•You may need to cycle the ignition from
off to on several times after refueling
to allow the fuel system to pump the
fuel from the tank to the engine. On
restarting, cranking time will take a few
seconds longer than normal. With
keyless ignition, just start the engine.
Crank time will be longer than usual.
•Normally, adding 1 gallon (3.8 liters) of
fuel is enough to restart the engine. If
the vehicle is out of fuel and on a steep
grade, more than 1 gallon (3.8 liters)
may be required.
•The service engine soon indicator may
come on. For more information on the
service engine soon indicator, See
Warning Lamps and Indicators
(page 16).
REFUELING
WARNINGS
Fuel vapor burns violently and a fuel
fire can cause severe injuries.
27
Motorhome (TY3) Canada/United States of America, enUSA, First Printing
Fuel and Refueling

WARNINGS
Read and follow all the instructions
on the pump island.
Turn off your engine when you are
refueling.
Do not smoke if you are near fuel or
refueling your vehicle.
Keep sparks, flames and smoking
materials away from fuel.
Stay outside your vehicle and do not
leave the fuel pump unattended
when refueling your vehicle. This is
against the law in some places.
Keep children away from the fuel
pump; never let children pump fuel.
Do not use personal electronic
devices while refueling.
Wait at least 10 seconds before
removing the fuel pump nozzle to
allow any residual fuel to drain into
the fuel tank.
Stop refueling after the fuel pump
nozzle automatically shuts off for the
second time. Failure to follow this
will fill the expansion space in the fuel tank
and could lead to fuel overflowing.
Do not remove the fuel pump nozzle
from its fully inserted position when
refueling.
Use the following guidelines to avoid
electrostatic charge build-up when filling
an ungrounded fuel container:
•Place approved fuel container on the
ground.
•Do not fill a fuel container while it is in
the vehicle (including the cargo area).
•Keep the fuel pump nozzle in contact
with the fuel container while filling.
•Do not use a device that would hold
the fuel pump handle in the fill position.
Fuel Filler Cap
WARNINGS
The fuel system may be under
pressure. If you hear a hissing sound
near the fuel filler door, do not refuel
until the sound stops. Otherwise, fuel may
spray out, which could cause serious
personal injury.
If you do not use the proper fuel filler
cap, excessive pressure or vacuum
in the fuel tank may damage the fuel
system or cause the fuel cap to disengage
in a collision, which may result in possible
personal injury.
Note: If you must replace the fuel filler cap,
replace it with a fuel filler cap that is
designed for your vehicle. The customer
warranty may be void for any damage to the
fuel tank or fuel system if the correct
genuine Ford, Motorcraft or other certified
fuel filler cap is not used.
Your fuel tank filler cap has an indexed
design with a 1/4th turn on and off feature.
When fueling your vehicle:
1. Put your vehicle in park (P).
2. Switch the engine off.
3. Carefully turn the filler cap
counterclockwise until it spins off.
4. Pull to remove the cap from the fuel
filler pipe.
5. To install the cap, align the tabs on the
cap with the notches on the filler pipe.
6. Turn the filler cap clockwise 1/4 of a
turn clockwise until it clicks at least
once.
If the Check Fuel Cap light or a Check Fuel
Cap message appears in the instrument
cluster and stays on after you start the
engine, you may not have installed the fuel
filler properly.
28
Motorhome (TY3) Canada/United States of America, enUSA, First Printing
Fuel and Refueling

If the fuel cap light remains on, at the next
opportunity, safely pull off of the road,
remove the fuel filler cap, align the cap
properly and reinstall it. The check fuel cap
light or Check fuel cap message may not
reset immediately. It may take several
driving cycles for the indicators to turn off.
A driving cycle consists of an engine
start-up (after four or more hours with the
engine off) followed by normal city and
highway driving.
FUEL CONSUMPTION
Empty reserve is the amount of fuel
remaining in the tank after the fuel gauge
indicates empty. The amount of usable
fuel in the empty reserve varies and should
not be relied upon to increase driving range.
•The usable capacity of the fuel tank is
the amount of fuel that you can add to
the fuel tank when the fuel gauge
indicates empty, before the first fuel
filler nozzle automatic shutoff event.
•The advertised capacity is equal to the
volumetric difference between actual
fuel fill before the first fuel filler nozzle
automatic shutoff event and the fuel
quantity when the fuel gauge indicates
empty. See Capacities and
Specifications (page 125). It is the
usable capacity minus the empty
reserve.
•Due to the empty reserve, you may be
able to add more fuel than the
advertised capacity of the fuel tank
when the fuel gauge indicates empty.
Filling the Fuel Tank
For consistent results when refueling:
•Turn the ignition off before fueling; an
inaccurate reading results if the engine
is left running.
•Use the same fill rate
(low-medium-high) each time the tank
is filled.
•Allow no more than one automatic
shut-off when refueling.
Results are most accurate when the filling
method is consistent.
Calculating Fuel Economy
Do not measure fuel economy during the
first 1,000 mi (1,600 km) of driving (this is
your engine’s break-in period). A more
accurate measurement is obtained after
2,000 mi (3,200 km) to 3,000 mi
(4,800 km). Also, fuel expense, frequency
of fill ups or fuel gauge readings are not
accurate ways to measure fuel economy.
1. Fill the fuel tank completely and record
the initial odometer reading.
2. Each time you fill the fuel tank, record
the amount of fuel added.
3. After at least three fill ups, fill the fuel
tank and record the current odometer
reading.
4. Subtract your initial odometer reading
from the current odometer reading.
To calculate L/100 km (liters per 100
kilometers) fuel consumption, multiply the
liters used by 100, then divide by kilometers
traveled. To calculate MPG (miles per
gallon) fuel consumption, divide miles
traveled by gallons used.
29
Motorhome (TY3) Canada/United States of America, enUSA, First Printing
Fuel and Refueling

Keep a record for at least one month and
record the type of driving (city or highway).
This provides an accurate estimate of your
vehicle’s fuel economy under current
driving conditions. Keeping records during
summer and winter will show how
temperature impacts fuel economy.
Conditions
•Heavily loading your vehicle reduces
fuel economy.
•Carrying unnecessary weight in your
vehicle may reduce fuel economy.
•Adding certain accessories to your
vehicle such as bug deflectors, rollbars
or light bars, running boards and ski
racks may reduce fuel economy.
•Using fuel blended with alcohol may
lower fuel economy.
•Fuel economy may decrease with lower
temperatures.
•Fuel economy may decrease when
driving short distances.
•You will get better fuel economy when
driving on flat terrain than when driving
on hilly terrain.
EMISSION CONTROL SYSTEM
WARNINGS
Do not park, idle or drive your vehicle
on dry grass or other dry ground
cover. The emission system heats up
the engine compartment and exhaust
system, creating the risk of fire.
Exhaust leaks may result in entry of
harmful and potentially lethal fumes
into the passenger compartment. If
you smell exhaust fumes inside your
vehicle, have your vehicle inspected
immediately. Do not drive if you smell
exhaust fumes.
Your vehicle has various emission control
components and a catalytic converter that
enables it to comply with applicable
exhaust emission standards.
To make sure that the catalytic converter
and other emission control components
continue to work properly:
•Use only the specified fuel listed.
•Avoid running out of fuel.
•Do not turn off the ignition while your
vehicle is moving, especially at high
speeds.
•Have the items listed in scheduled
maintenance information performed
according to the specified schedule.
The scheduled maintenance items listed
in scheduled maintenance information are
essential to the life and performance of
your vehicle and to its emissions system.
If you use anything other than Ford,
Motorcraft or Ford-authorized parts for
maintenance replacements or for service
of components affecting emission control,
such non-Ford parts should be equivalent
to genuine Ford Motor Company parts in
performance and durability.
Illumination of the service engine soon
indicator, charging system warning light or
the temperature warning light, fluid leaks,
strange odors, smoke or loss of engine
power could indicate that the emission
control system is not working properly.
An improperly operating or damaged
exhaust system may allow exhaust to
enter the vehicle. Have a damaged or
improperly operating exhaust system
inspected and repaired immediately.
Do not make any unauthorized changes to
your vehicle or engine. By law, vehicle
owners and anyone who manufactures,
repairs, services, sells, leases, trades
vehicles, or supervises a fleet of vehicles
are not permitted to intentionally remove
30
Motorhome (TY3) Canada/United States of America, enUSA, First Printing
Fuel and Refueling

an emission control device or prevent it
from working. Information about your
vehicle s emission system is on the Vehicle’
Emission Control Information Decal
located on or near the engine. This decal
also lists engine displacement.
Please consult your warranty information
for complete details.
On-Board Diagnostics (OBD-II)
Your vehicle has a computer known as the
on-board diagnostics system (OBD-II) that
monitors the engine’s emission control
system. The system protects the
environment by making sure that your
vehicle continues to meet government
emission standards. The OBD-II system
also assists a service technician in properly
servicing your vehicle.
When the service engine soon
indicator illuminates, the OBD-II
system has detected a
malfunction. Temporary malfunctions may
cause the service engine soon indicator to
illuminate. Examples are:
1. Your vehicle has run out of fuel the—
engine may misfire or run poorly.
2. Poor fuel quality or water in the
fuel the engine may misfire or run—
poorly.
3. The fuel fill inlet may not have closed
properly. See Refueling (page 27).
4. Driving through deep water—the
electrical system may be wet.
You can correct these temporary
malfunctions by filling the fuel tank with
good quality fuel, properly closing the fuel
fill inlet or letting the electrical system dry
out. After three driving cycles without these
or any other temporary malfunctions
present, the service engine soon indicator
should stay off the next time you start the
engine. A driving cycle consists of a cold
engine startup followed by mixed city and
highway driving. No additional vehicle
service is required.
If the service engine soon indicator remains
on, have your vehicle serviced at the first
available opportunity. Although some
malfunctions detected by the OBD-II may
not have symptoms that are apparent,
continued driving with the service engine
soon indicator on can result in increased
emissions, lower fuel economy, reduced
engine and transmission smoothness and
lead to more costly repairs.
Readiness for Inspection and
Maintenance (I/M) Testing
Some state and provincial and local
governments may have
Inspection/Maintenance (I/M) programs
to inspect the emission control equipment
on your vehicle. Failure to pass this
inspection could prevent you from getting
a vehicle registration.
If the service engine soon
indicator is on or the bulb does
not work, your vehicle may need
service. See On-Board Diagnostics.
Your vehicle may not pass the I/M test if
the service engine soon indicator is on or
not working properly (bulb is burned out),
or if the OBD-II system has determined
that some of the emission control systems
have not been properly checked. In this
case, the vehicle is not ready for I/M
testing.
If the vehicle s engine or transmission has’
just been serviced, or the battery has
recently run down or been replaced, the
OBD-II system may indicate that the
vehicle is not ready for I/M testing. To
determine if the vehicle is ready for I/M
testing, turn the ignition key to the on
31
Motorhome (TY3) Canada/United States of America, enUSA, First Printing
Fuel and Refueling

position for 15 seconds without cranking
the engine. If the service engine soon
indicator blinks eight times, it means that
the vehicle is not ready for I/M testing; if
the service engine soon indicator stays on
solid, it means that your vehicle is ready
for I/M testing.
The OBD-II system checks the emission
control system during normal driving. A
complete check may take several days.
If the vehicle is not ready for I/M testing,
you can perform the following driving cycle
consisting of mixed city and highway
driving:
1. 15 minutes of steady driving on an
expressway or highway followed by 20
minutes of stop-and-go driving with at
least four 30-second idle periods.
2. Allow your vehicle to sit for at least
eight hours with the ignition off. Then,
start the vehicle and complete the
above driving cycle. The vehicle must
warm up to its normal operating
temperature. Once started, do not turn
off the vehicle until the above driving
cycle is complete.
If the vehicle is still not ready for I/M
testing, you need to repeat the above
driving cycle.
32
Motorhome (TY3) Canada/United States of America, enUSA, First Printing
Fuel and Refueling

AUTOMATIC TRANSMISSION
WARNINGS
Always set the parking brake fully
and latch the gearshift in park (P).
Turn the ignition to the off position
and remove the key whenever you leave
your vehicle.
Do not apply the brake pedal and
accelerator pedal simultaneously.
Applying both pedals simultaneously
for more than three seconds will limit
engine rpm, which may result in difficulty
maintaining speed in traffic and could lead
to serious injury.
Understanding the Positions of
Your Automatic Transmission
E161511
P R N D 3 2 1
Putting your vehicle in or out of gear:
1. Fully press down the brake pedal.
2. Move the gearshift lever into the
desired gear.
3. Come to a complete stop.
4. Move the gearshift lever and securely
latch it in park (P)
Park (P)
This position locks the transmission and
prevents the wheels from turning.
Reverse (R)
With the gearshift lever in reverse (R), your
vehicle will move backward. Always come
to a complete stop before shifting into and
out of reverse (R).
Neutral (N)
With the gearshift lever in neutral (N), your
vehicle can be started and is free to roll.
Hold the brake pedal down while in this
position.
Drive (D)
Drive (D) is the normal driving position for
the best fuel economy. The overdrive
function allows automatic upshifts through
all available gears.
Third (3)
Transmission operates in third (3) gear
only. Use third (3) gear for improved
traction on slippery roads.
Second (2)
Transmission operates in second (2) gear
only. Use second (2) gear to start-up on
slippery roads.
First (1)
•Transmission operates in first (1) gear
only.
•Provides maximum engine braking.
•Allows upshifts by moving gearshift
lever.
•Will not downshift into first (1) gear at
high speeds; allows for first (1) gear
when vehicle reaches slower speeds.
33
Motorhome (TY3) Canada/United States of America, enUSA, First Printing
Transmission

Tow/Haul Mode
WARNING
Do not use the tow/haul feature
when driving in icy or slippery
conditions as the increased engine
braking can cause the wheels to slide and
your vehicle to swing around with the
possible loss of vehicle control.
E161510
E161509
To activate tow/haul, press the
button on the gearshift lever
once. The TOW HAUL indicator
light will illuminate in the instrument
cluster.
To deactivate the tow/haul feature and
return to normal driving mode, press the
button on the gearshift lever again. The
TOW HAUL light will deactivate. Tow/haul
will also deactivate when your power down
your vehicle.
The tow/haul feature:
•Delays upshifts to reduce the frequency
of transmission shifting.
•Provides engine braking in all forward
gears, which will slow your vehicle and
assist you in controlling your vehicle
when descending a grade.
•Depending on driving conditions and
load conditions, may downshift the
transmission, slow your vehicle and
control your vehicle speed when
descending a hill, without pressing the
accelerator pedal. The amount of
downshift braking provided will vary
based upon the amount the brake
pedal is pressed.
The tow/haul feature improves
transmission operation when towing a
trailer or a heavy load. All transmission
gear ranges are available when using
tow/haul.
Automatic Transmission Adaptive
Learning
This feature may increase durability and
provide consistent shift feel over the life
of your vehicle. A new vehicle or
transmission may have firm shifts, soft
shifts or both. This operation is considered
normal and will not affect function or
durability of the transmission. Over time,
the adaptive learning process will fully
update transmission operation.
Forced Downshifts
•Allowed in drive (D) with the tow/haul
feature on or off.
•Press the accelerator pedal to the floor.
•Allows transmission to select an
appropriate gear.
34
Motorhome (TY3) Canada/United States of America, enUSA, First Printing
Transmission

Brake-Shift Interlock
WARNINGS
Do not drive your vehicle until you
verify that the brake lamps are
working.
If your brake lamps are not working
properly or if you have disconnected
the vehicle battery cables, the
vehicle brake lamps and hazard flashers
may not properly warn traffic of a vehicle
breakdown or approaching danger, which
can increase the risk of serious injury or
death. To minimize the risk of serious injury
or death, be aware of your surroundings,
use other hazard signaling devices if
available, and move the vehicle to a safe
location away from traffic as soon as
possible.
When doing this procedure, you will
be taking the vehicle out of park
which means the vehicle can roll
freely. To avoid unwanted vehicle
movement, always fully set the parking
brake prior to doing this procedure. Use
wheel chocks if appropriate.
If the parking brake is fully released,
but the brake warning lamp remains
illuminated, the brakes may not be
working properly. See your authorized
dealer.
Your vehicle is equipped with a brake-shift
interlock feature that prevents moving the
gearshift lever from park (P) when the
ignition is in the on position and the brake
pedal is not pressed.
If you cannot move the gearshift lever out
of park (P) position with the ignition in the
on position and the brake pedal pressed,
a malfunction may have occurred. It is
possible that a fuse has blown or your
vehicle’s brake lamps are not operating
properly. See Fuse Specification Chart
(page 65).
If the fuse is not blown and the brake
lamps are working properly, the following
procedure will allow you to move the
gearshift lever from park (P):
1. Apply the parking brake. Turn key to
the lock position, and then remove the
key.
2. Disconnect the negative (black)
battery cable from the battery.
3. Insert the key and turn to the off
position. Shift the transmission to
neutral (N).
4. Reconnect the negative (black) battery
cable to the battery.
5. Start the vehicle.
Note: See your authorized dealer as soon
as possible if this procedure is used.
If Your Vehicle Gets Stuck In Mud
or Snow
Note: Do not rock your vehicle if the engine
is not at normal operating temperature or
damage to the transmission may occur.
Note: Do not rock your vehicle for more
than a minute or damage to the
transmission and tires may occur, or the
engine may overheat.
If your vehicle gets stuck in mud or snow,
you may rock it out by shifting between
forward and reverse gears, stopping
between shifts in a steady pattern. Press
lightly on the accelerator in each gear.
35
Motorhome (TY3) Canada/United States of America, enUSA, First Printing
Transmission

GENERAL INFORMATION
Note: Occasional brake noise is normal. If
a metal-to-metal, continuous grinding or
continuous squeal sound is present, the
brake linings may be worn-out and should
be inspected by an authorized dealer. If the
vehicle has continuous vibration or shudder
in the steering wheel while braking, the
vehicle should be inspected by an
authorized dealer.
Note: Brake dust may accumulate on the
wheels, even under normal driving
conditions. Some dust is inevitable as the
brakes wear and does not contribute to
brake noise. See Cleaning the Alloy
Wheels (page 102).
E144522
See the Instrument Cluster
chapter for information on the
brake system warning light.
Wet brakes result in reduced braking
efficiency. Gently press the brake pedal a
few times when driving from a car wash or
standing water to dry the brakes.
Brake Over Accelerator
In the event the accelerator pedal
becomes stuck or entrapped, apply steady
and firm pressure to the brake pedal to
slow the vehicle and reduce engine power.
If you experience this condition, apply the
brakes and bring your vehicle to a safe
stop. Turn the engine off, shift the
transmission into park (P), apply the
parking brake, and then inspect the
accelerator pedal for any interferences. If
none are found and the condition persists,
have your vehicle towed to the nearest
authorized dealer.
Hydraulic brake booster system
(Hydroboost or Hydromax)
The Hydroboost and Hydromax systems
receive fluid pressure from the power
steering pump to provide power assist
during braking.
The Hydromax booster receives backup
pressure from the reserve system electric
pump whenever the fluid in the power
steering system is not flowing. When the
engine is off, the pump will turn on if the
brake pedal is applied, or if the ignition is
turned to the on position.
The sound of the pump operating may be
heard by the driver, but this is a normal
characteristic of the system.
The reserve system provides reduced
braking power, so the vehicle should be
operated under these conditions with
caution, and only to seek service repair and
remove the vehicle from the roadway.
Note: For Hydromax-equipped vehicles
operating under normal conditions, the noise
of the fluid flowing through the booster may
be heard whenever the brake is applied. This
condition is normal. Vehicle service is not
required.
If braking performance or pedal response
becomes very poor, even when the pedal
is strongly pressed, it may indicate the
presence of air in the hydraulic system or
leakage of fluid. Stop the vehicle safely as
soon as possible and seek service
immediately.
HINTS ON DRIVING WITH
ANTI-LOCK BRAKES
Note: When the system is operating, the
brake pedal may pulse and may travel
further. Maintain pressure on the brake
pedal. You may also hear a noise from the
system. This is normal.
36
Motorhome (TY3) Canada/United States of America, enUSA, First Printing
Brakes

The anti-lock braking system will not
eliminate the risks when:
•You drive too closely to the vehicle in
front of you.
•Your vehicle is hydroplaning.
•You take corners too fast.
•The road surface is poor.
PARKING BRAKE
WARNING
Always set the parking brake fully
and make sure the transmission
selector lever is placed in park (P).
Failure to set the parking brake and engage
park could result in vehicle roll-away,
property damage or bodily injury. Turn the
ignition to the lock position and remove
the key whenever you leave your vehicle.
Apply the parking brake whenever your
vehicle is parked.
•For vehicles equipped with a foot
operated parking brake, press the pedal
downward to set the parking brake.
•For vehicle equipped with a hand
operated parking brake, pull the
parking brake lever up to set the
parking brake.
E144522
The brake warning lamp in the
instrument cluster illuminates
when the ignition is turned on
and the parking brake is applied.
The parking brake is not recommended to
stop a moving vehicle. However, if the
normal brakes fail, the parking brake can
be used to stop your vehicle in an
emergency. Your vehicle's stopping
distance will increase greatly and the
handling of your vehicle will be adversely
affected.
To release the parking brake:
•For vehicles equipped with a foot
operated parking brake, pull the
parking brake release lever.
•For vehicles equipped with a hand
operated parking brake, push the
parking brake lever down.
37
Motorhome (TY3) Canada/United States of America, enUSA, First Printing
Brakes

PRINCIPLE OF OPERATION
Cruise control lets you maintain a set
speed without keeping your foot on the
accelerator pedal. You can use cruise
control when your vehicle speed is greater
than 20 mph (30 km/h).
USING CRUISE CONTROL
WARNINGS
Do not use cruise control on winding
roads, in heavy traffic or when the
road surface is slippery. This could
result in loss of vehicle control, serious
injury or death.
When you are going downhill, your
vehicle speed may increase above
the set speed. The system will not
apply the brakes. Change down a gear to
assist the system in maintaining the set
speed. Failure to do so could result in loss
of vehicle control, serious injury or death.
Note: Cruise control will disengage if the
vehicle speed decreases more than 10 mph
(16 km/h) below the set speed while driving
uphill.
E161518
The cruise controls are on the steering
wheel.
Switching Cruise Control On
Press and release .ON
E71340
The indicator displays in the
instrument cluster.
Setting the Cruise Speed
1. Drive to desired speed.
2. Press and release SET ACCEL.
3. Take your foot off the accelerator
pedal.
Changing the Set Speed
• Press and release SET ACCEL to
increase or COAST to decrease the set
speed. When You select km/h as the
display measurement in the
information display, the set speed
changes in approximately 2 km/h
increments. When you select mph as
the display measurement in the
information display, the set speed
changes in approximately 1 mph
increments.
• Press the accelerator or brake pedal
until you reach the desired speed. Press
and release SET ACCEL.
• Press and hold SET ACCEL to increase
or COAST to decrease the set speed.
Release the control when you reach
the desired speed.
Canceling the Set Speed
Tap the brake pedal. The set speed will
not erase.
Resuming the Set Speed
Press and release .RES
Switching Cruise Control Off
Press and release when the systemOFF
is in stand by mode or switch the ignition
off.
Note: You erase the set speed when you
switch the system off.
38
Motorhome (TY3) Canada/United States of America, enUSA, First Printing
Cruise Control

LOAD LIMIT
Vehicle Loading - with and
without a Trailer
This section will guide you in the
proper loading of your vehicle,
trailer or both, to keep your loaded
vehicle weight within its design
rating capability, with or without
a trailer. Properly loading your
vehicle will provide maximum
return of vehicle design
performance. Before loading your
vehicle, familiarize yourself with
the following terms for
determining your vehicle’s weight
ratings, with or without a trailer,
from the vehicle’s Tire Label or
Safety Compliance Certification
Label:
Base Curb Weight - is the weight
of the vehicle including a full tank
of fuel and all standard
equipment. It does not include
passengers, cargo, or optional
equipment.
Vehicle Curb Weight - is the
weight of your new vehicle when
you picked it up from your
authorized dealer plus any
aftermarket equipment.
E143817
CARGO
Cargo Weight - includes all
weight added to the Base Curb
Weight, including cargo and
optional equipment. When towing,
trailer tongue load or king pin
weight is also part of cargo weight.
GAW (Gross Axle Weight) - is
the total weight placed on each
axle (front and rear) including
vehicle curb weight and all
payload.
GAWR (Gross Axle Weight
Rating) - is the maximum
allowable weight that can be
carried by a single axle (front or
rear). These numbers are shown
on the Safety Compliance
Certification Label. The label shall
be affixed to either the door hinge
39
Motorhome (TY3) Canada/United States of America, enUSA, First Printing
Load Carrying

pillar, door-latch post, or the door
edge that meets the door-latch
post, next to the driver's seating
position. The total load on each
axle must never exceed its
Gross Axle Weight Rating.
Note: For trailer towing
information refer to the RV and
Trailer Towing Guide available at
an authorized dealer.
E143818
GVW
GVW (Gross Vehicle Weight) -
is the Vehicle Curb Weight, plus
cargo, plus passengers.
GVWR (Gross Vehicle Weight
Rating) - is the maximum
allowable weight of the fully
loaded vehicle (including all
options, equipment, passengers
and cargo). It is shown on the
Safety Compliance Certification
Label. The label shall be affixed
to either the door hinge pillar,
door-latch post, or the door edge
that meets the door-latch post,
next to the driver's seating
position. The Gross Vehicle
Weight must never exceed the
Gross Vehicle Weight Rating.
40
Motorhome (TY3) Canada/United States of America, enUSA, First Printing
Load Carrying

Example only:
E198828
WARNING
Exceeding the Safety
Compliance Certification
Label vehicle weight rating limits
could result in substandard
vehicle handling or performance,
engine, transmission or structural
damage, serious damage to the
vehicle, loss of control and
personal injury.
E143819
GCW GVW
41
Motorhome (TY3) Canada/United States of America, enUSA, First Printing
Load Carrying

GCW (Gross Combined Weight)
- is the Gross Vehicle Weight plus
the weight of the fully loaded
trailer.
GCWR (Gross Combined
Weight Rating) - is the maximum
allowable weight of the vehicle
and the loaded trailer, including
all cargo and passengers, that the
vehicle can handle without risking
damage. (Important: The towing
vehicle s braking system is rated’
for operation at Gross Vehicle
Weight Rating, not at Gross
Combined Weight Rating.)
Separate functional brakes should
be used for safe control of towed
vehicles and for trailers where the
Gross Combined Weight of the
towing vehicle plus the trailer
exceed the Gross Vehicle Weight
Rating of the towing vehicle. The
Gross Combined Weight must
never exceed the Gross
Combined Weight Rating.
Maximum Loaded Trailer
Weight - is the highest possible
weight of a fully loaded trailer the
vehicle can tow. It assumes a
vehicle with mandatory options,
driver and front passenger weight
(150 pounds [68 kilograms]
each), no cargo weight (internal
or external) and a tongue load of
10–15% (conventional trailer).
Consult an authorized dealer (or
the RV and Trailer Towing Guide
available at an authorized dealer)
for more detailed information.
WARNINGS
Do not exceed the GVWR or
the GAWR specified on the
Safety Compliance Certification
Label.
Do not use replacement tires
with lower load carrying
capacities than the original tires
because they may lower the
vehicle s GVWR and GAWR’
limitations. Replacement tires
with a higher limit than the original
tires do not increase the GVWR
and GAWR limitations.
Exceeding any vehicle weight
rating limitation could result
in serious damage to the vehicle
and/or personal injury.
Steps for determining the
correct load limit:
1. Determine the combined weight
of the driver and passengers that
will be riding in your vehicle.
2. Subtract the combined weight
of the driver and passengers from
XXX kg or XXX lb.
3. The resulting figure equals the
available amount of cargo and
luggage load capacity. For
example, if the “ ”XXX amount
equals 1,400 lb. and there will be
five 150 lb. passengers in your
vehicle, the amount of available
cargo and luggage load capacity
is 650 lb. (1400-750 (5 x 150) =
650 lb.)
42
Motorhome (TY3) Canada/United States of America, enUSA, First Printing
Load Carrying
Produktspecifikationer
| Varumärke: | Ford |
| Kategori: | Bil |
| Modell: | F-53 Motorhome Chassis (2017) |
| Färg på produkten: | Zwart |
| Inbyggd display: | Nee |
| Antal hastigheter: | 2 |
| Innehåll behållare/burk: | - l |
| Varierande hastighet: | Ja |
| Blåtand: | Nee |
| Pulsfunktion: | Ja |
| Inkluderar skärskiva: | Ja |
Behöver du hjälp?
Om du behöver hjälp med Ford F-53 Motorhome Chassis (2017) ställ en fråga nedan och andra användare kommer att svara dig
Bil Ford Manualer

16 Januari 2025
18 Oktober 2024
18 Oktober 2024
14 Oktober 2024
14 Oktober 2024
13 Oktober 2024
12 Oktober 2024
11 Oktober 2024
11 Oktober 2024
10 Oktober 2024
Bil Manualer
- Bil Fiat
- Bil Opel
- Bil Pioneer
- Bil Renault
- Bil Volvo
- Bil Alfa Romeo
- Bil ACME
- Bil Infiniti
- Bil Subaru
- Bil Saturn
- Bil Audi
- Bil Hyundai
- Bil GMC
- Bil Audio-Technica
- Bil Skoda
- Bil Chevrolet
- Bil Kia
- Bil Suzuki
- Bil BMW
- Bil Nissan
- Bil Mitsubishi
- Bil Peugeot
- Bil Toyota
- Bil Land Rover
- Bil Volkswagen
- Bil Chrysler
- Bil Lexus
- Bil Jaguar
- Bil Citroën
- Bil Seat
- Bil Genesis
- Bil Buick
- Bil Honda
- Bil Cadillac
- Bil Jeep
- Bil Tesla
- Bil Rover
- Bil Pontiac
- Bil Mazda
- Bil Mercedes-Benz
- Bil MG
- Bil Mini
- Bil DS
- Bil Vauxhall
- Bil Dodge
- Bil Smart
- Bil Porsche
- Bil Maserati
- Bil Saab
- Bil Lancia
- Bil RAM
- Bil Acura
- Bil Mercury
- Bil Marklin
- Bil Dacia
- Bil POLARIS
- Bil Scion
- Bil Tata
- Bil GEM
- Bil VDL
- Bil Sharper Image
- Bil Aguilar
- Bil Abarth
- Bil Lincoln
- Bil Mahindra
- Bil Chery
- Bil Lada
- Bil Aston Martin
- Bil McLaren
Nyaste Bil Manualer
26 Mars 2025
13 Mars 2025
10 Mars 2025
10 Mars 2025
10 Mars 2025
10 Mars 2025
10 Mars 2025
5 Mars 2025
4 Mars 2025
4 Mars 2025