Hanwha QND-7082R Bruksanvisning
Hanwha
övervakningskamera
QND-7082R
Läs nedan 📖 manual på svenska för Hanwha QND-7082R (40 sidor) i kategorin övervakningskamera. Denna guide var användbar för 6 personer och betygsatt med 4.5 stjärnor i genomsnitt av 2 användare
Sida 1/40

NETWORK CAMERA
User Manual
QND-7012R 7022R 7032R 7082R/ / /
QNV-6014R 7012R 7022R 7032R 6084R/7082R/ / / /
QNO-6014R 7012R 7022R 7032R 6084R/7082R/ / / /

Copyright
©2021 Hanwha Techwin Co., Ltd. All rights reserved.
Trademark
Each of trademarks herein is registered. The name of this product and other trademarks mentioned in this manual are the registered trademark of their
respective company.
Restriction
Copyright of this document is reserved. Under no circumstances, this document shall be reproduced, distributed or changed, partially or wholly, without
formal authorization.
Disclaimer
Hanwha Techwin makes the best to verify the integrity and correctness of the contents in this document, but no formal guarantee shall be
provided. Use of this document and the subsequent results shall be entirely on the user’s own responsibility. Hanwha Techwin reserves the
right to change the contents of this document without prior notice.
※Design and specications are subject to change without prior notice.
※The initial administrator ID is “admin” and the password should be set when logging in for the rst time.
Please change your password every three months to safely protect personal information and to prevent the damage of the information
theft.
Please, take note that it’s a user’s responsibility for the security and any other problems caused by mismanaging a password.
Network Camera
User Manual
English _3
!OVERVIEW
IMPORTANT SAFETY INSTRUCTIONS
1. Read these instructions.
2. Keep these instructions.
3. Heed all warnings.
4. Follow all instructions.
5. Do not use this apparatus near water.
6. Clean the contaminated area on the product surface with a soft, dry cloth or a damp cloth.
(Do not use a detergent or cosmetic products that contain alcohol, solvents or surfactants or oil constituents
as they may deform or cause damage to the product.)
7. Do not block any ventilation openings, Install in accordance with the manufacturer’s instructions.
8. Do not install near any heat sources such as radiators, heat registers, stoves, or other apparatus (including
amplifiers) that produce heat.
9. Do not defeat the safety purpose of the polarized or grounding-type plug. A polarized plug has two blades
with one wider than the other. A grounding type plug has two blades and a third grounding prong. The wide
blade or the third prong are provided for your safety. If the provided plug does not fit into your outlet, consult
an electrician for replacement of the obsolete outlet.
10. Protect the power cord from being walked on or pinched particularly at plugs, convenience receptacles, and
the point where they exit from the apparatus.
11. Only use attachments/ accessories specified by the manufacturer.
12. Use only with the cart, stand, tripod, bracket, or table specified by the manufacturer,
or sold with the apparatus. When a cart is used, use caution when moving the cart/
apparatus combination to avoid injury from tip-over.
13. Unplug this apparatus during lighting storms or when unused for long periods of time.
14. Refer all servicing to qualified service personnel. Servicing is required when the apparatus
has been damaged in any way, such as power-supply cord or plug is damaged, liquid has
been spilled or objects have fallen into the apparatus, the apparatus has been exposed to rain or moisture,
does not operate normally, or has been dropped.
15. This product is intended to be a Listed Power Supply Unit marked “Class2” or “LPS” and rated from 12Vdc,
0.8A or PoE(48V), 0.24A. (QNV-7082R, QNO-7082R)
16. This product is intended to be a Listed Power Supply Unit marked “Class2” or “LPS” and rated from 12Vdc,
0.64A or PoE(48V), 0.18A. (QND-7082R)
17. This product is intended to be a Listed Power Supply Unit marked “Class2” or “LPS” and rated from 12Vdc,
0.76A or PoE(48V), 0.23A. (QNV-7012R/7022R/7032R, QNO-7012R/7022R/7032R)
18. This product is intended to be a Listed Power Supply Unit marked “Class2” or “LPS” and rated from 12Vdc,
0.6A or PoE(48V), 0.17A. (QND-7012R/7022R/7032R)
19. This product is intended to be a Listed Power Supply Unit marked “Class2” or “LPS” and rated from 12Vdc,
0.75A or PoE(48V), 0.23A. (QNV-6084R, QNO-6084R)
20. This product is intended to be a Listed Power Supply Unit marked “Class2” or “LPS” and rated from 12Vdc,
0.71A or PoE(48V), 0.21A. (QNV-6014R, QNO-6014R)
21. This product is intended to be supplied by isolation power.
22. If you use excessive force when installing the product, the camera may be damaged and malfunction.
If you forcibly install the product using non-compliant tools, the product may be damaged.
23. Do not install the product in a place where chemical substances or oil mist exists or may be generated. As
edible oils such as soybean oil may damage or warp the product, do not install the product in the kitchen or
near the kitchen table.
This may cause damage to the product.
24. When installing the product, be careful not to allow the surface of the product to be stained with chemical
substance.
Some chemical solvents such as cleaner or adhesives may cause serious damage to the product’s surface.
25. If you install/disassemble the product in a manner that has not been recommended, the production functions/
performance may not be guaranteed.
Install the product by referring to “Installation & connection” in the user manual.
26. Installing or using the product in water can cause serious damage to the product.
27. Although a rapid change in temperature could cause frost inside the dome, there will be no problem with the
video.
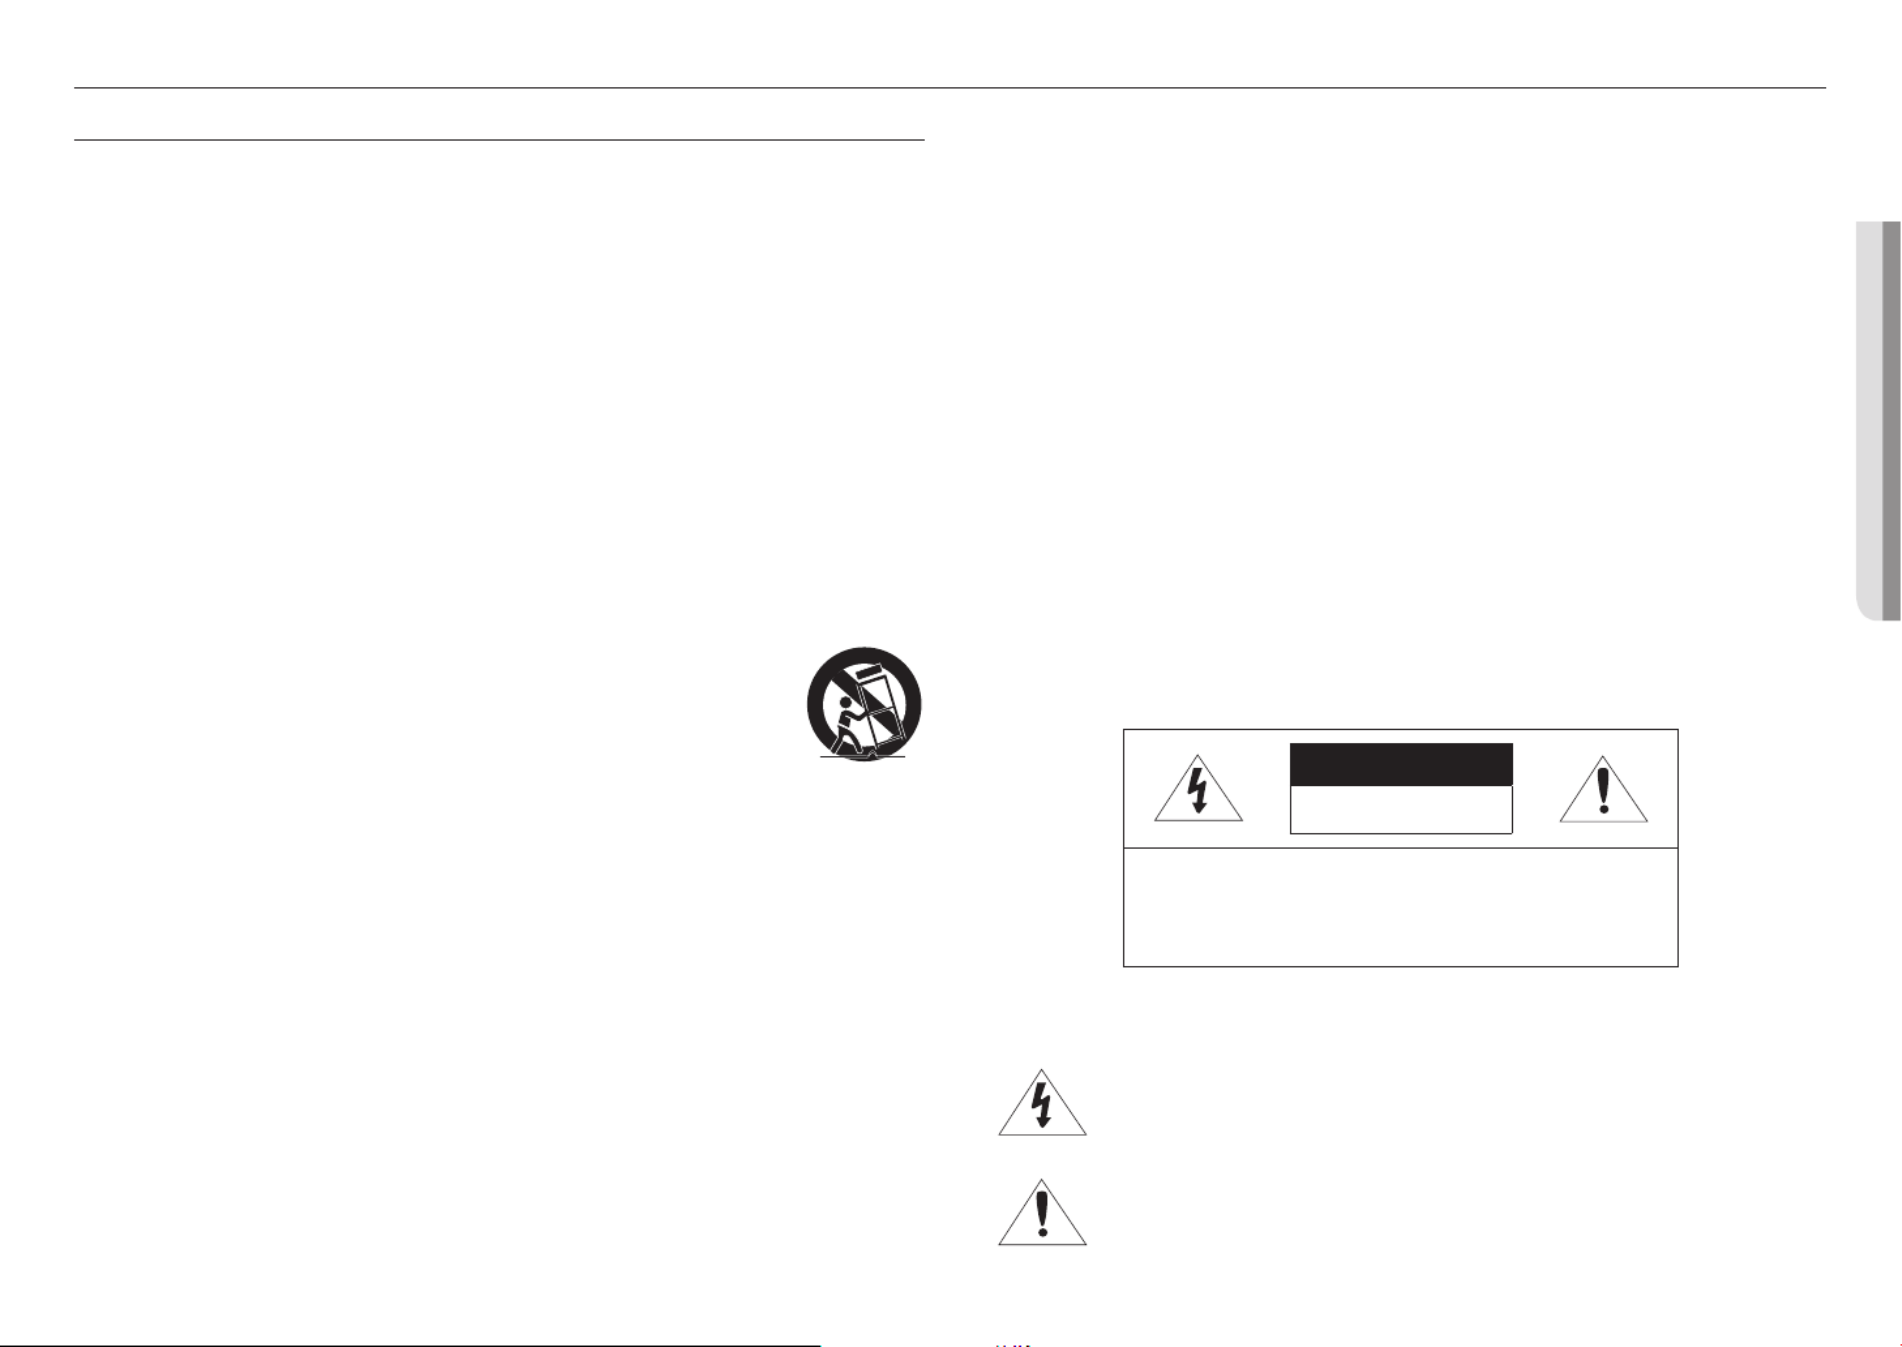
WARNING
TO REDUCE THE RISK OF FIRE OR ELECTRIC SHOCK, DO NOT EXPOSE THIS PRODUCT
TO RAIN OR MOISTURE. DO NOT INSERT ANY METALLIC OBJECT THROUGH THE
VENTILATION GRILLS OR OTHER OPENNINGS ON THE EQUIPMENT.
Apparatus shall not be exposed to dripping or splashing and that no objects filled with liquids,
such as vases, shall be placed on the apparatus.
To prevent injury, this apparatus must be securely attached to the Wall/ceiling in accordance
with the installation instructions.
CAUTION
CAUTION
RISK OF ELECTRIC SHOCK.
DO NOT OPEN
CAUTION : TO REDUCE THE RISK OF ELECTRIC SHOCK.
DO NOT REMOVE COVER (OR BACK).
NO USER SERVICEABLE PARTS INSIDE.
REFER SERVICING TO QUALIFIED SERVICE PERSONNEL.
EXPLANATION OF GRAPHICAL SYMBOLS
The lightning flash with arrowhead symbol, within an equilateral triangle, is
intended to alert the user to the presence of “dangerous voltage” within the
product’s enclosure that may be of sufficient magnitude to constitute a risk of
electric shock to persons.
The exclamation point within an equilateral triangle is intended to alert the user to
the presence of important operating and maintenance (servicing) instructions in
the literature accompanying the product.
overview

overview
4_ overview
Class construction
An apparatus with CLASS construction shall be connected to a MAINS socket outlet with a
protective earthing connection.
Battery
Batteries(battery pack or batteries installed) shall not be exposed to excessive heat such as
sunshine, fire or the like.
The battery cannot be replaced.
Disconnection Device
Disconnect the main plug from the apparatus, if it’s defected. And please call a repair man in
your location.
When used outside of the U.S., it may be used HAR code with fittings of an approved
agency is employed.
CAUTION
RISK OF EXPLOSION IF BATTERY IS REPLACED BY AN INCORRECT TYPE.
DISPOSE OF USED BATTERIES ACCORDING TO THE INSTRUCTIONS.
ATTENTION
IL Y A RISQUE D’EXPLOSION SI LA BATTERIE EST REMPLACÉE PAR UNE BATTERIE DE
TYPE INCORRECT.
METTRE AU REBUT LES BATTERIES USAGÉES CONFORMÉMENT AUX INSTRUCTIONS.
These servicing instructions are for use by qualified service personnel only.
To reduce the risk of electric shock do not perform any servicing other than that contained in
the operating instructions unless you are qualified to do so.
Please use the input power with just one camera and other devices must not be connected.
The ITE is to be connected only to PoE networks without routing to the outside plant.
The wired LAN hub providing power over the Ethernet (PoE) in accordance with IEEE
802-3af shall be a UL Listed device with the output evaluated as a Limited Power Source
as defined in UL60950-1or PS2 as defined in UL62368-1.
Unit is intended for installation in a Network Environment 0 as defined in IEC TR 62102.
As such, associated Ethernet wiring shall be limited to inside the building.
Please read the following recommended safety precautions carefully.
~Do not place this apparatus on an uneven surface.
~Do not install on a surface where it is exposed to direct sunlight, near heating equipment or
heavy cold area.
~Do not place this apparatus near conductive material.
~Do not attempt to service this apparatus yourself.
~Do not place a glass of water on the product.
~Do not install near any magnetic sources.
~Do not block any ventilation openings.
~Do not place heavy items on the product.
~Please wear protective gloves when installing/removing the camera.
The high temperature of the product surface may cause a burn.
User’s Manual is a guidance book for how to use the products.
The meaning of the symbols are shown below.
~Reference : In case of providing information for helping of product’s usages
~Notice : If there’s any possibility to occur any damages for the goods and human caused by
not following the instruction
※ Please read this manual for the safety before using of goods and keep it in the safe place.
We do not guarantee the quality of third-party products (e.g. lenses, accessories) that you
separately purchase.
In particular installation environments, there might be interference in radio communications.
When interference of electromagnetic waves occurs between the product and radio
communication device, it is recommended to keep a certain distance between the two or
change the direction of the receiving antenna.
WARNING
To Prevent damage which may caused by IR LED, don't stare at operating lamp.
For below models only.
QND-7012R/7022R/7032R/7082R
QNV-6014R/7012R/7022R/7032R/6084R/7082R
QNO-6014R/7012R/7022R/7032R/6084R/7082R
Risk Group 1
WARNING IR emitted from this product.
Do not stare at operating lamp.
Product tested against IEC 62471

English _5
!OVERVIEW
CONTENTS
OVERVIEW
3
3 Important Safety Instructions
6 Recommended PC Specifications
6 Recommended Micro SD/SDHC/SDXC
Memory Card Specifications
6 NAS recommended specs
6 What’s Included
8 At a Glance (QND-7012R/7022R/7032R)
9 At a Glance (QND-7082R)
11 At a Glance (QNO-6014R/7012R/7022R/70
32R/6084R/7082R)
12 At a Glance (QNV-
6014R/7012R/7022R/7032R)
14 At a Glance (QNV-6084R/7082R)
INSTALLATION & CONNECTION
16
16 Installation (QND-
7012R/7022R/7032R/7082R)
17 Installation (QNO-6014R/7012R/7022R/703
2R/6084R/7082R)
18 Installation (QNV-
6014R/7012R/7022R/7032R)
20 Installation (QNV-6084R/7082R)
23 Inserting/Removing a Micro SD card
27 Powering and networking
NETWORK CONNECTION AND
SETUP
31
31 Connecting the Camera Directly to Local
Area Networking
31 Connecting the Camera Directly to a DHCP
Based DSL/Cable Modem
32 Using Device Manager
32 Automatically searching camera
32 Configuring IP address
33 Manually registering camera
33 Automatically configuring IP
34 Port Range Forward (Port Mapping) Setup
35 Connecting to the Camera from a Shared
Local PC
35 Connecting to the Camera from a Remote
PC via the Internet
WEB VIEWER
36
36 Connecting to the Camera
37 Password setting
37 Login
37 Camera Web Viewer Setup
APPENDIX
38
38 Troubleshooting

overview
6_ overview
RECOMMENDED PC SPECIFICATIONS
~CPU : Intel(R) Core(TM) i7 3.4 GHz or higher
~RAM : 8G or higher
~Recommended browser: Chrome
~Supported browsers: Chrome, Safari, Firefox, MS Edge(chromium based)
~Supported OS : Windows, Mac, Linux, Android, iOS, Chrome
~Verification environment
- Windows 10: Google Chrome version 80 or later, Firefox version 72 or later, MS Edge version 83 or later
- Mac 10.13/14: Safari version 11.0.1 or later
※ The video play performance of the web viewer depends on the performance of the user’s CPU and GPU.
RECOMMENDED MICRO SD/SDHC/SDXC MEMORY CARD
SPECIFICATIONS
~Recommended capacity : 16GB ~ 128GB(MLC type required)
~Recommended Manufacturers : SanDisk, Transcend
~Product Type : High endurance
~The compatibility varies depending on the card manufacturers and types.
NAS RECOMMENDED SPECS
~Recommended capacity : 200GB or higher is recommended.
~For this camera, you are recommended to use a NAS with the following manufacturer’s specs.
Recommended products : QNAP NAS, Synology NAS
WHAT’S INCLUDED
Please check if your camera and accessories are all included in the product package.
(As for each sales country, accessories are not the same.)
Appearance DescriptionItem Name Quantity Model Name
Camera
1
QND-7012R/7022R/
7032R/7082R
1
QNO-6014R/
7012R/7022R/
7032R/6084R/7082R
1
QNV-6014R/
7012R/7022R/
7032R/6084R/7082R
Quick Guide
(Optional)
1
QND-7012R/7022R/
7032R/7082R,
QNV-6014R/
7012R/7022R/
7032R/6084R/7082R,
QNO-6014R/
7012R/7022R/
7032R/6084R/7082R
Template
1
Product installation guide
QND-7012R/7022R/
7032R/7082R,
QNV-6014R/
7012R/7022R/
7032R/6084R/7082R,
QNO-6014R/
7012R/7022R/
7032R/6084R/7082R
Power Terminal Block
1
Plugged in the power plug
QND-7012R/7022R/
7032R/7082R,
QNV-6014R/
7012R/7022R/
7032R/6084R/7082R

English _7
!OVERVIEW
Appearance DescriptionItem Name Quantity Model Name
L Wrench
1
Used to control the direction of the
camera
QNO-6014R/
7012R/7022R/
7032R/6084R/7082R
Torx L wrench
1
Used to remove and replace the
dome cover
QNV-6014R/
7012R/7022R/
7032R/6084R/7082R
Alarm cable
1
Used when connecting to an alarm QND-7012R/7022R/
7032R/7082R
RJ45 waterproof accessory
1
Used to install in humid places
QNO-6014R/
7012R/7022R/
7032R/6084R/7082R
Sunshield
1
It protects the camera from the
direct sunlight.
QNO-6014R/
7012R/7022R/
7032R/6084R/7082R
Sunshield Hold
1
It fixes the sunshield with the camera.
QNO-6014R/
7012R/7022R/
7032R/6084R/7082R
Card-type moisture absorbent
3
Attached when installed.
QNO-6014R/
7012R/7022R/
7032R/6084R/7082R
1
QNV-6014R/
7012R/7022R/
7032R/6084R/7082R
CAUTION: Be w a re o f t he Rated V ol tag e an d Po la ri t yof th e p owe r co nn e c tio n .
Power Cable
1
Used to plug into the power port
QNV-6014R/
7012R/7022R/
7032R/6084R/7082R
Appearance DescriptionItem Name Quantity Model Name
Audio/alarm cable
1
Used to connect with the audio and
alarm port
QNV-6014R/
7012R/7022R/
7032R/6084R/7082R
Cable for the testing monitor
1
Used to test the camera connection
to a portable display device
QND-7012R/7022R/
7032R/7082R,
QNV-6014R/
7012R/7022R/
7032R/6084R/7082R,
QNO-6014R/
7012R/7022R/
7032R/6084R/7082R
Cable Bushing
1
Used to connect the LAN cable
QNV-6014R/
7012R/7022R/
7032R/6084R/7082R
Cap Installer
1
Used when connecting RJ45 cable
QNV-6014R/
7012R/7022R/
7032R/6084R/7082R
Optional Accessories for Installation
For your easier installation, you can purchase appropriate optional accessories available.
Model name Hanging Mount Back Box Pole Mount All
QNV-6014R/
7012R/7022R/7032R SBP-122HMW SBV-120GW SBP-300LMW
(Parapet Mount)
SBP-300CMW
(Ceiling Mount)
SBP-300WMW1
(Wall Mount)
SBP-300NBW
(Instalation Box)
SBP-300PMW
(Pole Mount)
SBP-300KMW
(Corner Mount)
QNV-6084R/7082R SBP-301HMW2 SBV-136BW
QND-7012R/7022R/7032R SBP-300HMW7
QND-7082R SBP-122HMW
QNO-6014R/7012R/7022R/
7032R/6084R/7082R SBO-100B1 SBP-302PM

overview
8_ overview
AT A GLANCE (QND-7012R/7022R/7032R)
Appearance
Item Description
a
Dome cover Case cover used to protect the lens and the main unit.
b
Camera Case Housing part that covers the camera body.
c
Microphone hole Microphone is embedded.
Components
a
b
c
NET WORK
ACT LINK
DC 12V
FRONT
kj
NET WORK
ACT LINK
FRONT
RESET
2. ALM OUT
1. ALM IN
DC12V
4 5 GND
VIDEO
e
g
f
i
h
cdb
a
English _9
!OVERVIEW
Item Description
a
Inside cover Protective cover for the main body.
b
Illumination Sensor Detects incoming light to control the IR LED.
c
Lens Lens for the camera.
d
IR LED These infrared LED’s are controlled by the illumination sensor.
e
Reset Button
The button restores all camera settings to the factory default.
Press and hold for about 5 seconds to reboot the system.
J
If you reset the camera, the network settings will be adjusted so that DHCP can be
enabled. If there is no DHCP server in the network, you must run the Device Manager
program to change the basic network settings such as IP address, Subnet mask,
Gateway, etc., before you can connect to the network.
f
Test monitor out port Output port for test monitoring the video output. Use the test monitor cable to connect to a
mobile display and check the test video.
g
Alarm I/O Port
ARM-IN Used to connect the alarm input sensor or external day/night sensor.
ARM-OUT Used to connect the alarm output signal.
GND These are common ports to connect alarm input/output signals.
h
Microphone hole Microphone is embedded.
i
Power Port Port for power terminal block.
j
Micro SD Card slot Compartment for the Micro SD card.
k
Network Port Used to connect the PoE or Ethernet cable for network connection.
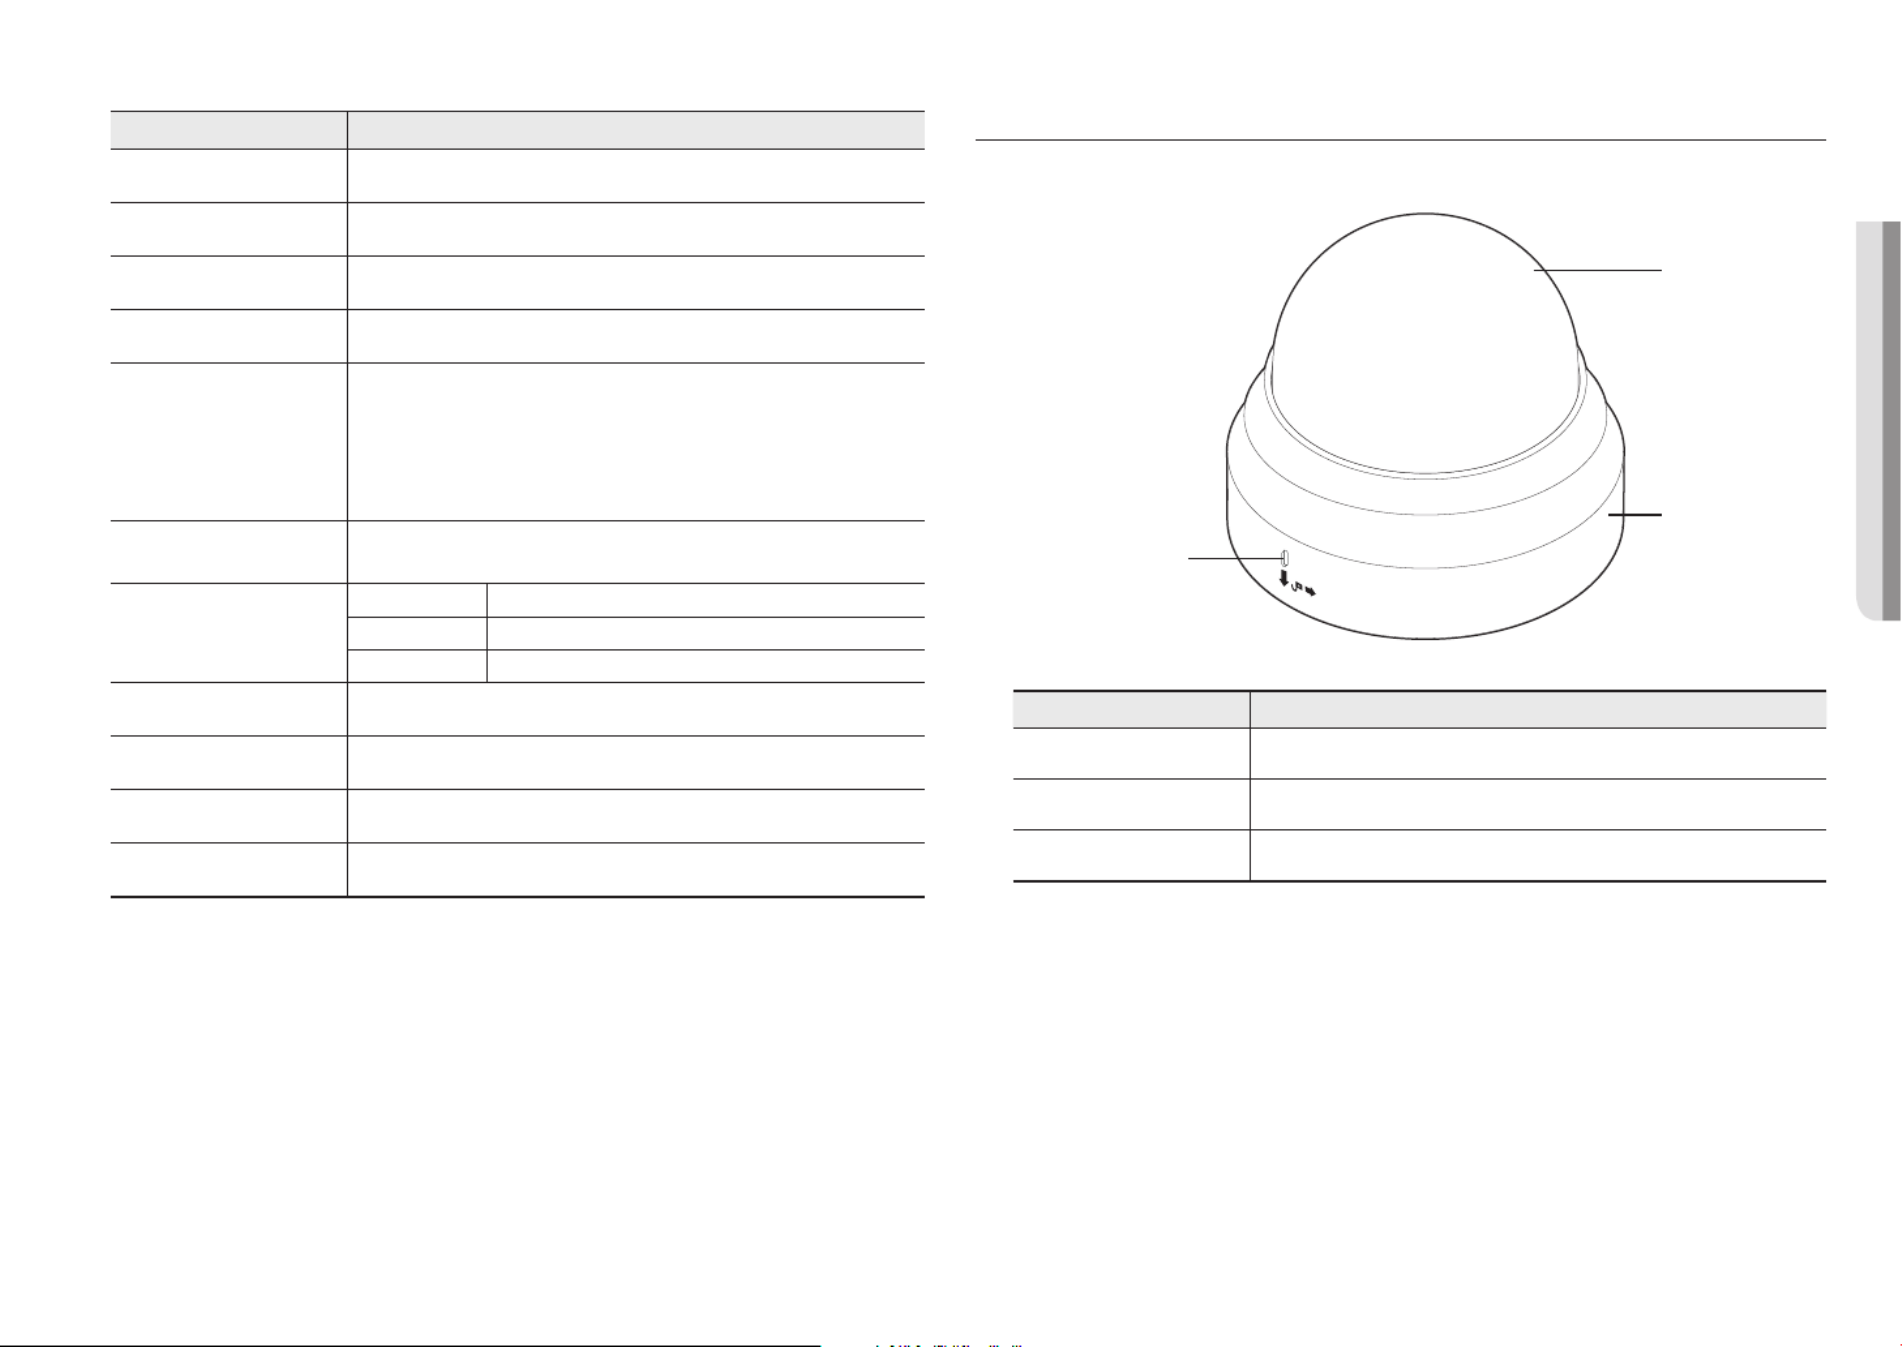
AT A GLANCE (QND-7082R)
Appearance
Item Description
a
Dome cover Case cover used to protect the lens and the main unit.
b
Camera Case Housing part that covers the camera body.
c
Microphone hole Microphone is embedded.
a
b
c

overview
10_ overview
Components Item Description
a
Inside cover Protective cover for the main body.
b
Illumination Sensor Detects incoming light to control the IR LED.
c
Lens Lens for the camera.
d
IR LED These infrared LED’s are controlled by the illumination sensor.
e
Power Port Port for power terminal block.
f
Microphone hole Microphone is embedded.
g
Network Port Used to connect the PoE or Ethernet cable for network connection.
h
Micro SD Card slot Compartment for the Micro SD card.
i
Alarm I/O Port
ARM-IN Used to connect the alarm input sensor or external day/night sensor.
ARM-OUT Used to connect the alarm output signal.
GND These are common ports to connect alarm input/output signals.
j
Reset Button
The button restores all camera settings to the factory default.
Press and hold for about 5 seconds to reboot the system.
J
If you reset the camera, the network settings will be adjusted so that DHCP can be
enabled. If there is no DHCP server in the network, you must run the Device Manager
program to change the basic network settings such as IP address, Subnet mask,
Gateway, etc., before you can connect to the network.
k
Test monitor out port Output port for test monitoring the video output. Use the test monitor cable to connect to a
mobile display and check the test video.
l
Zoom/Focus Control Button
T Zoom in (Tele)
W Zoom out (Wide)
N Focusing on a near object (Near)
F Focusing on a far object (Far)
Focus Control Press this button for automatic focus control.
a
NET WOR K
ACT
LINK
DC 12V
ESET
1 ALARM
2 ALARM OU
e
d
cb
f
VIDEO
RESET
1 ALARM IN
2 ALARM OUT
1 2 3 4 5 6 7 GND
T
W
AF
N
F
lkj i hg

English _11
!OVERVIEW
AT A GLANCE (QNO-6014R/7012R/7022R/7032R/6084R/7082R)
Appearance
Item Description
a
Micro SD Card slot (Internal space of the product) This is a slot in which you can insert a Micro SD card.
b
Reset Button
The button restores all camera settings to the factory default.
Press and hold for about 5 seconds to reboot the system.
J
If you reset the camera, the network settings will be adjusted so that DHCP can be
enabled. If there is no DHCP server in the network, you must run the Device Manager
program to change the basic network settings such as IP address, Subnet mask,
Gateway, etc., before you can connect to the network.
c
Test monitor out port Output port for test monitoring the video output. Use the test monitor cable to connect to a
mobile display and check the test video.
d
Sunshield Hold It fixes the sunshield with the camera.
e
Sunshield It protects the camera from the direct sunlight.
f
Zoom/Focus Control Button
(QNO-6084R 7082R/ )
T Zoom in (Tele)
W Zoom out (Wide)
N Focusing on a near object (Near)
F Focusing on a far object (Far)
Focus Control Press this button for automatic focus control.
bc d
a
e
c
f
<QNO-6084R/7082R>

overview
12_ overview
Components
Item Description
a
Power Port Used to plug the power cable.
b
Alarm I/O Port
ARM-OUT Used to connect the alarm output signal.
GND These are common ports to connect alarm input/output signals.
ARM-IN Used to connect the alarm input sensor or external day/night sensor.
c
Network Port Used to connect the PoE or Ethernet cable for network connection.
d
Audio In Port Used to connect to a microphone.
CA UT IO N:B e w are of the
R ated Vol tage an d Polari ty
of the power connecti on.
a
b
c
d
AT A GLANCE (QNV-6014R/7012R/7022R/7032R)
Appearance
Item Description
a
Dome cover Case cover used to protect the lens and the main unit.
b
Camera Case Housing part that covers the camera body.
a
b

English _13
!OVERVIEW
Components
1 2 3
4 5 GND
RESET
VIDEO
3.AUDIO IN
ALM OUT
IN
NETWORK
ACT LINK
i
h
3.AUDIO IN
2.ALM OUT
.ALM IN
VIDEO
1 2 3
4 5 GND
RESET
f
e
d
g
bca
Item Description
a
Illumination Sensor Detects incoming light to control the IR LED.
b
Lens Lens for the camera.
c
IR LED These infrared LED’s are controlled by the illumination sensor.
d
Reset Button
The button restores all camera settings to the factory default.
Press and hold for about 5 seconds to reboot the system.
J
If you reset the camera, the network settings will be adjusted so that DHCP can be
enabled. If there is no DHCP server in the network, you must run the Device Manager
program to change the basic network settings such as IP address, Subnet mask,
Gateway, etc., before you can connect to the network.
e
Test monitor out port Output port for test monitoring the video output. Use the test monitor cable to connect to a
mobile display and check the test video.
f
Audio/Alarm cable port
ARM-IN Used to connect the alarm input sensor or external day/night sensor.
ARM-OUT Used to connect the alarm output signal.
GND These are common ports to connect alarm input/output signals.
AUDIO IN Used to connect to a microphone.
g
Power Port Port for power terminal block.
h
Network Port Used to connect the PoE or Ethernet cable for network connection.
i
Micro SD Card slot Compartment for the Micro SD card.

overview
14_ overview
AT A GLANCE (QNV-6084R/7082R)
Appearance
Item Description
a
Dome cover Case cover used to protect the lens and the main unit.
b
Camera Case Housing part that covers the camera body.
a
b
Components
NETWO RK
LINK
ACT
RM IN
ARM OU T
AU DIO IN
ij
DC12V
FRONT
12 345 67
GND
RESET
1 ALARM IN
2 ALARM OUT
5 AUDIO IN
VIDEO
W
AF
NF
g
bca
d
e
f
h

English _15
!OVERVIEW
Item Description
a
Illumination Sensor Detects incoming light to control the IR LED.
b
Lens Lens for the camera.
c
IR LED These infrared LED’s are controlled by the illumination sensor.
d
Audio/Alarm cable port
ARM-IN Used to connect the alarm input sensor or external day/night sensor.
ARM-OUT Used to connect the alarm output signal.
GND These are common ports to connect alarm input/output signals.
AUDIO IN Used to connect to a microphone.
e
Reset Button
The button restores all camera settings to the factory default.
Press and hold for about 5 seconds to reboot the system.
J
If you reset the camera, the network settings will be adjusted so that DHCP can be
enabled. If there is no DHCP server in the network, you must run the Device Manager
program to change the basic network settings such as IP address, Subnet mask,
Gateway, etc., before you can connect to the network.
f
Test monitor out port Output port for test monitoring the video output. Use the test monitor cable to connect to a
mobile display and check the test video.
g
Zoom/Focus Control Button
T Zoom in (Tele)
W Zoom out (Wide)
N Focusing on a near object (Near)
F Focusing on a far object (Far)
Focus
Control Press this button for automatic focus control.
h
Power Port Port for power terminal block.
i
Network Port Used to connect the PoE or Ethernet cable for network connection.
j
Micro SD Card slot Compartment for the Micro SD card.

16_ installation & connection
installation & connection
INSTALLATION (QND-7012R/7022R/7032R/7082R)
Precautions before installation
Ensure you read out the following instructions before installing the camera:
~It must be installed on the area (ceiling or wall) that can withstand 5 times the weight of the camera
including the installation bracket.
~Stuck-in or peeled-off cables can cause damage to the product or a fire.
~For safety purposes, keep anyone else away from the installation site.
And put aside personal belongings from the site, just in case.
~If the product is installed with excessive force, it may cause damage to the camera due to malfunction.
Forcing assembly using non-compliant tools may damage the product.
Disassembling
1. Use one hand to hold the camera’s bottom part and turn the cover
counterclockwise with another hand to separate it.
J
`Do not touch the transparent part of the dome cover once the protective
film is removed.
2. Lift up the inner cover to separate it.
Installation
1. Consider the direction to be monitored, attach the template, and
drill holes by following the template.
2. Using 2 tapping screws, fix the camera at 2 holes drilled with a
template.
`Set the < > mark imprinted on the camera to face the direction of camera
monitoring.
3. Connect the camera internal terminal with the corresponding
cable.
4. Adjust the lens in a desired direction by referring to the “Adjusting
the monitoring direction for the camera” section. (page 23)
J
`We recommend you not to touch the lens as the camera lens has been
properly focused in the final process of manufacturing. If so, the lens may be
out of focus or stained by alien substances.
5. Please connect the inner cover to the main body.
6. While grabbing the bottom side of the camera with your hand, please
grab and push its cover with the other hand to align the two arrow signs,
as shown in the figure.
J
`To assemble the dome cover, make the arrows match each other and press the
cover firmly.
If the dome cover is rotated during assembly or is assembled incorrectly, diffused
reflection may occur or the lens section may rotate, which will cause the shooting
range to be changed.
`Make sure that the dome cover is correctly connected to the bottom part as shown
in the figure.
If the snap-fit is not connected correctly, the dome cover may fall, which may cause
injury.
DC12V
Dome Cover
NET WORK
ACT LIN K
FRONT
RESET
2. ALM OUT
1. ALM IN
DC12V
4 5 GND
VIDEO
FRONT
R
2. ALM OUT
1. ALM IN
DC12V
4 5 GND
VIDEO

English _17
!INSTALLATION & CONNECTION
INSTALLATION (QNO-6014R/7012R/7022R/7032R/6084R/7082R)
J
`This camera is waterproof and in compliance with the IP66 spec, but the jack connected to the external cable is not. You are
recommended to install this product below the edge of eaves to prevent the cable from being externally exposed.
Precautions before installation
Ensure you read out the following instructions before installing the camera:
~It must be installed on the area (ceiling or wall) that can withstand 5 times the weight of the camera
including the installation bracket.
~Stuck-in or peeled-off cables can cause damage to the product or a fire.
~For safety purposes, keep anyone else away from the installation site.
And put aside personal belongings from the site, just in case.
~Do not use the sunshield hole for any purpose other than for connecting the sunshield.
~If the product is installed with excessive force, it may cause damage to the camera due to malfunction.
Forcing assembly using non-compliant tools may damage the product.
Installation
1. Consider the direction to be monitored, attach the template, and
drill holes by following the template.
2. Insert and fasten 3 tapping screws into 3 holes to secure the
camera.
3. Connect the appropriate cables with camera terminals.
4. Adjust the camera direction using the L wrench provided.
J
`When you adjust the camera position using a bracket, please loosen the
bracket screw, adjust the camera, and tighten it. If you attempt to adjust it
forcibly while the screw is tight, it may result in a scratch or other problems.
How to connect the RJ45 waterproof cable to a LAN cable
1. Insert it through the arrow direction.
2. Connect the LAN connector (male) to the cable.
3. Connect the RJ45 modular jack (female) to the RJ45
connector (male).
J
`Please, keep each of the parts separated.
4. Assemble by rotating the RJ45 modular jack (female) and the RJ45
protection cover clockwise (Follow the arrow).
5. Assemble by rotating RJ45 protection cover and back cover
clockwise (Follow the arrow).
When the back cover is assembled, the cable waterproof gasket is
tightly attached to the cable to make it waterproof.
J
`You must fully assemble it to rotate the back cover up to the end of the screw thread of the RJ45 connector.
Mounting Template
Cable Line
RJ45 connector
(male)
RJ45 modular
jack (female) Rubber ring
RJ45 connector
protection cover
Back cover
Cable waterproof
gasket
Rubber ring

installation & connection
18_ installation & connection
INSTALLATION (QNV-6014R/7012R/7022R/7032R)
J
`This camera is waterproof and in compliance with the IP66 spec, but the jack connected to the external cable is not. You are
recommended to install this product below the edge of eaves to prevent the cable from being externally exposed.
Precautions before installation
Ensure you read out the following instructions before installing the camera:
~It must be installed on the area (ceiling or wall) that can withstand 5 times the weight of the camera
including the installation bracket.
~Stuck-in or peeled-off cables can cause damage to the product or a fire.
~For safety purposes, keep anyone else away from the installation site.
And put aside personal belongings from the site, just in case.
~If the product is installed with excessive force, it may cause damage to the camera due to malfunction.
Forcing assembly using non-compliant tools may damage the product.
Disassembling
1. Using the Torx L wrench provided, turn the 2 fastening
bolts on the dome cover counter clockwise to remove
the cover.
Installation
1. Using the template provided as an accessory, drill the screw
installation hole(diameter of 6mm, minimal depth of 55mm) and
firmly insert the plastic anchor provided as an accessory to the
end.
2. Fit the bottom hole to the anchor hole and insert and fix the taping
screw (M4.5xL50).
3. Connect and arrange the necessary cables lest that they should
be damaged or twisted while installing the camera.
4. Adjust the lens in a desired direction by referring to the “Adjusting
the monitoring direction for the camera” section. (page 23)
5. Close the dome cover.
`Securely fasten the fastening bolt using an Torx L wrench to prevent water from leaking.
Outdoor installation
When you install it outside of the building, please waterproof it with waterproof butyl rubber tape (can be
purchased in stores) so that water does not leak from the gap of the cable connected to the outside.
1. Connect the power, I/O, AUDIO, and LAN cables.
2. Wrap the black cable jacket (Area A) and the cable connection
area with waterproof (butyl rubber) tape so that more than half of
the butyl rubber tape is overlapped.
J
`If the cable jacket is not waterproofed properly, then it can directly cause
leakage. Make sure to protect the cable with a dense layer of taping.
`Waterproof butyl tape is made of butyl rubber that can be stretched to twice its normal length.
Ca erm a
Ca erm a
Ca erm a
S temys
S temys
S temys
AA
3.AUDIO IN
2.ALM OUT
VIDEO
1 2 3
4 5 GND
R
3.AUDIO IN
2.ALM OUT
VIDEO
1 2 3
4 5 GND
R
Dome cover
Camera Case
Bolts
Camera Body

English _19
!INSTALLATION & CONNECTION
Connecting the LAN cable
1. Remove the dome cover and the case.
2. Pull off the cable bush at the bottom as shown in the figure.
J
`Use an appropriate cable bush for the LAN cable to be connected.
-Basic camera : Use the cable with a diameter of Ø5~6.5.
3. Pull off the extruded part of the 1-hole cable bush provided.
4. Use the cap installer to route the LAN cable through the
cable bush.
5. Route the LAN cable through the hole created after removing the cable
bush in Step 2, and then connect it to the ethernet terminal.
6. Insert the bush of the LAN cable into the hole.
Connecting the audio/alarm cable and power cable
1. Remove the dome cover and the case.
2. Pull off the cable bush at the bottom as shown in the figure.
3. Pull off the small extruded part on the bush of the alarm/audio cable,
and route the power cable through the bush.
4. Route the alarm/audio cable through the hole left after removing the
cable bush in Step 2. Connect each to the alarm/audio terminal and
power terminal block of the PCB, respectively.
5. When mounting the camera, hang the cables on the fixed hook to avoid
cables from being damaged or pinched.
6. Insert the bush of the alarm/audio cables into the hole.
7. Adjust the lens in a desired direction by referring to the “Adjusting the
monitoring direction for the camera” section.
(page 23)
8. Attach the dome cover.
1 2 3
4 5 GND
RESET
VIDEO
3.AUDIO IN.ALM OUT
M IN
NETWORK
ACT LINK
CAUTIO N: Be wa re o f the
Rated Volta ge a nd Polari ty
of the power conn ection .
1 2 3
4 5 GND
RESET
VIDEO
3.AUDIO IN
ALM OUTM IN
ETWORK
ACT LINK
Produktspecifikationer
| Varumärke: | Hanwha |
| Kategori: | övervakningskamera |
| Modell: | QND-7082R |
Behöver du hjälp?
Om du behöver hjälp med Hanwha QND-7082R ställ en fråga nedan och andra användare kommer att svara dig
övervakningskamera Hanwha Manualer

26 Oktober 2024
21 September 2024
20 September 2024
19 September 2024
19 September 2024
19 September 2024
19 September 2024
19 September 2024
19 September 2024
19 September 2024
övervakningskamera Manualer
- övervakningskamera Sony
- övervakningskamera Samsung
- övervakningskamera Xiaomi
- övervakningskamera Bosch
- övervakningskamera Braun
- övervakningskamera Philips
- övervakningskamera Panasonic
- övervakningskamera Grundig
- övervakningskamera Gigaset
- övervakningskamera Honeywell
- övervakningskamera JVC
- övervakningskamera Motorola
- övervakningskamera Toshiba
- övervakningskamera VTech
- övervakningskamera Canon
- övervakningskamera Abus
- övervakningskamera Ag Neovo
- övervakningskamera Allnet
- övervakningskamera Alecto
- övervakningskamera Apc
- övervakningskamera Aldi
- övervakningskamera Aluratek
- övervakningskamera Airlive
- övervakningskamera Anker
- övervakningskamera Aritech
- övervakningskamera Acti
- övervakningskamera ACME
- övervakningskamera Edimax
- övervakningskamera Strong
- övervakningskamera Flamingo
- övervakningskamera Hikvision
- övervakningskamera Nedis
- övervakningskamera Thomson
- övervakningskamera Gembird
- övervakningskamera Yale
- övervakningskamera Pyle
- övervakningskamera Caliber
- övervakningskamera SereneLife
- övervakningskamera Eminent
- övervakningskamera Avanti
- övervakningskamera Renkforce
- övervakningskamera Kodak
- övervakningskamera Overmax
- övervakningskamera Niceboy
- övervakningskamera Sitecom
- övervakningskamera Blaupunkt
- övervakningskamera TP Link
- övervakningskamera Megasat
- övervakningskamera Logitech
- övervakningskamera Manhattan
- övervakningskamera Exibel
- övervakningskamera Ezviz
- övervakningskamera Trust
- övervakningskamera Fortinet
- övervakningskamera Elro
- övervakningskamera EMOS
- övervakningskamera Extech
- övervakningskamera KlikaanKlikuit
- övervakningskamera Denver
- övervakningskamera DataVideo
- övervakningskamera Schneider
- övervakningskamera Axis
- övervakningskamera Sanyo
- övervakningskamera Vitek
- övervakningskamera Imou
- övervakningskamera Hama
- övervakningskamera Maginon
- övervakningskamera Mitsubishi
- övervakningskamera Velleman
- övervakningskamera Smartwares
- övervakningskamera Profile
- övervakningskamera Marquant
- övervakningskamera Trebs
- övervakningskamera Ednet
- övervakningskamera Cisco
- övervakningskamera AVerMedia
- övervakningskamera Eufy
- övervakningskamera Steren
- övervakningskamera Perel
- övervakningskamera Engenius
- övervakningskamera Burg-Wachter
- övervakningskamera Lumens
- övervakningskamera Flir
- övervakningskamera Somfy
- övervakningskamera Netis
- övervakningskamera Genius
- övervakningskamera Adj
- övervakningskamera Digitus
- övervakningskamera Olympia
- övervakningskamera Belkin
- övervakningskamera Linksys
- övervakningskamera Buffalo
- övervakningskamera Uniden
- övervakningskamera Dahua Technology
- övervakningskamera Ion
- övervakningskamera GeoVision
- övervakningskamera Arlo
- övervakningskamera Netgear
- övervakningskamera Nest
- övervakningskamera LevelOne
- övervakningskamera DIO
- övervakningskamera Boss
- övervakningskamera Siedle
- övervakningskamera Ricoh
- övervakningskamera Hive
- övervakningskamera Netatmo
- övervakningskamera Marshall
- övervakningskamera Switel
- övervakningskamera Chacon
- övervakningskamera InFocus
- övervakningskamera Hombli
- övervakningskamera Reolink
- övervakningskamera First Alert
- övervakningskamera UniView
- övervakningskamera Planet
- övervakningskamera ZyXEL
- övervakningskamera Western Digital
- övervakningskamera Clas Ohlson
- övervakningskamera Naxa
- övervakningskamera Konig
- övervakningskamera Valueline
- övervakningskamera Trevi
- övervakningskamera Foscam
- övervakningskamera BRK
- övervakningskamera Orion
- övervakningskamera Zebra
- övervakningskamera EVE
- övervakningskamera Technaxx
- övervakningskamera D-Link
- övervakningskamera Swann
- övervakningskamera Withings
- övervakningskamera Tenda
- övervakningskamera QSC
- övervakningskamera Xavax
- övervakningskamera Marmitek
- övervakningskamera Minox
- övervakningskamera Delta Dore
- övervakningskamera M-e
- övervakningskamera Lorex
- övervakningskamera Ubiquiti Networks
- övervakningskamera Marshall Electronics
- övervakningskamera Vaddio
- övervakningskamera Gira
- övervakningskamera Jung
- övervakningskamera Interlogix
- övervakningskamera Ring
- övervakningskamera Trendnet
- övervakningskamera DSC
- övervakningskamera Boyo
- övervakningskamera Laserliner
- övervakningskamera Iget
- övervakningskamera CRUX
- övervakningskamera Conceptronic
- övervakningskamera EverFocus
- övervakningskamera Adesso
- övervakningskamera Satel
- övervakningskamera Vivotek
- övervakningskamera Notifier
- övervakningskamera Lanberg
- övervakningskamera Friedland
- övervakningskamera Nexxt
- övervakningskamera Revo
- övervakningskamera Quantum
- övervakningskamera Monoprice
- övervakningskamera Broan
- övervakningskamera Avidsen
- övervakningskamera Furrion
- övervakningskamera Beafon
- övervakningskamera SPC
- övervakningskamera Stabo
- övervakningskamera Crestron
- övervakningskamera Chuango
- övervakningskamera ORNO
- övervakningskamera ETiger
- övervakningskamera INSTAR
- övervakningskamera Grandstream
- övervakningskamera Provision ISR
- övervakningskamera Monacor
- övervakningskamera Logilink
- övervakningskamera Aqara
- övervakningskamera Moxa
- övervakningskamera Advantech
- övervakningskamera Digital Watchdog
- övervakningskamera Ferguson
- övervakningskamera Ganz
- övervakningskamera MEE Audio
- övervakningskamera Kwikset
- övervakningskamera Elmo
- övervakningskamera Intellinet
- övervakningskamera ClearOne
- övervakningskamera Ebode
- övervakningskamera Oplink
- övervakningskamera Kerbl
- övervakningskamera Dorr
- övervakningskamera Sonic Alert
- övervakningskamera Linear PRO Access
- övervakningskamera BirdDog
- övervakningskamera AVer
- övervakningskamera Summer Infant
- övervakningskamera SMC
- övervakningskamera Topica
- övervakningskamera Vimar
- övervakningskamera Kogan
- övervakningskamera Iiquu
- övervakningskamera Speco Technologies
- övervakningskamera Verint
- övervakningskamera ZKTeco
- övervakningskamera Brinno
- övervakningskamera Raymarine
- övervakningskamera Rostra
- övervakningskamera Caddx
- övervakningskamera Spyclops
- övervakningskamera Schwaiger
- övervakningskamera EKO
- övervakningskamera Inovonics
- övervakningskamera Kguard
- övervakningskamera Woonveilig
- övervakningskamera Mobi
- övervakningskamera V-Tac
- övervakningskamera Surveon
- övervakningskamera Hollyland
- övervakningskamera Epcom
- övervakningskamera EVOLVEO
- övervakningskamera Indexa
- övervakningskamera AViPAS
- övervakningskamera Kramer
- övervakningskamera Lutec
- övervakningskamera Whistler
- övervakningskamera ClearView
- övervakningskamera VideoComm
- övervakningskamera IMILAB
- övervakningskamera 3xLOGIC
- övervakningskamera Pelco
- övervakningskamera Leviton
- övervakningskamera EtiamPro
- övervakningskamera Inkovideo
- övervakningskamera Pentatech
- övervakningskamera Weldex
- övervakningskamera SecurityMan
- övervakningskamera Brilliant
- övervakningskamera Lindy
- övervakningskamera Canyon
- övervakningskamera CNB Technology
- övervakningskamera Tapo
- övervakningskamera Aigis
- övervakningskamera Exacq
- övervakningskamera Brickcom
- övervakningskamera Laxihub
- övervakningskamera Securetech
- övervakningskamera EFB Elektronik
- övervakningskamera Ernitec
- övervakningskamera NetMedia
- övervakningskamera Videotec
- övervakningskamera Illustra
- övervakningskamera Atlona
- övervakningskamera AVMATRIX
- övervakningskamera Nivian
- övervakningskamera Arenti
- övervakningskamera E-bench
- övervakningskamera Blow
- övervakningskamera Syscom
- övervakningskamera Tecno
- övervakningskamera Night Owl
- övervakningskamera Guardzilla
- övervakningskamera Astak
- övervakningskamera Blink
- övervakningskamera Milestone Systems
- övervakningskamera Zavio
- övervakningskamera Campark
- övervakningskamera IPX
- övervakningskamera Dedicated Micros
- övervakningskamera Hamlet
- övervakningskamera Equip
- övervakningskamera Annke
- övervakningskamera AVTech
- övervakningskamera Qoltec
- övervakningskamera Approx
- övervakningskamera Digimerge
- övervakningskamera Y-cam
- övervakningskamera Alfatron
- övervakningskamera Feelworld
- övervakningskamera KJB Security Products
- övervakningskamera Wisenet
- övervakningskamera BZBGear
- övervakningskamera WyreStorm
- övervakningskamera Infortrend
- övervakningskamera Epiphan
- övervakningskamera HiLook
- övervakningskamera Mach Power
- övervakningskamera Compro
- övervakningskamera Aida
- övervakningskamera Ikegami
- övervakningskamera Accsoon
- övervakningskamera Vimtag
- övervakningskamera Sonoff
- övervakningskamera Gewiss
- övervakningskamera Alula
- övervakningskamera Insteon
- övervakningskamera Costar
- övervakningskamera ALC
- övervakningskamera Security Labs
- övervakningskamera Comtrend
- övervakningskamera Seneca
- övervakningskamera Avigilon
- övervakningskamera American Dynamics
- övervakningskamera Vosker
- övervakningskamera Sentry360
- övervakningskamera Bea-fon
- övervakningskamera Owltron
- övervakningskamera Petcube
- övervakningskamera Enabot
- övervakningskamera Luis Energy
- övervakningskamera Sir Gawain
- övervakningskamera VisorTech
- övervakningskamera Atlantis Land
- övervakningskamera B & S Technology
- övervakningskamera I3International
- övervakningskamera IDIS
- övervakningskamera Promise Technology
- övervakningskamera Ecobee
- övervakningskamera Turing
- övervakningskamera Qian
- övervakningskamera Wasserstein
- övervakningskamera Qolsys
- övervakningskamera Control4
- övervakningskamera Milesight
- övervakningskamera GVI Security
- övervakningskamera Conbrov
- övervakningskamera HuddleCamHD
- övervakningskamera Setti+
- övervakningskamera Defender
- övervakningskamera Mobotix
- övervakningskamera IOIO
- övervakningskamera BIRDFY
- övervakningskamera I-PRO
- övervakningskamera DVDO
- övervakningskamera TCP
- övervakningskamera Bolin Technology
- övervakningskamera Nextech
Nyaste övervakningskamera Manualer
5 April 2025
5 April 2025
5 April 2025
28 Januari 2025

25 Januari 2025
25 Januari 2025

16 Januari 2025
10 Januari 2025
8 Januari 2025
8 Januari 2025