Hitachi VM-E230A Bruksanvisning
Hitachi
Videokamera
VM-E230A
Läs nedan 📖 manual på svenska för Hitachi VM-E230A (62 sidor) i kategorin Videokamera. Denna guide var användbar för 25 personer och betygsatt med 4.5 stjärnor i genomsnitt av 2 användare
Sida 1/62

Table of Contents
HITACHI
Instruction Manual
8mm Video Camcorder
VM-E230A
HITACHI HOME ELECTRONICS HITACHI (HSC) CANADA INC.
(AMERICA), INC. 6740 Campobello Road
3890 Steve Reynolds Blvd., Norcross, GA 30093 Mississauga, Ontario L5N 2L8
Tel. 770-279-5600 CANADA
Tel. 905-821-4545
HITACHI SALES CORPORATION OF
HAWAII, INC
3219 Koapaka Street, Honolulu, Hawaii 96819
Tel. 808-836-3621
Thank you for buying a Hitachi product. Please take time to become familiar with the
manual and how it is set up. Keep it handy for feature reference.
QR16731 © Hitachi, Ltd. 1997 Printed in Japan KN-H(N)

Table of Contents
Table of Contents
Table of Contents ........................................................................................................................................2
For Your Safety...........................................................................................................................................7
Important Safeguards .................................................................................................................................. 9
IMPORTANT SAFETY INSTRUCTIONS FOR AC ADAPTER/CHARGER ...................................... 13
Read This First ..........................................................................................................................................14
Before You Begin...................................................................................................................................... 15
Features...............................................................................................................................................15
Components and Accessories..........................................................................................................15
Optional RF Adapter ..........................................................................................................................16
Lens Cap..............................................................................................................................................16
Using the lens cap string:..................................................................................................................16
Removing the lens cap ...................................................................................................................... 16
Getting Started...........................................................................................................................................18
Charging the Battery ..........................................................................................................................18
Additional Information........................................................................................................................ 19
Adjusting the Electronic Viewfinder .................................................................................................19
Eyepiece Adjustment .........................................................................................................................20
Adjustment the Hand Strap...............................................................................................................20
Loading Batteries................................................................................................................................ 20
Clock Battery.......................................................................................................................................21
Remote Control Batteries..................................................................................................................21
Camcorder Batteries Using Battery Pack .......................................................................................22
Removing the Battery Pack .............................................................................................................. 23
Checking the Battery's Charge......................................................................................................... 24
Using Alkaline Dry-Cell Batteries..................................................................................................... 24
Using Alternative Power Sources ....................................................................................................26
Using the AC Adapter/Charger......................................................................................................... 26
Using a Car Battery............................................................................................................................26
Inserting and Removing Cassettes.................................................................................................. 27
Inserting a Cassette ...........................................................................................................................27
Removing a Cassette.........................................................................................................................28
Protecting Recorded Material...........................................................................................................28
Using the Linear Time Counter ........................................................................................................28
Remaining Tape .................................................................................................................................28
Setting the Date and Time ................................................................................................................ 29
Correcting the Date and Time ..........................................................................................................30
Getting Started, Identifying Controls........................................................................................................31
Basic Techniques.......................................................................................................................................34
Making a Basic Recording ................................................................................................................ 34
Playing Back Your Recording...........................................................................................................35
Connecting to a Television with a VCR Attached.......................................................................... 35
Connecting to a Television with Audio In and Video In Jacks.....................................................35
Connecting to a Television without Audio In and Video In Jacks ...............................................36
Simple Playback (Using the Electronic Viewfinder) ...................................................................... 36
Using Still .............................................................................................................................................37

Table of Contents
Using Forward and Reverse Search ...............................................................................................37
To Play Back a Recording at Double the Normal Speed............................................................. 37
Advanced Techniques ...............................................................................................................................39
Date Recording...................................................................................................................................39
Using the Power Zoom ......................................................................................................................40
Using the Digital Zoom ...................................................................................................................... 41
Using the INST. ZOOM (Instant Zoom) Button.............................................................................. 41
Using Auto Focus ...............................................................................................................................42
Using Manual Focus ..........................................................................................................................43
Using Instant Review .........................................................................................................................43
Using Quick Edit .................................................................................................................................44
Using Macro ........................................................................................................................................44
Date Search.........................................................................................................................................44
Dubbing from the Camcorder to a VCR..........................................................................................45
Remote Control Range......................................................................................................................45
Using Memory .....................................................................................................................................46
Using the Display Button...................................................................................................................47
Creating and Recording A Title........................................................................................................47
Creating a Title....................................................................................................................................48
Correcting Errors ................................................................................................................................48
Recording Title on a Tape in the Camcorder.................................................................................48
Recording a Created Title while Transferring a Tape...................................................................49
Using Audio/Video Dubbing.............................................................................................................. 50
Simple Programmable Edit (The edit remote control is optional) ...............................................50
Programming the Remote Control for the VCR.............................................................................50
Operation .............................................................................................................................................52
To End Programmable Simple Edit .................................................................................................53
Attaching the Optional Wide or Tele Converter Lens ................................................................... 54
Attaching the Optional DC Camera Light .......................................................................................54
Removing the DC Camera Light ......................................................................................................55
Replacing the DC Camera Light Bulb .............................................................................................55
Viewfinder Bright, Color and Tint Control .......................................................................................56
General Maintenance................................................................................................................................. 57
Cleaning the camcorder Heads........................................................................................................57
Cleaning the Lens and Picture Tube of the Electronic Viewfinder .............................................57
Periodic Maintenance ........................................................................................................................57
Troubleshooting .................................................................................................................................. 58
CAMERA RECORDING ....................................................................................................................58
Symptom.............................................................................................................................................. 58
Check Point & Correction..................................................................................................................58
Picture does not appear in the viewfinder. .....................................................................................58
Remove the lens cap. ........................................................................................................................58
Slide the CAM/OFF/VIDEO switch to CAM....................................................................................58
The camcorder cannot go into the recording mode, even when the start/stop button is
pressed. ...............................................................................................................................................58
Check the record protect tab on the cassette................................................................................58
Push the cassette holder embossed PUSH LOCK to close it.....................................................58
Slide the CAM/OFF/VIDEO switch to CAM....................................................................................58
Picture is out of focus. .......................................................................................................................58

Table of Contents
Make sure that FOCUS does not appear in the viewfinder. If it is displayed, press FOCUS
Control buttons to erase it................................................................................................................. 58
Auto-Focus does not operate if a special effects filter is attached. ............................................ 58
The created title does not appear.................................................................................................... 58
Insert the clock battery, then create a title...................................................................................... 58
Do not remove the clock battery after creating a title. .................................................................. 58
PLAYBACK OF PRE-RECORDED CASSETTE ........................................................................... 58
Symptom.............................................................................................................................................. 58
Check Point & Correction.................................................................................................................. 58
“Play” button cannot be engaged..................................................................................................... 58
Set the CAM/OFF/VIDEO switch to VIDEO. .................................................................................. 58
No picture appears on television screen when “PLAY” is pressed. ........................................... 58
(TV is connected to the camcorder by using RF output adapter. ...............................................58
Set the television to the camcorder channel.(3 or 4) depending upon the selected channel in
the RF channel select switch of the RF output adapter. .............................................................. 58
Interference on playback picture......................................................................................................58
When you see the playback picture on your TV, adjust fine tuning knob on television set to
obtain best picture.............................................................................................................................. 58
Picture bends at the top of the TV screen. ..................................................................................... 58
TV receiver is of older type. It needs to be modified to work properly with camcorder.......... 58
Tape is damaged. Try another cassette........................................................................................ 59
Color of your TV screen is too bright, too faint or change. .......................................................... 59
TV set has VIR circuit. Turn if off during playback....................................................................... 59
Date search function does not operate........................................................................................... 59
Slide the CAM/OFF/VIDEO switch to VIDEO. ...............................................................................59
Insert the clock battery, set the date and time, then start recording. ......................................... 59
Do not remove the clock battery after recording. .......................................................................... 59
Do not eject the recorded cassette. Leave it in the camcorder..................................................59
The playback picture moves rapidly and noise appears. Also sound speeded up from
normal is heard. .................................................................................................................................. 59
The camcorder is set to the double speed playback mode. Pressing the playback button to
restore the normal playback mode. The sound also returns to the normal speed. ................ 59
Noise appears in the picture during double speed playback, but this does not indicate a fault.
............................................................................................................................................................... 59
BATTERY CONDITION..................................................................................................................... 59
Symptom.............................................................................................................................................. 59
Check Point & Correction.................................................................................................................. 59
The ( ) indication in the electronic viewfinder flashes to indicate battery is discharged...... 59
Try another battery or charge the battery.......................................................................................59
NO OPERATION IS ACCEPTED .................................................................................................... 59
Symptom.............................................................................................................................................. 59
Check Point & Correction.................................................................................................................. 59
Power is turned on, but no button operation are accepted.......................................................... 59
Remove the power source and the date/title battery. And after about one minute, the display
in the viewfinder will be reset. Then set the information again. ................................................. 59
The camcorder does not operate when alkaline batteries are inserted..................................... 59
Check that the polarities (+,-) of the batteries are correct. .......................................................... 59
Insert six batteries. ............................................................................................................................. 59
Specifications ...................................................................................................................................... 60
General Specifications....................................................................................................................... 60

Table of Contents
Video Recorder Specifications ......................................................................................................... 60
Camera Specifications....................................................................................................................... 60
Accessories Add Excitement..................................................................................................................... 62
Available Accessories........................................................................................................................ 62
To Order in the United States........................................................................................................... 62
By Phone ............................................................................................................................................. 62
By Mail.................................................................................................................................................. 62
FOR AUTHORIZED HITACHE SERVICE IN CANADA............................................................... 62

Table of Contents

For Your Safety
For Your Safety
The CAM/OFF/VIDEO switch turns the camcorder on and off, leaving the date/time
feature unaffected. If the unit is to be left unattended for a long period of time, turn the
camcorder off and attach the lens cap.
WARNING: TO PREVENT FIRE OR SHOCK HAZARD, DO NOT EXPOSE THIS UNIT TO
RAIN OR MOISTURE.
The camcorder and AC adapter/charger have the following caution marks.
Identifications of caution marks
This symbol warms the user that uninsulated voltage within the unit may have
sufficient magnitude to cause electrical shock. Therefore, it is dangerous to make any kind
of contact with any inside part of this unit.
This symbol alerts the user that important literature concerning the operation and
maintenance of this unit has been included. Therefore, it should be read carefully to avoid
any problems.
CAUTION: TO REDUCE THE RISK OF ELECTRIC SHOCK, DO NOT OPEN.
NO USER-SERVICEABLE PARTS INSIDE.
REFER SERVICING TO QUALIFIED SERVICE PERSONNEL.
WARNING: TO PREVENT FIRE OR ELECTRIC SHOCK, MATCH WIDE BLADE OF
PLUG TO WIDE SLOT, AND FULLY INSERT PLUG.
WARNING: Many television programs and films are copyrighted. In certain circumstances,
copyright law may apply to private in-home videotaping of copyrighted materials.
This Class B digital apparatus meets all requirements of the Canadian Interference-
Causing Equipment Regulations.
The liquid crystal display (LCD) panel is made by highly precise technology. More than
99.99% of its picture elements (pixels) are effective, but some (less than 0.01%) may
appear as colored bright dots. This does not indicate a fault as the LCD panel stretches
the limits of current technology.
Warning: This device complies with Part 15 of the FCC Rules. Operation is subject to the
following two conditions: (1) This device may not cause harmful interference, and (2) this
device must accept any interference received, including interference that may cause
undesired operation.
Note: This equipment has been tested and found to comply with the limits for a Class B
digital device, pursuant of Part 15 of the FCC Rules. These limits are designed to provide

For Your Safety
reasonable protection against harmful interference in a residential installation. This
equipment generates, uses, and can radiate radio frequency energy and, if not installed
and used in accordance with the instructions, may cause harmful interference to radio
communications. However, there is no guarantee that interference will not occur in a
particular installation. If this equipment does cause harmful interference to radio or
television reception, which can be determined by turning the equipment off and on, the user
is encouraged to try to correct by one or more of the following measures:
-- Reorient or relocate the receiving antenna.
-- Increase the separation between the equipment and receiver.
-- Connect the equipment into an outlet on a circuit different from that to which the receiver
is connected.
-- Consult the dealer or an experienced radio/TV technician for help.
Caution to the user: Changes or modifications not expressly approved by the manufacture
could void the user's authority to operate the equipment.
"Note to CATV system installer: This reminder is provided to call the CATV system
installer's attention to Article 820-40 of the NEC that provides guidelines for proper
grounding and, in particular, specifies that the cable ground shall be connected to the
grounding system of the building, as close to the point of cable entry as practical".
Notes:
• This unit uses 8mm video format cassettes.
• It records and plays back in the SP mode (14.3 mm/sec).
• It cannot record and play back in the LP mode (7.2 mm/sec).
MOISTURE
Avoid operating your camcorder immediately after moving it from a cold place to a
warm, humid place. Give the camcorder 2 to 3 hours to stabilize in the ambient
conditions of the surroundings before inserting a cassette. When moved from a cold
place to a warm, humid place, moisture may condense on the head drum inside the
machine. This moisture could cause the tape to stick to the headwheel and damage the
headwheel or tape.
When a small amount of moisture is sensed, "TAPE" flashes in the viewfinder. Remove
the cassette and set the CAM/OFF/VIDEO switch to OFF, then wait for about one hour.

Important Safeguards
Important Safeguards
In addition to the careful attention devoted to quality standards in the manufacture of
your video product, safety is a major factor in the design of every instrument. But, safety
is your responsibility too.
This page lists important information that will help to assure your enjoyment and proper
use of a Video camcorder and accessory equipment. Please read it carefully before
operating your video product and keep it in a handy place for future reference.
INSTALLATION
1 Read and Follow Instructions -- All the safety and operating instructions should be
read before the video product is operated. Follow-all operating and use instructions.
2 Retain Instructions -- The safety and operating instructions should be retained for
future reference.
3 Heed Warnings -- Comply with all warnings on the video product and in the
operating instructions.
4 Polarized Plug -- This video product is equipped with a polarized alternating-current
line plug (a plug having one blade wider than the other). This plug will fit into the power
outlet only one way. This is a safety feature. If you are unable to insert the plug fully into
the outlet, try reversing the plug. If the plug should still fail to fit, contact your electrician
to replace your obsolete outlet. To prevent electric shock do not use this polarized plug
with an extension cord, receptacle or other outlet unless the blades can be fully inserted
without blade exposure. If you need an extension, use a polarized cord.
5 Power Sources -- This video product should be operated only from the type of power
source indicated on the marking label. If you are not sure of the type of power supply to
your home, consult your video dealer or local power company. For video products
intended to operate from battery power, or other sources, refer to the operating
instructions.
6 Overloading -- Do not overload wall outlets and extension cords as this can result in
a risk of fire or electric shock. Overloaded AC outlets and extension cords are
dangerous, and so are frayed power cords, damaged or cracked wire insulation and
broken plugs. They may result in a shock or fire hazard. Periodically examine the cord
and have it replaced by your service technician if appearance indicates damage or
deteriorated insulation.

Important Safeguards
7 Power-Cord Protection -- Power-supply cords should be routed so that they are not
likely to be walked on or pinched by items placed upon or against them, paying
particular attention to cords at plugs, convenience receptacles, and the point where they
exit from the appliance.
8 Ventilation -- Slots and openings in the cabinet are provided for ventilation to ensure
reliable operation of the video product and to protect it from overheating. These
openings must not be blocked or covered. The openings should never be blocked by
placing the video product on a bed, sofa, rug or other similar surface. This video product
should never be placed near or over a radiator or heat register. This video product
should not be placed in a built-in installation such as a bookcase or rack unless proper
ventilation is provided or the video product manufacturer's instructions have been
followed.
9 Attachments -- Do not use attachments unless recommended by the video product
manufacturer as they may cause hazards.
Caution: Maintain electrical safety. Powerline operated equipment or accessories
connected to this unit should bear the UL listing mark or CSA certification mark on the
accessory itself and should not have been modified so as to defeat the safety features. This
will help avoid any potential hazard from electric shock or fire. If in doubt, contact qualified
service personnel.
10 Water and Moisture -- Do not use this video product near water - for example, near
a bath tub, wash bowl, kitchen sink, or laundry tub, in a wet basement, or near a
swimming pool, and the like.
11 Accessories -- Do not place this video product on an unstable card, stand, tripod,
bracket, or table. The video product may fall, causing serious injury to a child or adult,
and serious damage to the appliance. Use only with a cart, stand, tripod, bracket, or
table recommended by the manufacturer, or sold with the video product. Any mounting
of the product should follow the manufacturer's instructions, and should use a mounting
accessory recommended by the manufacturer.
11A An appliance and cart combination should be moved with care. Quick stops,
excessive force, and uneven surfaces may cause the appliance and cart combination to
overturn.
12 Outdoor Antenna Grounding -- If an outside antenna or cable system is
connected to the video product, be sure the antenna or cable system is grounded so as
to provide some protection against voltage surges and built-up static charges. Section
810 of the National Electrical Code, ANSI/NFPA No. 70, provides information with

Important Safeguards
respect to proper grounding of the mast and supporting structure, grounding of the lead-
in wire to an antenna discharge unit, size of grounding conductors, location of antenna-
discharge unit, connection to grounding electrodes, and requirements for the grounding
electrode. See example below:
EXAMPLE OF ANTENNA GROUNDING
13 Power Lines -- An outside antenna system should not be located in the vicinity of
overhead power lines or other electric light or power circuits, or where it can fall into
such power lines or circuits. When installing an outside antenna system, extreme care
should be taken to keep from touching or approaching such power lines or circuits as
contact with them might be fatal. Installing an outdoor antenna can be hazardous and
should be left to a professional antenna installer.
USE
14 Cleaning -- Unplug this video product from the wall outlet before cleaning. Do not
use liquid cleaners or aerosol cleaners. Use a damp cloth for cleaning.
15 Object and Liquid Entry -- Never push objects of any kind into this video product
through openings as they may touch dangerous voltage points or short-out parts that
could result in a fire or electric shock. Never spill liquid of any kind on the video
product.
16 Lightning -- For added protection for this video product during a lightning storm, or
when it its left unattended and unused for long periods of time, unplug it from the wall
outlet and disconnect the antenna or cable-system. This will prevent damage to the
video product due to lightning and power-line surges.
SERVICE
17 Servicing -- Do not attempt to service this video product yourself as opening or
removing covers may expose you to dangerous voltage or other hazards. Refer all
servicing to qualified service personnel.
18 Conditions Requiring Service -- Unplug this video product from the wall outlet and
refer servicing to qualified service personnel under the following conditions.
a. When the power-supply cord or plug is damaged
b. If liquid has been spilled, or objects have fallen into the video product.
c. If the video product has been exposed to rain or water.
d. If the video product does not operate normally by following the operating instructions.
Adjust only those controls that are covered by the operating instructions. Improper
adjustment of other controls may result in damage and will often require extensive work
by a qualified technician to restore the video product to its normal operation.

Before You Begin
Before You Begin
Any problems that occur as a result of any of the following conditions will not be covered
by our warranty.
Be careful that no water, dust or sand enters the camcorder and all accessories.
When you shoot at a scene which contains an extremely bright object such as the sun
or a light source, a bright vertical bar may appear in the picture.
Your camcorder is functioning properly, but the solid-state pickup device (C.C.D) usually
causes this as an inherent characteristic. Try to avoid shooting an excessive bright
object directly.
Be sure not to leave the camcorder in a place where the temperature exceeds 140°F
(60°C), or the pickup device may be damaged.
Dangerous includes:
• Inside a car with the windows closed and in direct sunshine.
• Near heating appliances.
Do not leave the viewfinder lens facing sunlight for a prolonged period, or the liquid
crystal display (LCD) panel may be damaged.
Features
• Easy to use
• Instant zoom
• 24x zoom ratio
• Recorded date search
• Automatic title recording
Components and Accessories
Check that you have all the following components and accessories before preceding.
1. Audio/Video output cable
2. Battery pack
3. AC adapter/charger
4. Batteries for date/title
5. DC cord
6. Lens cap string
7. Remote control
+8. Batteries for remote control

Before You Begin
Optional RF Adapter
If you wish to connect this camcorder to a television that does not have audio/video
input jacks you will need to use the optional RF adapter model VM-RF86A (R).
The RF adapter can be purchased by calling the telephone number below. For your
convenience Visa, Master Card, and American Express credit cards are accepted. The
RF adapter can also be purchased by mail by sending either money order or your credit
card information to the following address:
HiTRON, Inc.
675, Old Peachtree RD.
Suwanee, GA 30174
Tel: 1-800-995-4500
For more information concerning the purchase of camcorder accessories, please see
the optional accessory listing on page 59.
Lens Cap
Using the lens cap string:
Pass the string through the lens cap and grip belt and attach it as shown in the figure.
Removing the lens cap
Always attach the lens cap to protect the lens when carrying or storing the camcorder.

Before You Begin
During shooting attach the lens cap as shown in the figure to prevent it from being lost.

Getting Started
Getting Started
This section guides you through the initial preparation of the camcorder. None of these
processes are complex. Set aside some time, relax, and familiarize yourself with this
quality instrument.
Enjoy getting to know all about your Hitachi 8mm camcorder. The more comfortable and
familiar you are with the machine and its features, the more you can make it do for you.
Let's get started!
It is crucial that you read and understand all the safety instructions before you begin. If
you haven't read the safety instructions yet, please take the time to do so now.
Charging the Battery
The first step is to set the battery to charge. It takes approximately an hour (VM-
BP82G), enough time to familiarize yourself with some of the basic features of the
camcorder. Once fully charged the battery will give an operating time of approximately
60 minutes, but this is reduced to a half to one-third depending on how often you use
zoom and start/stop functions.
Charge the battery at a temperature range of 50°F(10°C) - 86°F(30°C) to prevent
damage to the battery.
1. Plug the AC adapter/charger power cord into an AC outlet. Make sure that the wide
blade fits into the wide slot. If it doesn't fit try reversing it. If you still cannot make fit the
blades fully into the outlet either contact an electrician to replace your obsolete outlet, or
use a polarized cord or outlet accessory.
2. To insert the battery into the charger align the reference arrow on the battery with the
reference arrow on the AC adapter/charger. Push the battery till it is flush with the AC
adapter/charger sliding it in the direction of the arrow as shown in the figure.
3. The CHARGE light remains on while the battery charges, turning off when charging
completes.
Note: Remove the DC cord from the AC adapter/charger before attempting to charge the
battery. The CHARGE light flashes if the DC cord remains connected while you attempt to
charge the battery.
Note: Do not operate the battery at temperature below 14°F (-10°C) or above 95°F (35°C).
At extremely low temperatures operation time decreases, while at high temperature the
battery may be damaged.
After charging set the mark switch to red so that you may quickly identify
whether the battery is charged or uncharged.
Note: The marker switch does not guarantee the batteries charge status.
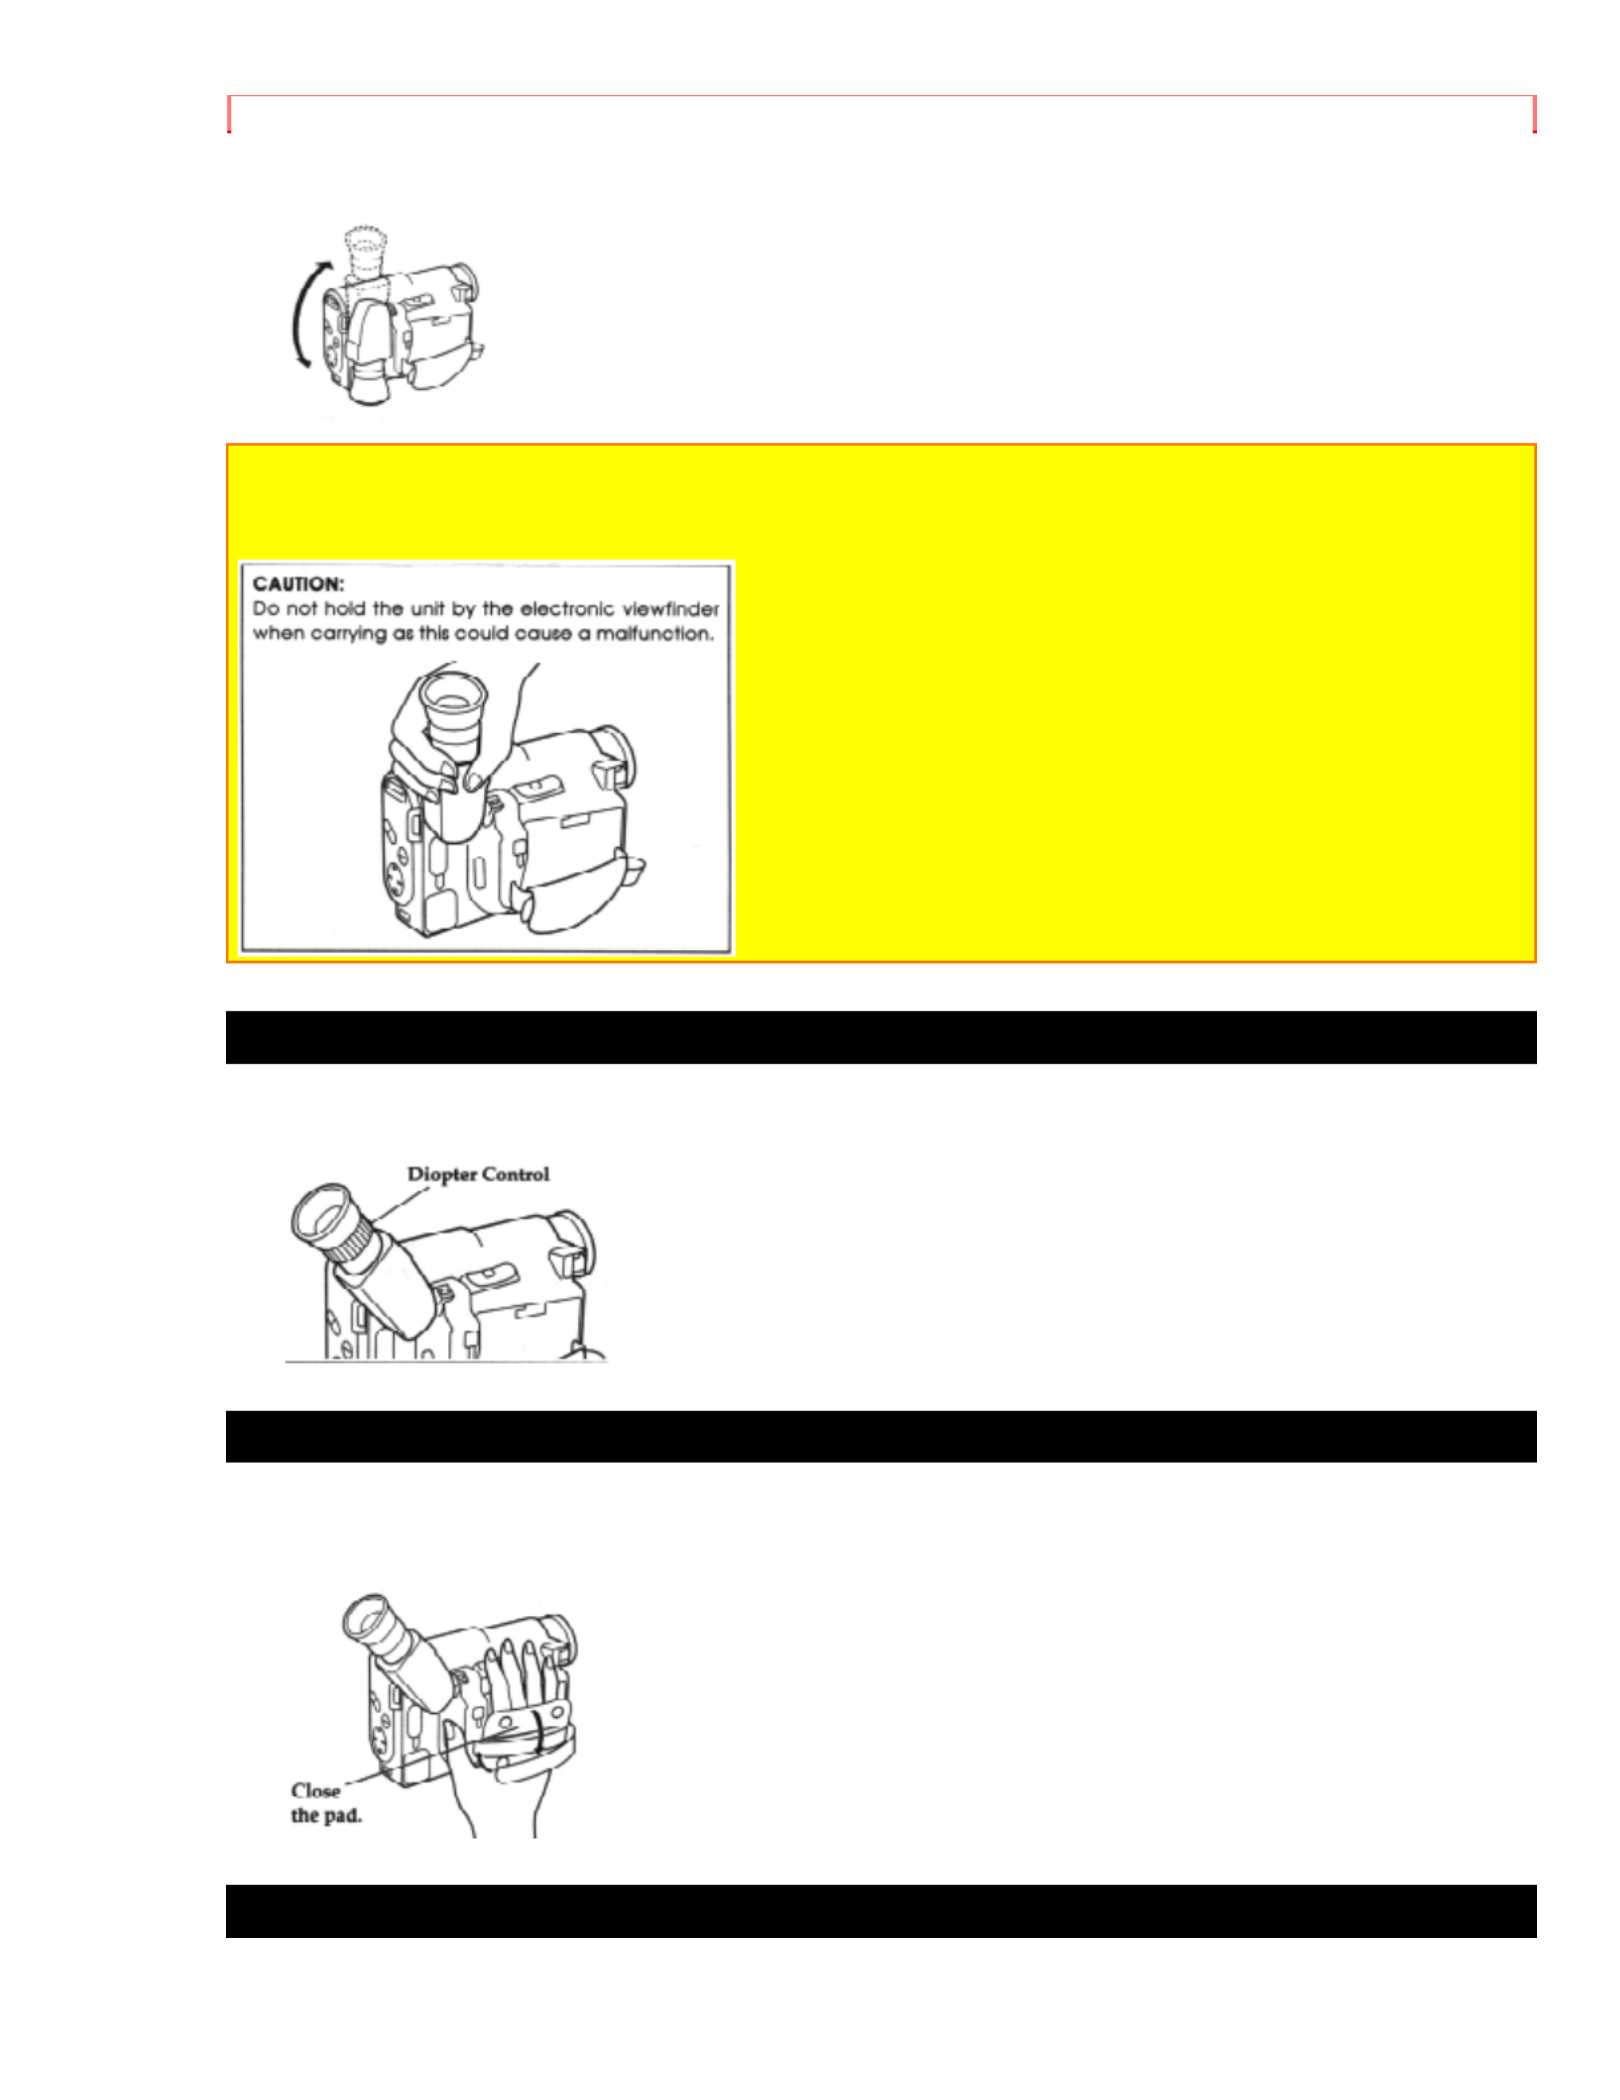
Getting Started
before storing the camcorder in its case or carrying the camera recorder around to avoid
damaging the viewfinder or camcorder.
CAUTION:
Do not hold the unit by the electronic viewfinder when carrying as this could cause a
malfunction.
Eyepiece Adjustment
To use the electronic viewfinder, turn this control for your optimum focus adjustment.
Adjustment the Hand Strap
Adjust the hand strap to best fit your hand. After adjustment, hook the hand strap's pad
securely.
Loading Batteries
Getting Started
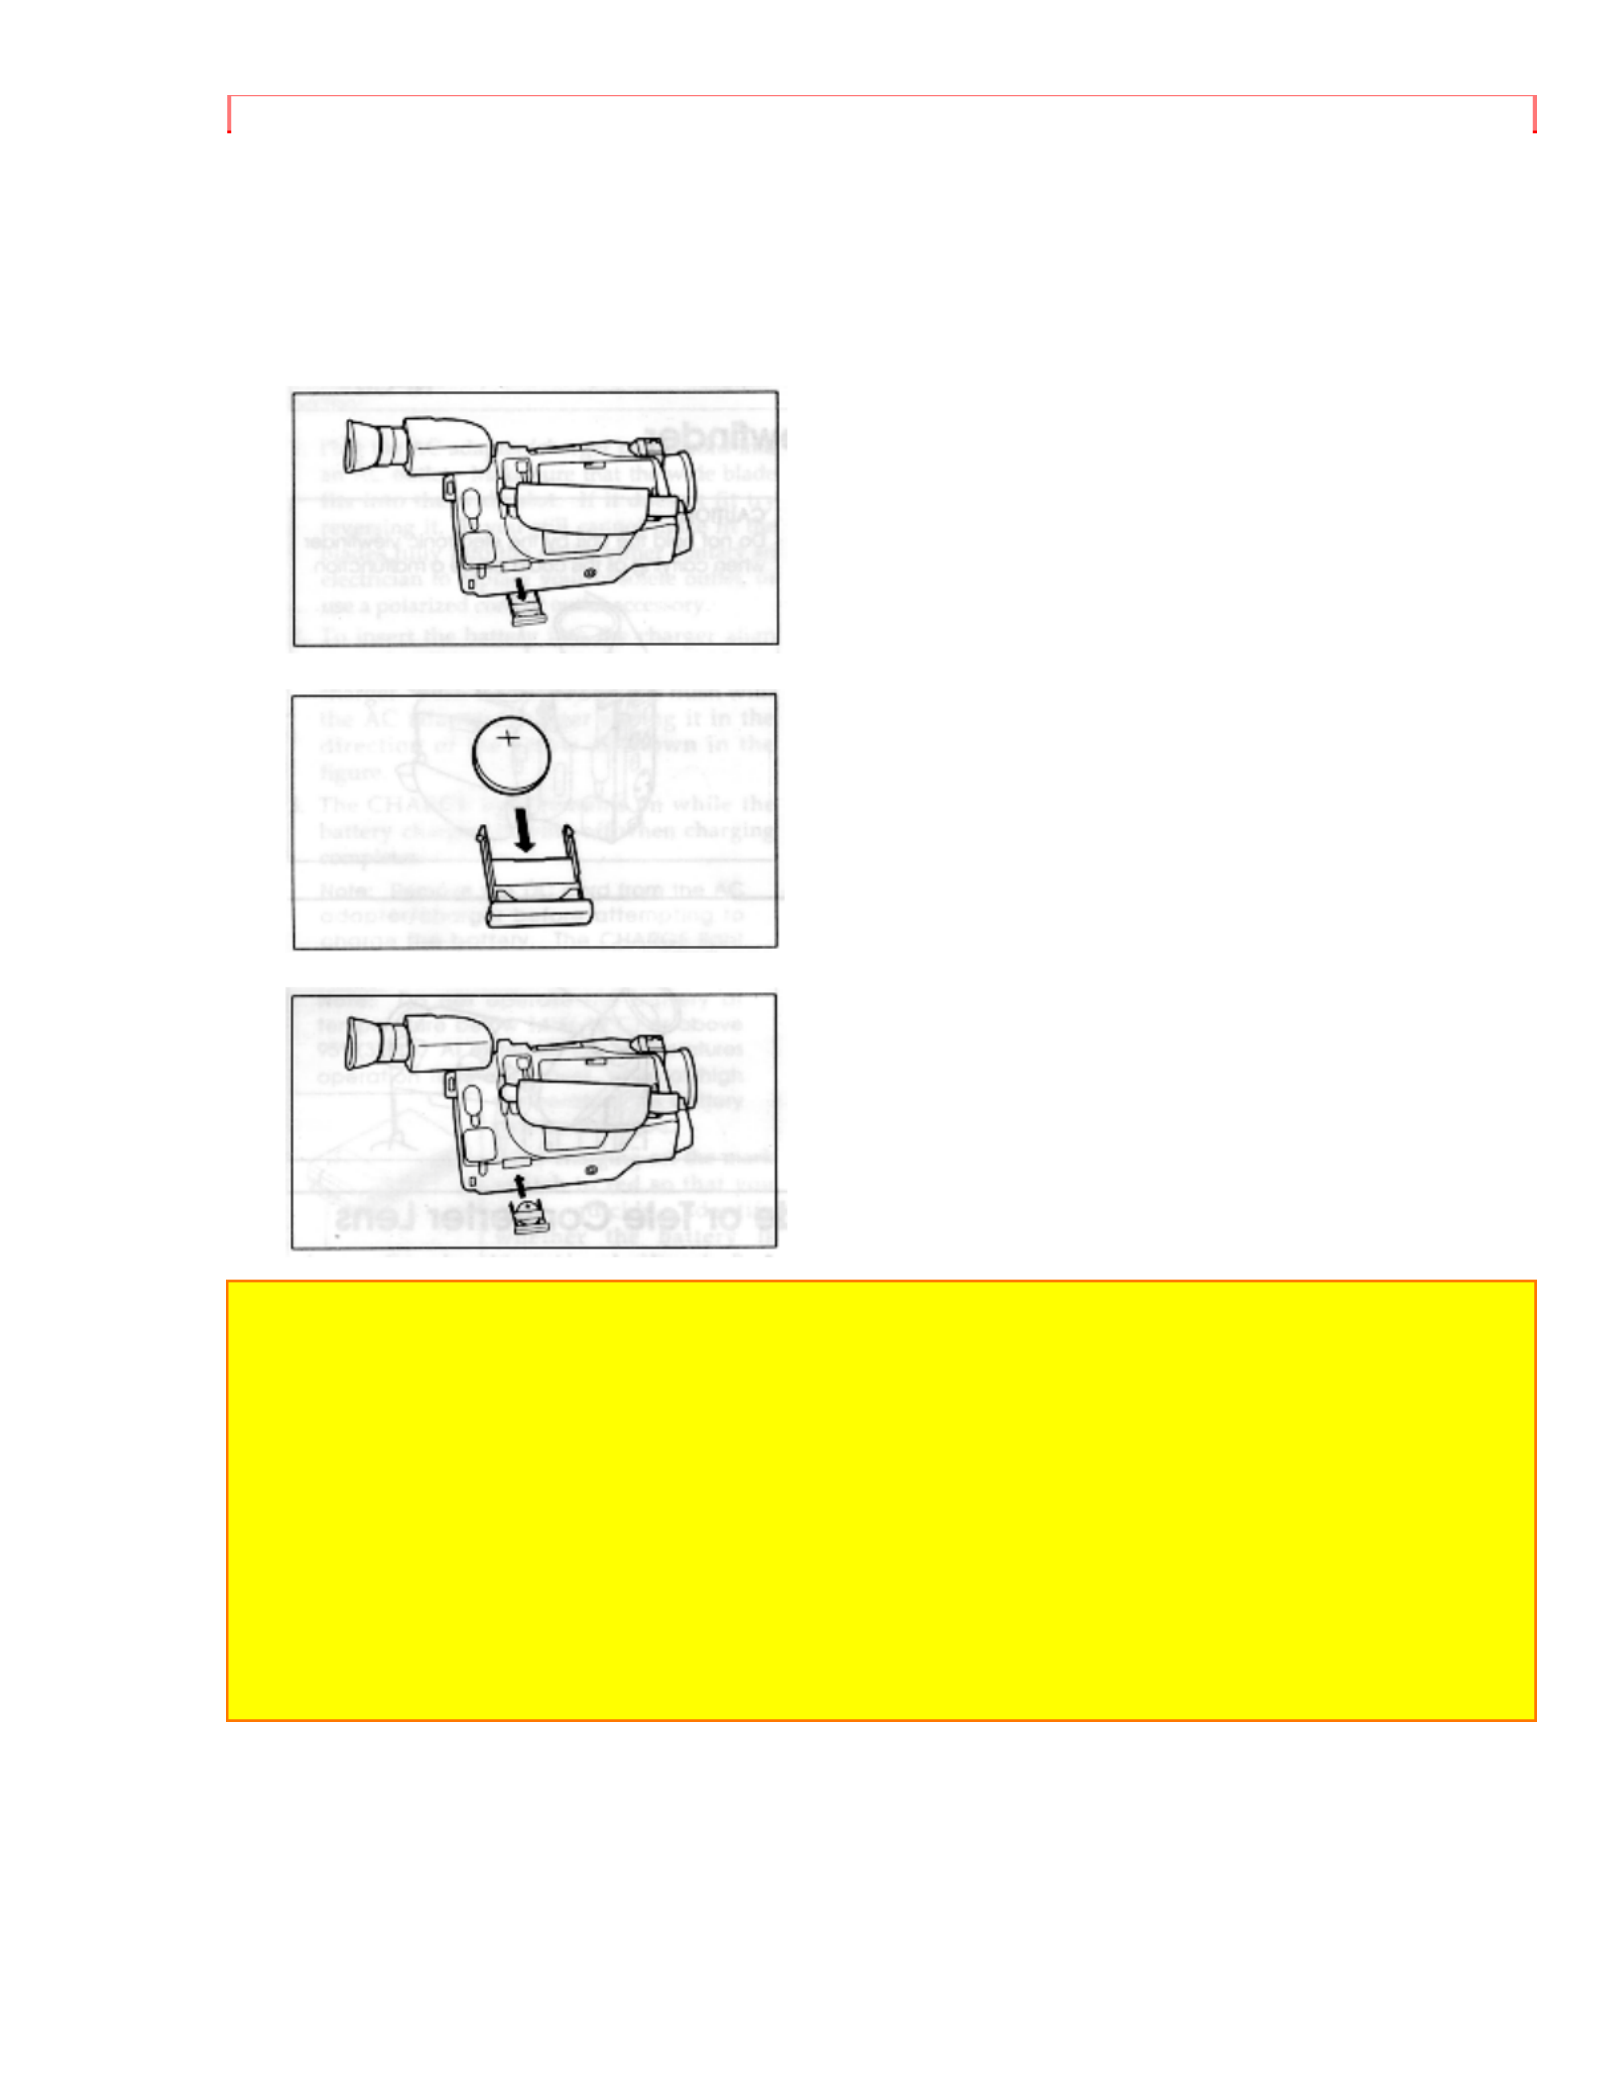
Clock Battery
Install the battery to prevent misplacing it.
1. Pull out the battery holder.
2. Insert the battery with the "+" terminal facing up.
3. Fully insert the battery holder into the camcorder.
WARNING: KEEP THE BATTERIES AWAY FROM CHILDREN AND PETS.
IF SWALLOWED CONSULT A PHYSICIAN IMMEDIATELY FOR EMERGENCY
TREATMENT.
Note: Replace the battery with 3V micro lithium cells such as Maxell CR2025 or its
equivalent.
Note: Dispose of battery safely in accordance with local laws. Do not dispose of in fire.
Note: Do not short circuit the battery.
Note: Do not take apart the battery.
Note: Do not hold the battery with the metallic tweezers.
Note: Do not re-charge the battery.
Note: Keep the battery in a dark, cool, dry place.
Remote Control Batteries
The remote control requires two "AA" batteries.
1. Slide the cover in the direction of the arrow to remove it.

Getting Started
2. Install batteries.
Be careful to install with correct polarity.
3. Re-attach the cover to the remote control.
Cautions on the batteries:
• Do not use the old and new batteries at the same time.
• Do not mix batteries of different types.
• Do not short, take apart or dispose of batteries by throwing them into a fire.
• When liquid leaks, wipe it off completely and then insert new batteries.
Camcorder Batteries
Using Battery Pack
Before you install the battery for the first time it must be fully charged. Refer to
"Charging the Battery" on page 12 for details.
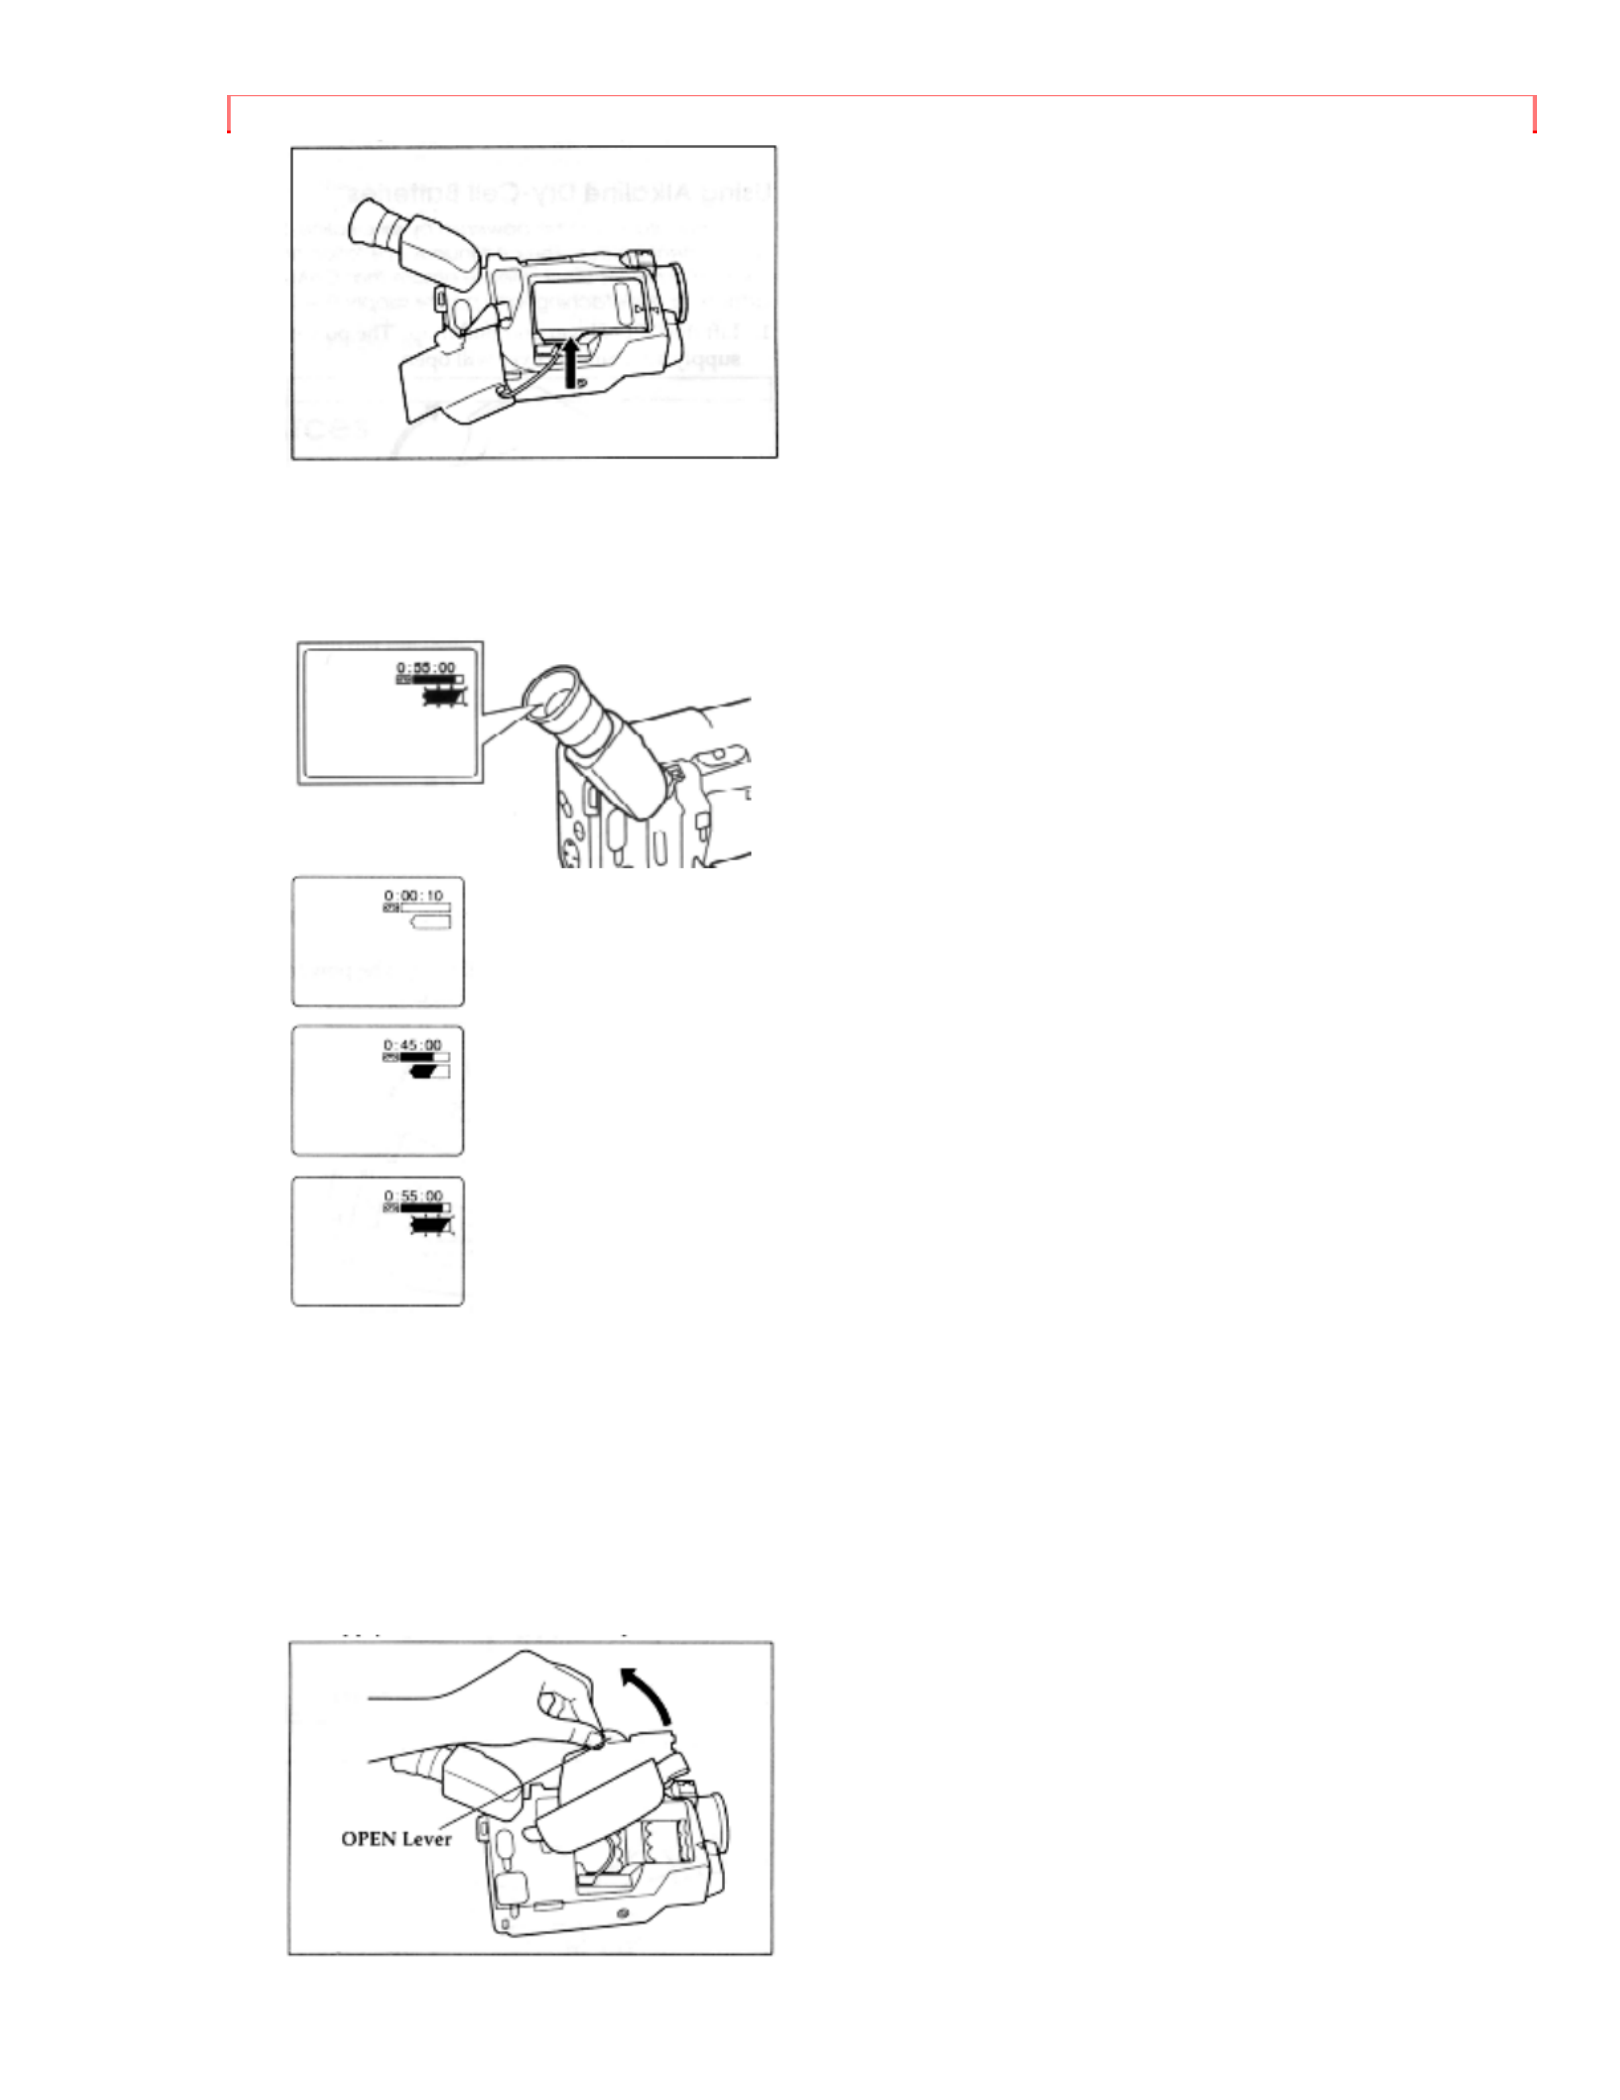
1. Lift the OPEN lever and pull it up. The power supply attachment cover will open.
2. With the battery compartment facing you, align arrow on the battery with the arrow on
the camcorder.

Getting Started
3. Once the arrows are aligned, push down on the battery.
4. While pushing down the battery, slide it to the right until it "clicks" into place.
5. After installing the battery, close the cover. Hold the OPEN lever and align the tabs
on both sides of the cover with the end of the attachment section.
Note: If the OPEN lever is flat, the cover will not close.
Note: Always remove the battery from the camcorder after use.
Note: We cannot guarantee against malfunctions of the camcorder which occur when you
use battery packs other than those specified.
Note: Always attach a battery by the procedure described here. Attaching a battery forcibly
could damage it.
Removing the Battery Pack
1. Lift the OPEN lever and pull it up. The power supply attachment cover will open.
2. Push the side of the battery in the direction of the arrow. A click will be heard and the
battery is released.
Getting Started
3. Remove the battery and close the cover.
Checking the Battery's Charge
A battery charge indicator is located on the upper right corner of the viewfinder. One of
three symbols displays when the battery is used.
This symbol indicates a fully charged battery.
This symbol indicates a partially charged battery.
This flashing symbol indicates a battery nearly out of power. Use an
alternate power source or charge the battery before continuing to use the camcorder.
Using Alkaline Dry-Cell Batteries
The camcorder can be powered by six alkaline dry-cell batteries inserted into the power
supply attachment holder. The continuous operation time of the camcorder depends on
the type of alkaline batteries used. Please ensure that CAM/OFF/VIDEO switch is in the
OFF position whenever attaching or detaching any power supply (i.e. Battery, AC
adapter/charger, etc.)
1. Lift the OPEN lever and pull it up. The power supply attachment cover will open.
2. Lift the battery holder plates at the center of the attachment holder.

Getting Started
3. Insert six alkaline batteries with the correct polarities.
4. After installing the batteries, close the cover. Hold the OPEN lever and align the tabs
on both sides of the cover with the end of the attachment section.
Note: Use only "AA" alkaline batteries marked "LR6". (Manganese batteries cannot be
used to power the camcorder.)
Note: It is recommended that you use alkaline batteries within the recommended period of
use or within two years of the date of manufacture.
Note: Be careful of the following to prevent the leakage of liquid or an explosion.
• Check that the orientation (polarity) of the batteries is correct.
• Remove the batteries when not using the camcorder.
• Remove the used batteries from the camcorder.
• Do not use batteries made by different manufacturers at the same time.
• Do not use old and new batteries at the same time.
Note: If the liquid leaks, remove the batteries immediately and ask your nearest dealer to
inspect the camcorder (this will be at your own expense).
Note: Do not let the batteries or the terminals of the camcorder get dirty. If they are dirty,
use a dry cloth to wipe off the dirt completely.
Note: It is recommended that you use a battery pack to power the camcorder when using a
DC camera light. If a camera light is used when the camcorder is powered by batteries, the
required supply voltage will be very short and the camcorder will turn off soon.
Note: When the batteries are used to power the camcorder in a cold place, it may not
operate normally; the operation time may become extremely short or the camcorder may
not be turned on. It is recommended that you use a battery pack to power the camcorder in

Getting Started
a cold place. (At 50°F (10°C), the chemical reaction decreases the capacity of battery to
one-tenth when compared to that at normal temperature 68°F (20°C).)
Note: Noise may appear momentarily in the viewfinder when recording is started or
stopped.
Note: Be careful when touching the batteries with your bare hand to remove them as they
are warm during and just use.
Note: Since the supply voltage from batteries decreases more abruptly when compared to
that from a battery pack, the battery remaining level indicator ( ) may not flash in the
viewfinder, noise may occur, the picture and sound may not be recorded normally and/or
the power may be turned off soon. These phenomena occur because the capacity of
batteries becomes low. So turn the power switch off and replace the batteries. If the power
switch is left turned on in this state, the power may turn on temporarily and turn off again
repeatedly.
Note: Be sure not to short, disassemble, heat or throw batteries into fire. This is very
dangerous.
Using Alternative Power Sources
Using the AC Adapter/Charger
Please ensure that the CAM/OFF/VIDEO switch is in the OFF position whenever
attaching or detaching any power supply (ie. battery, AC adapter/charger, etc.)
1. Plug the AC adapter/charger power cord into an AC outlet. Make sure that the wide
blade fits into the wide slot. If it doesn't fit try reversing it. If you still cannot make fit the
blades fully into the outlet either contact an electrician to replace your obsolete outlet, or
use a polarized cord or outlet accessory.
2. Connect one end of the DC cord (provided) to the DC IN jack of the camcorder.
Connect the other end of the DC cord to the DC OUTPUT of the AC adapter/charger.
Note: The AC adapter/charger can be used around the world. An AC plug adapter is
required in some foreign countries. If you need one purchase it at your Hitachi distributor.
Note: The battery level indicator sometimes displays the partial charge symbol when using
the AC adaptor/charger. Ignore this indicator when using the AC adaptor/charger.
Using a Car Battery
The camcorder can be powered with a car battery by using an optional car battery cord
(Hitachi VM-CC80A) to plug the camcorder into the car's cigarette lighter socket. Please
ensure that the CAM/OFF/VIDEO switch is in the OFF position whenever attaching or

Getting Started
damaged, is not slack or no dust adheres to it, etc. After making sure that there is no
abnormality, reinsert the cassette. If TAPE reappears, see "Troubleshooting" on page 53.
Removing a Cassette
Slide the EJECT switch in the direction of the arrow. The cassette door opens
automatically. Remove the cassette.
Protecting Recorded Material
Protect 8mm cassettes from accidental erasure by sliding the tab on the side of the
cassette towards the opposite side until the tab is completely visible. Slide the tab in the
opposite direction, until the tab disappears, to record on the cassette again.
Using the Linear Time Counter
The linear time counter displays the tape run in hours, minutes, and seconds, helping
you to keep track of how long you've been filming or time you have left to film before
running out of tape.
Turn the camcorder on to display the linear time counter. The linear time counter keeps
track from when you load a cassette into the camcorder and clears to 0:00:00 when the
cassette is ejected.
Remaining Tape
The tape remaining display shows the remaining tape that can be used for recording
and playback, using seven dashes. This feature is handy when recording since it lets
you know how long you can record on the loaded tape.
Insert a cassette into the camcorder and start recording or playback; 10 seconds later,
the remaining tape will be displayed. When the cassette is ejected, the display will
disappear. " " is displayed for 10 seconds after the tape starts to run.
Note: The tape remaining display appears 10 seconds after the tape starts to run.
Note: When the remaining tape time becomes less than about three minutes, TAPE END
Getting Started
flashes in the viewfinder.
Setting the Date and Time
Take the time to set the date and time now. The date and time can be recorded on your
tapes to act as a handy reference when viewing them later. Use the following procedure
to set up the display for the current date and time.
Note: Be sure to insert the clock battery before setting the date and time. Although the date
and time can be set without the clock battery inserted, they will disappear when the battery
providing power to the camcorder is removed.
Make sure that the current time is displayed correctly before you start filming.
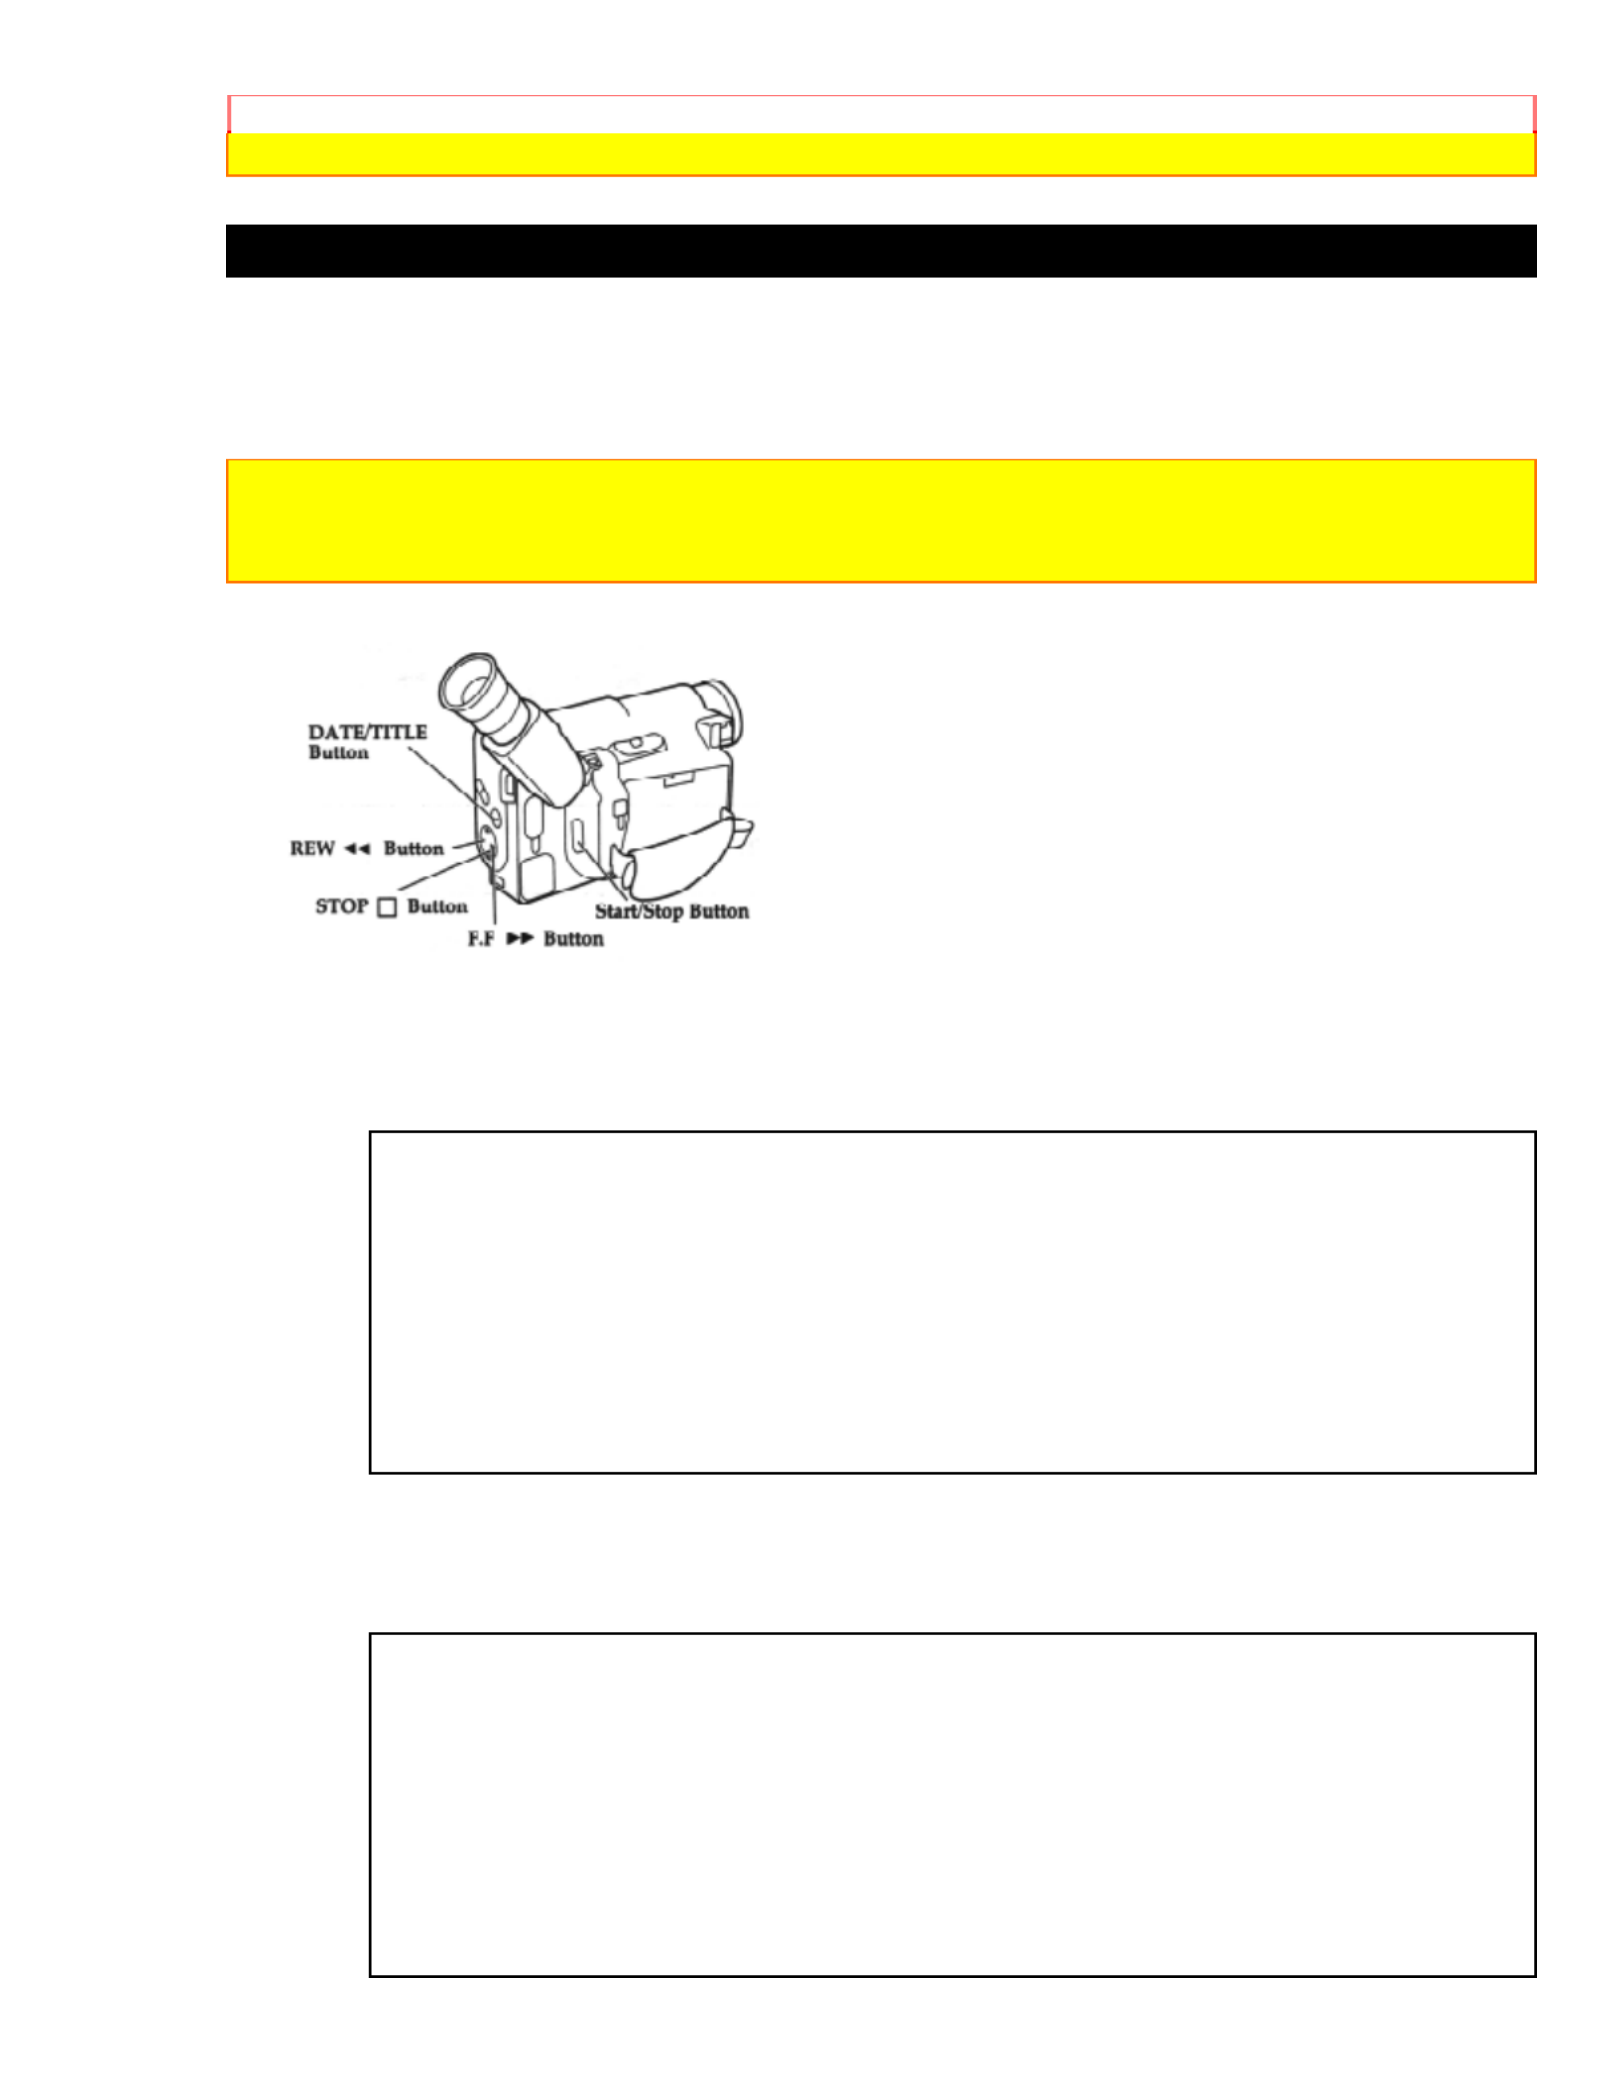
1. Load the battery ("Loading the Batteries: Camcorder batteries" p.15). Press the red
button on the CAM/OFF/VIDEO switch as you slide it to CAM.
2. Press the DATE/TITLE button and look into the viewfinder. The date and time should
appear in the lower right with the "1" flashing.
12:00 AM
1/ 1/1997
3. Pressing the F.F button gives you higher numbers while the REW button gives you
lower numbers. Select the right month and press STOP button. Use the F.F, REW and
STOP buttons to select the proper day, year, hour, minute, and AM or PM.
12:00 AM
11/ 5/1997

Getting Started
4. After setting the AM/PM, press the DATE/TITLE button. The display changes and the
internal clock starts.
6:30 AM
11/ 5/1997
Note: After the date and time are set, " AUTO" appears and the camcorder enters the
automatic date recording mode. See "Date Recording" on page 32.
Correcting the Date and Time
1. Press the DATE/TITLE button while pressing the STOP button. The flashing cursor
appears at the month.
2. Move to where you need to make the correction with the STOP button and use the
F.F and REW to correct.
3. Press the DATE/TITLE button to set the corrected date and time.
Produktspecifikationer
| Varumärke: | Hitachi |
| Kategori: | Videokamera |
| Modell: | VM-E230A |
Behöver du hjälp?
Om du behöver hjälp med Hitachi VM-E230A ställ en fråga nedan och andra användare kommer att svara dig
Videokamera Hitachi Manualer

8 Oktober 2024
19 September 2024
1 September 2024
29 Augusti 2024
28 Augusti 2024
28 Augusti 2024
24 Augusti 2024
24 Augusti 2024
23 Augusti 2024
22 Augusti 2024
Videokamera Manualer
- Videokamera Sony
- Videokamera Samsung
- Videokamera Xiaomi
- Videokamera Braun
- Videokamera HP
- Videokamera Philips
- Videokamera Panasonic
- Videokamera Garmin
- Videokamera JVC
- Videokamera Kenwood
- Videokamera Medion
- Videokamera Nikon
- Videokamera Olympus
- Videokamera Toshiba
- Videokamera Canon
- Videokamera Agfaphoto
- Videokamera Agfa
- Videokamera AEE
- Videokamera Airis
- Videokamera ATN
- Videokamera Prestigio
- Videokamera Activeon
- Videokamera BenQ
- Videokamera Lexibook
- Videokamera Sharp
- Videokamera Leica
- Videokamera Silvercrest
- Videokamera Nedis
- Videokamera Gembird
- Videokamera Lenco
- Videokamera GoPro
- Videokamera Pyle
- Videokamera OK
- Videokamera Hyundai
- Videokamera Renkforce
- Videokamera Kodak
- Videokamera Bushnell
- Videokamera RCA
- Videokamera Sencor
- Videokamera Overmax
- Videokamera Logitech
- Videokamera Energy Sistem
- Videokamera Polaroid
- Videokamera Trust
- Videokamera Milwaukee
- Videokamera Extech
- Videokamera Salora
- Videokamera Easypix
- Videokamera Denver
- Videokamera DataVideo
- Videokamera Hazet
- Videokamera Sanyo
- Videokamera Vitek
- Videokamera Nilox
- Videokamera Hama
- Videokamera Soundmaster
- Videokamera Voltcraft
- Videokamera Maginon
- Videokamera Midland
- Videokamera Konica Minolta
- Videokamera Easymaxx
- Videokamera Cisco
- Videokamera Magellan
- Videokamera Flir
- Videokamera Coby
- Videokamera Envivo
- Videokamera Genius
- Videokamera Mio
- Videokamera DJI
- Videokamera Linksys
- Videokamera Lamax
- Videokamera Uniden
- Videokamera Ion
- Videokamera Insignia
- Videokamera Rollei
- Videokamera Macally
- Videokamera Transcend
- Videokamera Goclever
- Videokamera Trotec
- Videokamera Ricoh
- Videokamera Cobra
- Videokamera Marshall
- Videokamera Xblitz
- Videokamera Naxa
- Videokamera TomTom
- Videokamera Navitel
- Videokamera Mamiya
- Videokamera Konig
- Videokamera Tronje
- Videokamera Mpman
- Videokamera Trevi
- Videokamera Viewsonic
- Videokamera Nikkei
- Videokamera T'nB
- Videokamera Ematic
- Videokamera Tracer
- Videokamera Kyocera
- Videokamera Minox
- Videokamera Minolta
- Videokamera Zagg
- Videokamera Zoom
- Videokamera Veho
- Videokamera Creative
- Videokamera Vivitar
- Videokamera Steinberg
- Videokamera Blackmagic Design
- Videokamera SJCAM
- Videokamera Contour
- Videokamera Laserliner
- Videokamera Iget
- Videokamera RunCam
- Videokamera Drift
- Videokamera SeaLife
- Videokamera Jobo
- Videokamera Intenso
- Videokamera Dragon Touch
- Videokamera Kreator
- Videokamera ARRI
- Videokamera Traveler
- Videokamera Contour Design
- Videokamera Kaiser Baas
- Videokamera Bluetech
- Videokamera Elmo
- Videokamera Oregon Scientific
- Videokamera Braun Phototechnik
- Videokamera Spypoint
- Videokamera Kitvision
- Videokamera Praktica
- Videokamera MMTC
- Videokamera Thinkware
- Videokamera Flip
- Videokamera Vimar
- Videokamera Kogan
- Videokamera Speco Technologies
- Videokamera BlackVue
- Videokamera Jay-tech
- Videokamera Brinno
- Videokamera DXG
- Videokamera Storex
- Videokamera Insta360
- Videokamera MD 80
- Videokamera Berger & Schröter
- Videokamera Vupoint Solutions
- Videokamera EVOLVEO
- Videokamera Skytronic
- Videokamera Whistler
- Videokamera Curve
- Videokamera PCE Instruments
- Videokamera DOD
- Videokamera CamOne
- Videokamera Mobius
- Videokamera Klein Tools
- Videokamera ISAW
- Videokamera Beaulieu
- Videokamera Revier Manager
- Videokamera Kobian
- Videokamera FHD 1080P
- Videokamera RSC
- Videokamera Stealth Cam
- Videokamera Aqua-Vu
- Videokamera Hamlet
- Videokamera Qoltec
- Videokamera Leotec
- Videokamera Replay
- Videokamera Akaso
- Videokamera Hamilton Buhl
- Videokamera Aida
- Videokamera Best Buy
- Videokamera National Geographic
- Videokamera Rexing
- Videokamera IOPLEE
- Videokamera Moultrie
- Videokamera Bolex
- Videokamera Microtek
- Videokamera Teslong
- Videokamera Izzo
Nyaste Videokamera Manualer
30 Mars 2025
30 Mars 2025
30 Mars 2025
30 Mars 2025
28 Mars 2025
28 Mars 2025
28 Mars 2025
28 Mars 2025
14 Mars 2025
13 Mars 2025