Provision ISR SA-16200AHD-2 (1U) Bruksanvisning
Provision ISR
Röstinspelning
SA-16200AHD-2 (1U)
Läs nedan 📖 manual på svenska för Provision ISR SA-16200AHD-2 (1U) (73 sidor) i kategorin Röstinspelning. Denna guide var användbar för 10 personer och betygsatt med 4.5 stjärnor i genomsnitt av 2 användare
Sida 1/73

A SeriesHD
DVR User Manual (Version 3.4.3 Higher)and

AHD DVR User Manual
P
P
P
PPR
R
R
RRO
O
O
OOV
V
V
VVI
I
I
IIS
S
S
SSI
I
I
IIO
O
O
OON
N
N
NN-IS
-IS
-IS
-IS-ISR
R
R
R R
A
A
A
AAH
H
H
HHD
D
D
DD D
D
D
D DV
V
V
VVR
R
R
R R
U
U
U
UUs
s
s
sse
e
e
eer
r
r
rr
M
M
M
MMa
a
a
aan
n
n
nnu
u
u
uua
a
a
aal
l
l
ll
For H.264 AHD digital video recorder
All rights reserved

AHD DVR User Manual
CA
CA
CA
CACAUT
UT
UT
UTUTION
ION
ION
ION ION
Please read this user manual carefully to ensure that you can use the device correctly
and safely.
There may be several technically incorrect places or prinng errors in this manual. The
updates will be added into the new version of this manual. The contents of this manual are
subject to change without noce.
This device should be operated only from the type of power source indicated on the
marking label. The voltage of the power must be veried before using. If the device doesn’t
work for a long me, pull out the plug from the socket.
Do not install this device near any heat sources such as radiators, heat registers, stoves
or other device that produce heat.
Do not install this device near water. Clean only with a dry cloth.
Place the device in a well-ventilated area.
Do not power off the DVR at normal recording condion! The correct operaon to shut
o DVR is to stop recording rstly, and then to select “shut down” buon at the right of the -
menu bar to exit, and nally to cut off the power.
This machine is indoor using equipment. Do not expose the machine in rain or moist
environment. In case any solid or liquid get into the machine’s case, please cut o the power
supply immediately, and ask for qualied technicians to check the machine before restart
Do not try to repair the device by yourself without technical aid or approval.
When this product is in use, the relevant contents of Microso, Apple and Google will be
involved in. The pictures and screenshots in this manual are only used to explain the usage of
our product. The ownerships of trademarks, logos and other intellectual properes related to
Microso, Apple and Google shall belong to the above-menoned companies.
This manual is suitable for AHD digital video recorders. All examples and pictures used in
the manual are from 16-channel DVR.

AHD DVR User Manual
Tab
Tab
Tab
TabTable
le
le
le le of
of
of
ofof C
C
C
C Cont
ont
ont
ontonten
en
en
enents
ts
ts
tsts
1
1
1
11 In
In
In
InIntr
tr
tr
trtrod
od
od
ododuc
uc
uc
ucucon
on
on
onon
.......................................................................................
.......................................................................................
.......................................................................................
..............................................................................................................................................................................
1
1
1
11
1.1 DVR Introducon 1.......................................................................................................................
1.2 Main Features ............................................................................................................................ 1
2
2
2
22 Har
Har
Har
HarHard
d
d
ddw
w
w
wwar
ar
ar
arare In
e In
e In
e Ine Ins
s
s
sst
t
t
ttall
all
all
allallat
at
at
atation
ion
ion
ionion
.........................................................................
.........................................................................
.........................................................................
..................................................................................................................................................
3
3
3
33
2.1 Install Hard Drive ........................................................................................................................ 3
2.2 Front Panel Descripons 4...........................................................................................................
2.3 Remote Controller 7.....................................................................................................................
2.4 Control with Mouse ................................................................................................................... 7
2.4.1 Connect Mouse ....................................................................................................... 7
2.4.2 Use Mouse ............................................................................................................... 7
3
3
3
33 Bas
Bas
Bas
BasBasic Fu
ic Fu
ic Fu
ic Fuic Func
nc
nc
ncncon
on
on
onon Ins
Ins
Ins
Ins Instru
tru
tru
trutruc
c
c
ccon
on
on
on on ..................................................................
..................................................................
..................................................................
....................................................................................................................................
8
8
8
88
3.1 Power On/O ............................................................................................................................. 8
3.1.1 Power On ................................................................................................................. 8
3.1.2 Power O ................................................................................................................. 9
3.2 Login 9...........................................................................................................................................
3.3 Live Preview 9................................................................................................................................
3.4 Live Playback ............................................................................................................................ 10
4
4
4
44 Add
Add
Add
AddAdding
ing
ing
ing ing IP Cam
IP Cam
IP Cam
IP CamIP Camer
er
er
ereras (App
as (App
as (App
as (Appas (Applicab
licab
licab
licablicable on
le on
le on
le onle only f
ly f
ly f
ly fly for Hyb
or Hyb
or Hyb
or Hybor Hybrid
rid
rid
rid rid Mod
Mod
Mod
ModModels)
els)
els)
els) els) ..................
..................
..................
....................................
11
11
11
1111
5
5
5
55 Main
Main
Main
MainMain Men
Men
Men
Men Menu Se
u Se
u Se
u Seu Setup
tup
tup
tup tup Guide
Guide
Guide
GuideGuide
................................
................................
................................
..................................................................................................
..................................
..................................
....................................................................
12
12
12
1212
5.1 Basic Conguraon .................................................................................................................. 14
5.1.1 System .................................................................................................................... 14
5.1.2 Date & Time ........................................................................................................... 15
5.1.3 DST ......................................................................................................................... 15
5.2 Live Conguraon .................................................................................................................... 16
5.2.1 Live ......................................................................................................................... 16
5.2.2 Main Monitor ........................................................................................................17
5.2.3 Mask ....................................................................................................................... 17
5.3 Record Conguraon ............................................................................................................... 18
5.3.1 Enable .................................................................................................................... 19
5.3.2 Record Bitrate ........................................................................................................ 19
5.3.3 Time ....................................................................................................................... 20
5.3.4 Stamp ..................................................................................................................... 20
5.3.5 Recycle Record ...................................................................................................... 21
5.3.6 Snap .......................................................................................................................21
5.4 Schedule Conguraon ........................................................................................................... 21
5.4.1 Schedule ................................................................................................................22
5.4.2 Moon Schedule ................................................................................................... 23
5.5 Alarm Conguraon ................................................................................................................. 23

AHD DVR User Manual
5.5.1 Moon Alarm ........................................................................................................ 23
5.5.2 Video Loss .............................................................................................................. 25
5.5.3 Other Alarm ........................................................................................................... 25
5.5.4 Alarm Out .............................................................................................................. 26
5.6 Network Conguraon ............................................................................................................ 27
5.6.1 Network ................................................................................................................. 27
5.6.2 Sub Stream ............................................................................................................ 28
5.6.3 Email ...................................................................................................................... 29
5.6.4 Server ..................................................................................................................... 29
5.6.5 NAT ......................................................................................................................... 30
5.6.6 Other Sengs ........................................................................................................ 30
5.7 User Management Conguraon ........................................................................................... 33
5.8 P.T.Z Conguraon .................................................................................................................. 35
5.9 Advanced .................................................................................................................................. 39
5.9.1 Reset ...................................................................................................................... 39
5.9.2 Import/Export ........................................................................................................ 39
5.9.3 Block/Allow List ..................................................................................................... 39
6
6
6
66 Sea
Sea
Sea
SeaSearch,
rch,
rch,
rch,rch, Pla
Pla
Pla
Pla Playba
yba
yba
ybayback &
ck &
ck &
ck & ck & Bac
Bac
Bac
BacBackup
kup
kup
kupkup
..............................................................
..............................................................
..............................................................
............................................................................................................................40
40
40
4040
6.1 Time Search .............................................................................................................................. 40
6.2 Event Search ............................................................................................................................. 41
6.3 File Management ..................................................................................................................... 41
6.4 Search by Image ....................................................................................................................... 42
6.5 Backup ...................................................................................................................................... 42
7
7
7
77 Man
Man
Man
ManManage
age
age
ageage DV
DV
DV
DV DVR
R
R
R R ....................................................................................
....................................................................................
....................................................................................
........................................................................................................................................................................
44
44
44
4444
7.1 Check System Informaon ...................................................................................................... 44
7.1.1 System Informaon ............................................................................................... 44
7.1.2 Event Informaon .................................................................................................. 44
7.1.3 Log Informaon ..................................................................................................... 44
7.1.4 Network Informaon ............................................................................................ 44
7.1.5 Online Informaon ................................................................................................ 44
7.1.6 Record Informaon ............................................................................................... 44
7.1.7 QRCODE ................................................................................................................. 44
7.2 Disk Management .................................................................................................................... 45
7.3 Upgrade .................................................................................................................................... 45
7.4 Logo ........................................................................................................................................ 46
8
8
8
88 R
R
R
RRemot
emot
emot
emotemote Su
e Su
e Su
e Sue Surveill
rveill
rveill
rveillrveillance
ance
ance
anceance
........................................................................
........................................................................
........................................................................
................................................................................................................................................
47
47
47
4747
8.1 IE Remote Surveillance by NAT ............................................................................................... 47
8.1.1 NAT Sengs ........................................................................................................... 47
8.1.2 NAT Access ............................................................................................................. 47
8.2 IE Remote Surveillance via LAN & WAN ................................................................................. 48
8.2.1 Via LAN ................................................................................................................... 48
8.2.2 Via WAN ................................................................................................................. 48

AHD DVR User Manual
8.3 Remote Surveillance through Apple PC .................................................................................. 49
8.3.1 Via LAN ................................................................................................................... 49
8.3.2 Via WAN ................................................................................................................. 50
8.4 The Remote Live Preview ........................................................................................................ 51
8.5 Remote Playback & Backup ..................................................................................................... 53
8.5.1 Remote Playback ................................................................................................... 53
8.5.2 Remote Backup ..................................................................................................... 56
8.6 Remote System Conguraon ................................................................................................ 57
8.7 Tools ......................................................................................................................................... 57
8.8 Remote Managem ent.............................................................................................................. 57
8.9 By Phones with iPhone OS ....................................................................................................... 58
8.10 By Phones with Android ........................................................................................................ 65
App
App
App
AppAppend
end
end
endendix A: F
ix A: F
ix A: F
ix A: Fix A: FA
A
A
AAQ
Q
Q
Q Q
...................................................................................
...................................................................................
...................................................................................
......................................................................................................................................................................
69
69
69
6969
App
App
App
AppAppend
end
end
endendix B: C
ix B: C
ix B: C
ix B: Cix B: Calcul
alcul
alcul
alculalculate
ate
ate
ate ate R
R
R
RRecor
ecor
ecor
ecorecording
ding
ding
dingding Cap
Cap
Cap
Cap Capacit
acit
acit
acitacity
y
y
y y
............................................
............................................
............................................
........................................................................................
73
73
73
7373
App
App
App
AppAppend
end
end
endendix C: C
ix C: C
ix C: C
ix C: Cix C: Compa
ompa
ompa
ompaompable
ble
ble
ble ble Dev
Dev
Dev
DevDevices
ices
ices
icesices
..........................................................
..........................................................
..........................................................
....................................................................................................................
73
73
73
7373
Not
Not
Not
NotNotes:
es:
es:
es: es:
...................................................................................................
...................................................................................................
...................................................................................................
......................................................................................................................................................................................................
75
75
75
7575

AHD DVR User Manual
1
1 Int
Int
Int
IntIntro
ro
ro
rorodu
du
du
duduco
co
co
cocon
n
n
n n
1.1 DV
DV
DV
DVDVR In
R In
R In
R InR Intr
tr
tr
trtrodu
odu
odu
oduoducon
con
con
con con
This model is standard 720P/ high resoluon AHD DVR (Analog High Denion Digital Video 960H
Recorder), which adopts high performance video processing chips and embedded Linux system.
Meanwhile, it ulizes many most advanced technologies, such as standard H.264 with low bit
rate, dual stream, SATA interface, VGA output mouse supported, IE browser supported with full
remote control, mobile view (by phones), etc., which ensure its powerful funcons and high
stability. Due to these disncve characteriscs, it is widely used in banks, telecommunicaon,
transportaon, factories, warehouse, and irrigaon and so on.
1.2 Main
Main
Main
MainMain F
F
F
F Featu
eatu
eatu
eatueatures
res
res
resres
COM
COM
COM
COMCOMPRES
PRES
PRES
PRESPRESSION FOR
SION FOR
SION FOR
SION FORSION FORMAT
MAT
MAT
MAT MAT
Standard H.264 compression with low bit rate and beer image quality
LIVE S
LIVE S
LIVE S
LIVE SLIVE SURVEILL
URVEILL
URVEILL
URVEILLURVEILLANCE
ANCE
ANCE
ANCE ANCE
Supports VGA output HDMI/
Supports Analog/AHD video input the odd and even channels (such as Channel 1 and ,
Channel 2 Channel 3 and Channel 4 etc.) must be connected to the same video source 960H , , (
or AHD signal may be oponal)
Supports channel security by hiding live display
Display the local record state and basic informaon
Supports USB to make full control
RECO
RECO
RECO
RECORECORD MEDI
RD MEDI
RD MEDI
RD MEDIRD MEDIA
A
A
A A
Supports SATA HDD to record for a longer me without any limitaon one
BACK
BACK
BACK
BACKBACKUP
UP
UP
UP UP
Supports USB 2.0 devices to backup
Supports saving recorded les with AVI standard format to a remote computer through
internet
RECO
RECO
RECO
RECORECORD & PL
RD & PL
RD & PL
RD & PLRD & PLAYB
AYB
AYB
AYBAYBACK
ACK
ACK
ACK ACK
Record modes: Manual, Schedule and Moon detecon recording
Supports recycle aer HDD full
Resoluon, frame rate and picture quality are adjustable
1 audio channels available
Three record search modes: me search, event search and image search
4/8 channels playback simultaneously
Supports deleng and locking the recorded files one by one
Supports remote playback in Network Client through LAN or internet

AHD DVR User Manual
2
ALAR
ALAR
ALAR
ALARALARM
M
M
M M
Supports schedule for moon detecon
Supports pre-recording and post recording
PTZ CO
PTZ CO
PTZ CO
PTZ COPTZ CONTR
NTR
NTR
NTRNTROL
OL
OL
OL OL
Supports various PTZ protocols
Supports 128 PTZ presets and auto cruise tracks 8
Supports remote PTZ control through internet
SECUR
SECUR
SECUR
SECURSECURITY
ITY
ITY
ITYITY
Customize user right: log search, system setup, two way audio, le management, disk
management, remote login, live view, manual record, playback, PTZ control and remote live view
Supports 1 administrator and users 63
Supports event log recording and checking, events unlimited
NETW
NETW
NETW
NETWNETWORK
ORK
ORK
ORKORK
Supports TCP/IP, DHCP, PPPoE, DDNS protocol
Supports NAT technology
Supports IE browser to do remote view
Supports QRCODE Scanning through mobile phone client
Supports setup client connecon amount
Supports dual stream. Network stream is adjustable independently to t the network
bandwidth and environment
Supports picture snap and color adjustment in remote live
Supports remote me and event search, and channel playback with picture snap
Supports remote PTZ control with preset and auto cruise
Supports remote full menu setup, changing all the DVR parameters remotely
Supports mobile surveillance by Mobile devices with i /Android OS OS
Supports CMS to manage mul devices on internet

AHD DVR User Manual
3
2 Har
Har
Har
HarHardw
dw
dw
dwdware
are
are
areare Inst
Inst
Inst
Inst Installa
alla
alla
allaallao
o
o
oon
n
n
n n
2.1 Ins
Ins
Ins
InsInsta
ta
ta
tatall H
ll H
ll H
ll Hll Hard
ard
ard
ardard Dr
Dr
Dr
Dr Drive
ive
ive
iveive
Check the unit and the accessories aer geng the DVR. Please don’t power up the unit till the
physical installaon is complete.
Noce:
Noce:
Noce:
Noce:Noce: 1. This series support one SATA hard drive. Please use the hard drive the
manufacturers recommend specially for security and safe eld.
2. Please calculate HDD capacity according to the recording seng. Please refer to
“Appendix B Calculate Recording Capacity”.
① Loosen the screws on the back and side ② Take out the HDD.
of the device to remove the cover.
③ Put the HDD on the bottom of the ④ Turn over the device and x the HDD
device. with the screws.
⑤ Connect the power and data cables. ⑥ Install the cover back and x it with the
screws.

AHD DVR User Manual
4
2.2 Fr
Fr
Fr
FrFron
on
on
onont P
t P
t P
t Pt Pane
ane
ane
aneanel
l
l
l l scrip
scrip
scrip
scripscripons
ons
ons
onsons
De
De
De
DeDe
The front panel descriptions are only for reference; please make the object as the standard.
No
No
No
NoNoce:
ce:
ce:
ce:ce: The front panel descripons are only for reference; please make the object as the standard.
Mini Metal Case (MM)
Item
Type
Name
Descripon
1
Work state
indicator
Power
Power indicator, when connecon , the light is blue
Net
When access to network , the light is blue
REC
When recording, the light is blue
2
Compound
buon
Fn
Change the display output type (Long Press)
3
IR receiver
IR
For remote controller
4
USB
USB port
external USB devices (USB ash, USB HDD for backup, update rmware,
USB mouse)
Small 1U Case
Front panel descripon:
Item
Type
Name
Descripon
1
Work state
indicator
Power
Power indicator, when connecon , the light is blue
HDD
When HDD is wring and reading , the light is blue
Net
When access to network , the light is blue
Backup
When backup les and data, the light is blue
Play
When playing video, the light is blue
REC
When recording, the light is blue
2
Compound
buon
MENU/+
1. Enter menu in live
2. Increase the value in setup
BACKUP/-
1. Decrease the value in setup
2. Enter backup mode in live
RECORD/FOCUS
1. Record manually
2. FOCUS funcon enables at PTZ mode.
REW/SPEED
1. Rewind key 2. SPEED funcon enables at PTZ mode
1
2
3
4

AHD DVR User Manual
5
Item
Type
Name
Descripon
SEARCH/ZOOM
1. Enter search mode
2.ZOOM funcon enables at PTZ mode.
PLAY /IRIS
1. Enter play interface
2. IRIS funcon enables at PTZ mode
FF/ P.T.Z.
1. Fast forward
2. Enter PTZ mode in live
STOP/ESC
1. Quit play mode
2. Exit the current interface or status
3
Input buon
Direcon buon
Change direcon to select items
Mul-screen
Change screen display mode like1/4/9 channel
Enter buon
Conrm selecon
4
IR receiver
IR
For remote controller
5
USB
USB port
external USB devices (USB ash, USB HDD for backup, update rmware,
USB mouse)
6
External IR
EXT_IR
Extension for the IR receiver
1U Case
Item
Type
Name
Descripon
1
Work state
indicator
Power
Power indicator, when connecon , the light is blue
HDD
When HDD is wring and reading , the light is blue
Net
When access to network , the light is blue
Backup
When backup les and data, the light is blue
Play
When playing video, the light is blue
REC
When recording, the light is blue
2
Compound
buon
MENU/+
1. Enter menu in live
2. Increase the value in setup
BACKUP/-
1. Decrease the value in setup
2. Enter backup mode in live
RECORD/FOCUS
1. Record manually
2. FOCUS funcon enables at PTZ mode.
REW/SPEED
1. Rewind key 2. SPEED function enables at PTZ mode
SEARCH/ZOOM
1. Enter search mode
2.ZOOM funcon enables at PTZ mode.
PLAY /IRIS
1. Enter play interface
2. IRIS funcon enables at PTZ mode
FF/ P.T.Z.
1. Fast forward
2. Enter PTZ mode in live
STOP/ESC
1. Quit play mode
2. Exit the current interface or status
3
Digital Input
1- 10
1. Input number 1-9 or ch se cam a / Input numbe , 10 and the abo oo er r0 ve
nu er t ogether wi other digital mb th keys
4
Input buon
Direcon buon
Change direcon to select items
Mul-screen
Change screen display mode like1/4/9 channel
Enter buon
Conrm selecon
5
IR receiver
IR
For remote controller
6
USB
USB port
external USB devices (USB ash, USB HDD for backup, update rmware,
USB mouse)
7
External IR
EXT_IR
Extension for the IR receiver

AHD DVR User Manual
6
I
I
I
II m
m
m
mm
te
te
te
tete
Nam
Nam
Nam
NamNam
e
e
e
ee
F
F
F
FF
u
uuu
1
Power Bu on
So switft ch o to stop firmware running. Do it before power off.
2
DVD button
P this buon, user can pla the DVD to do backup. ress ce
3
Keys
0-9
Input number 1-9 o h se camr c oo era
4
(0/ )—
1. Represents channel number. 2. Indicates digital number 0
5
Audio/+
1. Cont l voro ice 2. Increase the value in setup
6
P.T.Z ./
-
1. Enter Z mode in livPT e 2. Decr se the value in set ea up
7
Input butt on
ion buon Direct
C nge dire ion to select ha ct items
i- reen Mult sc
C nge ha screen display mode kli e1/4/9/16 channel
Enter bu on tt
C rm selecon on
8
Work a ind at st te ic or
REC
When re rdco ing, the ght blue li is
HDD
When HDD wr ing and reading , the li t is it gh is blue
Backup
When backup les and data, the ght blue fi li is
Net
When a e to netw k , the li t bl cc ss or gh is ue
Play
When playing vid , the ght eo li is blue
Power
Power i icatnd or, when con ion , the t blue nect ligh is
9
Funcon bu on
ME NU
Enter menu in li ve
INFO
Che data, same as: in nu=>Inf ma ck Ma me or on
BACK UP
Enter backup mode in live
SEARCH
Enter se ch mode ar
R EW
Rewind
FF
Fast f ward or
REC
Record manually
PLAY
Play/Pau se
STOP
St /E op sc
10
Jog
C t l rewi /fa f wa /f me when playing the im e. on ro nd st or rd ra ag
11
USB
external USB de ces (USB ash, US HDD for back , upvi B up date rmware, US m se) B ou
12
IR receiv er
IR
Remo contro er receiv te ll er
13
Exter l na IR
EXT_IR
Ext sion for the IR receiv en er
AHD DVR User Manual
7
2.3 Re
Re
Re
ReRemo
mo
mo
momote C
te C
te C
te Cte Cont
ont
ont
ontontro
ro
ro
roroller
ller
ller
llerller
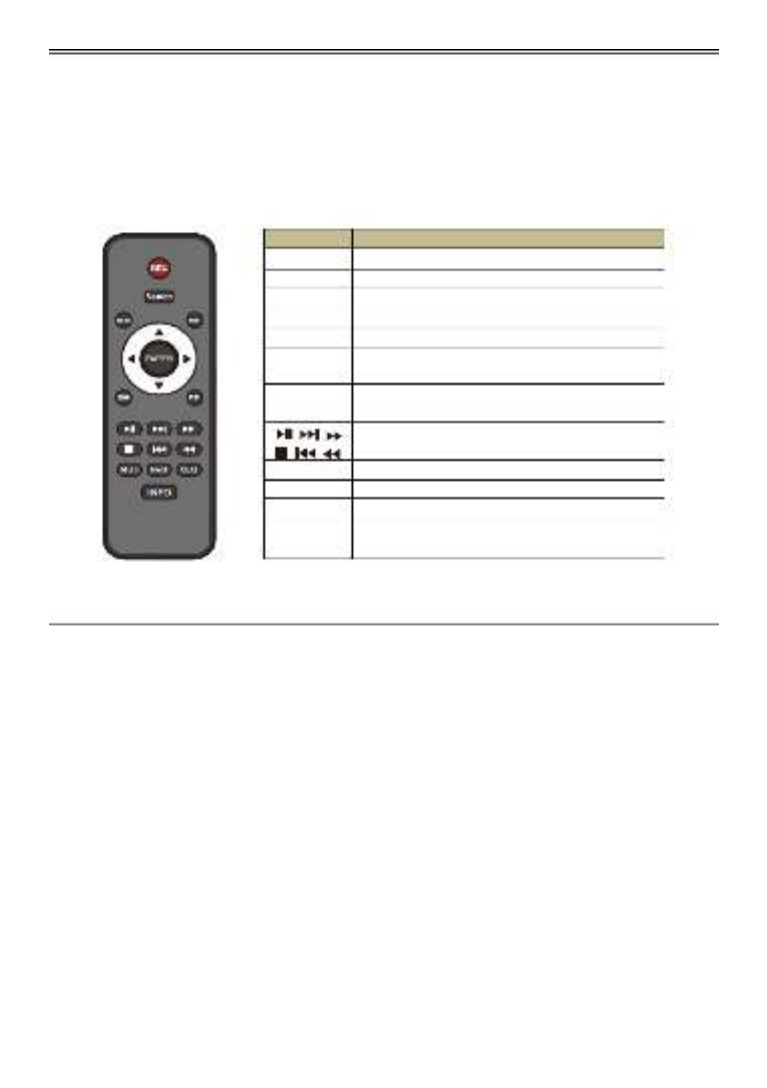
It uses two AAA size baeries.
① Open the battery cover of the remote controller.
② Place batteries. Please take care the polarity (+ and -).
③ Replace the baery cover.
The interface of remote controller is shown below.
2.4 Con
Con
Con
ConContr
tr
tr
trtrol w
ol w
ol w
ol wol with M
ith M
ith M
ith Mith Mous
ous
ous
ousouse
e
e
e e
2.4.
2.4.
2.4.
2.4.2.4.1 Co
1 Co
1 Co
1 Co1 Conn
nn
nn
nnnnect M
ect M
ect M
ect Mect Mou
ou
ou
ououse
se
se
se se
It supports USB mouse through the ports on the rear panel.
If mouse is not detected or doesn t work, check below steps: ’
1. Make sure the mouse is plugged in the USB mouse port.
2. Try with a good know mouse.
2.4.
2.4.
2.4.
2.4.2.4.2 U
2 U
2 U
2 U2 Use M
se M
se M
se Mse Mous
ous
ous
ousouse
e
e
e e
Durin
Durin
Durin
DurinDuring liv
g liv
g liv
g livg live:
e:
e:
e: e:
Double-click on any camera window to see the full screen. Double-click again to return to the
previous screen.
Right click to reveal the control menu on the screen. Right click again to hide the menu.
In Con
In Con
In Con
In ConIn Congu
gu
gu
gugurat
rat
rat
ratration:
ion:
ion:
ion: ion:
Click to enter a parcular opon. Right click to cancel the opon or to return to the previous
menu.
In order to input a value in a parcular screen, move cursor to the input box and click. An input
window will appear as below. It supports digits, alphabets and symbols input. Click Shi “ft”
buon to input capital leers and symbols; click Shi buon again to return. “ ”
But
But
But
ButButton
ton
ton
tonton
Func
Func
Func
FuncFuncon
on
on
onon
RE
RE
RE
REREC
C
C
C C
Record manually.
Sear
Sear
Sear
SearSearch
ch
ch
chch
To enter search mode.
MEU
MEU
MEU
MEUMEUN
N
N
N N
To enter menu.
Exit
Exit
Exit
ExitExit
To exit the current interface.
ENTE
ENTE
ENTE
ENTEENTER
R
R
R R
To conrm the choice or setup.
Dir
Dir
Dir
DirDirecon
econ
econ
econecon
but
but
but
butbutton
ton
ton
tonton
To move cursor in setup.
ZO
ZO
ZO
ZOZOOM
OM
OM
OM OM
To zoom in.
PIP
PIP
PIP
PIPPIP
To set picture in picture.
To control playback. Play/Pause/Stop/Previous
Secon/Next Secon/Rewind/Fast Forward.
Mult
Mult
Mult
MultMulti
i
i
i i
To choose mul screen display mode.
Ne
Ne
Ne
NeNext
xt
xt
xt xt
To switch between single picture and picture group.
SE
SE
SE
SESEQ
Q
Q
Q Q
To enter auto dwell mode.
INF
INF
INF
INFINFO
O
O
O O
Get informaon about DVR like rmware version,
HDD informaon.

AHD DVR User Manual
8
It supports mouse drag. Take seng up moon detecon area for example: Click customized,
hold down the le buon and drag to set moon detecon area.
In Pla
In Pla
In Pla
In PlaIn Playb
yb
yb
ybyback:
ack:
ack:
ack:ack:
Click to choose the opons. Right click to return to live mode.
In Bac
In Bac
In Bac
In BacIn Backu
ku
ku
kukup:
p:
p:
p: p:
Click to choose the opons. Right click to return to previous picture.
In PTZ
In PTZ
In PTZ
In PTZIn PTZ Con
Con
Con
Con Cont
t
t
ttrol
rol
rol
rolrol:
:
:
: :
Click le buon to choose the buttons to control the PTZ. Click right button to return to live.
Not
Not
Not
NotNote
e
e
ee: Mouse is the default tool for all operaons unless an excepon, as indicated.
3 Bas
Bas
Bas
BasBasic Fu
ic Fu
ic Fu
ic Fuic Fun
n
n
nnco
co
co
cocon
n
n
nn Inst
Inst
Inst
Inst Instr
r
r
rruct
uct
uct
uctuction
ion
ion
ionion
3.1 P
P
P
PPow
ow
ow
owower
er
er
erer On
On
On
On On/O
/O
/O
/O/O
Before you power on the unit, please make sure all the connecon is good.
3.1.
3.1.
3.1.
3.1.3.1.1
1
1
1 1 P
P
P
PPow
ow
ow
owowe
e
e
eer O
r O
r O
r Or On
n
n
n n
① Connect with the power.
② The device will boot and the power LED would turn blue.
③ A ZARD window will pop up and show some informaon about me zone me setupWI , ,
network configuraon, record conguraon and disk management. User can set up here
and refer to the concrete setup steps from the corresponding chapters. If users don’t
want to set up Wizard, please click Exit buon to exit. Press and hold FN/ESC key to
switch the resoluon of VGA and HDMI output.

AHD DVR User Manual
9
3.1.
3.1.
3.1.
3.1.3.1.2
2
2
2 2 P
P
P
PPo
o
o
oowe
we
we
wewer O
r O
r O
r Or Off
ff
ff
ffff
You can power o the device by using remote controller, keyboard mouse. or
① Go to Main Menu and to pop up the Shut down window. then select “Shut Down” icon
② Click OK. Then the unit will power off aer a while.
③ Disconnect the power.
3.2 Login
Login
Login
LoginLogin
User can login or log o the DVR system. Once logged o the user cannot do any other operaon
except changing the mul-screen display.
Fig 3
Fig 3
Fig 3
Fig 3Fig 3-1 L
-1 L
-1 L
-1 L-1 Log
og
og
ogogin
in
in
in in
Noce:
Noce:
Noce:
Noce: Noce: admin
admin
admin
adminadminThe default user name is the default password is and 123456
123456
123456
123456123456.
For complete operaonal steps for changing password, adding or deleng users, please
refer to secon 4.7 User Management Conguraon.
3.3 Liv
Liv
Liv
LivLive P
e P
e P
e Pe Previ
revi
revi
revireview
ew
ew
ewew
Fig 3
Fig 3
Fig 3
Fig 3Fig 3-2 L
-2 L
-2 L
-2 L-2 Liv
iv
iv
ivive P
e P
e P
e Pe Pr
r
r
rrevi
evi
evi
evieview I
ew I
ew I
ew Iew Int
nt
nt
ntnterfac
erfac
erfac
erfacerface
e
e
e e

AHD DVR User Manual
11
4 Ad
Ad
Ad
AdAddin
din
din
dinding IP
g IP
g IP
g IPg IP C
C
C
C Cam
am
am
amamer
er
er
erera
a
a
aas (A
s (A
s (A
s (As (App
pp
pp
pppplic
lic
lic
liclicab
ab
ab
abable o
le o
le o
le ole only
nly
nly
nlynly fo
fo
fo
fo for H
r H
r H
r Hr Hyb
yb
yb
ybybrid
rid
rid
ridrid Mo
Mo
Mo
Mo Models
dels
dels
delsdels)
)
)
) )
This chapter mainly introduces how to connect mulple IP cameras through NVR. Once you nish adding IP
cameras, you can see the live images through the monitor of the NVR.
T
T
T
TTo
o
o
oo add IP c
add IP c
add IP c
add IP c add IP came
ame
ame
ameameras
ras
ras
rasras via LAN
via LAN
via LAN
via LAN via LAN:
Step
Step
Step
StepStep 1
1
1
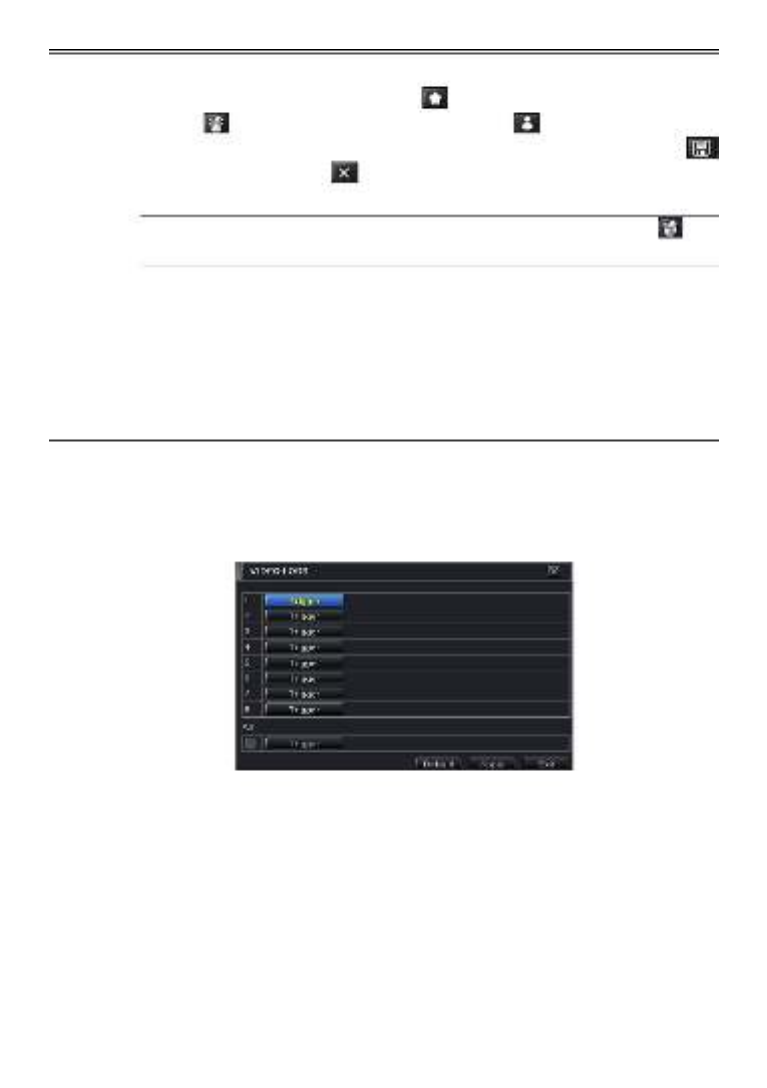
1 1: Please enter Menu IP Camera tab. Refer to Fig 4-1. Click “Search” buon to search the devices in
the same network.
Fig 4-
Fig 4-
Fig 4-
Fig 4-Fig 4-1 Device
1 Device
1 Device
1 Device1 Device Manage
Manage
Manage
Manage Management
ment
ment
ment ment
Step
Step
Step
StepStep
2
2
2
22: Enter into the search tab. Click “Refresh” to refresh the searched devices. You can modify the IP
address of the searched device by checking the device and clicking “Setup” buon.
Fig 4-
Fig 4-
Fig 4-
Fig 4-Fig 4-2 Sear
2 Sear
2 Sear
2 Sear2 Search Devices
ch Devices
ch Devices
ch Devices ch Devices
Not
Not
Not
NotNote
e
e
ee: If the network of IP cameras and NVR are in LAN, their IP address must be in the same network
segment. For example: If the IP address of NVR is 192.168.013.057, the IP address of IP camera must
be 192.168.013.XXX.
Step
Step
Step
StepStep 3
3
3
3 3: Choose the searched devices and click “OK” buon to add these devices. The added cameras will be
listed in the device management interface.
Step
Step
Step
StepStep
4:
4:
4:
4:4: -3. Check Choose the camera device and click “Setup” buon to enable the camera. Refer to Fig 4
the “enable” checkbox, select channel and input the username and password of this device. Then click “OK”
to save sengs.

AHD DVR User Manual
12
Fig 4-
Fig 4-
Fig 4-
Fig 4-Fig 4-3 Add D
3 Add D
3 Add D
3 Add D3 Add Device
evice
evice
evice evice
T
T
T
TTo ad
o ad
o ad
o ado add I
d I
d I
d Id IP c
P c
P c
P cP cam
am
am
amamer
er
er
ereras v
as v
as v
as vas via W
ia W
ia W
ia Wia WAN
AN
AN
ANAN:
Step
Step
Step
StepStep 1
1
1
1 1: Please enter Menu IP Camera tab. Refer to Fig 4-1.
Step
Step
Step
StepStep 2
2
2
2 2: Click “Add” button to pop up a window similar to Fig 4 3. You need to check “Enable” box, select -
channel, manufacturer and product model and manually input IP address, server port, username and
password of this device.
Note: If the NVR and the IP cameras you want to add are both in WAN, the IP address of the IP camera
input here must be WAN IP. You should forward the LAN IP address and port of the IP camera in the
router and use its WAN IP address, provided that the IP camera is in local area network, otherwise,
the NVR cannot connect this IP camera.
5 Main
Main
Main
MainMain
Me
Me
Me
MeMenu
nu
nu
nunu S
S
S
S Setu
etu
etu
etuetup
p
p
p p G
G
G
GGuid
uid
uid
uiduide
e
e
ee
Click right mouse or press FN/ESC button on the front panel and then the control bar will display
at the boom of the screen. Refer to Fig 4- 1.
Fig 4
Fig 4
Fig 4
Fig 4Fig 4-1 M
-1 M
-1 M
-1 M-1 Mai
ai
ai
aiain M
n M
n M
n Mn Men
en
en
enenu T
u T
u T
u Tu T
oolba
oolba
oolba
oolbaoolbar
r
r
r r
Scr
Scr
Scr
ScrScreen Mod
een Mod
een Mod
een Modeen Mode
e
e
ee: Click to select screen mode. Click the icon beside the screen display mode
to select channels. Images can drag to any place to display in the live interface.
Dwel
Dwel
Dwel
DwelDwell:
l:
l:
l:l: Dwell means to display live images from dierent cameras in a sequence. The images may
be displayed as a single channel or in a grid fashion from dierent cameras. Dwell mode is
enabled only when the chosen display mode is not able to display all the available cameras.
Color:
Color:
Color:
Color:Color: If this buon is enabled, you can adjust the color of live pictures.
E-Z
E-Z
E-Z
E-ZE-Zoo
oo
oo
oooom:
m:
m:
m: m: Single channel large screen electronic amplicaon.

AHD DVR User Manual
13
Aud
Aud
Aud
AudAudio:
io:
io:
io:io: Enable sound.
PTZ:
PTZ:
PTZ:
PTZ:PTZ: Click the PTZ buon to control rotaon posion, speed and auto scan of the PTZ.
Snap
Snap
Snap
SnapSnap:
:
:
:: Click this button to snap the live pictures. These pictures will automacally be saved in the
SATA disk.
Rec
Rec
Rec
RecReco
o
o
oord
rd
rd
rdrd:
:
:
:: Click this buon to start/stop recording.
Pla
Pla
Pla
PlaPlayba
yba
yba
ybayback:
ck:
ck:
ck: ck: Click this buon to playback the record les. Click the icon beside the playback
icon to select playback me. For example, if 2 minutes is selected and then click playback buon,
it will start to play from 2 minutes ago.
User can click buon and drag it anywhere with the le mouse.
Click Menu buon to pop up a window as Fig 4-2. You can also press MENU buon on
the front panel or operate with remote controller to display the main menu. Clicking Setup icon
will pop-up the conguraon menu:
Fig 4
Fig 4
Fig 4
Fig 4Fig 4-2 S
-2 S
-2 S
-2 S-2 Set
et
et
etetup
up
up
upup
*No
*No
*No
*No*Noc
c
c
cce:
e:
e:
e:e:
IP
IP
IP
IPIP
Ca
Ca
Ca
CaCame
me
me
memer
r
r
rra
a
a
aa
se
se
se
sesetu
tu
tu
tutup
p
p
p p is
is
is
is is a
a
a
aav
v
v
vvai
ai
ai
aiailab
lab
lab
lablable
le
le
lele
on
on
on
ononly
ly
ly
lyly
in
in
in
inin
ve
ve
ve
vever
r
r
rrs
s
s
ssion
ion
ion
ionion
3.
3.
3.
3.3.4.3
4.3
4.3
4.34.3
a
a
a
aand
nd
nd
ndnd
hi
hi
hi
hihigh
gh
gh
ghgher
er
er
erer
an
an
an
anand
d
d
d d not
not
not
notnot
sup
sup
sup
supsuppor
por
por
porport
t
t
tted
ed
ed
eded b
b
b
b by S
y S
y S
y Sy SA-4
A-4
A-4
A-4A-410
10
10
10100
0
0
00AH
AH
AH
AHAHD-
D-
D-
D-D-1 (M
1 (M
1 (M
1 (M1 (MM
M
M
MM)
)
)
) )

AHD DVR User Manual
14
5.1 Bas
Bas
Bas
BasBasic C
ic C
ic C
ic Cic Con
on
on
onongu
gu
gu
gugur
r
r
rra
a
a
aa
on
on
on
onon
Basic conguraon includes three sub menus: system, date & me and DST.
5.1.
5.1.
5.1.
5.1.5.1.1
1
1
1 1 S
S
S
SSys
ys
ys
ysyst
t
t
tte
e
e
eem
m
m
mm
Go to Main Menu Setup Basic System interface. Refer to Fig 4- 3.
Fig 4-
Fig 4-
Fig 4-
Fig 4-Fig 4- Ba
Ba
Ba
BaBasic Co
sic Co
sic Co
sic Cosic Congur
ngur
ngur
ngurngurao
ao
ao
aoaon-Sy
n-Sy
n-Sy
n-Syn-System
stem
stem
stemstem
3
3
3
3 3
In this interface you can set up the device name, device ID, video format, max network users,
VGA resoluon, language and so on. The denions for every parameters display as below:
Devi
Devi
Devi
DeviDevice N
ce N
ce N
ce Nce Name:
ame:
ame:
ame:ame: The name of the device. It may display on the client end or CMS that help user to
recognize the device remotely.
Devi
Devi
Devi
DeviDevice I
ce I
ce I
ce Ice ID:
D:
D:
D: D: This ID is used to map the speed dome cameras.
Vid
Vid
Vid
VidVideo F
eo F
eo F
eo Feo Format
ormat
ormat
ormatormat:
:
:
:: Two modes: PAL and NTSC. User can select the video format according to that of
camera.
P
P
P
PPassw
assw
assw
asswassword
ord
ord
ordord
Chec
Chec
Chec
ChecCheck:
k:
k:
k: k: If this opon is enabled the user would need to input the user name and the ,
password for performing corresponding operaons.
Show
Show
Show
ShowShow Sy
Sy
Sy
Sy Syst
st
st
ststem Tim
em Tim
em Tim
em Timem Time:
e:
e:
e:e: If selected, the current me will be displayed during live monitoring.
Max
Max
Max
MaxMax Onl
Onl
Onl
Onl Online U
ine U
ine U
ine Uine U r
r
r
rr
se
se
se
sese s:
s:
s:
s:s: To set the max number of concurrent user logins in the DVR.
Vid
Vid
Vid
VidVideo Ou
eo Ou
eo Ou
eo Oueo Outpu
tpu
tpu
tputput
t
t
tt:
:
:
: : The resoluon of live display interface.
Langu
Langu
Langu
LanguLanguage:
age:
age:
age:age: S up the menu language. et
Not
Not
Not
NotNote
e
e
ee: Aer changing the language and video output, the device needs to login again.
Logou
Logou
Logou
LogouLogout A
t A
t A
t At Aer (
er (
er (
er (er (Minut
Minut
Minut
MinutMinutes):
es):
es):
es): es): A user can set up the screen interval me (30s, 60s, 180s, 300s). If there
is no any operaon within the seng period, the device will auto logout and return to login
interface.
Show
Show
Show
ShowShow
Wiz
Wiz
Wiz
WizWizard:
ard:
ard:
ard:ard: If selected, the GUI would launch the startup wizard on every boot, allowing the
user to do basic setup.
No I
No I
No I
No INo Imag
mag
mag
magmage When
e When
e When
e Whene When Logout
Logout
Logout
Logout Logout:
:
:
:: If selected, there will be no image showing when logging out.

AHD DVR User Manual
15
5.1.
5.1.
5.1.
5.1.5.1.2
2
2
2 2 Da
Da
Da
DaDate
te
te
tete &
&
&
& & Ti
Ti
Ti
Ti Time
me
me
meme
① Go to Main Menu Setup Basic Date Time interface. Refer to Fig 4-4. &
Fig 4
Fig 4
Fig 4
Fig 4Fig 4-
-
-
-- Bas
Bas
Bas
BasBasic Co
ic Co
ic Co
ic Coic Con
n
n
nngu
gu
gu
gugura
ra
ra
rarao
o
o
oon-D
n-D
n-D
n-Dn-Dat
at
at
atate
e
e
e e
4
4
4
4 4 &
&
&
& & Tim
Tim
Tim
TimTime
e
e
ee
② Set the date format, me format, me zone in this interface; checkmark Sync Time With “
NTP Server” to refresh NTP server date. You can also adjust system date manually.
③ Click “Apply” buon to save the seng.
5.1.
5.1.
5.1.
5.1.5.1.3
3
3
3 3 DS
DS
DS
DSDST
T
T
T T
① Go to Main Menu Setup Basic DST interface. Refer to Fig 4-5.
Fig 4
Fig 4
Fig 4
Fig 4Fig 4-
-
-
-- Bas
Bas
Bas
BasBasic Co
ic Co
ic Co
ic Coic Con
n
n
nngu
gu
gu
gugura
ra
ra
rarao
o
o
oon-D
n-D
n-D
n-Dn-DST
ST
ST
STST
5
5
5
5 5
② In this interface, enable daylight saving me, me oset, mode, start & end
month/week/date, etc.
③ Click “Apply” button to save the seng.

AHD DVR User Manual
18
T
T
T
TTo s
o s
o s
o so set up
et up
et up
et upet up mas
mas
mas
mas mask a
k a
k a
k ak ar
r
r
rrea:
ea:
ea:
ea: ea:
① Go to Main Menu Setup Live Mask interface.
F
F
F
FFig 4
ig 4
ig 4
ig 4ig 4-9 L
-9 L
-9 L
-9 L-9 Liv
iv
iv
ivive
e
e
e e Con
Con
Con
ConCongu
gu
gu
gugur
r
r
rra
a
a
aaon
on
on
onon-Ma
-Ma
-Ma
-Ma-Mask
sk
sk
sksk
② Click Seng buon to go to live image. “ ”
③ Press and drag the left mouse buon set mask area as shown belowto .
④ Right click to exit the mask seng interface.
⑤ Click “Apply buon to save the setng. ”
T
T
T
TTo del
o del
o del
o delo delet
et
et
etete
e
e
e e mask
mask
mask
mask mask ar
ar
ar
ararea:
ea:
ea:
ea:ea:
① Click Seng buon in the mask interface. “ ”
② Select a certain masked area and double click to delete that masked area.
③ Then click “Apply buon to save the seng. ”
Fig 4
Fig 4
Fig 4
Fig 4Fig 4-
-
-
-- Se
Se
Se
Se Seing Ma
ing Ma
ing Ma
ing Maing Mask Ar
sk Ar
sk Ar
sk Arsk Area
ea
ea
ea ea
10
10
10
1010
5.3 Re
Re
Re
ReRec
c
c
ccord
ord
ord
ord ord Cong
Cong
Cong
CongCongur
ur
ur
ururaon
aon
aon
aonaon
Record conguraon includes six sub menus: enable, record bit rate, me, recycle record, stamp
and snap .
Before Configuraon, please make sure your DVR has been installed with HDD and has
completed its inialization.

AHD DVR User Manual
19
5.3.
5.3.
5.3.
5.3.5.3.1
1
1
1 1 Ena
Ena
Ena
EnaEnabl
bl
bl
blble
e
e
e e
① Go to Main Menu Setup Record Enable interface. Refer to Fig 4-11.
Fig 4
Fig 4
Fig 4
Fig 4Fig 4-11
-11
-11
-11-11 R
R
R
R Rec
ec
ec
ececor
or
or
orord C
d C
d C
d Cd Con
on
on
onongu
gu
gu
gugura
ra
ra
rarao
o
o
oon-En
n-En
n-En
n-Enn-Enab
ab
ab
abable
le
le
lele
② Checkmark record and audio.
③ Select All to up the same seings for all channels. set
5.3.
5.3.
5.3.
5.3.5.3.2
2
2
2 2 R
R
R
RRec
ec
ec
ececor
or
or
orord
d
d
dd Bi
Bi
Bi
Bi Bitr
tr
tr
trtra
a
a
aate
te
te
tete
① Go to Main Menu Setup Record Record Bitrate. Refer to Fig 4-12.
Fig 4
Fig 4
Fig 4
Fig 4Fig 4-12
-12
-12
-12-12 R
R
R
R Rec
ec
ec
ececor
or
or
orord C
d C
d C
d Cd Con
on
on
onongu
gu
gu
gugura
ra
ra
rarao
o
o
oon-
n-
n-
n-n-Rec
Rec
Rec
RecRecor
or
or
orord
d
d
dd Bit
Bit
Bit
Bit Bitrate
rate
rate
raterate
② Set up rate, resoluon, quality, encode and max bit stream.
③ Select “All” to set the same seings for all channels.
④ Click “Apply” buon to save the seng.
Pa
Pa
Pa
PaPar
r
r
rram
am
am
amameter
eter
eter
etereter
Mean
Mean
Mean
MeanMeanin
in
in
ining
g
g
g g
Record
To enable/disable recording for the channel
Audio
To enable/disable audio recording for the channel

AHD DVR User Manual
21
Fig 4
Fig 4
Fig 4
Fig 4Fig 4-14
-14
-14
-14-14 R
R
R
R Reco
eco
eco
ecoecord
rd
rd
rdrd Con
Con
Con
Con Congu
gu
gu
gugura
ra
ra
rarao
o
o
oon-St
n-St
n-St
n-Stn-Stam
am
am
amamp
p
p
p p
② Checkmark camera name and me stamp. Click Seing buon to set up the posion of
the stamp You can drag the camera name and me stamp random posions. Refer to . at
below Figures.
③ Select “All” to set up all channels with the same parameters.
Bef
Bef
Bef
BefBefor
or
or
orore d
e d
e d
e de dr
r
r
rrag
ag
ag
ag ag
A
A
A
AAer
er
er
erer dr
dr
dr
dr drag
ag
ag
ag ag
5.3.
5.3.
5.3.
5.3.5.3.5 R
5 R
5 R
5 R5 Recy
ecy
ecy
ecyecycle
cle
cle
clecle R
R
R
R Rec
ec
ec
ececor
or
or
orord
d
d
dd
This opon is used to recycle the HDD space once it is full. If enabled, the system will
automacally delete the old records and recycle the space if it is completely ulized. The setng
steps are as follows:
① Go to Main Menu Setup Record Recycle Record interface.
② Checkmark recycle record to acvate auto recycling I the opon is disabled or not . f
selected the DVR would stop recording once HDD is full. ,
③ Click “Apply” buon to save the seng.
5.3.
5.3.
5.3.
5.3.5.3.6 S
6 S
6 S
6 S6 Snap
nap
nap
napnap
In this interface, user can set up resoluon, quality, snap interval, snap number.
5.4 Sched
Sched
Sched
SchedSchedu
u
u
uule C
le C
le C
le Cle Conf
onf
onf
onfonfigu
igu
igu
iguigur
r
r
rrat
at
at
atation
ion
ion
ionion
Schedule conguraon includes two sub menus: schedule and moon.

AHD DVR User Manual
24
Fig 4
Fig 4
Fig 4
Fig 4Fig 4-18
-18
-18
-18-18 Alar
Alar
Alar
Alar Alarm Co
m Co
m Co
m Com Conf
nf
nf
nfnfigur
igur
igur
igurigurat
at
at
atation
ion
ion
ionion-Mot
-Mot
-Mot
-Mot-Motion
ion
ion
ion ion T
T
T
TTrig
rig
rig
rigrigger
ger
ger
gerger
Buzz
Buzz
Buzz
BuzzBuzzer:
er:
er:
er:er: If selected, the local buzzer would be acvated on an alarm.
Show
Show
Show
ShowShow Full
Full
Full
Full Full Scr
Scr
Scr
Scr Screen:
een:
een:
een: een: If selected, there will pop up the chosen channel on the monitor on an alarm
trigger.
Email
Email
Email
EmailEmail:
:
:
:: If selected, the DVR will send an email alert to the precongured email address in case
of a moon based alarm from the parcular input.
Snap
Snap
Snap
SnapSnap:
:
:
:: If selected, the system will snap images of the checked channels on an alarm and save
them in the HDD automacally.
④ Go to To Record tab. Select recording channels. It would be recorded in case of an alarm.
Click OK buon to save the setng.
⑤ Go to “To PTZ” tab. Set preset, cruise and track opons for a PTZ in case of a sensor based
alarm. Single or mulple PTZ units could be programmed to perform this funcon on the
same alarm.
⑥ Aer clicking Area button, a dialog box will pop up as Fig 4-19.
Fig 4
Fig 4
Fig 4
Fig 4Fig 4-19
-19
-19
-19-19 Mot
Mot
Mot
Mot Motion-
ion-
ion-
ion-ion-Ar
Ar
Ar
ArArea
ea
ea
ea ea
⑦ In the Area interface, you can drag slide bar to set the sensivity value (1-8). The higher
the value is the more sensive it is to moon. Since the sensivity is inuenced by color
AHD DVR User Manual
25
and me (day or night), you can adjust its value according to the praccal condions. Le
click the grid and drag to delete area. Click icon to set the whole area as detecon
area. Click icon to clear the set detecon area. Click icon to test the sensivity
as per the local condions. Once moon is sensed, it displays a gure icon. Click
icon, to save the seng. Click icon to exit the current interface.
Not
Not
Not
NotNote:
e:
e:
e: e: Prior to seng motion detecon eld it is recommended that you click icon
to clear the exisng eld and set afresh.
⑧ Select “All” to set the same setngs for all channels.
⑨ Click “Apply” buon to save the seng.
⑩ Go to Schedule tab. The seng steps for schedule for moon based alarm are similar to
normal schedule setup (see Chapter 4.4.1 for more details).
5.5.
5.5.
5.5.
5.5.5.5.2 V
2 V
2 V
2 V2 Vide
ide
ide
ideideo Lo
o Lo
o Lo
o Loo Loss
ss
ss
ssss
This DVR can be set up to detect video loss. The seing steps are as follows:
① Go to Main Menu Setup Alarm Video Loss. Refer to Fig 4- . 20
② The setup steps of video loss trigger are similar to moon trigger setng. (See Chapter
4.5.1 Moon Trigger seng for more details).
Fig 4
Fig 4
Fig 4
Fig 4Fig 4-
-
-
-- Ala
Ala
Ala
Ala Alarm C
rm C
rm C
rm Crm Con
on
on
onongur
gur
gur
gurgura
a
a
aaon
on
on
onon-Vid
-Vid
-Vid
-Vid-Video Lo
eo Lo
eo Lo
eo Loeo Loss
ss
ss
ssss
20
20
20
2020
5.5.
5.5.
5.5.
5.5.5.5.3 O
3 O
3 O
3 O3 Oth
th
th
thther Al
er Al
er Al
er Aler Alar
ar
ar
ararm
m
m
m m
This tab gives a choice to congure alarm for Disk Full, IP Conict, the Disconnect event, Disk
Aenuaon or Disk Lost.
① Go to Main Menu Setup Alarm Other Alarm. Refer to Fig 4-21.
② Use the dropdown menu and select the event or the alarm.
③ Check the required trigger opons.
④ If the selected event is “Disk Full”, then use the drop down box for “Disk Shortage Alarm”
to choose a threshold value for remaining HDD space. If the threshold value is reached,

AHD DVR User Manual
26
the system will trigger the Disk Full Alarm.
⑤ Click “Apply” to save the seng.
Fig 4
Fig 4
Fig 4
Fig 4Fig 4-21
-21
-21
-21 -21 Other
Other
Other
OtherOther Ala
Ala
Ala
Ala Alarm
rm
rm
rm rm
5.5.
5.5.
5.5.
5.5.5.5.4 A
4 A
4 A
4 A4 Alar
lar
lar
larlarm Ou
m Ou
m Ou
m Oum Out
t
t
t t
T
T
T
TTo
o
o
o o set u
set u
set u
set uset up ala
p ala
p ala
p alap alarm out
rm out
rm out
rm outrm out:
:
:
: :
① Go to Main Menu Setup Alarm Alarm Out. Refer to Fig 4-22.
Fig 4
Fig 4
Fig 4
Fig 4Fig 4-22 A
-22 A
-22 A
-22 A-22 Alarm
larm
larm
larmlarm Out
Out
Out
Out Out
② Checkmark Buzzer and set buzzer alarm hold me. This would trigger the buzzer when the
system is on an alarm.

AHD DVR User Manual
27
5.6 Net
Net
Net
NetNetwo
wo
wo
wowork C
rk C
rk C
rk Crk Conf
onf
onf
onfonfigur
igur
igur
igurigura
a
a
aaon
on
on
on on
Network conguraon includes Network, Sub Stream, Email, Server, NAT and Other Sengs.
Network seings must be congured if DVR is used for monitoring over network.
5.6.
5.6.
5.6.
5.6.5.6.1 N
1 N
1 N
1 N1 Net
et
et
etetwor
wor
wor
worwork
k
k
k k
T
T
T
TTo
o
o
o o set u
set u
set u
set uset up net
p net
p net
p netp netwo
wo
wo
wowork:
rk:
rk:
rk: rk:
① Go to Main Menu Setup Network tab. Refer to Fig 4-23.
② Set HTTP port. The default HTTP port is 80. If the value is changed, you shall add the port
number when typing IP address in IE address blank. e.g. If HTTP port is set to 82 and IP
address is hp://192.168.0.25 you should input the following IP address: ,
hp://192.168.0.25:82 into IE browser.
③ Set server port. The default server port is 6036.
④ Connect internet. There are three ways to connect internet.
Fig 4
Fig 4
Fig 4
Fig 4Fig 4-23
-23
-23
-23 -23 Netw
Netw
Netw
NetwNetwork
ork
ork
orkork Co
Co
Co
Co Congu
ngu
ngu
ngungura
ra
ra
raraon
on
on
onon-Net
-Net
-Net
-Net-Netwo
wo
wo
wowork
rk
rk
rkrk
If you have a DHCP server running and would like your DVR to automacally obtain an IP
address and other network sengs, check the checkbox beside Obtain an IP address “
automacally”. Then the device will distribute IP address, subnet mask, and gateway IP
and DNS server.
If you want to congure your own sengs, disable “Obtain an IP address automacally”
item and input the IP address, subnet mask, gateway IP and DNS server.
If you connect internet through PPPoE, disable “Obtain an IP address automacally” item
and check PPPoE checkbox and then enter username and password. Once the setup is
completed, your DVR will automacally dial up into your network.
⑤ Test the eectiveness of the network by clicking “Test” buon.
⑥ If the network is well connected, please click “Apply” buon to save the seing.

AHD DVR User Manual
28
5.6.
5.6.
5.6.
5.6.5.6.2
2
2
2 2 Sub
Sub
Sub
SubSub St
St
St
St Str
r
r
rrea
ea
ea
eaeam
m
m
m m
To set up sub stream:
① Go to Main Menu Setup Network Sub Stream interface. Refer to Fig 4-24.
② Select fps, resoluon, quality, encode and max bit rate.
③ Select “All” to set the same seings for all channels.
Fig 4
Fig 4
Fig 4
Fig 4Fig 4-24
-24
-24
-24-24 Net
Net
Net
Net Netw
w
w
wwork
ork
ork
orkork Co
Co
Co
Co Cong
ng
ng
ngngur
ur
ur
urura
a
a
aaon
on
on
onon-Su
-Su
-Su
-Su-Sub St
b St
b St
b Stb Str
r
r
rrea
ea
ea
eaeam
m
m
m m
Pa
Pa
Pa
PaPar
r
r
rram
am
am
amameter
eter
eter
etereter
Mean
Mean
Mean
MeanMeanin
in
in
ining
g
g
g g
FPS
FPS
FPS
FPSFPS
1-12/15. Can be higher in some models
Re
Re
Re
ReResolu
solu
solu
solusoluo
o
o
oon
n
n
n n
Support CIF.
Qua
Qua
Qua
QuaQuality
lity
lity
litylity
The quality of the clients’ image. The higher the value is, the clearer the
record image. Six opons: lowest, lower, low, medium, higher and highest.
Enc
Enc
Enc
EncEncod
od
od
odode
e
e
e e
VBR and CBR.
Ma
Ma
Ma
MaMax bit
x bit
x bit
x bitx bit r
r
r
r rat
at
at
atate
e
e
ee
Range from: 256~1792kbps.

AHD DVR User Manual
29
5.6.
5.6.
5.6.
5.6.5.6.3
3
3
3 3 Em
Em
Em
EmEmail
ail
ail
ail ail
T
T
T
TTo s
o s
o s
o so set up
et up
et up
et upet up Em
Em
Em
Em Email:
ail:
ail:
ail:ail:
① Go to Main Menu Setup Network Email interface. Refer to Fig 4-25.
Fig 4
Fig 4
Fig 4
Fig 4Fig 4-25
-25
-25
-25-25 Net
Net
Net
Net Netw
w
w
wwork
ork
ork
orkork Co
Co
Co
Co Cong
ng
ng
ngngur
ur
ur
urura
a
a
aaon
on
on
onon-Em
-Em
-Em
-Em-Email
ail
ail
ailail
② Set SMTP Server and port.
SMT
SMT
SMT
SMTSMTP Se
P Se
P Se
P SeP Serve
rve
rve
rverver/P
r/P
r/P
r/Pr/Port:
ort:
ort:
ort:ort: The name and port number of SMTP server. You can set up SSL check
(such as Gmail) according to actual needs.
③ Set sender’s address and password.
④ Set receiver’s email address and click “Test” buon to test the validity of the mailbox.
A
A
A
AA
ac
ac
ac
acaching i
hing i
hing i
hing ihing imag
mag
mag
magmage:
e:
e:
e:e: If selected, the system will aach images when sending emails.
5.6.
5.6.
5.6.
5.6.5.6.4
4
4
4 4 Serv
Serv
Serv
ServServer
er
er
erer
This funcon is mainly used for connecng ECMS/NVMS. The seng steps are as follows:
① In the server interface, select “Enable” as shown in the Fig 4-26 .
② Check the IP address and port of the transfer media server in the ECMS/NVMS. The default
server port for auto report is 2009. If it is modied, please go to the transfer media
interface to check.
Fig 4
Fig 4
Fig 4
Fig 4Fig 4-26 Net
-26 Net
-26 Net
-26 Net-26 Netw
w
w
wwork
ork
ork
orkork Co
Co
Co
Co Congur
ngur
ngur
ngurngurat
at
at
atation-Se
ion-Se
ion-Se
ion-Seion-Server
rver
rver
rverrver

AHD DVR User Manual
32
2) Fill in the registraon form, then click "Submi
Submi
Submi
SubmiSubmit
t
t
tt"
3) Fill in the host name you want
to apply for and press "R
R
R
RRequ
equ
equ
equeques
es
es
esest
t
t
t t
Doma
Doma
Doma
DomaDomain
in
in
inin"
"
"
"" (for example "hom
"hom
"hom
"hom"home"
e"
e"
e"e")
4) If there is no problem with the domain registraon you will see the following message:
“Y
Y
Y
YYou
ou
ou
ouour domai
r domai
r domai
r domair domain was
n was
n was
n was n was succes
succes
succes
successuccessfu
sfu
sfu
sfusfully cre
lly cre
lly cre
lly crelly created
ated
ated
atedated.
.
.
..”
”
”
” ”
If you do not see this message, the domain name you requested is already in use and you will
be requested to provide an alternate domain name (please note: is somemes domain name
called host name).
You can create up to 35 domain
records under a single account

AHD DVR User Manual
33
5) The domain name is added at the
beginning of your DVR's address, for
example the domain " " will home
appear as hom
hom
hom
homhome.p
e.p
e.p
e.pe.pro
ro
ro
rorovision
vision
vision
visionvision-isr
-isr
-isr
-isr-isr-dns.
-dns.
-dns.
-dns.-dns.c
c
c
ccom.
om.
om.
om.om.
(b)
(b)
(b)
(b)(b) Set
Set
Set
SetSetn
n
n
nng up
g up
g up
g upg up you
you
you
you your D
r D
r D
r Dr DVR t
VR t
VR t
VR tVR to
o
o
o o wo
wo
wo
wowork wit
rk wit
rk wit
rk witrk with t
h t
h t
h th the DD
he DD
he DD
he DDhe DDNS
NS
NS
NS NS
serve
serve
serve
serveserver
r
r
r r
1) The DDNS server will work only if the
three steps are completed; (1) domain registraon, (2) correct network configuraon with
correct preferred/alternate DNS servers, and (3) correct port forwarding configuraons are
set on the local network (your router).
2) On the DVR Under Main menu => Seings => “Cong” => “Network” set the correct DNS
servers;
For example take a look at the correct sengs on the gure below; the router's IP address is
10.0.
10.0.
10.0.
10.0.10.0.0.13
0.13
0.13
0.130.138
8
8
88 bob
bob
bob
bobbob@g
@g
@g
@g@gmail.c
mail.c
mail.c
mail.cmail.com
om
om
omom
, the e-mail account registered is , and the host domain registered is
"home.
home.
home.
home.home.pro
pro
pro
proprovision
vision
vision
visionvision-is
-is
-is
-is-isr-dns.
r-dns.
r-dns.
r-dns.r-dns.com
com
com
comcom".
3) As shown on gure above: Check the “DDNS” check box, select “mintdns” for DDNS type,
and ll in all the other elds.
4) Make sure you have the preferred & alternate DNS servers lled in (under the “Network”
sengs secon): the preferred server should be the Internet gateway and the alternate
server should be a dierent DNS server for example one of Google's DNS servers (IP –
8.8.8.8 or 8.8.4.4)
5) Click the “Test” buon
a. If the test succeeds click the “Apply” buon
b. If the test fails check all elds again or call the support helpline
6) Now you can access the DVR using the DDNS (ht
ht
ht
hthttp:
tp:
tp:
tp:tp://hom
//hom
//hom
//hom//home.p
e.p
e.p
e.pe.pr
r
r
rrovisi
ovisi
ovisi
ovisiovision-i
on-i
on-i
on-ion-isr-
sr-
sr-
sr-sr- .c
.c
.c
.c.com
om
om
omom
dns
dns
dns
dnsdns )
5.7 User
User
User
User User Manag
Manag
Manag
ManagManagemen
emen
emen
emenement Con
t Con
t Con
t Cont Cong
g
g
ggur
ur
ur
ururaon
aon
aon
aonaon
This tab allows you to add normal or advanced users. To add user and set up user authority:
① Go to Main Menu Setup Users. Refer to Fig 4-29.

AHD DVR User Manual
34
Fig 4
Fig 4
Fig 4
Fig 4Fig 4-29
-29
-29
-29-29 Us
Us
Us
Us User Ma
er Ma
er Ma
er Maer Mana
na
na
nanagem
gem
gem
gemgemen
en
en
enent Co
t Co
t Co
t Cot Cong
ng
ng
ngngur
ur
ur
ururat
at
at
atation
ion
ion
ionion
② Click Add buon to display a dialog box as Fig 4- . 30
Fig 4
Fig 4
Fig 4
Fig 4Fig 4-
-
-
-- Add
Add
Add
Add Add-G
-G
-G
-G-Gener
ener
ener
enereneral
al
al
alal
30
30
30
3030
③ In General tab, input username, password and select user type. You can also check
“Binding PC MAC Address” and input this address.
④ Click “OK” to save the seing.
Not
Not
Not
NotNote:
e:
e:
e:e: When the default value of binding PC MAC Address is 0, the user is not bound with
the specied computer. If the bind opon is used, the user would be able to log into the
DVR only through the specic computer (carrying the MAC address).
⑤ Select Authority tab and assign the operaon rights for particular user. Refer to Fig 4-31.
⑥ Click OK to save the seng.

AHD DVR User Manual
35
Fig 4
Fig 4
Fig 4
Fig 4Fig 4-31
-31
-31
-31-31 Add U
Add U
Add U
Add U Add User
ser
ser
serser-Au
-Au
-Au
-Au-Author
thor
thor
thorthority
ity
ity
ityity
T
T
T
TTo del
o del
o del
o delo delete
ete
ete
eteete us
us
us
us user:
er:
er:
er:er:
① Go to Main Menu Setup Users interface.
② Select the added user you want to delete and then click “Delete” buon.
T
T
T
TTo m
o m
o m
o mo modify u
odify u
odify u
odify uodify user:
ser:
ser:
ser:ser:
① Go to Main Menu Setup Users interface.
② Select the added user you want to modify and then click “Modify” buon to do the
relevant operaon.
T
T
T
TTo cha
o cha
o cha
o chao change
nge
nge
ngenge us
us
us
us user pas
er pas
er pas
er paser passw
sw
sw
swsword
ord
ord
ordord:
:
:
: :
① Go to Main Menu Setup Users interface.
② Select the added user you want to change its password and then click “Change
Password” buon.
5.8 P
P
P
PP
.
.
.
..T
T
T
TT
.Z Con
.Z Con
.Z Con
.Z Con.Z Congu
gu
gu
gugur
r
r
rra
a
a
aaon
on
on
onon
P.T.Z conguraon includes two submenus: serial port and advance d.
Serial port sengs are as follows:
① Go to Main Menu Setup P.T.Z Serial Port interface. Refer to Fig 4-32.
Fig 4
Fig 4
Fig 4
Fig 4Fig 4-32
-32
-32
-32-32 P
P
P
P P
.
.
.
..T
T
T
TT
.Z Co
.Z Co
.Z Co
.Z Co.Z Con
n
n
nngur
gur
gur
gurgurat
at
at
atation-S
ion-S
ion-S
ion-Sion-Serial P
erial P
erial P
erial Perial Port
ort
ort
ortort

AHD DVR User Manual
36
② Select “Enable” and set up the value of address, baud rate and protocol according to the
sengs of the speed dome.
③ Select “All” to set the same sengs for all channels.
Advanced setngs include preset seng, cruise seing and track seng.
Go to Main Menu Setup P.T.Z Advanced. Refer to Fig 4-33.
Fig 4
Fig 4
Fig 4
Fig 4Fig 4-33
-33
-33
-33-33 P
P
P
P P
.
.
.
..T
T
T
TT.Z co
.Z co
.Z co
.Z co.Z conf
nf
nf
nfnfigur
igur
igur
igurigura
a
a
aaon
on
on
onon-ad
-ad
-ad
-ad-adv
v
v
vvanc
anc
anc
ancanced
ed
ed
eded
T
T
T
TTo
o
o
o o set u
set u
set u
set uset up p
p p
p p
p pp pres
res
res
resreset:
et:
et:
et:et:
① In the Advanced interface, click preset “Seing” buon to see a dialog box as Fig 4-34.
Pa
Pa
Pa
PaPar
r
r
rram
am
am
amamet
et
et
eteter
er
er
er er
Mean
Mean
Mean
MeanMeanin
in
in
ining
g
g
g g
Address
The address of the PTZ device.
Baud rate
Baud rate of the PTZ device. Range form: 110, 300, 600, 1200, 2400, 4800,
9600, 19200, 34800, 57600, 115200, 230400, 460800, 921600.
Protocol
Communicaon protocol of the PTZ device. Range from: NULL, PELCOP,
PELCOD, LILIN, MINKING, NEON, STAR, VIDO, DSCP, VISCA, SAMSUNG,
RM110, HY, N-control.
Simulave
Cruise
If enabled, no maer whether the PTZ device supports cruise or not, the
presets will cruise.

AHD DVR User Manual
38
Fig 4
Fig 4
Fig 4
Fig 4Fig 4-36
-36
-36
-36-36 Cruis
Cruis
Cruis
Cruis Cruise S
e S
e S
e Se Set
et
et
etett
t
t
tting
ing
ing
inging
② Click Add buon to add cruise line in the list box (8 cruise lines can be added at most).
③ Select a cruise line and click Setup buon to see a dialog box as Fig 4-37. “ ”
Fig 4
Fig 4
Fig 4
Fig 4Fig 4-37
-37
-37
-37-37 Mod
Mod
Mod
Mod Modifyin
ifyin
ifyin
ifyinifying Cr
g Cr
g Cr
g Crg Cruis
uis
uis
uisuise Lin
e Lin
e Lin
e Line Line
e
e
e e
④ Click Add icon to set the speed and me of preset point. Select a preset point and
then click Delete icon to delete that preset point. Click Modify icon to modify
the seng of a preset point. User can click those icons to adjust the
posion of preset point. Click Preview buon to preview the cruise line. Click OK buon
to save the seng.
T
T
T
TTo s
o s
o s
o so set up
et up
et up
et upet up tr
tr
tr
tr track:
ack:
ack:
ack:ack:
① In the Advanced interface, click to see a dialog box as Fig 4-38. track “Seng” buon
② Control the dome by rotang up, up le, down, right down, le, le down, right and up
right and adjust the rotate speed and the value of zoom, focus and iris of the dome.
③ Click Start Record buon to record the move track of PTZ. Click this buon again to stop
record.
④ Click Start track buon to play recorded track. Click this buon again to stop playing.
⑤ Click icon to exit the current interface.

AHD DVR User Manual
39
Fig 4
Fig 4
Fig 4
Fig 4Fig 4-38
-38
-38
-38-38 T
T
T
T Tr
r
r
rrac
ac
ac
acack S
k S
k S
k Sk Set
et
et
etetng
ng
ng
ngng
5.9 Ad
Ad
Ad
AdAdvan
van
van
vanvanced
ced
ced
cedced
Advanced conguraon includes three submenus: reset, import/export and block/allow list.
5.9.
5.9.
5.9.
5.9.5.9.1 R
1 R
1 R
1 R1 Rese
ese
ese
eseeset
t
t
t t
Reset the device to factory default sengs.
5.9.
5.9.
5.9.
5.9.5.9.2 I
2 I
2 I
2 I2 Imp
mp
mp
mpmport
ort
ort
ortort/Exp
/Exp
/Exp
/Exp/Expor
or
or
orort
t
t
t t
Export the data les into mobile storage devices for backup and then import specied data les
from mobile storage device to DVR.
5.9.
5.9.
5.9.
5.9.5.9.3 Bl
3 Bl
3 Bl
3 Bl3 Bloc
oc
oc
ocock/
k/
k/
k/k/Allo
Allo
Allo
AlloAllow Lis
w Lis
w Lis
w Lisw List
t
t
t t
Here authorized user can prohibit computer users within a certain IP address range from
accessing to DVR or allow computer users within a certain IP address range to access DVR. E.g.
if an admin user doesn’t want computer users within IP address range from 192.168.000.002
to 192.168.000.004 to access the DVR, he can check Block list option, and then input such IP
address range. If it is required that computer users within a certain IP address range access
DVR, they can check Allow List opon and then do the required setng.
Fig 4
Fig 4
Fig 4
Fig 4Fig 4-39
-39
-39
-39-39 Block
Block
Block
Block Block/
/
/
//Allow
Allow
Allow
AllowAllow List
List
List
List List

AHD DVR User Manual
40
6 Sea
Sea
Sea
SeaSearch
rch
rch
rchrch, P
, P
, P
, P, Playb
layb
layb
layblaybac
ac
ac
acack &
k &
k &
k &k & B
B
B
B Back
ack
ack
ackackup
up
up
upup
Search conguraon includes four submenus: me search, event search, le management and
image.
6.1 Tim
Tim
Tim
TimTime Se
e Se
e Se
e See Sear
ar
ar
ararch
ch
ch
chch
① Go to Main Menu Search Time Search. Refer to Fig 5-1.
Fig 5
Fig 5
Fig 5
Fig 5Fig 5-1 S
-1 S
-1 S
-1 S-1 Sear
ear
ear
earearch
ch
ch
chch Con
Con
Con
Con Congu
gu
gu
gugura
ra
ra
rarao
o
o
oon-T
n-T
n-T
n-Tn-Time
ime
ime
ime ime Sear
Sear
Sear
SearSearch
ch
ch
chch
② Select date and channels on the Search buon. A date right hand side and press the “ ”
with highlighted borderline indicates presence of data.
③ Set the start me by clicking a parcular grid or by entering the specic value in the start
me eld.
④ Select the channel display mode and click Play buon to play record. Use the playback
toolbar to control the playback.
To set backup during a certain period in the playback interface:
Select the start me by dragging the slider and click icon. Then select the end me and
click this icon again to confirm the record period. Next, click icon to backup the record
during this period.

AHD DVR User Manual
41
6.2 E
E
E
EEve
ve
ve
vevent
nt
nt
nt nt Se
Se
Se
SeSear
ar
ar
ararch
ch
ch
ch ch
① Go to Main Menu Search Event Search buon. Refer to Fig 5-2.
Fig 5
Fig 5
Fig 5
Fig 5Fig 5-2 S
-2 S
-2 S
-2 S-2 Sear
ear
ear
earearch C
ch C
ch C
ch Cch Con
on
on
onongur
gur
gur
gurgura
a
a
aaon-
on-
on-
on-on-E
E
E
EEven
ven
ven
venvent S
t S
t S
t St Sear
ear
ear
earearch
ch
ch
ch ch
② Select date and channels on the right hand side. A data with highlighted borderline
indicates presence of data.
③ Checkmark Moon or All accordingly.
④ Click Search buon to display the searched event informaon in the event list box.
⑤ Double check a certain record le to playback.
6.3 File
File
File
File File Man
Man
Man
ManManag
ag
ag
agagem
em
em
ememen
en
en
enent
t
t
t t
① Go to Main Menu Search File Management interface. Refer to Fig 5-3.
Fig 5
Fig 5
Fig 5
Fig 5Fig 5-3 S
-3 S
-3 S
-3 S-3 Sear
ear
ear
earearch C
ch C
ch C
ch Cch Con
on
on
onongur
gur
gur
gurgura
a
a
aaon-
on-
on-
on-on-Fil
Fil
Fil
FilFile Man
e Man
e Man
e Mane Manag
ag
ag
agagem
em
em
emement
ent
ent
entent
② Select date and channels. The date with highlighted borderline indicates presence of data.

AHD DVR User Manual
42
③ Click Search buon to display the searched les in the le list box.
④ Use “All” buon to lock/unlock or delete all les in the le management column.
⑤ Double click an unlocked item to play.
Lock:
Lock:
Lock:
Lock:Lock: Select a file and click Lock buon to lock this le, aer that, that le will not be deleted or
covered.
Unl
Unl
Unl
UnlUnlock:
ock:
ock:
ock:ock: Select a locked le and click “Lock” buon to unlock this le.
Del
Del
Del
DelDelete:
ete:
ete:
ete:ete: Select an unlocked le and click “Delete” buon to delete this le.
6.4 Sea
Sea
Sea
SeaSearch
rch
rch
rchrch b
b
b
b by Im
y Im
y Im
y Imy Imag
ag
ag
agage
e
e
e e
① Go to Main Menu Search Image tab.
② Select data and channels on the right hand side.
③ Press “Search” buon to search for a recorded image.
④ Once an alarm image has been idened, the user can double click the image to play
recording.
Fig 5
Fig 5
Fig 5
Fig 5Fig 5-4 S
-4 S
-4 S
-4 S-4 Sear
ear
ear
earearch C
ch C
ch C
ch Cch Con
on
on
onongur
gur
gur
gurguraon-I
aon-I
aon-I
aon-Iaon-Image
mage
mage
magemage
Lock
Lock
Lock
LockLock: Select the image and click “Lock” buon to lock this image.
Sa
Sa
Sa
SaSave
ve
ve
veve: Click “Save” buon to copy the image on the HDD.
Sa
Sa
Sa
SaSave Al
ve Al
ve Al
ve Alve All
l
l
ll: Click “Save All” buon to copy all images on the HDD.
6.5 Back
Back
Back
BackBacku
u
u
uup
p
p
p p
This unit supports backup by USB Flash. You can also make backup by IE browser via internet
(see secon 5.2 Remote backup). 7.
① Insert USB storage device and then go to backup configuraon. Refer to Fig 5-5.
② Set the start & end me, select channels and click Search buon to display the searched
data in the data backup list box.

AHD DVR User Manual
43
Fig 5
Fig 5
Fig 5
Fig 5Fig 5-5 B
-5 B
-5 B
-5 B-5 Back
ack
ack
ackackup C
up C
up C
up Cup Con
on
on
onongur
gur
gur
gurgura
a
a
aaon
on
on
onon
③ Select a required le or checkmark “All” to select all data les. Click Backup buon to
display Backup informaon window.
④ In the backup informaon interface, you can check the relevant informaon of backup
les, storage type, save le type, etc. Then click Start button to start backup.
Not
Not
Not
NotNote:
e:
e:
e: e: If the backup les are saved in DVR format, please check backup player. Only this
player can play these les in DVR format. If the backup les are saved in AVI format, you
can play these les with common media player.

AHD DVR User Manual
46
Not
Not
Not
NotNote:
e:
e:
e: e: Please wait for a while when the system reboots. Any power interrupon is not
allowed during upgrading.
7.4 Log
Log
Log
LogLogof
of
of
ofoff
f
f
f f
A log off dialogue box will pop up by clicking Log o icon. Then click OK buon to conrm to log
o. If you want to log in again, click Main Menu icon to enter user name and password to re-
login.

AHD DVR User Manual
57
② S Belect backup les and click “ rowse” buon to set the save path. Then click “ ackup” B
buon to start backup. The backup les will be saved on user’s PC.
8.6 Rem
Rem
Rem
RemRemote
ote
ote
oteote Sys
Sys
Sys
Sys System
tem
tem
tem tem Cong
Cong
Cong
CongCongura
ura
ura
urauraon
on
on
onon
You can do remote setup of the device which includes funcons like basic conguraon, live
conguraon, record conguraon, schedule conguraon, alarm conguraon, network
conguraon, PTZ conguraon and user conguraon. You should select an opon from the
menu list on the le and then set up the relave parameters. Only one user can do conguraon
setup at a given point of me. Click Cong tab to go to the below interface
The sub menu list and the opons in every menu are similar to that of the DVR. Please refer to
Chapter 4 Main Menu Setup Guide for more details.
Fig 7
Fig 7
Fig 7
Fig 7Fig 7-9 R
-9 R
-9 R
-9 R-9 Remot
emot
emot
emotemote M
e M
e M
e Me Menu S
enu S
enu S
enu Senu Setup
etup
etup
etup etup
8.7 Too
Too
Too
TooTools
ls
ls
ls ls
Click on the tool’s tab to access the Disk Management tool. The user can view the status of the
hard drive(s), view/change the read write properes and format the hard drive(s).
8.8 Rem
Rem
Rem
RemRemote
ote
ote
oteote Man
Man
Man
Man Managem
agem
agem
agemagement
ent
ent
entent
The Info interface provides a web based interface to access the general informaon pertaining
to the DVR’s sengs. The interface includes ve submenus: System, Event, Log, Network and
Online users.
Not
Not
Not
NotNote:
e:
e:
e:e: There may be subtle dierences with respect to funcons of remote surveillance
between through IE and through Apple PC. Here we only take IE remote access for
example.

AHD DVR User Manual
61
3.
3.
3.
3.3. Serve
Serve
Serve
ServeServer list
r list
r list
r listr list
Click buon to pop up the
following picture.
Add device: Click “Add” buon in the top
right corner to pop up a dialog box as shown in
the following le picture. Input the relave
informaon of the device and click “Save”
buon.
Delete device: Click buon behind
the device name to delete this device.
Edit device: Click buon behind the
device name to edit the informaon of this device.
Backup & restore: It is recommended to click “Backup” buon to reserve the information of all devices.
Then you can click “Restore” button to restore all device informaon aer you re-install the client or reset the
device.
indicates the device has been connected;
indicates the device is connecng;
indicates the device is not connected.
4.
4.
4.
4.4. Live
Live
Live
Live Live Prev
Prev
Prev
PrevPreview
iew
iew
iew iew
Once you access the device, the system will automacally display the screen mode in accordance with
the channel number of the device
Note:
Note:
Note:
Note:Note: The
The
The
The The ma
ma
ma
mamaximum
ximum
ximum
ximumximum num
num
num
num number o
ber o
ber o
ber ober of cha
f cha
f cha
f chaf channel
nnel
nnel
nnelnnels wh
s wh
s wh
s whs which c
ich c
ich c
ich cich can b
an b
an b
an ban be conn
e conn
e conn
e conne connect
ect
ect
ectected are
ed are
ed are
ed areed are nin
nin
nin
nin nine af
e af
e af
e afe after lo
ter lo
ter lo
ter loter login.
gin.
gin.
gin. gin.
1. Click “Screen mode” buon to select channel as shown in Fig 1.
2. When there is video playing in a screen, you can switch the channel by long pressing the screen as
shown in Fig 2.
3. When no video is playing in a screen, click this screen to choose channel as shown in Fig3.
4. When the single channel is playing, you can zoom in/out the image by swiping you nger up and down
as shown in Fig 4.
5. When the single channel is playing, the channel can be switched by swiping your nger le or right as
shown in Fig 5.
6. When mul channels are playing, drag one channel screen to the other channel screen. This will make
Produktspecifikationer
| Varumärke: | Provision ISR |
| Kategori: | Röstinspelning |
| Modell: | SA-16200AHD-2 (1U) |
Behöver du hjälp?
Om du behöver hjälp med Provision ISR SA-16200AHD-2 (1U) ställ en fråga nedan och andra användare kommer att svara dig
Röstinspelning Provision ISR Manualer

21 September 2024
21 September 2024
21 September 2024
21 September 2024
21 September 2024
21 September 2024
21 September 2024
21 September 2024
21 September 2024
21 September 2024
Röstinspelning Manualer
- Röstinspelning Sony
- Röstinspelning Philips
- Röstinspelning Panasonic
- Röstinspelning Grundig
- Röstinspelning Motorola
- Röstinspelning Olympus
- Röstinspelning Toshiba
- Röstinspelning Yamaha
- Röstinspelning Abus
- Röstinspelning Aiwa
- Röstinspelning Airlive
- Röstinspelning Hikvision
- Röstinspelning GPO
- Röstinspelning Kodak
- Röstinspelning RCA
- Röstinspelning Salora
- Röstinspelning Roland
- Röstinspelning DataVideo
- Röstinspelning Axis
- Röstinspelning Marquant
- Röstinspelning AVerMedia
- Röstinspelning AJA
- Röstinspelning Digitus
- Röstinspelning Olympia
- Röstinspelning Audioline
- Röstinspelning Dahua Technology
- Röstinspelning Audiovox
- Röstinspelning GeoVision
- Röstinspelning Goclever
- Röstinspelning Profoon
- Röstinspelning Boss
- Röstinspelning Tascam
- Röstinspelning Planet
- Röstinspelning Konig
- Röstinspelning Reloop
- Röstinspelning Mpman
- Röstinspelning Trevi
- Röstinspelning D-Link
- Röstinspelning Swann
- Röstinspelning Lorex
- Röstinspelning Zoom
- Röstinspelning Humax
- Röstinspelning Sangean
- Röstinspelning Saramonic
- Röstinspelning Line 6
- Röstinspelning Blackmagic Design
- Röstinspelning Irradio
- Röstinspelning EverFocus
- Röstinspelning Gefen
- Röstinspelning Vivotek
- Röstinspelning Atomos
- Röstinspelning M-Audio
- Röstinspelning Lervia
- Röstinspelning Livescribe
- Röstinspelning Oregon Scientific
- Röstinspelning Speco Technologies
- Röstinspelning Kguard
- Röstinspelning Neo
- Röstinspelning Epcom
- Röstinspelning Hanwha
- Röstinspelning LifeGood
- Röstinspelning Syscom
- Röstinspelning Lectrosonics
- Röstinspelning Pixel Maker
- Röstinspelning Sound Devices
- Röstinspelning AVTech
- Röstinspelning Feelworld
- Röstinspelning Majestic
- Röstinspelning HiLook
- Röstinspelning Jammin Pro
- Röstinspelning Mach Power
- Röstinspelning Qian
Nyaste Röstinspelning Manualer
5 April 2025
5 April 2025
3 April 2025
5 Mars 2025

16 Februari 2025
25 Januari 2025
31 December 2025
30 December 2025
27 December 2024
22 December 2024