Siemens EQ.6 Plus S100 TE651209RW Bruksanvisning
Siemens
kaffebryggare
EQ.6 Plus S100 TE651209RW
Läs nedan 📖 manual på svenska för Siemens EQ.6 Plus S100 TE651209RW (188 sidor) i kategorin kaffebryggare. Denna guide var användbar för 14 personer och betygsatt med 4.5 stjärnor i genomsnitt av 2 användare
Sida 1/188

siemens-home.bsh-group.com/welcome
Register
your
product
online
TE65..
en Instruction manual
fr Mode d’emploi
nl Gebruiksaanwijzing
pl Instrukcjaobsługi
cs Návodkpoužití
ru Инструкцияпоэксплуатации
de Gebrauchsanleitung

A
E-Nr. ……… FD… …
b
c
a
TZ80002
d
g ie f
*
h
* *
en English 2
fr Français 26
nl Nederlands 52
pl Polski 77
cs Čeština 103
ru Pycckий 127
de Deutsch 154
Included in delivery (see page 5)
Contenu de l’emballage (voir page 29)
Leveringsomvang (zie pagina 55)
Zakres dostawy (patrzstrona80)
Součást dodávky (vizstrana106)
Объем поставки (см.стр.130)
Lieferumfang (sieheSeite157)

B
C
1
12
9
10
11
13
3
2
5
6
4
17
19

4a
D
E F
8
7
18
4c
4d
17b
17a 17c
17d
4b

2�
1�
13
G
1�
15
1614b
14
14a
2�

2
en
Contents
DearCoeeConnoisseur,
Congratulationsonpurchasingthisfully
automaticcoeemachinefromSiemens.
Thisinstructionmanualdescribesanumber
ofversionsoftheappliancewithminor
dierences.
PleasealsotakenoteoftheenclosedQuick
referenceguide,whichyoucanthenkeep
inthespeciallyprovidedcompartment16
untilyouneeditagain.
How to use these instructions:
Youcanopenupthefrontcoverofthis
instructionmanualtoseeillustrationsofthe
appliancewitheachpartnumbered.These
numberswillbereferredtothroughoutthe
text.
Example:brewingunit14
Theseinstructionsalsoshowdisplaytexts
andsymbolsinaspecialwaysothatyou
canclearlyseewherewerefertotexts
displayedbytheapplianceorsymbolsthat
aremarkedonit.
Exampleofdisplaytexts:Espresso
Exampleofcontrolelements:C
Intended use 3 ���������������������������������������������
Important safety information 3 �������������������
Included in delivery 5 ����������������������������������
Overview����������������������������������������������������5
Overview of control elements 6 �����������������
Display 7 �������������������������������������������������������
Initial use 8 ���������������������������������������������������
Own settings “Favourite” 9 �����������������������
Childproof lock 9 �����������������������������������������
Preparing drinks 9 ���������������������������������������
Preparingcoeedrinks.............................10
Preparationusingmilk.............................. 11
Specialbeverages....................................12
Preparationusinggroundcoee..............13
Menu 13 ��������������������������������������������������������
Care and daily cleaning 16 �������������������������
Cleaningthemilksystem..........................17
Cleaningthebrewingunit(FigureG)........18
Service programmes 19 ������������������������������
Cleaningthemilksystem..........................19
Descaling..................................................19
Cleaning...................................................20
calc‘nClean...............................................20
Tips on energy saving 21 ����������������������������
Frost protection 21 ��������������������������������������
Storing accessories 22 �������������������������������
Accessories 22 ��������������������������������������������
Disposal���������������������������������������������������22
Guarantee 22 ������������������������������������������������
Simple troubleshooting 23 �������������������������
Technical specications ������������������������25

3
en
Intendeduse
Intended use
This appliance is intended for
domestic use only.
Only use the appliance indoors
at room temperature and up to
2000 m above sea level.
Important safety information
Please read and follow the
operating instructions carefully
and keep them for later refer-
ence! Enclose these instructions
when you give this appliance to
someone else.
This appliance can be used
by children aged from 8 years
and above and by persons with
reduced physical, sensory or
mental capabilities or lack of
experience and knowledge if
they have been given supervi-
sion or instruction concerning
use of the appliance in a safe
way and if they understand the
hazards involved. Keep children
under 8 years of age away from
the appliance and connecting
cable and do not allow them
to use the appliance. Children
shall not play with the appliance.
Cleaning and user maintenance
shall not be made by children
unless they are older than
8 years and supervised.
Intended use Important safety information

4
en Importantsafetyinformation
WWarning
Risk of electric shock!
■The appliance may only be
connected to a power supply
with alternating current via
a correctly installed socket
with earthing. Ensure that the
protective conductor system
of the domestic supply has
been correctly installed.
■Connect and operate the
appliance only in accordance
with the specications on the
rating plate.
■Do not use the appliance if
the power cord and/or appli-
ance are damaged.
■Only our customer service
may repair the appliance,
e.g. by replacing a damaged
power cord, in order to avoid
hazards.
■Never immerse the appliance
or mains cord in water.
■If there is a fault, pull out the
mains plug immediately or
switch o the power supply.
WWarning
Hazard due to magnetism!
The appliance contains perma-
nent magnets which can aect
electronic implants such as
pacemakers or insulin pumps.
Persons wearing electronic
implants must maintain a
minimum distance of 10 cm
from the appliance and from the
following parts upon removal:
milk container, milk system,
water tank and brewing unit.
WWarning
Risk of suocation!
■Do not allow children to play
with packaging material.
■Store small parts safely as
they can be easily swallowed.
WWarning
Risk of injury!
■Do not reach into the grinding
unit!
■Improper use of this appliance
may result in injury.
WWarning
Risk of burns!
■The milk system becomes
extremely hot. After use,
always let it cool down before
you touch it.
■After use the surfaces of the
heating element or hotplate
can remain hot for some time.

5
en
Included in delivery
1 MainsswitchJ
2 Controlpanel(seenextpage)
3 Display
4 Drinksoutlet(coee,milk,hotwater),
height-adjustable
a) Cover
b) Milksystem/coeeoutlet(two-part)
c) Milktube
d) Suctionpipe
5 Removablewatertank
6 Lidforwatertank
7 Storagecompartmentformeasuring
spoon
8 Measuring spoon
(insertionaidforwaterlter)
9 Beancontainer
10 Aromacover
11 Dialselectorforgrindinglevel
12 Drawer
(forgroundcoee/cleaningtablet)
13 Doortobrewingunit
14 Brewingunit
a) Lockingmechanism
b) Cover
15 Ejectlever
16 Storagecompartment
forquickreferenceguide
17 Driptray
a) Driptraypanel
b) Driptray(two-section)
c) Coeegroundscontainer
d) Floater
18 Compartmentforpowercord
19 Ratingplate(Enumber,FD)
*Theseuserinstructionsdescribeanumber
ofapplianceversions.Itemsmarked*are
notpresentinallmodels.
Overview
(Figures and B, C, D, E, F Gonthefold-outpages)
Included in delivery
(Figure Aonthefold-outpages)
a Fullyautomaticcoeemachine
b User Manual
c Quickreferenceguide
d Milktubeandsuctionpipe
e Waterhardnesstestingstrip
f Measuring spoon
g Waterlter*
h Milkcontainerwith“freshLock”lid*
i Descalingtablets*

7
en
Display
F
Mains switch J
Themainsswitch isusedtoswitchJ
theapplianceonoro.Theappliance
rinsesitselfautomaticallywhenitis
switchedonando.
Theappliancedoesnotrinseif:
■ itisstillwarmwhenswitchedon,or
■ nocoeewasdispensedbeforeitwas
switchedo.
Theapplianceisreadyforusewhenthe
symbolsandthedisplayonthecontrol
panelarelit.
Control panel (touch eld)
Inthecontrolpanelyoucaneasilynavigate
thecontrolsjustbytouchingthesymbols
andcharacters.
Youwillhearanaudiblesignal.
Theseaudiblesignalscanbeswitchedon
oro(seethesection“Menu– ”).Key tones
Drink selection
Touchingthecorrespondingsymbol
selectsthedesireddrink(seethesection
“Preparingdrinks”).
Start/stop button
Touching Ceitherbeginspreparing
adrinkorlaunchesaserviceprogramme.
Ifyoutouch againwhiletheC
drinkisbeingprepared,dispensingwillbe
prematurelyhalted.
Menu
Touching Acallsupthemenu,the
navigationsymbolswillbeactivatedand
lightup.Touch , toI B F and
navigatethroughthemenuandcallup
informationorchangesettings(seethe
section“Menu”).
Drink options
Touching or H Dadjuststhestrengthor
sizeofthedrink,touching preparestwoG
cupssimultaneouslyassoonasyoutouch
Ctobegindispensing(seethe
section“Preparingdrinks”).
“Favourite” and Childproof lock
Brieytouching -R calls up person
alisedbeverages(seethesection
“OwnsettingsFavourite”).
Touching Rfor3secondsormoreacti-
vatesordeactivatesthechildprooflock(see
thesection“Childprooflock”).
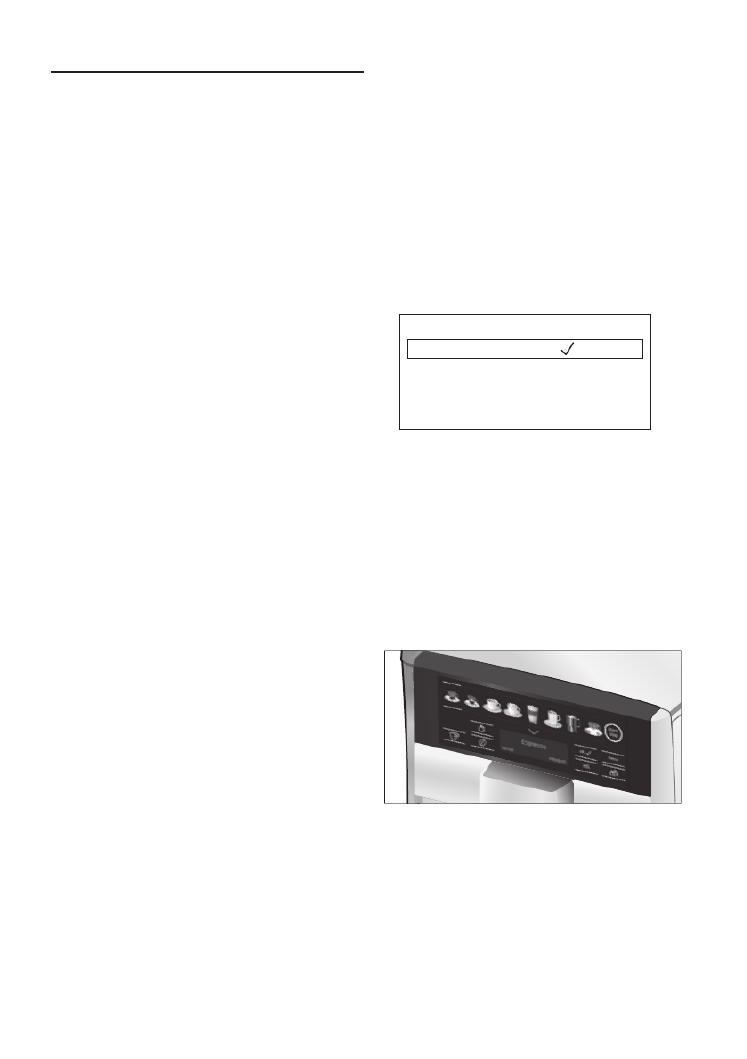
Display
Thedisplayshowstheselecteddrinks
andsettingsplusmessagesreportingthe
appliance’soperatingstatus.
Espresso
regular medium
Please refill water tank
Thesemessagesareclearedassoonas
theactionhasbeencarriedout.
8
en Initialuse
Initial use
General
Filltheappropriatecontainerusingonly
pure, ,uncarbonatedwaterandsolelycold
roastedbeans.Donotusecoeebeans
thathavebeenglazed,caramelisedor
treatedwithotheradditivescontaining
sugar,sincetheywillblockthebrewingunit.
Thewaterhardnesssettingonthe
appliancecanbeadjusted.Thefactory
settingforthewaterhardnessis4.Use
theenclosedteststriptodeterminethe
hardnessofyourwatersupply.Ifthis
showsavalueotherthan4,youwillneed
toprogrammetheapplianceappropriately
afterithasbeentakenintoservice(see
section“Menu– ”).Water hardness
Setting up the appliance
■ Removeanyprotectiveplasticlm.
■ Placethefullyautomaticcoeemachine
onalevel,waterproofsurfacethatisable
tosupportitsweight.
■ Theappliance’sventilationslitsmustnot
becoveredorobscured.
F Important:Onlyusetheappliance
inafrost-freeroom.Ifithasbeen
transportedorstoredattemperatures
below0°C,waitatleast3hours
beforetakingitintooperation.
■ Connectthepowersupply(cablestorage
compartment )tothesocket.Youcan18
adjustthelengthofthecablebypullingit
furtheroutorpushingitbackin.Todothis,
placetheappliancewithitsbackush
withtheedgeoftheworksurfaceand
eitherpullthecableoutdownwards or
pushitin .upwards
■ Flipupthelidofthewatertank .6
■ Removethewatertank ,rinseitoutand5
llitwithfreshcoldwater.Donotllit
pastthe“ ”mark.max
■ Replacethewatertank ,makingsure5
thatitisstraight,andpushitrightdown
intoplace.
■ Reclosethelidofthewatertank .6
■ Fillthebeancontainer9withcoeebeans.
■ Usethemainswitch toswitchontheJ 1
appliance.
Thecontrolpanelandthedisplaywill
beactivated.Thedisplaywillshowthe
previouslyspeciedlanguage,whichwill
alsobeusedforallsubsequentdisplay
texts.Anumberofdierentlanguagesare
available.
■Touch Irepeatedlyuntilthedisplay
indicatesthedesiredlanguage.
Deutsch
English
Français
■Touch Ctoconrmyour
selection.
Thechosenlanguageisnowstored.
Thebrandlogowilllightuponthedisplay .3
Theappliancewillheatupandrinseitself,
asmallamountofwaterwillrunoutofthe
drinkoutlet .4
Theapplianceisreadyforusewhenthe
symbolsandthedisplayonthecontrol
panelarelit.
F Thefactorysettingsofthefully
automaticcoffeemachineare
programmedforoptimalperfor-
mance.Theappliancesswitchesoff
automaticallyafteraconfiguredtime
(seethesection“Menu–Automatic
shut-down”).

10
en Preparing drinks
Adjusting the strength,
selecting ground coee
Touch Htosetthestrengthofyourcoee
individuallyortospecifythatgroundcoee
istobeused.
Thefollowingsettingsarepossible:
very mild very strong
mild doubleshot strong
regular doubleshot strong+
strong Ground coffee
■ Touchingtheappropriatesymbolselects
thedesireddrink.
■ Touch Hrepeatedlyuntilthedesired
settinge.g.strong or (see Ground coffee
thesection“Preparationusingground
coee”)appearsonthedisplay.
aromaDouble Shot
Thelongerthecoeeisbrewed,themore
bittersubstancesandundesiredaromas
arereleased.Thishasanegativeeecton
thetasteandmakesthecoeelesseasily
digestible.Soforextrastrongcoee,the
appliancehasaspecialaromaDoubleShot
function.Whenhalfthequantityhasbeen
prepared,itgrindsandbrewsfreshcoee
beanssothatonlythepleasant,aromatic
scentsarereleased.
F ThearomaDoubleShotfunctioncan
beselectedforanydrinkcontaining
aproportionofatleast35mlcoffee
volume.Itisnotavailableforsmall
drinkssuchasasmallespressoor
whenthe settingisenabled.G
Select cup size
Touching Dindividuallyselectsthe
beveragevolumedesired.
Thefollowingsettingsarepossible:
small medium large
■ Touchingtheappropriatesymbolselects
thedesireddrink.
■ Touch Drepeatedlyuntilthedisplay
indicatesthedesiredsetting.
F
Anarrowormultiplearrowsnextto
thesetting,e.g.„large ˆ”,indicatethat
thepresetcapacity(seethesection
“Menu–Set cup size”)hasbeen
changed.
Two cups at once
Onceyouhaveselectedablackcoeeor
milkycoeedrink(forsomeappliances,this
appliesonlytoblackcoee),touchingG
preparestwocupssimultaneouslyassoon
asyoutouch tobegindispensing.C
Thesettingisshownonthedisplay.
■ Touchingtheappropriatesymbolselects
thedesireddrink.
■ Touch G.
■ Placetwoprewarmedcupsatleftand
rightunderneaththebeverageoutlet .4
■ Touch Ctobegindispensingthe
beverage.
Theselecteddrinkwillbebrewedandwill
thenbedispensedintothetwocups.
F Thedrinkispreparedintwostages
(twogrindingoperations).Please
waituntiltheprocessiscompletely
finished.
F Depending on the type of
appliance:
Thefunction“Twocupsatonce”may
beavailableonlyforblackcoffee,not
formilkycoffeedrinks.
Preparing coee drinks
Theappliancemustbereadyforuse.
■ Placeaprewarmedcupunderneaththe
beverageoutlet .4
■ Touchtheappropriatesymboltoselect
thedesireddrink,Espresso or Coffee.
Thenameofthedrinkandthecurrently
activevaluesforstrengthandcupsizeare
shownindisplay.
Coffee
regular medium

11
en
Preparing drinks
F
Youcanchangethecupsizeand
coffeestrengthbytouchingD and
H.IfyouselectGround coffee,
followtheproceduredescribedunder
“Preparationusinggroundcoffee”.
For example:
■ Touch Drepeatedlyuntilthedisplay
showslarge.
■ Touch Hrepeatedlyuntilthedisplay
showsmild.
■ Touch Ctobegindispensing
thebeverage.
Thecoeeisbrewedandthendispensed
intothecup.
F Youcantouch againtoC
prematurelyhaltdispensing.
Preparation using milk
Thisfullyautomaticcoeemachine
possessesanintegratedmilksystemthat
enablesyoutopreparecoeewithmilkor
milkfrothorwarmmilkalone.
B Risk of burns!
Theupperandlowersectionsofthe
milksystem becomeextremely4b
hot.Afteruse,alwaysletthemcool
downbeforeyoutouchthem.
F Caution!
Driedmilkresiduesaredifficultto
remove,soyoushouldalways clean
theapplianceaftereachuse(seethe
section“Cleaningthemilksystem”).
F Whilemilkisbeingpreparedyoumay
hearawhistlingsound.Thisisdue
tothetechnicalnatureofthemilk
system .4b
F Touch Cagainto
prematurelyhaltdispensing.
Theappliancemustbereadyforuse.
Themilktubeandsuctionpipemustbe
connected.
■ Insertthesuctionpipe intothemilk4d
container.
■ Placeaprewarmedcuporglassunder-
neaththebeverageoutlet.
Coee-based drinks with milk
■ Touchtheappropriatesymbolto
selectEspresso Macch., Caffe Latte,
Latte Macchiato or Cappuccino.
Thenameofthedrinkandthepreviously
speciedvaluesforstrengthandcupsize
areshownindisplay.
F Youcanchangethecupsizeand
coffeestrengthbytouchingD and
H.IfyouselectGround coffee,
followtheproceduredescribedunder
“Preparationusinggroundcoffee”.
■ Touch Ctobegindispensingthe
beverage.
Themilkormilkfrothisdispensedintothe
cuporglassrst.Thenthecoeeisbrewed
andrunsintothecuporglass.
Youcantouch againtoprema-C
turelyhaltdispensingofthemilkorcoee,
touching twicestopstheentireC
dispensingprocess.
Milk froth
■ TouchthesymboltoselectMilk froth.
■ Touch Dtoselectthecupsize.
■ Touch Ctobegindispensing
thebeverage.
Milkfrothisdispensedfromthebeverage
outlet.

12
en Preparing drinks
Special beverages
Touchthe“specialbeverages”button
severaltimestoselectdierentdrinksone
aftertheother.
Itemsmarked*arenotpresentinallmodels.
Hot water
Beforehotwaterisdispensed,themilk
systemshouldbecleanedandthemilktube
removed(seethesection“Cleaningthemilk
system”).Ifthemilksystemisnotcleaned,
smallamountsofmilkmaybedispensed
togetherwiththehotwater.
B Risk of burns!
Themilksystem becomes4b
extremelyhot.Afteruse,alwaysletit
cooldownbeforeyoutouchit.
Theappliancemustbereadyforuse.
■ Placeacuporglassunderneaththe
beverageoutlet .4
■ Touchthe“specialbeverages”symbol
repeatedlyuntilHot waterappearsonthe
display.
■ Touch Dtoselectthecupsize.
■ Touch Ctobegindispensing
thebeverage.
F IfyouseethemessagePlease
remove suction hose,proceedas
follows:
■ Takeothemilktube andthentouch4c
Cagain.
Hotwaterwillowoutoftheoutlet .4
F Youcantouch againtoC
prematurelyhaltdispensing.
Warm milk *
Pleasereadthroughrstandtakenoteof
thesection“Preparationusingmilk”.
Then:
■ Touchthe“specialbeverages”symbol
repeatedlyuntilWarm milk appears on
thedisplay.
■ Touch Dtoselectthecupsize.
■ Touch Ctobegindispensing
thebeverage.
Warmmilkwillowoutoftheoutlet .4
F
Youcantouch againtoC
prematurelyhaltdispensing.
Americano *
■ Placeaprewarmedcupunderneath
thebeverageoutlet .4
■ Touchthe“specialbeverages”symbol
repeatedlyuntilAmericano appears on
thedisplay.
■ Selectsettingssuchasthecupsize
andstrengthasdescribedinthesection
“Preparingcoeedrinks”.
■ Touch Ctobegindispensing
thebeverage.
Thecoeeisbrewedandthendispensed
intothecup.
F Youcantouch againtoC
prematurelyhaltdispensing.
Flat White *, Kleiner Brauner * or
Cafe Cortado *
Pleasereadthroughrstandtakenoteof
thesection“Preparationusingmilk”.
Then:
■ Placeacuporglassunderneaththe
beverageoutlet .4
■ Touchthe“specialbeverages”symbol
repeatedlyuntil ,Flat White Kleiner Brauner
or Cafe Cortadoappearsonthedisplay.
■ Selectsettingssuchasthecupsize
andstrengthasdescribedinthesection
“Preparingcoeedrinks”.
■ Touch Ctobegindispensing
thebeverage.
First,themilkisdispensedintothecupor
glass.Thenthecoeeisbrewedandruns
intothecuporglass.
F Youcantouch againtoC
prematurelyhaltdispensingofmilk
orcoee.Touching twiceC
stopstheentiredispensingprocess.

15
en
Menu
F
Itisimportanttosetthewaterhard-
nesscorrectly,sothattheappliance
indicatesaccuratelywhenthe
descalingprogrammeshouldberun.
Youcancheckthewaterhardnessusing
theenclosedteststriporbyaskingyour
localwatersupplier.Ifawatersoftening
systemisinstalledinthehouse,please
selectthe setting.Softening system
■ Brieydiptheteststripinthewaterand
checktheresultafteroneminute.
Level Waterhardness
German(°dH) French(°fH)
1
2
3
4
1-7
8-14
15-21
22-30
1-13
14-25
26-38
39-54
Automatic shut-down
Settinghowlongtheapplianceshouldwait
afterthelastdrinkwaspreparedbeforeit
automaticallyswitchesitselfo.
Youcanspecifyvaluesfrom15minutesto
8hours.Thefactorysettingis30minutes.
■ tochoosethedesiredintervalUse I
andtouch toconfirmyourchoice.B
Coffee temperature
Specifyingthetemperatureforcoeedrinks
andhotwater.
You can choose normal,high,or .max
Thesettingappliestoalltypesofdrink
preparation.
■ tochoosethedesiredtemper-Use I
aturelevelandtouch toconfirmB
yourchoice.
Water filter
Specifyingwhetherawaterltershouldbe
activatedorwhethernolterisused.
You can choose or Activate new filter No
filter.
F Usingawaterfiltercanpreventthe
build-upoflimescale.
Waterltersareavailablefromretailoutlets
orfromcustomerservices(seethesection
“Accessories”).
F
Important:Beforeyoucanusea
newwaterfilteritwillneedtobe
rinsed.
■ Usethemeasuringspoon topressthe8
waterlterrmlyintothewatertank .5
■ Fillthewatertankwithwateruptothe
“ ”mark.max
■ Connectthemilktube tothemilk4c
system ndthesuctionpipe .4b a 4d
■ Inserttheendofthesuctionpipe into4d
thedripplate .17b
■ Touch and use A Itoselect
Water filter.
■ Touch and use B Itoselect
Activate new filter.
■ Emptythedriptrayandre-insert.
■ Touch Btoconrm.
Waterwillnowowthroughthelterto
rinseit.
■ Thenemptythedriptrayandre-insert.
Theapplianceisreadyforuseagain.
Rinsingthefiltersimultaneouslyactivates
thesettingfordisplayingthemessage
“Please change water filter”.
Whenthismessageappears,oratthe
latestaftertwomonths,thelterwillno
longerbeeective.Itneedstobereplaced
forreasonsofhygieneandtopreventa
build-upoflimescale(whichcoulddamage
theappliance).
Ifyoudonotintendtoinsertanewlter,
selectthesettingNo filterandtouchB
toconrm.

16
en Care and daily cleaning
F
Iftheappliancehasnotbeenused
foraprolongedperiod(forexample,
whileyouareonholiday),theexisting
filtershouldberinsedbeforethe
applianceisusedagain.Todothis,
simplydispenseacupofhotwater.
Languages
Settingupthelanguagetobeusedfor
displaytexts.
■ tochoosethedesiredUse I
languageandtouch toconfirmB
yourchoice.
Frost protection
Serviceprogrammetopreventfrost
damageduringtransportationandstorage.
Thisprogrammecompletelyemptiesthe
appliance.
F Theappliancemustbereadyforuse
andthewatertank mustbefilled.5
■ Touch Ctobeginrunningthe
programme.
■ Removethewatertank;theappliance
automaticallyemptiesallitspipesand
thenswitchesitselfo.
■ .Emptythewatertank5andthedriptray17
Key tones
Switchesonorothetonesthatyouhear
whenyoutouchthecontrolpanel.
■ Touch Btoconfirmyourchoice.
■ tochooseUse I Key tones ON
or Key tones OFFandtouch toB
confirmyourchoice.
Beverage statistics
(dependingonthetypeofappliance)
Showsthevolumeofdrinksdispensed
sincetheappliancewastakenintoservice.
■ Touch Ftoexitfromthedisplay.
Factory settings
Resetsyourownsettingstothecondition
whendelivered.
■ Touch Ctoclearallyourown
settings.
Care and daily cleaning
E
Risk of electric shock!
Beforecleaningtheappliance,unplug
itfromthemains. Neverimmerse
theapplianceinwater. Donotusea
steamcleaner.
■ Wipetheoutsideoftheappliancewitha
soft,dampcloth.
■ Cleanthecontrolpanelwithamicrobre
cloth.
■ Donotuseanycleaningagentscontaining
alcoholorspirits.
■ Donotuseabrasiveclothsorcleaning
agents.
■ Alwaysimmediatelyremoveanylimes-
cale,orresiduesofcoee,milk,cleaning
ordescalingsolution.Itispossiblefor
corrosiontoformunderneathsuch
deposits.
■ Newspongeclothsmaycontainsaltsthat
cancauserustlmstoformonstainless
steel,sosuchclothsshouldalwaysbe
thoroughlyrinsedbeforeuse.
■ Pullthedriptray andcoeegrounds17
container towardsthefrontand17c
removethem.Takeothepanel17a and
dripplate .Emptyandcleanthedrip17b
trayandcoeegroundscontainer.
■ Wipeouttheinsideoftheappliance
(holder,trays)andthedrawerforground
coee(thiscannotberemoved).
■ Removetheoat andcleanitwith17d
amoistcloth(dependsonthetypeof
appliance).

17
en
Care and daily cleaning
L
Do not in the putthefollowingparts
dishwasher:
Panelofdriptray ,cover ,brewing17a 4a
unit ,watertank andaromacover .14 5 10
M Thefollowingpartsmaybecleanedin
thedishwasher:
Driptray ,dripplate ,coeegrounds17 17b
container ,measuringspoon17c 8 and
theupperandlowerpartsofthemilk
system .4b
F Important 17:Thedriptray and
coffeegroundscontainer17c should
beemptiedandcleanedeverydayin
ordertopreventdeposits.
F Iftheapplianceiscoldwhen
switchedon,orifitisswitchedoff
afterdispensingcoffee,itrinsesauto-
matically.Thesystemistherefore
self-cleaning.
F Important:Ifatanytimetheappli-
anceisnotusedforalengthyperiod
(e.g.holiday),cleantheentireappli-
ancethoroughly,includingthemilk
system andbrewingunit .4b 14
Cleaning the milk system
A Besuretocleanthemilksystem4b
everytimeyoumakeadrinkinvolving
milk!
F Themilksystem isautomatically4b
cleanedwithashortjetofsteam
directlyafterpreparingamilkdrink.
Forparticularlythoroughcleaning,
themilksystem canbeautomat-4b
icallyrinsedwiththeprogramme
“ (seetheCleaning the milk system”
section“Serviceprogrammes–
Cleaningthemilksystem”).
Cleaning by hand
B
Risk of burns!
Themilksystem becomes4b
extremelyhot. Afteruse,alwayslet
themcooldownbeforeyoutouch
them.
Takethemilksystem aparttocleanit:4b
■ Pushthebeverageoutlet rightdown.4
■ Takeothecover towardsthefront4a
andpullothemilktube.
■ Removethemilksystem bypullingit4b
straightforward.
■ Takeaparttheupperandlowerpartsof
themilksystem .4b
■ Separatethemilktubefromthesuction
pipe.
■ Cleantheindividualpartswithwash-
ing-upliquidandasoftcloth.
■ Rinseallpartswithcleanwateranddry
them.

18
en Care and daily cleaning
F
Theupperandlowerpartsofthemilk
system ,themilktube andthe4b 4c
suctionpipe canalsobecleaned4d
inadishwasher.
■ Reassembletheindividualparts.
■ Placethemilksystem backinthe4b
appliancefromthefront,makingsureitis
straight.
■ Replacethecover .4a
Cleaning the brewing unit
(Figure G)
F SeealsotheQuickreferenceguidein
thestoragecompartment .16
Inadditiontotheautomaticcleaning
programme,thebrewingunit shouldbe14
removedregularlyforcleaning.
■ Usethemainswitch toswitchtheJ 1
appliancecompletelyo.
■ Openthedoor tothebrewingunit.13
■ Slidetheredlatch onthebrewing14a
unit allthewaytotheleft.14
■ Presstheejectlever rightdown.The15
brewingunitwillbereleased.
■ Takeholdofthebrewingunit bythe14
recessedgripsandcarefullyremoveit.
F Important:Cleanitwithoutusing
washing-upliquidanddonotputitin
thedishwasher.
■ Removethecover andthoroughly14b
cleanthebrewingunit14 under running
water.
■ Thoroughlycleanthestrainerofthe
brewingunitunderthewaterjet.
■ Thoroughlycleantheinsideoftheappli-
ancewithamoistcloth,removingany
coeeresidues.
■ Allowthebrewingunit andtheinside14
oftheappliancetodry.
■ Replacethecover onthebrewing14b
unitandthenpushthebrewingunit14
backintotheapplianceuntilitlatchesinto
place.
■ Presstheejectlever rightup.15
■ Slidetheredlatch allthewaytothe14a
rightandclosethedoor .13

19
en
Serviceprogrammes
Service programmes
F
SeealsotheQuickreferenceguidein
thestoragecompartment .16
Followingpriornotication,either
Descaling necessary or
Cleaning necessary or
calc’nClean necessary.
appears in display 3atcertainintervals.
Theunitshouldimmediatelybecleanedor
descaledusingtheappropriateprogramme.
ThetwoprocessesDescale and can Clean
optionallybecarriedouttogetherusing
the function(seethesectioncalc’nClean
“calc’nClean”).Failuretocarryoutthe
serviceprogrammeaccordingtotheinstruc-
tionsmaydamagetheappliance.
F Important:ifdescalingisnot
performedontheapplianceingood
time,thenthefollowingappears:
Descaling overdue. Appliance will soon
be locked --> press menu for 3 sec.
Immediatelyperformthedescaling
processinaccordancewiththe
instructions.Iftheapplianceis
locked,itcanonlybeoperatedagain
oncethedescalingprocesshasbeen
carriedout.
F Caution!
Foreachoftheserviceprogrammes,
usedescalingandcleaningagents
asdescribedintheinstructions.
Neverinterruptaserviceprogramme.
Donotswallowanycleaninguids!
Neverusevinegar,citricacidorany
vinegar-basedorcitricacid-based
agents.Neverplacedescalingtablets
orotherdescalingmaterialsinthe
coeedrawer12!
Beforestartingtheserviceprogram
(Descale,Cleanorcalc’nClean)remove
thebrewingunit,cleanitasinstructedand
replaceit.
Specially developed suitable descaling
and cleaning tablets are available from
retail outlets or from customer services
(see the section “Accessories”)�
Cleaning the milk system
Takesabout1minute.
Touch Atoopenthemenu.
■ tochooseUse I Cleaning and care
andtouch toconrmyourchoice.B
■ tochooseUse I Rinse the milk
systemandtouch toconrmyourB
choice.
■ Touch Ctobeginrunningthe
programme.
The display 3willindicatetheprogressof
theprogramme:
■ Placeanemptyglassunderthebeverage
outlet andstandtheendofthesuction4
pipe 4dinit.
■ Touch C.Themilksystemwill
nowcleanitselfautomatically.
■ Thenemptytheglassandcleanthe
suctionpipe .4d
Youshouldalsoregularlycleanthemilk
systemmanually(dishwasherorbyhand).
Descaling
Takesabout30minutes.
Thelineatthebottomofthedisplay
indicatestheprogressofthedescaling
process.
F Ifthereisawaterfilterinthewater
tank ,besuretoremoveitbefore5
startingtheserviceprogramme.
■ Touch Atoopenthemenu.
■ tochooseUse I Cleaning and care
andtouch toconrmyourchoice.B
■ tochoose andtouchUse I Descale
Btoconrmyourchoice.
■ Touch Ctobeginrunningthe
programme.
The display 3willindicatetheprogressof
theprogramme:
■ Emptyandre-insertthedriptray .17
F Thefollowingrequestappears:
Remove water filter if inserted ¢start.

20
en Serviceprogrammes
■ Removethelterandthentouch
Cagain.
■ Pourlukewarmwaterintotheemptywater
tank uptothe“ ”markandthen5 0�5 l
dissolveoneSiemensdescalingtablet
TZ80002init.
■ Touch C.
■ Placeacontainerwithacapacityof0.5litre
underthebeverageoutlet .4
■ Placetheendofthesuctionpipe4d in
thecontainer.
■ Touch C.
Thedescalingprogrammewillnowrunfor
about20minutes.
F Ifthereisnotenoughdescalingsolu-
tioninthewatertank ,youwillsee5
theprompt .Refill descaler ¢start
■ Addmoredescalingsolutionandthen
touch again.C
■ Rinsethewatertank andrellitwith5
freshwateruptothe“ ”mark.max
■ Ifyouusealter,replaceitnow.
■ Touch C.
Thedescalingprogrammewillnowrunfor
about1minuteandrinsetheappliance.
■ Emptyandre-insertthedriptray .17
F Important:Wipeovertheappliance
withasoftdampclothtoensurethat
youimmediatelyremoveanytraces
ofdescalingsolution.Itispossiblefor
corrosiontoformunderneathsuch
deposits.Newspongeclothsmay
containsaltsthatcancauserustfilms
toformonstainlesssteel,sosuch
clothsshouldalwaysbethoroughly
rinsedbeforeuse.Cleanthesuction
pipe 4dofthedrinksoutletparticu-
larlycarefully.
Theappliancehasnisheddescalingandis
readyforuseagain.
Cleaning
Takesabout9minutes.
Thelineatthebottomofthedisplay
indicatestheprogressofthedescaling
process.
■ Touch Atoopenthemenu.
■ tochooseUse I Cleaning and care
andtouch toconrmyourchoice.B
■ tochoose andtouchUse I Clean
Btoconrmyourchoice.
■ Touch Ctobeginrunningthe
programme.
The display 3willindicatetheprogressof
theprogramme:
■ Emptyandre-insertthedriptray .17
■ Openthegroundcoeedrawer .12
■ DroponeSiemenscleaningtabletinthe
drawer andcloseit.12
■ Touch C.
Thecleaningprogrammewillnowrunfor
about7minutes.
■ Emptyandre-insertthedriptray .17
Theappliancehasnishedcleaningandis
readyforuseagain.
calc‘nClean
Takesabout43minutes.
calc’nCleancombinesthefunctions
DescaleandClean.
Ifbothprogrammesareduetobecarried
outclosetogetherthefullyautomaticcoee
machinewillautomaticallysuggestthis
serviceprogramme.
Thelineatthebottomofthedisplayindi-
catestheprogressofthedescalingprocess.
F Ifthereisawaterfilterinthewater
tank ,besuretoremoveitbefore5
startingtheserviceprogramme.
■ Touch Atoopenthemenu.
■ tochooseUse I Cleaning and care
andtouch toconrmyourchoice.B
■ tochooseUse I calc’nClean and
touch toconrmyourchoice.B
■ Touch Ctobeginrunningthe
programme.
The display 3willindicatetheprogressof
theprogramme:

21
en
Tips on energy saving
■ Emptyandre-insertthedriptray .17
■ Openthegroundcoeedrawer .12
■ DroponeSiemenscleaningtabletinthe
drawer andcloseit.12
■ Touch C.
F Thefollowingrequestappears:
Remove water filter if inserted ¢start.
■ Removethelterandthentouch
Cagain.
■ Pourlukewarmwaterintotheemptywater
tank uptothe“ ”markandthen5 0�5 l
dissolveoneSiemensdescalingtablet
TZ80002init.
■ Touch C.
■ Placeacontainerwithacapacityof1litre
underthebeverageoutlet4.
■ Placetheendofthesuctionpipe4d in
thecontainer.
■ Touch C.
Thedescalingprogrammewillnowrunfor
about28minutes.
F Ifthereisnotenoughdescalingsolu-
tioninthewatertank ,youwillsee5
theprompt .Refill descaler ¢start
■ Addmoredescalingsolutionandthen
touch again.C
■ Rinsethewatertank5andrellitwith
freshwateruptothe“ ”mark.max
■ Ifyouusealter,replaceitnow.
■ Touch C.
Thedescalingprogrammewillnowrun
foraboutonemoreminute,andthenthe
cleaningprogrammewillrunforabout
7minutesandrinsetheappliance.
■ Emptyandre-insertthedriptray .17
F Important:Wipeovertheappliance
withasoftdampclothtoensurethat
youimmediatelyremoveanytraces
ofdescalingsolution.Itispossiblefor
corrosiontoformunderneathsuch
deposits.Newspongeclothsmay
containsaltsthatcancauserustfilms
toformonstainlesssteel,sosuch
clothsshouldalwaysbethoroughly
rinsedbeforeuse.Cleanthesuction
pipe 4dofthedrinksoutletparticu-
larlycarefully.
Theappliancehasnisheddescalingandis
readyforuseagain.
F
Important:Ifanyoftheservice
programmesiseverinterrupted,for
instancebyapowerfailure,please
proceedasfollows:
■ Rinsethewatertank andrellitwith5
freshwateruptothe“ ”mark.max
■ Touch C.
Theappliancewillberinsedforapprox.
2minutesforsafetyreasons.
■ Emptyandre-insertthedriptray .17
Theabortedserviceprogrammemust
berestarted.
Tips on energy saving
■ Whenthefullyautomaticcoeemachine
isnotinuse,usethemainsswitchJ on 1
thefrontoftheappliancetoswitchito.
■ Inthemenu,settheAutomatic shut-down
periodto15minutes.
■ Ifpossible,donotinterruptthedispensing
ofcoeeormilkfroth.Stoppingaprocess
prematurelyresultsinhigherenergy
consumptionandthedriptrayllsup
morequickly.
■ Descaletheapplianceregularlytoavoida
build-upoflimescale.Limescaleresidues
causehigherenergyconsumption.
Frost protection
F Caution!
Topreventfrostdamageduringtrans-
portationandstorage,completely
emptytheappliancebeforehand.
Seethesection“Menu–Frost protection”.

23
en
Simpletroubleshooting
Simple troubleshooting
Problem Cause Solution
Coeeormilkfrothquality
variesconsiderably.
Build-upoflimescaleinthe
appliance.
Descaletheapplianceas
describedintheinstructions.
Nohotwaterdispensed. Themilksystemorits
holderisnotclean.
Cleanthemilksystemor
itsholder(seethesection
“Cleaningthemilksystem”).
Toolittlemilkfroth,or
noneatall,orthemilk
systemisnottakingin
anymilk.
Themilksystemorits
holderisnotclean.
Cleanthemilksystemor
itsholder(seethesection
“Cleaningthemilksystem”).
Milknotsuitablefor
foaming.
Donotusemilkthathasalready
beenboiled.Usecoldmilkwitha
fatcontentofatleast1.5%.
Themilksystemisincor-
rectlyassembled.
Moistentheupperandlower
sectionsandtthemtogether.
Build-upoflimescaleinthe
appliance.
Descaletheapplianceas
describedintheinstructions.
Theselectedper-cup
quantityisnotreached.
Coeedispensingslows
toatrickleorstops
completely.
Coeeisbeinggroundtoo
nely,orthepre-ground
coeeistoone.
Adjustthegrindingunittoa
coarsersetting.Useacoarser
groundcoee.
Heavybuild-upoflimes-
caleintheappliance.
Descaletheapplianceas
describedintheinstructions.
Coeehasno“crema”. Unsuitabletypeofcoee. Useatypeofcoeewitha
higherproportionofrobusta
beans.
Thebeansarenolonger
fresh.
Usefreshbeans.
Thegrindingsettingisnot
suitableforthebeans.
Adjustthegrindingunittoaner
setting.
Coeeistoo“acidic”. Thegrindingsettingistoo
coarseorthepre-ground
coeeistoocoarse.
Adjustthegrindingunittoaner
settingorusenerpre-ground
coee.
Unsuitabletypeofcoee. Useadarkerroast.
Coeeistoo“bitter”. Thegrindingsettingis
too neorthepre-ground
coeeis too ne.
Adjustthegrindingunittoa
coarsersettingorusecoarser
pre-groundcoee.
Unsuitabletypeofcoee. Changethetypeofcoee.
If you are unable to solve the problem, always call the hotline!
You will nd the telephone numbers at the back of these instructions.

24
en Simpletroubleshooting
Problem Cause Solution
Thecoeetastes“burnt”. Thebrewingtemperatureis
toohigh
Reducethetemperature,
seethesection
“Menu– ”.Coffee temperature
Thegrindingsettingis
tooneorthepre-ground
coeeistoone.
Adjustthegrindingunittoa
coarsersettingorusecoarser
pre-groundcoee.
Unsuitabletypeofcoee. Changethetypeofcoee.
Thewaterlterdoesnot
stayinpositioninthe
watertank.
Thewaterlterisnot
mountedcorrectly.
Firmlypressthewaterlter
straightdownintothetank
connection.
Thecoeegroundsare
notcompactandaretoo
wet.
Thegrindingsettingistoo
neortoocoarse,ornot
enoughgroundcoeehas
beenused.
Adjustthegrindingunittoa
coarserornersetting,oruse
2levelmeasuringspoonsof
groundcoee.
Waterdrippedontothe
innerooroftheappli-
ancewhenthedriptray
wasremoved.
Driptraywasremovedtoo
soon.
Waitafewsecondsafterthe
lastdrinkwasdispensedbefore
removingthedriptray.
Displayshows
Please refill bean container
althoughthecontaineris
alreadyfull,orthegrinder
isnotgrindinganybeans.
Beansarenotfallinginto
thegrindingunit(beanstoo
oily).
Gentlytapthebeancontainer.
Possiblychangethetypeof
coeeused.Whenthebean
containerisempty,wipeitwitha
drycloth.
Displayshows
Please empty drip tray
despitethedriptraybeing
empty.
Emptyingisnotdetected
whentheapplianceis
switchedo.
Whentheapplianceisswitched
on,removeandre-insertthe
driptray.
Thedriptrayissoiled. Cleanthedriptraythoroughly.
Displayshows
Refill with still water or
change filter
Watertankwrongly
inserted.
Insertwatertankcorrectly.
Carbonatedwaterinthe
watertank.
Fillthewatertankwithfreshtap
water.
Floatisstuckinthewater
tank.
Removethetankandclean
thoroughly.
Newwaterlterdidnot
rinseaccordingtothe
instructions.
Rinsethewaterlteraccording
toinstructionsandthenswitch
on.
Airinthewaterlter. Dipthewaterlterintowater
untilnomoreairbubbles
escape,replacethelter.
Waterlterisold. Insertanewwaterlter.
If you are unable to solve the problem, always call the hotline!
You will nd the telephone numbers at the back of these instructions.

25
en
Technicalspecications
Problem Cause Solution
Displayshows
Please clean brewing unit,
then replace
Brewingunitissoiled. Cleanthebrewingunit.
Toomuchpre-ground
coeeinthebrewingunit.
Cleanthebrewingunit.Placeno
morethantwolevelmeasuring
spoonsofgroundcoeeinthe
drawer.
Themechanismofthe
brewingunitissti.
Cleanthebrewingunit(seethe
section“Dailymaintenanceand
cleaning”).
Displayshows
Please restart appliance
Applianceistoowarm. Leavetheappliancetocool
down.
Brewingunitissoiled. Cleanthebrewingunit.
Displayshows
Descaling insufficient.
Repeat process
Incorrectorinsucient
descalerorexcessivescale
existingonappliance.
Performdescalingprogramme
again.
Displayshows
Please let appliance
cool down
Applianceistoohot. Switchoappliancefor
30minutes.
Displayshows
Error
Please contact hotline
Theappliancehasafault. Pleasecontactthehotline.
If you are unable to solve the problem, always call the hotline!
You will nd the telephone numbers at the back of these instructions.
Technical specications
Powerconnection(voltage–frequency) 220-240V–50/60Hz
Powerrating 1500W
Maximumstaticpumppressure 15bar(TE651..,TE653..,TE654..)
19bar(TE655..,TE657..)
Maximumwatertankcapacity(withoutlter) 1.7l
Maximumcapacityofthecoeebeancontainer ~300g
Lengthofpowercable 100cm
Dimensions(HxBxD) 385x301x458mm
Weight,empty 10-12kg
Typeofgrindingunit Ceramic

26
fr
Sommaire
Chèreamatricedecafé,
cheramateurdecafé,
nousvousfélicitonspourl’achatdecette
machineàespressoautomatiqueSiemens.
Cemoded’emploidécritdiérentsmodèles
demachinesquisedistinguentparleur
niveaud’équipement.
Veuillezégalementtenircomptedela
noticesuccinctejointe.Unlogement16 a
étéprévuspécialementpourlaconserverà
portéedemaindanslamachine.
Comment utiliser ce mode d’emploi :
Vouspouvezrabattrelapagedecouverture
decemoded’emploiversl’avant.Vousy
trouverezlesillustrationsdelamachine
aveclesnumérosauxquelsilestfait
constammentréférencedanscemode
d’emploi.
Exemple:unitédepercolation14
Lessymbolesetlesmessagesachés
surl’écransontégalementreprésentésde
manièredistinctedanscemoded’emploi.
Vouspourrezainsirepérerplusfacilement
lesmessagesetlessymbolesachésou
apposéssurl’appareil.
Exempledemessageachéàl’écran:
Expresso
Exempled’élémentdecommande:
C
Conformité d’utilisation 27 �������������������������
Consignes de sécurité importantes������27
Contenu de l’emballage 29 �������������������������
Vue d’ensemble 29 ��������������������������������������
Vue d’ensemble –
Éléments de commande 30 ������������������������
Écran��������������������������������������������������������31
Mise en service 32 ���������������������������������������
Réglages personnels « Favori » ������������33
Sécurité-enfants �������������������������������������33
Préparation des boissons����������������������33
Préparationdeboissonsaucafé..............35
Préparationdeboissonslactées..............35
Boissonsspéciales...................................36
Préparationavecducafémoulu...............38
Réglagedudegrédemouture..................38
Menu 39 ��������������������������������������������������������
Entretien et nettoyage quotidiens 42 ���������
Nettoyagedumousseurdelait.................42
Nettoyagedel’unitédepercolation
(gureG)..................................................43
Programmes de maintenance 44 ���������������
Nettoyagedumousseurdelait.................45
Détartrage.................................................45
Nettoyage.................................................46
Conseils pour économiser l’énergie�����47
Protection contre le gel��������������������������47
Rangement des accessoires 47 �����������������
Accessoires 48 ��������������������������������������������
Mise au rebut 48 ������������������������������������������
Garantie 48 ���������������������������������������������������
Données techniques 48 ������������������������������

27
fr
Conformitéd’utilisation
Conformité dʼutilisation
Cetappareilestdestinéexclusi-
vementàuneutilisationdomes-
tiqueetnonprofessionnelle.
Nʼutiliserlʼappareilquʼàlʼintérieur
depièces,àtempérature
ambiante,etjusquʼà2000m
au-dessusduniveaudelamer.
Consignes de sécurité
importantes
Veuillezlirelanoticedʼutilisa-
tionattentivement,respecter
lesinstructionsetlaconserver
soigneusement!Silʼappa-
reilchangedepropriétaire,
remettez-luicettenotice.
Lesenfantsde8ansetplus,
lespersonnessourantdʼun
handicapphysique,sensoriel
oumentalounedétenantpas
lʼexpérienceet/oulesconnais-
sancesnécessairespourront
utilisercetappareilàcondition
delefairesoussurveillance,
ouquesonutilisationsûreleur
aitétéenseignéeetquʼilsaient
comprislesdangersquien
émanent.Maintenirlesenfants
demoinsde8ansàlʼécartde
lʼappareiletducordondʼalimen-
tationsecteuretnepasleur
permettredʼutiliserlʼappareil.
Nepaslaisserlesenfantsjouer
aveclʼappareil.Lenettoyageet
lʼentretienincombantàlʼutilisa-
teurnedoiventpasêtreeec-
tuéspardesenfantssaufsʼils
sontâgésde8ansetpluset
sʼilsagissentsoussurveillance.
Conformité d’utilisation Consignes de sécurité
importantes

28
fr Consignesdesécuritéimportantes
WAvertissement
Risque dʼélectrocution !
■ Lʼappareildoitêtrebranché
uniquementsurunréseauà
courantalternatifparlʼinter-
médiairedʼuneprisesecteur
installéedemanièreconforme
etdisposantdʼuneconnexion
àlaterre.Assurez-vousque
lesystèmeàconducteurde
protectiondelʼinstallation
électriquedevotremaisonest
conforme.
■ Branchezetutilisezlʼappareil
uniquementenconformité
aveclesindicationsgurant
surlaplaquesignalétique.
■ Nʼutilisezlʼappareilquesi
soncordondʼalimentation
etlʼappareillui-mêmene
présententaucundommage.
■ Andʼécartertoutdanger,
seulnotreserviceaprès-
venteesthabilitéàréparer
lʼappareil,commepar
exempleprocéderau
remplacementdʼuncordon
dʼalimentationendommagé.
■ Neplongezjamaislʼappareil
oulecordondʼalimentation
danslʼeau.
■ Encasdedéfaut,débran-
chezimmédiatementlache
secteuroucoupezlatension
duréseau.
WAvertissement
Danger par magnétisme !
Lʼappareilrenfermedesaimants
permanentssusceptiblesdʼagir
surdesimplantsélectroniques,
parexempledesstimulateurs
cardiaquesoudespompesà
insuline.Lespersonnesportant
desimplantsélectroniquessont
priéesderesteràaumoins
10cmdelʼappareiletdespièces
suivantes,lorsdeleurretrait:
réservoiràlait,systèmeàlait,
réservoirdʼeauetunitéde
percolation.
WAvertissement
Risque dʼasphyxie !
■ Nelaissezjamaislesenfants
joueraveclesemballages.
■ Rangezlespetitespiècesde
manièresûre,ellespourraient
êtreavalées.
WAvertissement
Risque de blessures !
■ Nʼintroduisezjamaislesdoigts
danslemoulin.
■ Lʼutilisationinappropriéede
lʼappareilpeutentraînerdes
blessures.
WAvertissement
Risque de brûlure !
■ Lesystèmeàlaitesttrès
chaud.Aprèsutilisation,
laissez-lerefroidiravantdele
toucher.
■ Aprèslʼutilisation,lessurfaces
delʼélémentchauantoude
laplaquechauantepeuvent
resterchaudespendantune
certainedurée.

29
fr
Contenudel’emballage
1 InterrupteurprincipalJ
2 Bandeaudecommande
(voirpagesuivante)
3 Écran
4 Bused’écoulement(café,lait,
eauchaude),réglableenhauteur
a) Couvercle
b) Mousseurdelait/bused’écoulement
ducafé(endeuxparties)
c) Tuyauàlait
d) Tubed’aspiration
5 Réservoird’eauamovible
6 Couvercleduréservoird’eau
7 Casederangementdelacuillère-dose
8 Cuillère-dose(outildemiseenplacedu
ltreàeau)
9 Réservoirpourcaféengrains
10 Couverclepréservateurd’arôme
11 Sélecteurderéglagedenessedela
mouture
12 Tiroiràcafé
(caféenpoudre/pastilledenettoyage)
13 Ported’accèsàl’unitédepercolation
14 Unitédepercolation
a) Verrouillage
b) Couvercle
15 Levierd’éjection
16 Compartimentderangementdela
noticesuccincte
17 Baccollecteur
a) Panneau
b) Égouttoir(endeuxparties)
c) Tiroiràmarcdecafé
d) Flotteur
18 Rangementducordon
19 Plaquesignalétique(n°E.;FD)
*Lemoded’emploidécritdiérents
modèles.Lespositionsmarquéesd’un*
sontdisponiblesuniquementsurcertains
modèlesd’appareils.
Vue d’ensemble
(Images et surlespagesdépliantes)B, C, D, E, F G
Contenu de l’emballage
(Image surlespagesdépliantes) A
a Machineàespressoautomatique
b Moded’emploi
c Noticesuccincte
d Tuyauàlaitettubed’aspiration
e Bandelettepourdéterminerla
duretédel’eau
f Cuillère-dose
g Filtreeau*
h Réservoiràlaitaveccouvercle
«freshLock»*
i Pastillesdedétartrage*

30
fr Vued’ensemble–Élémentsdecommande
Vue d’ensemble – Éléments de commande
(Image surlespagesdépliantes) B
F Lessymbolessuivantssontvisiblesouéclairésenfonctiondel’étatde
fonctionnementdel’appareil:
Expresso Latte Macchiato
Expresso macch. Café au lait
Café Mousse lait
Cappuccino Boissonsspéciales(voirchapitre
«Boissonsspéciales»).
start
stop C–ToucheStart/Stop I–Sedéplacerverslebas
danslemenu
F – Revenir en arrière menu A–Ouvrirlemenu
G–Préparerdeuxtassesen
mêmetemps ok B–Valider/mémoriser
H–Réglerl’intensitéducafé
ml
D–Sélectionnerlaquantité
deboisson
R–Appelerunfavori
(appuyerbrièvement)etsécurité
enfants(appuyerpendantamoins
3secondes).

31
fr
Écran
Interrupteur principal J
L’interrupteurprincipal vouspermetd’al-J
lumeretd’éteindrel’appareil.Lamachine
eectueautomatiquementunrinçage
lorsqu’elleestmiseenmarcheetarrêtée.
Lamachinen’eectuepasderinçagedans
lescassuivants:
■ elleestencorechaudeaumomentdela
miseenmarche.
■ aucunetassedecafén’aétéservieavant
d’éteindrelamachine.
Lamachineestprêteàfonctionnerlorsque
l’écranetlessymbolessontéclairéssurle
bandeaudecommande.
Bandeau de commande (champ tactile)
Ilsutd’appuyersurlessymbolesetles
inscriptionspournavigueraisémentdansle
bandeaudecommande.
L’appareilémetunsignalsonore.
Lesignalsonorepeutêtreactivéoudésac-
tivé(voirauchapitre«Menu–Bip sonore »).
Sélection de la boisson
Poursélectionnerlaboissondesonchoix,
appuyersurlesymbolecorrespondant(voir
auchapitre«Préparationdesboissons»).
Touche Start / Stop
AppuyersurlatoucheC pour
lancerlapréparationd’uneboissonou
eectuerunprogrammedemaintenance.
AppuyerànouveausurlatoucheC
pourstopperladistributionencours.
Menu
Appuyersurlatouche pouraccéderA
aumenu,lessymbolesdenavigationsont
alorsactivésetéclairés.Appuyersurles
touches , etI B F pour naviguer
danslemenu,acherdesinformations
oueectuerdesréglages(voirauchapitre
«Menu»).
Options de boisson
Appuyer sur Hpourréglerl’intensité
ducaféousur pourréglerlaquantitéD
d’eau.Appuyersur pourpréparerdeuxG
tassesàlafoisaprèsavoirlancélaprépa-
rationaveclatoucheC (voir au
chapitre«Préparationdesboissons»).
« Favori » et sécurité enfants
AppuyerbrièvementsurlatoucheR pour
appelerlesboissonspersonnalisés(voir
chapitre«RéglagespersonnelsFavori»).
Appuyersurlatouche pendantauR
moins3secondespouractiveroudésac-
tiverlasécurité-enfants(voirauchapitre
«Sécurité-enfants»).
Écran
L’écranachelesboissonsetlesréglages
sélectionnésainsiquedesmessages
concernantl’étatdefonctionnement.
Expresso
normal moyen
Remplissez le réservoir d'eau
Lemessagedisparaîtunefoisl’opération
eectuée.

32
fr Mise en service
Mise en service
Généralités
Neverser,danslesconteneurscorrespon-
dants,quedel’eaupure, ,sansgazfroide
carboniqueetuniquementducaféengrains
torréé.Nepasemployerdesgrainsde
caféavecglaçage,desgrainscaramélisés
ouenrobésd’unesubstancesucréequel-
conque;ilsobturentl’unitédepercolation.
Cettemachinepermetderéglerla
duretédel’eau.Enusine,laduretéde
l’eauestrégléesur4 Testerladuretéde.
l’eauutiliséeàl’aidedelabandelettejointe.
Siladuretédel’eauestdiérentedela
valeur4,programmerlamachineenconsé-
quenceaprèslamiseenservice(voirau
chapitre«Menu– »).Dureté de l’eau
Mise en service de l’appareil
■ Retirerleslmsdeprotection.
■ Placerlamachineàespressoauto-
matiquesurunesurfaceparfaitement
horizontale,susammentsolidepour
supportersonpoidsetétancheàl’eau.
■ Nepasobturerlesfentesd’aérationde
l’appareil.
F Important :utiliserl’appareilunique-
mentdansunepièceàl’abridugel.
Sil’appareilaététransportéouentre-
poséàdestempératuresendessous
de0°C,attendreaumoins3heures
avantdelemettreenservice.
■ Brancherlache(rangementdu
cordon 18)ausecteur.Pourajusterla
longueurducordon,ilsutdetirerle
cordonoudelerepousseràl’intérieur.
Pourcefaire,placerledosdel’appareil
p.ex.aubordd’unetableettirerlecordon
vers le ou le pousser vers le bas haut.
■ Releverlecouvercleduréservoird’eau .6
■ Retirerleréservoird’eau ,lerinceretle5
rempliravecdel’eaufraîcheetfroide.Ne
pasdépasserlerepère«max ».
■ Positionnerleréservoird’eau bienàla5
verticaleetl’enfoncerentièrement.
■ Refermerlecouvercleduréservoir
d’eau .6
■ Remplirleréservoirpourcaféengrains9
degrainsdecafé.
■ Allumerl’appareilenappuyantsurl’inter-
rupteurprincipal1 J.
Lebandeaudecommandeetl’écrans’allu-
ment.L’écranachelalanguepardéfaut
danslaquellelesmessagesserontachés.
Vousavezlechoixentreplusieurslangues.
■ Appuyersurlatouche jusqu’àceI
quelalanguesouhaitéeapparaisseà
l’écran.
Deutsch
English
Français
■ pourconrmerlaAppuyer sur C
sélection.
Lalanguesélectionnéeestainsimémorisée.
Lelogodelamarques’allumeàl’écran .3
Lamachinechaueeteectueunrinçage,
unepetitequantitéd’eaus’écouledela
buse .4
Lamachineestprêteàfonctionnerlorsque
l’écranetlessymbolessontéclairéssurle
bandeaudecommande.
F Lamachineàespressoautomatique
estprogramméeenusineavec
desréglagesstandarddefaçonà
fonctionnerdemanièreoptimale.
Lamachines’éteintautomatiquement
aprèsunlapsdetempsréglable
(voirauchapitre«Menu–Arrêt
automatique »).

33
fr
Réglagespersonnels«Favori»
F
Lorsdelapremièreutilisationdela
machineouaprèsunprogramme
demaintenanceouencoreaprès
unelonguepérioded’inutilisation,
lapremièreboissonservien’apas
encoreatteintsonpleinarôme.Ilne
fautdoncpaslaboire.
F Unefoislamiseenservicedela
machineàespressoautomatique
effectuée,laprésenced’unemousse
denseetfinesurlecafén’est
obtenuequ’aprèsavoirpréparé
plusieurstasses.
F Laformationdegouttesd’eausurles
fentesd’aérationestnormaleencas
d’utilisationprolongée.
Réglages personnels
« Favori »
Lenombredesfavorispossiblesdépenddu
modèled’appareil.Souslepointdemenu
« Favori »,ilestpossibledemémoriseret
modierdesboissonsindividuelles(person-
nalisées)(voirchapitre«Menu,Favori»).
Appeler une boisson individuelle
■ Appuyerbrièvementsur .R
■ Sélectionnerunfavoridontlesréglages
ontdéjàétémémorisés.
■Appuyer sur pour lancer la C
préparationdelaboisson.
Sécurité-enfants
And’éviterquelesenfantssebrûlentou
s’ébouillantent,ilestpossibledeverrouiller
lamachine.
■ Appuyersurlatouche pendantauR
moins3secondes.L’écran ache3
uneclé.Lasécurité-enfantsestactivée.
Lebandeaudecommandeestdèslors
verrouillé.
■ Appuyersurlatouche pendantauR
moins3secondes.Laclédisparaîtde
l’écran .Lasécurité-enfantsestdésac-3
tivée.Lebandeaudecommandedela
machineestdenouveauactif.
Préparation des boissons
Cettemachineàespressoautomatique
moudducaféfraispourchaqueprépara-
tion.Pourassurerauxharicotsunequalité
optimale,lesconserveraufraisdansun
récipientfermé.
F Important : remplirchaquejour
leréservoird’eau avecdel’eau5
fraîcheetfroide.Leréservoird’eau5
doittoujourscontenirsuffisamment
d’eaupourpermettrelefonctionne-
mentdelamachine.
F Préchaufferla(les)tasse(s),en
particulierlespetitestassesépaisses
pourexpresso,avecdel’eauchaude
parexemple.
F Aveccertainsréglages,lecafé
estpréparéendeuxétapes(voir
«aromaDoubleShot»).Dansce
cas,attendrequel’opérationsoit
terminée.
Lamachinepermetdepréparerdiérentes
boissonssursimplepressiond’unetouche.

35
fr
Préparationdesboissons
Deux tasses à la fois
Préparerdeuxtassesenmêmetemps
parsimplepressionsurG après avoir
sélectionnélecaféoulaboissonlactée
souhaités(uniquementducafésur
certainesmachines),puisappuyersur
C pourlancerlapréparation.Le
réglagesélectionnés’ache.
■ Appuyersurlesymbolecorrespondant
poursélectionnerlaboissonsouhaitée.
■ .Appuyer sur G
■ Placerdeuxtassespréchauéesà
gaucheetàdroitesouslabused’écoule-
ment .4
■Appuyer sur pour lancer la C
préparationdelaboisson.
Lamachineeectuelapercolationducafé
quis’écouleensuitedanslesdeuxtasses.
F Laboissonestpréparéeendeux
étapes(deuxcyclesdemouture).
Attendrequel’opérationsoitentière-
mentterminée.
F Selon le modèle de machine :
lafonction«Deuxtassesàlafois»
n’estdisponiblequepourlescaféset
nonpourlesboissonslactées.
Préparation de boissons au café
Lamachinedoitêtreprêteàfonctionner.
■ Placerlatassepréchauéesouslabuse
d’écoulement .4
■ Sélectionnerletypedecafésouhaité,
Expresso ou Café,enappuyantsurle
symbolecorrespondant.
L’écranachelenomdelaboissonchoisie,
ainsiquel’intensitésélectionnéeetlataille
delatassecorrespondantàcetteboisson.
Café
normal moyen
F
Latailledelatasseetl’intensité
ducafépeuventêtremodifiées
enappuyantsur et .SileD H
réglagecomp. poudreaétésélec-
tionné,procédercommedécrit
auchapitre«Préparationavecdu
cafémoulu».
Par exemple :
■ jusqu’àcequel’écranAppuyer sur D
acheleréglagegrand.
■ jusqu’àcequel’écranAppuyer sur H
acheleréglagedoux.
■Appuyer sur pour lancer la C
préparationdelaboisson.
Lamachineeectuelapercolationetlecafé
s’écouleensuitedanslatasse.
F UnesimplepressionsurC
permetd’arrêterladistribution
encours.
Préparation de boissons lactées
Cettemachineàespressoautomatique
possèdeunmousseurdelaitintégré.
Celui-civouspermetdepréparerdes
boissonslactées,delamoussedelait
ainsiquedulaitchaud.
B Risque de brûlures !
Lespartiessupérieureetinférieure
dumousseurdelait sont4b
brûlantes.Aprèsutilisation,laisser
refroidiravantdetoucher.
F Attention !
Unefoissecs,lesrésidusdelait
sontdifficilesànettoyer,ilestdonc
impératifdenettoyerlemousseur
delaitaprèschaqueutilisation(voir
auchapitre«Nettoyagedumousseur
delait»).
F Lorsdelapréparationdelaitchaud,
lamachinepeutémettreunsiffle-
ment.Cebruitestdûaufonctionne-
mentdumousseurdelait .4b
F UnesimplepressionsurC
permetd’arrêterladistribution
encours.

36
fr Préparationdesboissons
Lamachinedoitêtreprêteàfonctionner.
Letuyauàlaitetletubed’aspirationdoivent
êtreraccordés.
■ Introduireletubed’aspiration4d dans le
réservoiràlait.
■ Placerlatassepréchauéeouleverre
souslabused’écoulement.
Préparer une boisson lactée
■ SélectionnerlaboissonExpresso macch.,
Café au lait,Latte Macchiato ou
Cappuccino enappuyantsurlesymbole
correspondant.
L’écranachelaboissonchoisie,ainsi
quel’intensitésélectionnéeetlatailledela
tassecorrespondantàlaboisson.
F Latailledelatasseetl’intensité
ducafépeuventêtremodifiéesen
appuyantsur et .SileréglageD H
comp. poudreaétésélectionné,
procédercommedécritauchapitre
«Préparationavecducafémoulu».
■Appuyer sur pour lancer la C
préparationdelaboisson.
Lamachineversetoutd’abordlelaitoula
moussedelaitdanslatasseouleverre.
Puiselleeectuelapercolationetlecafé
s’écouleensuitedelabuse.
Ladistributiondelaitoudecafépeutêtre
interrompueàtoutmomentenappuyant
unefoissur ;appuyerdeuxfoisC
sur Cpourarrêterlapréparationde
laboissoncomplète.
Mousse lait
■ Sélectionner enappuyantsurMousse lait
lesymbolecorrespondant.
■ pourréglerlatailledeAppuyer sur D
latasse.
■Appuyer sur pour lancer la C
préparationdelaboisson.
Lamoussedelaits’écouledanslatasse.
Boissons spéciales
Diérentesboissonspeuventêtresélection-
néessuccessivementparpressionmultiple
surlatouche«Boissonsspéciales».
Lespositionsmarquéesd’un*sontdispo-
niblesuniquementsurcertainsmodèles
d’appareils.
Eau chaude
Avantdefairecoulerdel’eauchaude,le
mousseurdelaitdoitavoiréténettoyé
etletuyauàlaitretiré(voirauchapitre
«Nettoyagedumousseurdelait»).Sile
mousseurdelaitn’estpaspropre,depetits
résidusdelaitrisquentdesemélangerà
l’eau.
B Risque de brûlures !
Lemousseurdelait estbrûlant.4b
Aprèsutilisationdelamachine,la
laisserrefroidiravantdelatoucher.
Lamachinedoitêtreprêteàfonctionner.
■ Placerlatasseouleverresouslabuse
d’écoulement .4
■ Appuyeràplusieursreprisessurle
symbole«Boissonsspéciales»jusqu’à
cequeEau chaudeapparaissesurl’écran.
■ pourréglerlatailledeAppuyer sur D
latasse.
■Appuyer sur pour lancer la C
préparationdelaboisson.
F LorsquelemessageVeuillez retirer le
tuyau à laitapparaît,procédercomme
suit:
■ Retirerletuyauàlait etappuyerune4c
nouvellefoissur .C
L’eauchaudes’écouledelabuse .4
F UnesimplepressionsurC
permetd’arrêterladistributionen
cours.

37
fr
Préparationdesboissons
Lait chaud *
Mercidelired’abordlechapitre«Prépara-
tiondeboissonslactées»etenrespecter
lesconsignes.
Ensuite:
■ appuyeràplusieursreprisessurle
symbole«Boissonsspéciales»jusqu’à
cequeLait chaudapparaissesurl’écran.
■ pourréglerlatailledeAppuyer sur D
latasse.
■Appuyer sur pour lancer la C
préparationdelaboisson.
Dulaitchauds’écouledelabuse .4
F UnesimplepressionsurC
permetd’arrêterladistributionen
cours.
Americano *
■ Placerlatassepréchauéesouslabuse
d’écoulement .4
■ Appuyeràplusieursreprisessurle
symbole«Boissonsspéciales»jusqu’à
cequ’ apparaissesurl’écran.Americano
■ Eectuerlesréglages,commelataille
delatasseetl’intensité,commedécrit
auchapitre«Préparationdeboissonsau
café».
■Appuyer sur pour lancer la C
préparationdelaboisson.
Lamachineeectuelapercolationetlecafé
s’écouleensuitedanslatasse.
F UnesimplepressionsurC
permetd’arrêterladistributionen
cours.
Flat white *, Kleiner Brauner * ou
Cafe cortado *
Mercidelired’abordlechapitre«Prépara-
tiondeboissonslactées»etenrespecter
lesconsignes.
Ensuite:
■ placerlatasseouleverresouslabuse
d’écoulement .4
■ Appuyeràplusieursreprisessurle
symbole«Boissonsspéciales»jusqu’à
ceque ,Flat white Kleiner Brauner ou Cafe
cortadoapparaissesurl’écran.
■ Eectuerlesréglages,commelataille
delatasseetl’intensité,commedécrit
auchapitre«Préparationdeboissons
aucafé».
■Appuyer sur pour lancer la C
préparationdelaboisson.
Lamachineversetoutd’abordlelaitdansla
tasseouleverre.Puiselleeectuelaperco-
lationetlecafés’écouleensuitedelabuse.
F Ladistributiondelaitoudecafépeut
êtreinterrompueprématurémenten
appuyantunefoissur .C
AppuyerdeuxfoissurC
pourarrêterlapréparationdela
boissoncomplète.
Fonction Verseuse *
■ Placeruneverseusesouslabused’écou-
lement .4
■ Appuyeràplusieursreprisessurle
symbole«Boissonsspéciales»jusqu’à
cequeFonction Verseuse apparaisse sur
l’écran.
■ Réglerl’intensitéducaféenappuyantsur
H.
■ Réglerlaquantité(4ou6tasses)en
appuyantsur .D
■Appuyer sur pour lancer la C
préparationdelaboisson.
Lamachineeectuelapercolationetlecafé
s’écouleensuitedanslaverseuse.
F UnesimplepressionsurC
permetd’arrêterladistributionen
cours.

38
fr Préparationdesboissons
Préparation avec du café moulu
Cettemachineàespressoautomatique
fonctionneégalementavecducafémoulu
(pasdecafésoluble).
F Pourlapréparationavecducafé
moulu,leréglagedel’intensitédu
café,lafonction«Deuxtassesàla
fois»etlafonction«aromaDouble
Shot»nesontpasdisponibles.
Lamachinedoitêtreprêteàfonctionner.
■ Placerunetassepréchauéesousla
bused’écoulement .4
■ Sélectionneruneboissonaucaféou
uneboissonlactéeenappuyantsurle
symbolecorrespondant.
■ jusqu’àcequel’écranAppuyer sur H
achecomp. poudre.
■ Ouvrirletiroiràcafé .12
■ Mettreaumaximum2cuillères-doses
rasesdecafémoulu.
F Attention !
Nejamaisrempliravecducaféen
grainsouducafésoluble.
■ Refermerletiroiràcafé .12
■ Appuyer sur pour lancer la C
préparationdelaboisson.
Lamachineeectuelapercolationetlecafé
s’écouleensuitedanslatasse.
F UnesimplepressionsurC
permetd’arrêterladistribution
encours.
Réglage du degré de mouture
Lesélecteurderéglage delamouture11
permetderéglerlanesseducaféen
poudre.
F Attention !
Modifierleréglagedelamouture
uniquementlorsquelemoulintourne!
Sinonlamachinerisqued’être
endommagée.
A Risques de blessures !
Nepasmettrelesdoigtsdansle
moulin.
■ Lorsquelemoulintourne,réglerle
sélecteurderéglage entreune11
mouturene( tournerdanslesensa :
contrairedesaiguillesd’unemontre)et
unemouturegrossière( tournerdansb :
lesensdesaiguillesd’unemontre).
a b
F Lenouveauréglagen’estperceptible
qu’àpartirdelasecondetassede
café.
F Choisirunemoutureplusfinepour
lesgrainstorréfiésdecouleurfoncée
etunemoutureplusgrossièrepour
lesgrainstorréfiésdecouleurclaire.

39
fr
Menu
Menu
Lemenupermetdemodierdesréglages
individuellement,d’appelerdesinformations
ouencoredelancerdesprogrammes.
■ pourouvrirlemenu.Appuyer sur A
L’écranachelesdiérentesoptionsde
réglageetlessymbolesdenavigationsont
éclairés.Leréglageencoursestsignaléà
l’écran.
Navigation dans le menu :
I =sedéplacerverslebas
danslemenu
B =conrmer/mémoriser
F = revenir en arrière
A =ouvrirlemenu/quitterlemenu
F Lorsquevousappuyezsur ,lesI
possibilitésderéglageetdesélection
s’affichentselonunordrerécurrent.
Unefoisladernièreoptiondemenu
atteinte,lapremièreoptions’affiche
denouveau.
Par exemple :
Réglerlatempératureducafésurmaxi :
■ .Lemenus’ouvre.Appuyer sur A
■ jusqu’àcequel’écranAppuyer sur I
acheTempérature du café.
■ ,l’écranachep.ex.Appuyer sur B
haute.
■ jusqu’àcequel’écranAppuyer sur I
achemaxi.
■ pourmémoriserlaAppuyer sur B
sélection.L’écranacheunmessagede
conrmation.
■ L’optiondemenuTempérature du café
apparaît.
■ pourquitterlemenu.Appuyer sur F
Vous pouvez eectuer les
réglages suivants :
Nettoyage et entretien
Lancementdeprogrammesde
maintenancespéciques.
Vousavezlechoixentrelesprogrammes
Nettoyer le mousseur de lait,Détartrer,
Nettoyer calc‘nClean ou .
■ Sélectionnerleprogrammesouhaitéavec
I Betconfirmeravec .
■ Appuyer sur pour lancer le C
programme.
F Important :lireimpérativement
lechapitre«Programmesde
maintenance».
Informations relatives aux programmes de
maintenance
(dépenddumodèledemachine)
Achelenombredeboissonspouvant
encoreêtredistribuéesavantqu’un
programmedemaintenancedoiveêtre
eectué.
■ etacherAppuyer sur I
Nettoyer dans --- c ou
Détartrer dans --- c.
■ Quitterl’affichageenappuyantsur .F
F Pourdesraisonstechniques,le
compteurn’estpas«àlatasse
près».
Proportion lait/café
Laproportionlait/caférégléeenusinepeut
êtreadaptéeenplusieursétapes.
■ Sélectionner,avec ,laboissonI
(uniquementpourdesboissonsàbase
decaféetdelait),puisconrmeravec
B.
■ Sélectionner,avec ,laproportionI
café/laitsouhaitée(réglagedelapropor-
tiondelaiten%),puisconrmeravec
B.
■ Leréglageestmémorisé.
Exemple :silavaleurestrégléesur30%,
30%delaitet70%decafésontversés.

40
fr Menu
Favori
LemenuFavoripermetdecréeroude
modierdesboissonsindividualisées.Le
nombredesfavorisdépenddumodèle
d’appareil.
■ Sélectionner,avec ,unnouveauI
prolouunproldéjàexistant,puis
conrmeravec .B
■ Appuyersurlaboissonsouhaitée,puis
conrmeravec .B
■ Enfonctiondelaboissonchoisie,la
sélectionpourlesréglages,commela
quantité( ,ml) ou la proportion café/lait
apparaîtsurl’écran.
■ Eectuerlasélection,puislaconrmer
avec B.
■ Laboissonestmémoriséedansleprol.
Régler qté boissons
Réglerlaquantitépourchaqueboisson
etpourchaquetasse.Laquantitéréglée
enusinepeutêtreadaptéeenplusieurs
étapes.
■ Sélectionnerlaboissonavec etI
confirmeravec .B
■ Sélectionnerlaquantitésouhaitéeavec
I Betconfirmeravec .
Leréglageestmémorisé.
Dureté de l’eau
Réglageenfonctiondeladuretédel’eau
locale.
Lesniveaux1, ,2 3,4 ou Adoucisseur
peuventêtresélectionnés.Laduretéde
l’eauestrégléepardéfautsurleniveau .4
■ Sélectionnerladuretédel’eausouhaitée
avec I Betconfirmeravec .
F Ilimportederéglercorrectementla
duretédel’eaucarcelapermetàla
machined’indiquerlemomentoùun
détartrageestnécessaire.
Laduretédel’eaupeutêtredéterminéeà
l’aidedelabandelettedetestfournieou
êtredemandéeauServicedesEauxlocal.
Danslecasoùunadoucisseurd’eauest
installédanslamaison,veuillezchoisirle
réglageAdoucisseur.
■ Plongerbrièvementlabandelettedetest
dansl’eauetlirelerésultatquiapparaît
auboutde1minute.
Niveau Degrédeduretédel’eau
Allemagne
(°dH)
France(°fH)
1
2
3
4
1-7
8-14
15-21
22-30
1-13
14-25
26-38
39-54
Arrêt automatique
Réglagedeladuréeaprèslaquellela
machines’éteintautomatiquementsitôtla
dernièrepréparationdeboissonterminée.
Laduréepeutêtrecompriseentre
15minuteset8heures.Elleestrégléepar
défautsur30minutes.
■ Sélectionnerladuréesouhaitéeavec
I Betconfirmeravec .
Température du café
Réglagedelatempératuredesboissonsau
caféetdel’eauchaude.
Lesoptionsderéglagesontnormale,haute,
ou maxi.Leréglagesélectionnévautpour
touteslespréparations.
■ Sélectionnerlatempératuresouhaitée
avec I Betconrmeravec .
Filtre à eau
Permetdedénirsiunltreàeaudoitêtre
activéousiaucunltreàeaun’estutilisé.
VousavezlechoixentreActiver nouveau
filtre ou Filtre non placé.
F Lefiltreàeaupeutréduirela
formationdetartre.
Lesltresàeausontdisponiblesdansle
commerceoupeuventêtrecommandés
auprèsduserviceaprès-vente(voirau
chapitre«Accessoires»).
F Important :Avantd’utiliserun
nouveaufiltreàeau,ildoittout
d’abordêtrerincé.

41
fr
Menu
■ Pourcela,enfoncerfermementleltreà
eaudansleréservoird’eau àl’aidede5
lacuillère-dose .8
■ Remplirleréservoird’eaujusqu’aurepère
« max».
■ Relierletuyauàlait aumousseurde4c
lait etautubed’aspiration4b 4d�
■ Insérerl’extrémitédutubed’aspiration4d
dansl’égouttoir .17b
■ etAppuyer sur puis sur A I
sélectionnerFiltre à eau.
■ etAppuyer sur puis sur B I
sélectionnerActiver nouveau filtre.
■ Viderlebaccollecteuretleremettreen
place.
■ Validerlasélectionavec .B
L’eautraversealorsleltrepourlerincer.
■ Ensuite,viderlebaccollecteuretle
remettreenplace.
L’appareilestdenouveauprêtà
fonctionner.
F Lerinçagedufiltreaactivéle
paramètred’affichagedumessage
« Remplacer le filtre à eau svp ».
Unefoisquecemessageestapparu
ouauboutde2moisauplustard,le
ltren’estplusecace.Ilfautalorsle
remplacerpourdesraisonsd’hygiène
etanquel’appareilnes’entartrepas
(celapourraitl’endommager).
Siaucunltreneufn’estutilisé,sélectionner
leréglageFiltre non placéetconrmer
avec B.
F
Silamachinen’estpasutilisée
durantunepériodeprolongée
(vacancesp.ex.),rincerlefiltreavant
d’utiliserànouveaulamachine.Pour
cela,préparertoutsimplementune
tassed’eauchaude.
Langues
Réglagedelalangued’achagedestextes
del’écran.
■ Sélectionnerlalanguesouhaitéeavec
I Betconfirmeravec .
Protection contre le gel
Programmedemaintenancevisantà
éviterlesdommagesprovoquésparlegel
durantletransportetl’entreposage.Lors
deceprogramme,lamachineestvidée
entièrement.
F Lamachinedoitêtreprêteàfonc-
tionneretleréservoird’eau rempli.5
■ Appuyer sur pour lancer le C
programme.
■ Retirerleréservoird’eau,l’appareilpurge
automatiquementlecircuitets’éteint.
■ Viderleréservoird’eau etlebac5
collecteur .17
Bip sonore
Activationoudésactivationdubipsonore
destouchesdubandeaudecommande.
■ Conrmerlasélectionavec .B
■ poursélectionnerAppuyer sur I
Activer Désactiverou etconfirmeravec
B.
Nbre de boissons
(dépenddumodèledemachine)
Achelenombredeboissonsservies
depuislamiseenservice.
■ Quitterl’affichageenappuyantsur .F
Préréglages usine
Restauretouslesparamètresdela
machinetelsqu’ilsétaientàlalivraison.
■ poursupprimerAppuyer sur C
touslesréglagespersonnels.

42
fr Entretienetnettoyagequotidiens
Entretien et
nettoyage quotidiens
E Risque d’électrocution !
Débrancherlamachineavanttout
nettoyage.Nejamaisplongerla
machinedansl’eau.Nejamais
utiliserdenettoyeuràvapeur.
■ Essuyerl’habillagedelamachineavec
unchiondouxethumide.
■ Nettoyerlepanneaudecommandeà
l’aided’unchionenmicrobres.
■ Nepasutiliserdeproduitnettoyantconte-
nantdel’alcooloudel’alcoolàbrûler.
■ Nepasutiliserdechionsabrasifsoude
produitsnettoyants.
■ Toujoursnettoyerimmédiatementles
résidusdecalcaire,decafé,delait,de
produitnettoyantoudesolutiondétar-
trante.Lessurfacessituéessousces
résidusrisquentdesecorroder.
■ Leschionsépongesneufspeuvent
contenirdessels.Cesselspeuventêtre
responsablesderouillesuperciellesur
l’acierinox;unrinçageméticuleuxestpar
conséquentindispensableavantl’emploi.
■ Sortirlebaccollecteur avecletiroirà17
marcdecafé enletirantversl’avant.17c
Retirerlepanneau etl’égouttoir .17a 17b
Videretnettoyerlebaccollecteuretle
tiroiràmarcdecafé.
■ Essuyerl’intérieurdelamachine(loge-
mentdesbacscollecteurs)etletiroirà
café(nonamovible).
■ Démonterleotteur etlenettoyer17d
avecunchionhumide(dépenddu
modèledemachine).
L
Ne pas mettrelesélémentssuivants
au lave-vaisselle :
Panneaudubaccollecteur ,couvercle17a 4a,
unitédepercolation ,réservoird’eau et14 5
couverclepréservateurd’arôme10.
M Lesélémentssuivantspeuventaller
aulave-vaisselle:
Baccollecteur ,égouttoir ,tiroiràmarc17 17b
decafé ,cuillère-dose etlapartiesupé17c 8 -
rieureetinférieuredumousseurdelait4b.
F Important : 17 lebaccollecteur et
leréservoiràmarc doiventêtre17c
vidésetnettoyéstouslesjoursafin
d’éviterlesdépôts.
F Silamachineestmiseenmarcheà
froidouarrêtéeaprèslapréparation
d’uncafé,elleserinceautomatique-
ment.L’appareilsenettoiedoncde
lui-même.
F Important :Silamachinen’apas
étéutiliséependantunepériode
prolongée(vacancesp.ex.),nettoyer
soigneusementl’ensembledela
machine,ycomprislemousseurde
lait etl’unitédepercolation .4b 14
Nettoyage du mousseur de lait
A Lemousseurdelait doitimpéra-4b
tivementêtrenettoyéaprèschaque
utilisation!
Lesystèmeàlait estnettoyéautoma-4b
tiquementparunbrefcoupdevapeur,
immédiatementaprèslapréparationd’une
boissonàbasedelait.Pourassurerun
nettoyageparticulièrementminutieux,le
systèmeàlait peutêtreenoutrerincé4b
avecleprogrammeNettoyage du mousseur
de lait (voirchapitre«Programmesde
maintenance»–«Nettoyagedumousseur
delait»).

44
fr Programmesdemaintenance
■ Retirerlecouvercle del’unitéde14b
percolationetnettoyersoigneusement
l’unitédepercolation àl’eaucourante.14
■ Nettoyersoigneusementleltredel’unité
depercolationsouslejetd’eau.
■ Essuyersoigneusementl’intérieurdela
machineavecunchionhumideetretirer
leséventuelsrésidusdecafé.
■ Laissersécherl’unitédepercolation et14
l’intérieurdelamachine.
■ Remettrelecouvercledeprotection14b
surl’unitédepercolation etlapousser14
jusqu’enbutéedansl’appareil.
■ Pousserlelevierd’éjection complète-15
mentverslehaut.
■ Faire glisser le verrouillage rouge 14a
àfondversladroiteetrefermerlaporte
d’accès .13
Programmes de
maintenance
F Voiraussilanoticesuccinctedansle
compartimentderangement .16
Aintervallesréguliers,l’écran ache3
périodiquementl’undesmessages
suivants:
Détartrage nécessaire ou
Nettoyage nécessaire ou
calc‘nClean nécessaire.
Lamachinedoitalorsêtrenettoyéeoudétar-
tréesanstarderavecleprogrammecorres-
pondant.LesopérationsDétartreretNettoyer
peuventêtreréuniesàl’aidedelafonction
calc‘nClean(voirauchapitre«calc‘nClean»).
Sileprogrammedemaintenancen’estpas
réaliséconformémentauxindications,la
machinerisqued’êtreendommagée.
F Important :Sil’appareiln’estpas
détartréàtemps,lemessage
« Détartrage nécessaire Blocage
imminent de l’appareil --> Appuyer
3 s sur menu »apparaît.Effectuer
leprocessusdedétartrageimmé-
diatementaprèsl’apparitiondela
consigne.Sil’appareilestverrouillé,
ilpeutêtreréutiliséunefoisle
processusdedétartrageterminé.
F Attention !
Lorsdechaqueprogrammedemain-
tenance,utiliserleproduitdétartrantet
leproduitnettoyantconformémentaux
instructions.Nejamaisinterromprele
programmedemaintenance!
Nepasboirelesliquides!
Nejamaisutiliserdevinaigre,de
produitàbasedevinaigre,d’acide
citriqueoudeproduitàbased’acide
citrique!
Nejamaisverserdepastillesdedétar-
trageouautresproduitsdedétartrage
dansletiroiràcafé12 !

45
fr
Programmesdemaintenance
Avantdedémarrerleprogrammede
maintenance(Détartrage,Nettoyageou
calc‘nClean),retirerl’unitédepercolation,
lanettoyerensuivantlesindicationsetla
remettreenplace.
Des pastilles de détartrage et de
nettoyage spécialement conçues à cet
eet sont disponibles dans le commerce
et auprès du service après-vente (voir au
chapitre « Accessoires »)�
Nettoyage du mousseur de lait
Durée:1minuteenv.
Appuyer sur Apourouvrirlemenu.
■ ,sélectionnerAppuyer sur I
Nettoyage et entretienetconrmeravec
B.
■ ,sélectionnerAppuyer sur I Nettoyer
le mousseur de laitetconrmeravec
B.
■ Appuyer sur pour lancer le C
programme.
Desmessagesapparaissentàl’écran3
pourvousguider:
■ Placerunverrevidesouslabused’écou-
lement etplacerl’extrémitédutube4
d’aspiration dansleverre.4d
■ .LemousseurdeAppuyer sur C
laitsenettoiealorsautomatiquement.
■ Viderensuiteleverreetnettoyerletube
d’aspiration .4d
Deplus,nettoyerrégulièrementettrès
soigneusementlemousseurdelait(en
lave-vaisselleouàlamain).
Détartrage
Durée:30minutesenv.
Laligneinférieuredel’écranindiquela
progressionduprogramme.
F Siunfiltreestprésentdansleréser-
voird’eau ,leretirerimpérativement5
avantdelancerleprogrammede
maintenance.
■ pourouvrirlemenu.Appuyer sur A
■ ,sélectionnerAppuyer sur I
Nettoyage et entretienetconrmeravec
B.
■ ,sélectionnerAppuyer sur I Détartrer
etconrmeravec .B
■ Appuyer sur pour lancer le C
programme.
Desmessagesapparaissentàl’écran3
pourvousguider:
■ Viderlebaccollecteur etleremettre17
enplace.
F L’écranaffichelemessaged’invite
Si nécess., retirez filtre eau ¢start.
■ Retirerleltreetappuyerànouveausur
C.
■ Verserdel’eautièdedansleréservoir
d’eau videjusqu’aurepère« »5 0,5 l
etydissoudre1pastillededétartrage
SiemensTZ80002.
■ .Appuyer sur C
■ Placerunrécipientd’unecontenancede
0,5lsouslabused’écoulement4.
■ Placerl’emboutdutubed’aspiration4d
danslerécipient.
■ .Appuyer sur C
Leprogrammededétartragesedérouleà
présentpendant20minutesenviron.
F S’iln’yapasassezdesolutionde
détartragedansleréservoird’eau ,5
lemessageRajoutez du détartrant
¢starts’affiche.
■ Rajouterdudétartrantetappuyerà
nouveau sur C.
■ Rincerleréservoird’eau etleremplir5
d’eaufraîchejusqu’aurepère«max ».
■ Siunltreestutilisé,leremettreenplace.
■ .Appuyer sur C

46
fr Programmesdemaintenance
Leprogrammededétartragesedérouleà
présentpendant1minuteenvironetrincela
machine.
■ Viderlebaccollecteur etleremettre17
enplace.
F Important :Essuyerlamachine
avecunchiffondouxethumide
pouréliminerimmédiatementles
résidusduproduitdedétartrage.Les
surfacessituéessouscesrésidus
risquentdesecorroder.Leschiffons
épongesneufspeuventcontenirdes
sels.Cesselspeuventêtrerespon-
sablesderouillesuperficiellesur
l’acierinox;unrinçageméticuleux
estparconséquentindispensable
avantl’emploi.Nettoyersoigneuse-
mentletubed’aspiration4d de la
bused’écoulement.
Lamachineaétédétartréeetestainside
nouveauprêteàfonctionner.
Nettoyage
Durée:env.9minutes.
Laligneinférieuredel’écranindiquela
progressionduprogramme.
■ pourouvrirlemenu.Appuyer sur A
■ ,sélectionnerAppuyer sur I
Nettoyage et entretienetconrmeravec
B.
■ ,sélectionnerAppuyer sur I Nettoyer
etconrmeravec .B
■ Appuyer sur pour lancer le C
programme.
Desmessagesapparaissentàl’écran3
pourvousguider:
■ Viderlebaccollecteur etleremettre17
enplace.
■ Ouvrirletiroiràcafé .12
■ Déposerunepastilledenettoyage
Siemensdansletiroir etrefermer.12
■ .Appuyer sur C
Leprogrammedenettoyagesedérouleà
présentpendant7minutesenviron.
■ Viderlebaccollecteur etleremettre17
enplace.
Lamachineestàprésentnettoyéeetde
nouveauprêteàfonctionner.
calc‘nClean
Durée:43minutesenv.
calc‘nCleancombinelesdeuxfonctions
DétartrageetNettoyage.
Silemomentderéaliserchacundesdeux
programmesestproche,lamachinepropose
automatiquementceprogrammede
maintenance.
Laligneinférieuredel’écranindiquela
progressionduprogramme.
F Siunfiltreestprésentdansleréser-
voird’eau ,leretirerimpérativement5
avantdelancerleprogrammede
maintenance.
■ pourouvrirlemenu.Appuyer sur A
■ ,sélectionnerAppuyer sur I
Nettoyage et entretienetconrmeravec
B.
■ ,sélectionnerAppuyer sur I
calc‘nCleanetconrmeravec .B
■ Appuyer sur pour lancer le C
programme.
Desmessagesapparaissentàl’écran3
pourvousguider:
■ Viderlebaccollecteur etleremettre17
enplace.
■ Ouvrirletiroiràcafé .12
■ Déposerunepastilledenettoyage
Siemensdansletiroir etrefermer.12
■ .Appuyer sur C
F L’écranaffichelemessaged’invite
Si nécess., retirez filtre eau ¢start.
■ Retirerleltreetappuyerànouveausur
C.
■ Verserdel’eautièdedansleréservoir
d’eau jusqu’aurepère« »et5 0,5 l
dissoudre1pastillededétartrageSiemens
TZ80002.
■ .Appuyer sur C
■ Placerunrécipientd’unecontenancede
1laumoinssouslabused’écoulement4.
■ Placerl’emboutdutubed’aspiration4d
danslerécipient.
■ .Appuyer sur C
Leprogrammededétartragesedérouleà
présentpendant28minutesenviron.

51
fr
Donnéestechniques
Problème Cause Remède
Messageachéàl’écran
Veuillez remplir avec de l’eau
non gazeuse ou changer le
filtre
Leréservoird’eauestmal
inséré.
Mettreleréservoird’eaucorrecte-
mentenplace.
Leréservoird’eaucontient
del’eaugazeuse.
Remplirleréservoird’eauavecde
l’eaufraîchedurobinet.
Leotteurquisetrouve
dansleréservoird’eauest
grippé.
Retirerleréservoiretlenettoyer
minutieusement.
Leltred’eauneufn’apas
étérincéconformément
auxinstructions.
Rincerleltreàeauconformément
auxinstructionsetleremettreen
service.
Del’airsetrouvedansle
ltred’eau.
Plongerleltreàeaudansl’eau
jusqu’àcequeplusaucunebulle
nesurvienneetremettreleltreen
place.
Leltreàeauesttrop
vieux.
Mettreenplaceunnouveaultreà
eau.
Messageachéàl’écran
Nettoyez l’unité de percola-
tion et la remettre en place
Unitédepercolation
encrassée.
Nettoyerl’unitédepercolation.
Tropdecafémouludans
l’unitédepercolation.
Nettoyerl’unitédepercolation.
Mettreaumaximum2cuillères-
dosesrasesdecaféenpoudre.
Lemécanismede
l’unitédepercolationne
fonctionnepasaisément.
Nettoyerl’unitédepercolation(voir
auchapitre«Entretienetnettoyage
quotidiens»).
Messageachéàl’écran
Redémarrez l’appareil
Appareiltropchaud. Laisserl’appareilrefroidir.
L’unitédepercolationest
encrassée.
Nettoyerl’unitédepercolation.
Messageachéàl’écran
Appareil pas suffisammt
détartré. Répéter l’opération
Détartrantinappropriéou
entropfaiblequantitéou
appareilexcessivement
entartré.
Exécutezunenouvellefoisle
programmededétartrage.
Messageachéàl’écran
Veuillez laisser refroidir
l’appareil
L’appareilesttropchaud. Laissezl’appareiléteintpendant
30minutes.
Messageachéàl’écran
Défaillance
Appelez le service clientèle
Unedéfaillances’est
produitedanslamachine.
Appelerleserviceclientèle.
Appeler impérativement la hotline si les problèmes ne peuvent pas être résolus !
Les numéros de téléphone se trouvent aux dernières pages de la notice�

53
nl
Bestemmingvanhetapparaat
Bestemming van het
apparaat
Dit apparaat is alleen bestemd
voor huishoudelijk gebruik en de
huiselijke omgeving.
Gebruik het apparaat alleen
binnenshuis bij kamertempe-
ratuur en tot 2000 m boven de
zeespiegel.
Belangrijke
veiligheidsinstructies
De gebruiksaanwijzing a.u.b.
zorgvuldig doorlezen, opvolgen
en goed bewaren! Als u dit appa-
raat aan iemand anders geeft,
lever dan ook deze gebruiksaan-
wijzing mee.
Dit apparaat kan worden
bediend door kinderen vanaf
8 jaar en door personen met
fysieke, sensorische of geeste-
lijke beperkingen of met gebrek-
kige ervaring en/of kennis,
indien zij onder toezicht staan of
zijn geïnstrueerd in het veilige
gebruik van het apparaat en de
daaruit resulterende gevaren
hebben begrepen. Kinderen
jonger dan 8 jaar dienen uit
de buurt van het apparaat en
het aansluitsnoer te worden
gehouden en mogen het appa-
raat niet bedienen. Kinderen
mogen niet met het apparaat
spelen. Reiniging en onderhoud
mogen niet worden uitgevoerd
door kinderen, tenzij ze 8 jaar
of ouder zijn en onder toezicht
staan.
Bestemming van het
apparaat
Belangrijke
veiligheidsinstructies

54
nl Belangrijkeveiligheidsinstructies
WWaarschuwing
Gevaar voor elektrische
schokken!
■ Het apparaat mag uitslui-
tend via een conform de
voorschriften geïnstalleerd
stopcontact met randaarde
op een stroomnet met wissel-
stroom worden aangesloten.
Overtuig u ervan dat het
randaardesysteem van de
elektrische huisinstallatie
conform de elektrotechnische
voorschriften is geïnstalleerd.
■ Het apparaat uitsluitend
aansluiten en gebruiken
volgens de gegevens op het
typeplaatje.
■ Alleen gebruiken wanneer het
aansluitsnoer en het apparaat
niet beschadigd zijn.
■ Om gevaren te vermijden,
mogen reparaties aan het
apparaat, zoals het vervangen
van een beschadigd aansluit-
snoer, uitsluitend worden
uitgevoerd door onze Service.
■ Het apparaat en het aansluit-
snoer nooit onderdompelen in
water.
■ Bij storingen direct de stekker
uit het stopcontact trekken of
de netspanning uitschakelen.
WWaarschuwing
Gevaar door magnetisme!
Het apparaat bevat permanente
magneten die elektronische
implantaten zoals pacemakers,
of insulinepompen kunnen
beïnvloeden. Dragers van elek-
tronische implantaten dienen
een minimumafstand van
10 cm tot het apparaat en bij
het wegnemen tot de volgende
delen aan te houden: melkreser-
voir, melksysteem, watertank en
zetgroep.
WWaarschuwing
Verstikkingsgevaar!
■ Laat kinderen niet met
verpakkingsmateriaal spelen.
■ Bewaar kleine onderdelen
op een veilige plaats om te
voorkomen dat deze worden
ingeslikt.
WWaarschuwing
Gevaar voor letsel!
■ Grijp niet in het maalwerk.
■ Onjuist gebruik van het
apparaat kan letsel tot gevolg
hebben.
WWaarschuwing
Verbrandingsgevaar!
■ Het melksysteem wordt erg
warm. Laat dit na gebruik
eerst afkoelen alvorens het
aan te raken.
■ Na het gebruik kunnen de
oppervlakken van het verwar-
mingselement of de warm-
houdplaat nog enige tijd heet
zijn.

56
nl Overzicht–Bedieningselementen
Overzicht – Bedieningselementen
(Afbeelding opdeuitklapbarepagina’s) B
F Devolgendesymbolenzijnafhankelijkvandebedrijfstoestandvandemachinete
zienresp.verlicht:
Espresso Latte macchiato
Espresso macch. Koffie verkeerd
Koffie Melkschuim
Cappuccino Specialedranken(ziehoofdstuk
„Specialedranken“).
start
stop C I–Start-Stop-toets –Selectieomlaag
F – Terug menu A – Menu openen
G–Afnamevantweekopjes
tegelijkertijd ok B–Bevestigen/Opslaan
H–Koffiesterkteinstellen
ml
D–Maatkopjeselecteren
R–Favorietoproepen
(kortaanraken)enkinderbevei-
liging(tenminste3seconden
aanraken).

57
nl
Display
Netschakelaar J
Metdenetschakelaar wordtdemachineJ
in-ofuitgeschakeld.Demachinespoelt
automatischalsdezewordtin-en
uitgeschakeld.
Demachinespoeltnietwanneer:
■ dezebijhetinschakelennogwarmis.
■ ervóórhetuitschakelengeenkoffiewerd
gezet.
Demachineisklaarvoorgebruikalsde
symboleninhetbedieningsveldenhet
displayoplichten.
Bedieningsveld (tiptoets)
Inhetbedieningsveldkandooraanraking
vandesymbolenentekensheeleenvoudig
genavigeerdworden.
Erklinkteenakoestischsignaal.
Designaaltoonkanin-enuitgeschakeld
worden(ziehoofdstuk“Menu–Toetstonen”).
Drankkeuze
Dooraanrakingvanhetdesbetreffende
symboolwordtdegewenstedrank
directgeselecteerd(ziehoofdstuk
“Drankbereiding”).
Start / Stop-toets
Door aanraking van Cwordtde
drankbereidingofeenserviceprogramma
gestart.Doorhetopnieuwaanrakenvan
C tijdensdedrankbereidingwordt
deafnamevoortijdiggestopt.
Menu
Door aanraking van Awordthetmenu
opgeroepen,denavigatiesymbolenworden
geactiveerdenlichtenop.Dooraanraking
van en I B, Fwordtinhetmenu
genavigeerdenwordterinformatieopge-
roepenofwordenerinstellingenuitgevoerd
(ziehoofdstuk“Menu”).
Drankopties
Door aanraking van H Dof wordt
desterkteofhoeveelheidvandedrank
aangepast,dooraanrakingvan wordenG
tweekopjestegelijkertijdtoebereidzodra
met deafnamewordtgestart(zieC
hoofdstuk“Drankbereiding”).
“Favoriet” en kinderbeveiliging
Dooreenkorteaanrakingvan wordenR
gepersonaliseerde dranken opgeroepen
(ziehoofdstuk“EigeninstellingenFavoriet”).
Als Rtenminste3secondenlangwordt
ingedrukt,wordtdekinderbeveiliging
geactiveerdofgedeactiveerd(ziehoofdstuk
“Kinderbeveiliging”).
Display
Ophetdisplaywordendegeselecteerde
drankeneninstellingenalsmedemeldingen
overdebedrijfstoestandweergegeven.
Espresso
normaal medium
Waterreservoir vullen a.u.b.
Demeldingverdwijntzodradehandelingis
uitgevoerd.

58
nl Inbedrijfstelling
Inbedrijfstelling
Algemeen
Vulhetwaterreservoiruitsluitendmet
zuiver, waterzonderkoolzuurenhetkoud
bonenreservoiruitsluitendmetgeroosterde
bonen.Gebruikgeengeglaceerde,gekara-
meliseerdeofmetanderesuikerhoudende
additievenbehandeldekoffiebonen,aange-
ziendezedezetgroepkunnenverstoppen.
Bijdezemachineisdehardheidvanhet
waterinstelbaar.Affabriekisdemachine
opwaterhardheid4ingesteld.Controleer
dedaadwerkelijkewaterhardheidmet
hetmeegeleverdeteststrookje.Alser
eenanderewaardedanwaterhardheid4
wordtaangegeven,moetdemachinena
inbedrijfstellingovereenkomstiggepro-
grammeerdworden(zieonderhoofdstuk
“Menu– ”).Waterhardheid
Machine in gebruik nemen
■ Verwijderdebeschermendefolie.
■ Zetdevolautomatischeespressomachine
neeropeenvlakenvoorhetgewicht
geschikt,watervastoppervlak.
■ Deventilatiespletenvandemachine
moetenvrijblijven.
F Belangrijk:Gebruikdemachine
alleeninvorstvrijeruimten.Alsde
machinebijtemperaturenonder0°C
isgetransporteerdofopgeslagen,
dientutenminste3uurtewachten
alvorensdemachineingebruikte
nemen.
■ Sluitdenetstekker(snoeropbergvak18)
aanophetstopcontact.Steldesnoer-
lengteafdoorhetsnoerietsinhetvak
terugteduwenofverdernaarbuiten
tetrekken.Plaatsdemachinehiervoor
bijvoorbeeldmetdeachterzijdetegen
detafelrandentrekhetsnoer ofomlaag
schuifhet .omhoog
■ Klaphetdekselvanhetwaterreservoir6
omhoog.
■ Verwijderhetwaterreservoir ,spoelhet5
reservoiruitenvulhetmetvers,koud
water.Letopdemarkering“ ”.max
■ Brenghetwaterreservoir inrechte5
standaanendrukhethelemaalomlaag.
■ Sluithetdekselvanhetwaterreservoir6
weer.
■ Vulhetbonenreservoir metkoffiebonen.9
■ Schakeldemachineinmetbehulpvande
netschakelaar1 J.
Hetbedieningsveldenhetdisplayworden
geactiveerd.Ophetdisplayverschijntde
voorafingesteldetaalwaarindeandere
displaytekstenwordenweergegeven.Erzijn
meerderetalenbeschikbaar.
■ zovaakaantotdegewensteRaak I
taalophetdisplaygemarkeerdis.
Deutsch
English
Français
■ aanomdeselectieteRaak C
bevestigen.
Degeselecteerdetaalisopgeslagen.
Hetmerkenlogoophetdisplay isverlicht.3
Demachinewordtverwarmdengespoeld,
erloopteenbeetjewateruitdeuitloop .4
Demachineisklaarvoorgebruikalsde
symbolenophetbedieningsveldenhet
displayoplichten.
F Devolautomatischeespressoma-
chineisaffabriekgeprogrammeerd
metdestandaardinstellingenvoor
eenoptimalewerking.Demachine
wordtnaeengekozentijdautoma-
tischuitgeschakeld(ziehoofdstuk
“Menu– ”).Auto. uitschakeling

60
nl Drankbereiding
Doordetoets„specialedranken“meer-
maalsaanteraken,kunnennaelkaar
verschillendedrankenwordengeselecteerd:
Heet water Americano *
Warme melk Flat white * *
Kleiner Brauner *Cafe cortado *
Koffiekan *
Demeteen*gemarkeerdepositieszijn
slechtsinbepaaldemodellenvoorhanden.
Koffiesterkte aanpassen,
koffiemaling selecteren
Door aanraking van Hwordtdesterkte
vandekoffieindividueelingesteldof
debereidingmetkoffiemalingwordt
geselecteerd.
Devolgendeinstellingenzijnmogelijk:
zeer mild zeer sterk
mild doubleshot sterk
normaal doubleshot sterk+
sterk Koffielade
■ Selecteerdegewenstedrankdooraanra-
kingvanhetdesbetreffendesymbool.
■ zovaakaantotdegewensteRaak H
instellingbijv.sterkofKoffielade (zie
hoofdstuk“Bereidingmetgemalenkoffie”)
ophetdisplaywordtweergegeven.
aromaDouble Shot
Hoelangerhetkoffiezettenduurt,deste
meerbitterstoffenenongewenstearoma’s
vrijkomen.Hierdoorsmaaktdekoffie
mindergoedenwordtmindergoedverteer-
baar.Voorextrasterkekoffiebeschikt
demachinedaaromovereenspeciale
aromaDoubleShot-functie.Nadatdehelft
vandekoffieisgezet,wordeneropnieuw
koffiebonengemalenentoebereid,zodat
alleendelekkereenmaagvriendelijke
aroma’svrijkomen.
F DefunctiearomaDoubleShotkan
vooralledrankenmetmin.35ml
vulhoeveelheidkoffiewordeninge-
steld.Voorkleinedrankjeszoalseen
kleineespressoofbijinstellingop
Gisdefunctienietbeschikbaar.
Maat kopje selecteren
Door aanraking van Dwordtdevulhoe-
veelheidvandedrankindividueelingesteld.
Devolgendeinstellingenzijnmogelijk:
klein medium groot
■ Selecteerdegewenstedrankdooraanra-
kingvanhetdesbetreffendesymbool.
■ zovaakaan,totdegewensteRaak D
instellingophetdisplayverschijnt.
F Eenpijlofpijlennaastdeinstelling,
bijv.„groot ˆ“gevenaandatdein
defabriekvooringesteldeinhoud
(ziehoofdstuk„Menu–Maat kopje
instellen“)werdveranderd.
Twee kopjes tegelijkertijd
Door aanraking van Gwordennaselectie
vaneendrankmetalleenkoffieofvan
eendrankmetkoffieenmelk(bijbepaalde
machinesuitsluitendvoordrankenmet
alleenkoffie)tweekopjestegeljkertijd
toebereidzodradeafnamemetC
wordtgestart.Deinstellingwordtweerge-
gevenophetdisplay.
■ Selecteerdegewenstedrankdooraanra-
kingvanhetdesbetreffendesymbool.
■ aan.Raak G
■ Zettweevoorverwarmdekopjeslinksen
rechtsonderdeuitloop .4
■ aanomdeafnameteRaak C
starten.
Degeselecteerdedrankwordttoebereiden
stroomtvervolgensindebeidekopjes.
F Dedrankwordtintweestappen
(tweemaalprocessen)toebereid.
Wachteventothetprocesvolledigis
afgesloten.
F Afhankelijk van het machinetype:
Defunctie“Tweekopjestegelijkertijd”
isalleenbeschikbaarvoordranken
metalleenkoffie,nietvoordranken
metkoffieenmelk.
Produktspecifikationer
| Varumärke: | Siemens |
| Kategori: | kaffebryggare |
| Modell: | EQ.6 Plus S100 TE651209RW |
Behöver du hjälp?
Om du behöver hjälp med Siemens EQ.6 Plus S100 TE651209RW ställ en fråga nedan och andra användare kommer att svara dig
kaffebryggare Siemens Manualer

29 Mars 2025
6 December 2024
6 December 2024
17 Oktober 2024
8 Oktober 2024
25 September 2024
25 September 2024
25 September 2024
25 September 2024
25 September 2024
kaffebryggare Manualer
- kaffebryggare Electrolux
- kaffebryggare ATAG
- kaffebryggare Bosch
- kaffebryggare AEG
- kaffebryggare IKEA
- kaffebryggare Braun
- kaffebryggare Philips
- kaffebryggare Panasonic
- kaffebryggare AEG Electrolux
- kaffebryggare Bauknecht
- kaffebryggare BEKO
- kaffebryggare Delonghi
- kaffebryggare Etna
- kaffebryggare Grundig
- kaffebryggare Inventum
- kaffebryggare Kenwood
- kaffebryggare Krups
- kaffebryggare Miele
- kaffebryggare Medion
- kaffebryggare Quigg
- kaffebryggare Unold
- kaffebryggare Tefal
- kaffebryggare Adler
- kaffebryggare Alpina
- kaffebryggare Ambiano
- kaffebryggare Amica
- kaffebryggare Animo
- kaffebryggare Afk
- kaffebryggare Alaska
- kaffebryggare Ariete
- kaffebryggare Arendo
- kaffebryggare Arcelik
- kaffebryggare Asko
- kaffebryggare Aroma
- kaffebryggare Ascaso
- kaffebryggare Bartscher
- kaffebryggare Morphy Richards
- kaffebryggare OneConcept
- kaffebryggare GE
- kaffebryggare Orbegozo
- kaffebryggare Salton
- kaffebryggare Princess
- kaffebryggare Sharp
- kaffebryggare Fisher And Paykel
- kaffebryggare Bertazzoni
- kaffebryggare Lamona
- kaffebryggare Klarstein
- kaffebryggare Fagor
- kaffebryggare Brandt
- kaffebryggare Severin
- kaffebryggare Smeg
- kaffebryggare Telefunken
- kaffebryggare Gorenje
- kaffebryggare Neff
- kaffebryggare Silvercrest
- kaffebryggare Bezzera
- kaffebryggare Baumatic
- kaffebryggare Makita
- kaffebryggare Nedis
- kaffebryggare Korona
- kaffebryggare Saturn
- kaffebryggare Black And Decker
- kaffebryggare Breville
- kaffebryggare Tiger
- kaffebryggare KitchenAid
- kaffebryggare Innoliving
- kaffebryggare Tristar
- kaffebryggare Domo
- kaffebryggare Teka
- kaffebryggare Trisa
- kaffebryggare Gaggenau
- kaffebryggare Rowenta
- kaffebryggare Waring Commercial
- kaffebryggare Tomado
- kaffebryggare Maestro
- kaffebryggare Livoo
- kaffebryggare OBH Nordica
- kaffebryggare Caffitaly
- kaffebryggare OK
- kaffebryggare Hanseatic
- kaffebryggare Bestron
- kaffebryggare Bellini
- kaffebryggare Oster
- kaffebryggare Westinghouse
- kaffebryggare ECG
- kaffebryggare Moulinex
- kaffebryggare Sinbo
- kaffebryggare Izzy
- kaffebryggare Pelgrim
- kaffebryggare Blomberg
- kaffebryggare Curtis
- kaffebryggare Jata
- kaffebryggare Melissa
- kaffebryggare Magic Chef
- kaffebryggare Swan
- kaffebryggare Emerio
- kaffebryggare Scarlett
- kaffebryggare Profitec
- kaffebryggare Clatronic
- kaffebryggare Fritel
- kaffebryggare Taurus
- kaffebryggare Russell Hobbs
- kaffebryggare Hotpoint
- kaffebryggare Sencor
- kaffebryggare Conair
- kaffebryggare De Dietrich
- kaffebryggare Cuisinart
- kaffebryggare Blaupunkt
- kaffebryggare Solac
- kaffebryggare Frigidaire
- kaffebryggare Jura
- kaffebryggare Sunbeam
- kaffebryggare Logik
- kaffebryggare Teesa
- kaffebryggare Mesko
- kaffebryggare Melitta
- kaffebryggare Profilo
- kaffebryggare Ernesto
- kaffebryggare Beper
- kaffebryggare Gevalia
- kaffebryggare CDA
- kaffebryggare Hendi
- kaffebryggare Mellerware
- kaffebryggare Douwe Egberts
- kaffebryggare Heinner
- kaffebryggare Lakeland
- kaffebryggare Schneider
- kaffebryggare Termozeta
- kaffebryggare Bella
- kaffebryggare Vitek
- kaffebryggare Nespresso
- kaffebryggare Eldom
- kaffebryggare Hama
- kaffebryggare Kenmore
- kaffebryggare Philco
- kaffebryggare Premium
- kaffebryggare Ninja
- kaffebryggare Bialetti
- kaffebryggare DCG
- kaffebryggare Illy
- kaffebryggare Blokker
- kaffebryggare Marquant
- kaffebryggare Lavazza
- kaffebryggare Trebs
- kaffebryggare First Austria
- kaffebryggare Solis
- kaffebryggare Bourgini
- kaffebryggare Koenic
- kaffebryggare H.Koenig
- kaffebryggare Boretti
- kaffebryggare Haeger
- kaffebryggare Ariston Thermo
- kaffebryggare Steba
- kaffebryggare Beem
- kaffebryggare Exquisit
- kaffebryggare Elba
- kaffebryggare Proline
- kaffebryggare King
- kaffebryggare Zelmer
- kaffebryggare Muse
- kaffebryggare Gaggia
- kaffebryggare Nutrichef
- kaffebryggare Sage
- kaffebryggare ETA
- kaffebryggare Malmbergs
- kaffebryggare Olympia
- kaffebryggare Champion
- kaffebryggare Bomann
- kaffebryggare Hamilton Beach
- kaffebryggare Kuppersbusch
- kaffebryggare Buffalo
- kaffebryggare Continental Edison
- kaffebryggare Wmf
- kaffebryggare Graef
- kaffebryggare Ecm
- kaffebryggare Farberware
- kaffebryggare Ufesa
- kaffebryggare Tesco
- kaffebryggare Rommelsbacher
- kaffebryggare Wilfa
- kaffebryggare Presto
- kaffebryggare Kaiser
- kaffebryggare Bunn
- kaffebryggare Cilio
- kaffebryggare Capresso
- kaffebryggare Franke
- kaffebryggare AYA
- kaffebryggare Camry
- kaffebryggare Arzum
- kaffebryggare Isomac
- kaffebryggare Bifinett
- kaffebryggare Nova
- kaffebryggare Proctor Silex
- kaffebryggare Electra
- kaffebryggare Primo
- kaffebryggare Gerlach
- kaffebryggare Tower
- kaffebryggare Clas Ohlson
- kaffebryggare Gastroback
- kaffebryggare Saro
- kaffebryggare MPM
- kaffebryggare Konig
- kaffebryggare Becken
- kaffebryggare Ices
- kaffebryggare Nescafe
- kaffebryggare Sogo
- kaffebryggare Saeco
- kaffebryggare Cloer
- kaffebryggare Harper
- kaffebryggare Waeco
- kaffebryggare Mestic
- kaffebryggare Petra
- kaffebryggare La Pavoni
- kaffebryggare Team
- kaffebryggare Privileg
- kaffebryggare ProfiCook
- kaffebryggare Nivona
- kaffebryggare Vivax
- kaffebryggare Nuova Simonelli
- kaffebryggare Xavax
- kaffebryggare Nevir
- kaffebryggare Ilve
- kaffebryggare CaterChef
- kaffebryggare G3 Ferrari
- kaffebryggare Caple
- kaffebryggare Bravilor Bonamat
- kaffebryggare Magimix
- kaffebryggare Efbe-schott
- kaffebryggare Lifetec
- kaffebryggare Gourmetmaxx
- kaffebryggare Wolf
- kaffebryggare Varo
- kaffebryggare Stelton
- kaffebryggare Bodum
- kaffebryggare Schaerer
- kaffebryggare Superior
- kaffebryggare Kunft
- kaffebryggare Caso
- kaffebryggare Dualit
- kaffebryggare Koenig
- kaffebryggare Bugatti
- kaffebryggare Turmix
- kaffebryggare Demoka
- kaffebryggare Fakir
- kaffebryggare Cremesso
- kaffebryggare Ritter
- kaffebryggare Arno
- kaffebryggare Magefesa
- kaffebryggare Carimali
- kaffebryggare Handpresso
- kaffebryggare OXO
- kaffebryggare Comelec
- kaffebryggare CRUX
- kaffebryggare C3
- kaffebryggare EMSA
- kaffebryggare Grunkel
- kaffebryggare Polti
- kaffebryggare Nesco
- kaffebryggare Rancilio
- kaffebryggare Waves
- kaffebryggare Philips-Saeco
- kaffebryggare Coline
- kaffebryggare Technivorm
- kaffebryggare Home Electric
- kaffebryggare Butler
- kaffebryggare Elta
- kaffebryggare Barazza
- kaffebryggare Optimum
- kaffebryggare Bravilor
- kaffebryggare Ideeo
- kaffebryggare AdHoc
- kaffebryggare Tchibo
- kaffebryggare Cecotec
- kaffebryggare Zepter
- kaffebryggare Sanremo
- kaffebryggare Instant
- kaffebryggare Lelit
- kaffebryggare Wittenborg
- kaffebryggare Micromaxx
- kaffebryggare Weasy
- kaffebryggare Chefman
- kaffebryggare Kalorik
- kaffebryggare Gutfels
- kaffebryggare Turbotronic
- kaffebryggare T-fal
- kaffebryggare Heyner
- kaffebryggare Prima Donna
- kaffebryggare Mia
- kaffebryggare Galanz
- kaffebryggare Orava
- kaffebryggare Gastronoma
- kaffebryggare Faema
- kaffebryggare Amici
- kaffebryggare Spidem
- kaffebryggare Azkoyen
- kaffebryggare Riviera And Bar
- kaffebryggare SAB
- kaffebryggare Puc
- kaffebryggare Witt
- kaffebryggare Micro Matic
- kaffebryggare Redmond
- kaffebryggare NutriBullet
- kaffebryggare Walco
- kaffebryggare Foster
- kaffebryggare L'or
- kaffebryggare UNIC
- kaffebryggare Fine Dine
- kaffebryggare Venga
- kaffebryggare Kees Van Der Westen
- kaffebryggare Rival
- kaffebryggare Thomas
- kaffebryggare Exido
- kaffebryggare Rosseto
- kaffebryggare Innova
- kaffebryggare Francis Francis
- kaffebryggare Moccamaster
- kaffebryggare K-fee
- kaffebryggare Wilbur Curtis
- kaffebryggare Fetco
- kaffebryggare Avantco
- kaffebryggare Kogan
- kaffebryggare La Marzocco
- kaffebryggare Cecilware
- kaffebryggare La San Marco
- kaffebryggare PowerXL
- kaffebryggare Estella Caffe
- kaffebryggare QuickMill
- kaffebryggare Signature
- kaffebryggare PowerTec Kitchen
- kaffebryggare Leopold Vienna
- kaffebryggare Emeril Lagasse
- kaffebryggare Autobar
- kaffebryggare Didiesse
- kaffebryggare JennAir
- kaffebryggare Flama
- kaffebryggare Wacaco
- kaffebryggare BCC
- kaffebryggare Kitchen Originals
- kaffebryggare Ursus Trotter
- kaffebryggare Keurig
- kaffebryggare Nostalgia
- kaffebryggare Espressions
- kaffebryggare Barista
- kaffebryggare Prixton
- kaffebryggare Fulgor Milano
- kaffebryggare Egro
- kaffebryggare Nemox
- kaffebryggare Veromatic
- kaffebryggare Toddy
- kaffebryggare KING Hoff
- kaffebryggare WestBend
- kaffebryggare Mr Coffee
- kaffebryggare Newco
- kaffebryggare Elektra
- kaffebryggare Vibiemme
- kaffebryggare Focus Electrics
- kaffebryggare Petra Electric
- kaffebryggare Hario
- kaffebryggare La Cimbali
- kaffebryggare Wega
- kaffebryggare Casadio
- kaffebryggare Bellarom
- kaffebryggare Bloomfield
- kaffebryggare Giesen Coffee Roasters
- kaffebryggare Bifinet
- kaffebryggare Ceado
- kaffebryggare Casselin
- kaffebryggare Create
- kaffebryggare Ideen Welt
- kaffebryggare Victoria Arduino
- kaffebryggare Girmi
- kaffebryggare Conti
- kaffebryggare Koolatron
- kaffebryggare Astoria
- kaffebryggare Inalsa
- kaffebryggare HeyCafe
- kaffebryggare Espressotoria
- kaffebryggare Delizio
- kaffebryggare Bonavita
- kaffebryggare Beautiful
- kaffebryggare Caffe Borbone
- kaffebryggare Rhea
- kaffebryggare Catler
- kaffebryggare Royal Catering
- kaffebryggare Szarvasi
- kaffebryggare Auspure
- kaffebryggare Brentwood
- kaffebryggare Avoury
- kaffebryggare Electroline
- kaffebryggare Healthy Choice
- kaffebryggare Café
- kaffebryggare The Little Guy
- kaffebryggare Barista Mate
- kaffebryggare Imarflex
- kaffebryggare Mystery
- kaffebryggare HomeCraft
- kaffebryggare Flytek
- kaffebryggare Pyrex
- kaffebryggare Total Chef
- kaffebryggare Veromatic International
- kaffebryggare Coffeemaxx
- kaffebryggare Sielaff
- kaffebryggare Caffe2go
Nyaste kaffebryggare Manualer
9 April 2025
9 April 2025
7 April 2025
7 April 2025
6 April 2025
5 April 2025
4 April 2025
4 April 2025
4 April 2025
4 April 2025