Asus Zenfone 4 Selfie Pro Bruksanvisning
Asus
Smartphone
Zenfone 4 Selfie Pro
Läs nedan 📖 manual på svenska för Asus Zenfone 4 Selfie Pro (104 sidor) i kategorin Smartphone. Denna guide var användbar för 6 personer och betygsatt med 4.5 stjärnor i genomsnitt av 2 användare
Sida 1/104

ZD552KL
User Guide

2
Care and safety
Guidelines
Road safety comes first. We strongly recommend not to use your device when
driving or operating any type of vehicle.
This device should only be used in environments with ambient temperatures
between 0°C (32°F) and 35°C (95°F).
Turn off your device in restricted areas where the use of mobile devices is prohibited.
Always obey rules and regulations when in restricted areas, such as, in aircraft, movie
theater, in hospitals or near medical equipment, near gas or fuel, construction sites,
blasting sites and other areas.
Use only AC adapters and cables approved by ASUS for use with this device. Refer to
the rating label on the bottom of your device and ensure that your power adapter
complies with this rating.
Do not use damaged power cables, accessories, and other peripherals with your
device.
Keep your device dry. Do not use or expose your device near liquids, rain, or
moisture.
You can put your device through x-ray machines (such as those used in conveyor
belts for airport security), but do not expose the device to magnetic detectors and
wands.
The device screen is made of glass. If the glass gets broken, stop using the device
and do not touch the broken glass parts. Immediately send device for repair to
ASUS-qualified service personnel.
Do not listen at high volume levels for long periods to prevent possible hearing
damage.
Disconnect the AC power before cleaning your device. Use only a clean cellulose
sponge or chamois cloth when cleaning your device screen.
Send device for repair to ASUS-qualified service personnel only.
E12567
July 2017
First Edition

3
Proper disposal
Risk of explosion if battery is replaced by an incorrect type. Dispose of used batteries
according to the instructions.
DO NOT throw the battery in municipal waste. The symbol of the crossed out
wheeled bin indicates that the battery should not be placed in municipal waste.
DO NOT throw this product in municipal waste. This product has been designed to
enable proper reuse of parts and recycling. The symbol of the crossed out wheeled
bin indicates that the product (electrical, electronic equipment and mercury-
containing button cell battery) should not be placed in municipal waste. Check local
regulations for disposal of electronic products.
DO NOT throw this product in fire. DO NOT short circuit the contacts. DO NOT
disassemble this product.
ZenTalk Fans Forum
(http://www.asus.com/zentalk/global_forward.php)
WARNING: This product may contain chemicals known to the State of California to cause cancer, birth
defects, or other reproductive harm. Wash hands after handling.

6
Wi-Fi Hotspot 80 ........................................................................................................................................
Bluetooth Tethering ............................................................................................................................81
8 Travel and Maps
Weather 82 .......................................................................................................................
Launching the Weather app 82 ............................................................................................................
Weather home screen 83 ........................................................................................................................
Clock 84 ............................................................................................................................
World Clock 84 ............................................................................................................................................
Alarm clock 85 ............................................................................................................................................
Stopwatch 85 ..............................................................................................................................................
Timer 86 ........................................................................................................................................................
9 Zen Everywhere
Special Zen Tools .........................................................................................................87
Flashlight 87 ................................................................................................................................................
Power & Boost 88 .......................................................................................................................................
Calculator 89 ...............................................................................................................................................
Auto-start Manager 90 ............................................................................................................................
Sound Recorder 91 ...................................................................................................................................
Mobile Manager 93 ...................................................................................................................................
Bluelight Filter 94 ......................................................................................................................................
10 Maintain your Zen
Keeping your device up-to-date 95 ................................................................................
Updating your system 95 .......................................................................................................................
Storage 95 ....................................................................................................................
Backup and reset 95 ....................................................................................................
Securing your ASUS Phone 96 ..............................................................................................................
Appendix
Index

9
Chapter 1: Basics
Installing a Nano SIM card
A Nano subscriber identity module (Nano SIM) card stores information, such as your mobile phone
number, contacts, messages and other data that gives you access to a mobile network.
YourASUSPhonecomeswithoneNanoSIMandoneNanoSIM/MicroSDcombocardslotthatallow
you to set up and use two mobile network services without having to carry two mobile devices at
the same time.
CAUTION!
• Thisdeviceisdesignedforusewithamobilecarrier-approvedNanoSIMcardonly.
• WedonotrecommendtheuseoftrimmedSIMcardsintheNanoSIMcardslots.
• TurnoffyourdevicebeforeinsertingaNanoSIMcard.
• BeextracarefulwhenhandlingaNanoSIMcard.ASUSisnotresponsibleforanylossordamage
incurred to your Nano SIM card.
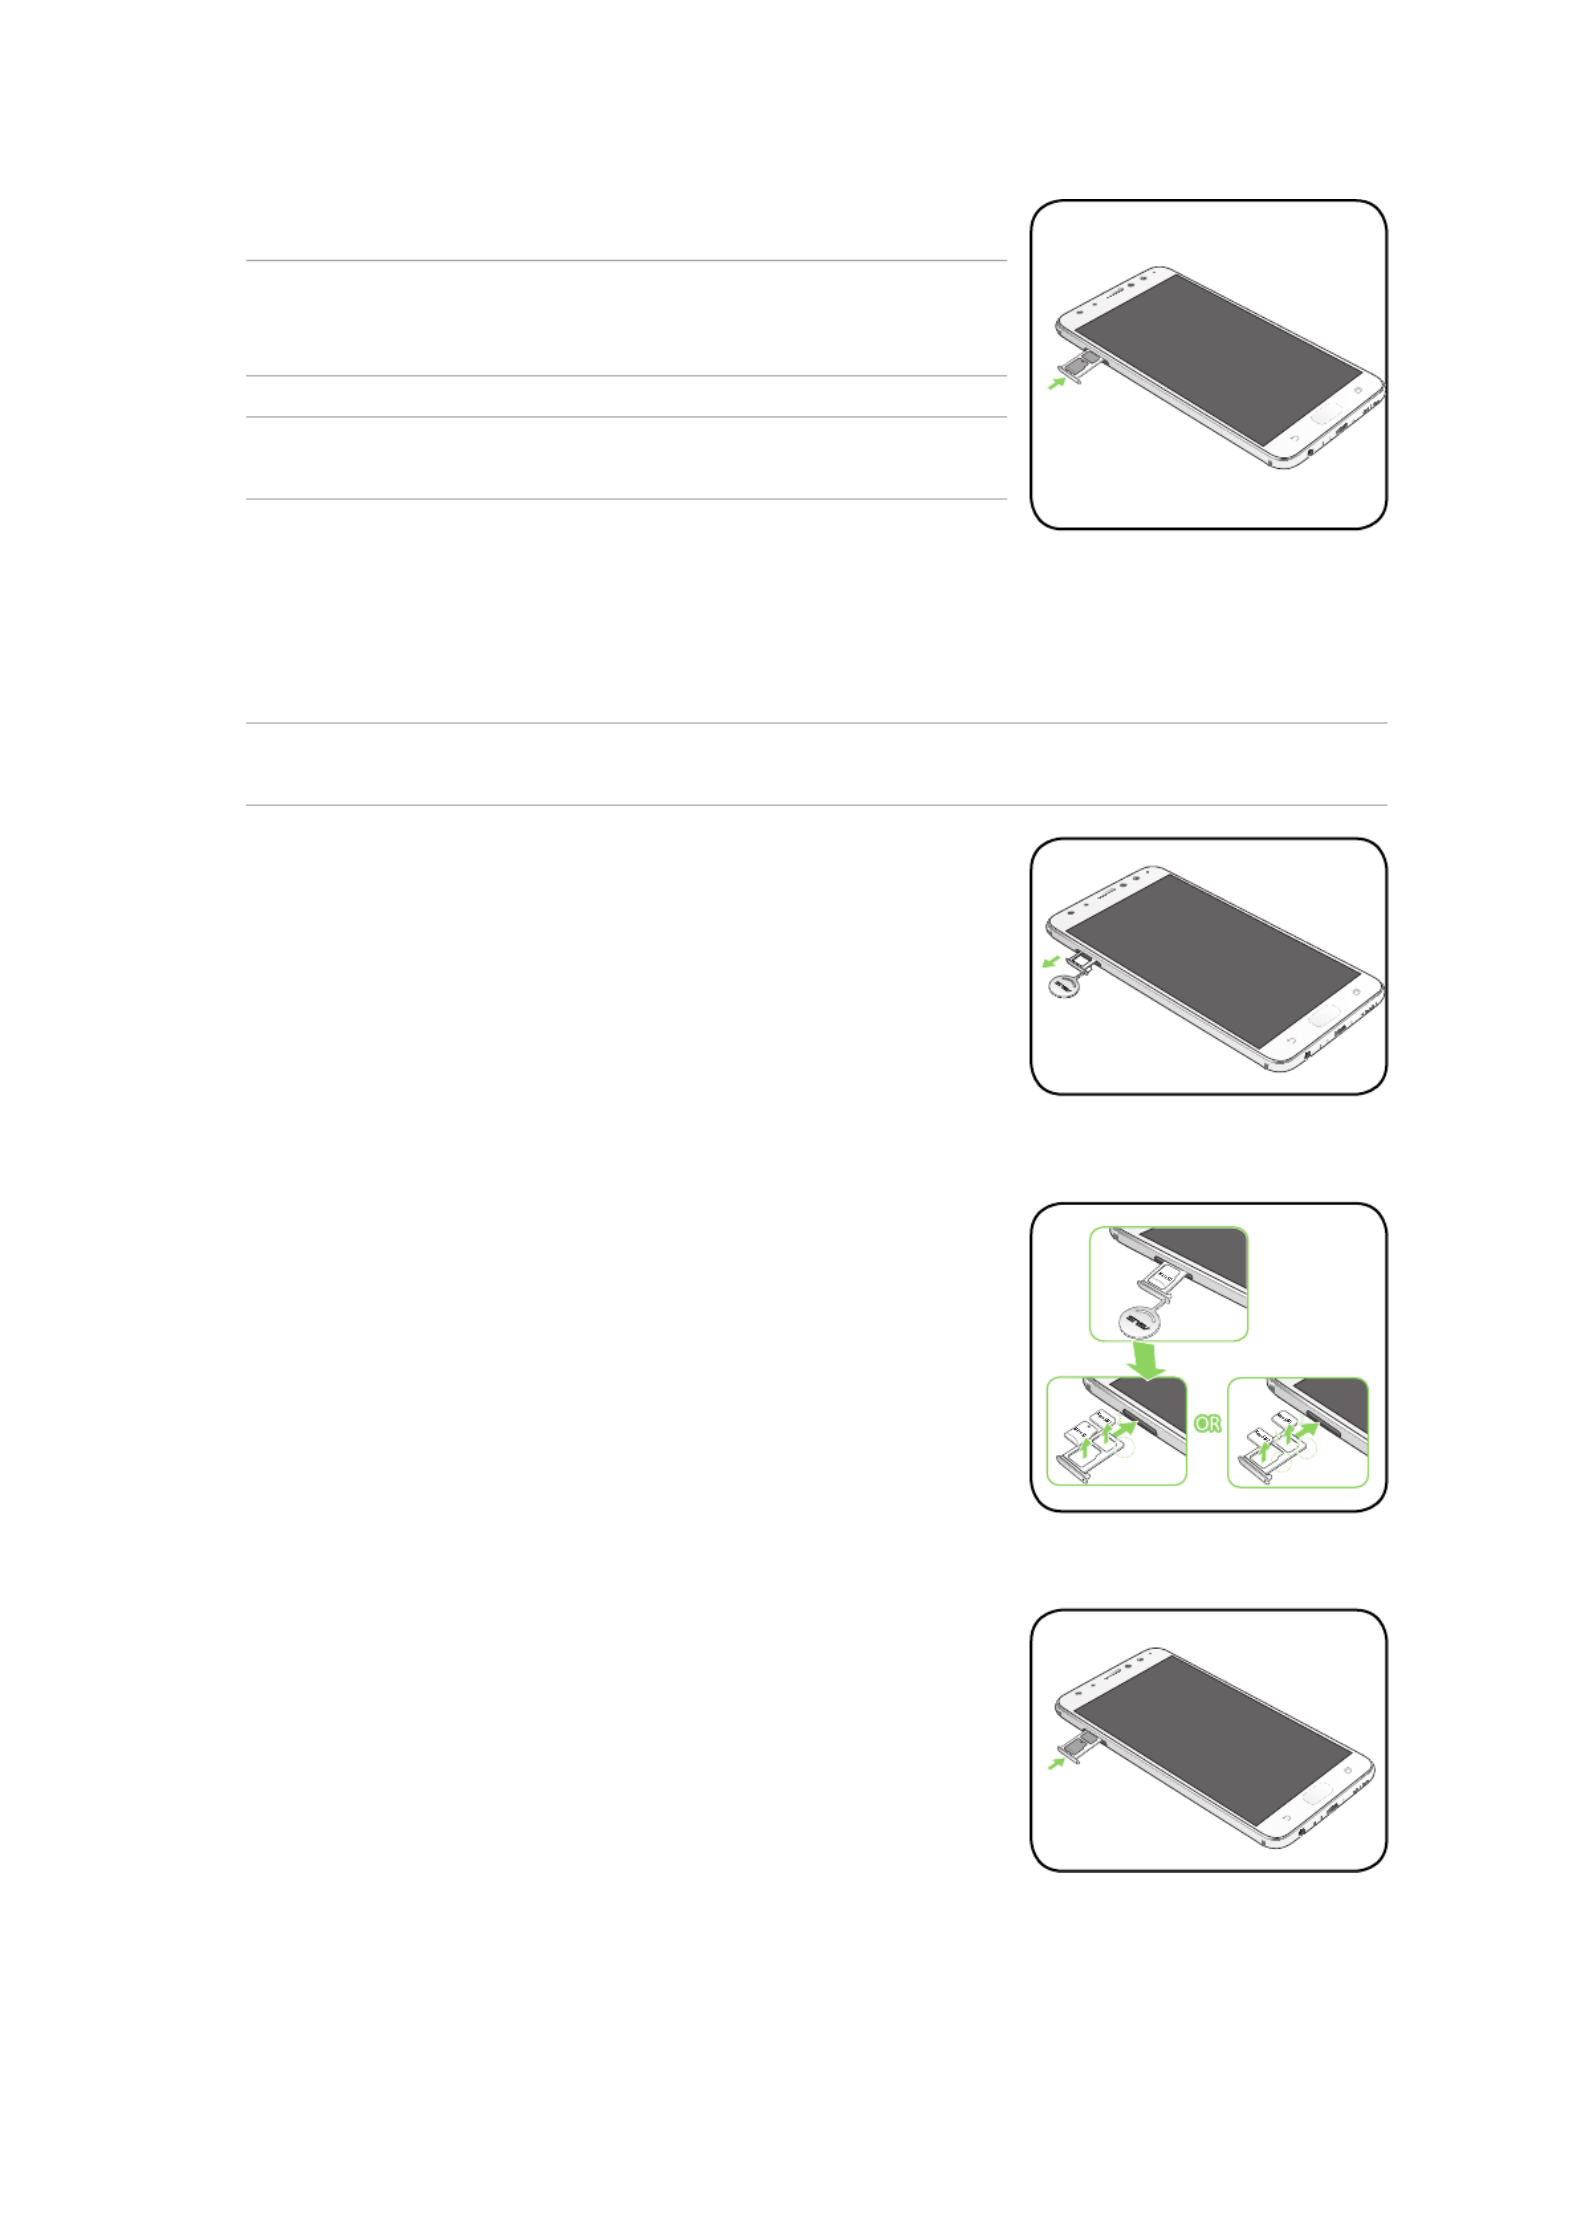
ToinstallaNanoSIMcard:
1. Turn off your device.
2. PushapinintotheholeontheNanoSIM,NanoSIM/
MicroSD combo card slot to eject the tray out.
3. InserttheNanoSIM/MicroSDcard(s)intothecardslot(s).
IMPORTANT!
• Use only a standard Nano SIM card on your ASUS Phone.
A trimmed SIM card may not properly fit into and may
not be detected by your ASUS Phone.
• You can only use the Nano SIM2 card or the MicroSD
card at a time.
10
Chapter 1: Basics
Removing a Nano SIM card
CAUTION: Be extra careful when handling a Nano SIM card. ASUS is not responsible for any loss or
damage incurred to your Nano SIM card.
ToremoveaNanoSIMcard:
1. Turn off your device.
2. PushapinintotheholeontheNanoSIM,NanoSIM/MicroSD
combo card slot to eject the tray out.
3. RemovetheNanoSIMcardfromtheNanoSIM,NanoSIM/
MicroSD combo card slot.
4. Push the tray to close it.
4. Push the tray to close it.
IMPORTANT! When two SIM cards are inserted, only one SIM
cardslotsupports4G/3G/2Gservice.TheotherSIMcardslotonly
supports2G/3Gservice.
CAUTION: Do not use sharp tools or solvent on your device to avoid
scratches on it.

11
Chapter 1: Basics
Installing a memory card
Your ASUS Phone supports a MicroSD™ memory card with up to 2TB capacity.
NOTE: Some memory cards may not be compatible with your ASUS Phone. Ensure that you use only
compatible memory cards to prevent loss of data, damage to your device or memory card, or both.
CAUTION: Be extra careful when handling a memory card. ASUS is not responsible for any data loss or
damage incurred to your memory card.
Toinstallamemorycard:
1. Turn off your device.
2. PushapinintotheholeontheNanoSIM,NanoSIM/
MicroSD combo card slot to eject the tray out.
3. InserttheMicroSDcardintotheNanoSIM/MicroSDcombocardslot.
4. Push the tray to close it.
Micro SD
Nano-SIM1

15
Chapter 1: Basics
Turning your ASUS Phone on or off
Turning your device on
To turn your device on, press and hold the power button until your device vibrates and starts up.
Turning your device off
Toturnyourdeviceo:
1. If your screen is turned off, press the power button to turn it on. If your screen is locked, unlock
the device screen.
2. Press and hold the power button, then when prompted, tap Power off OKthen tap .
Sleep mode
To put your device in sleep mode, press the power button once until the screen turns off.
Power key
Charging other devices
Use your ASUS Phone to power-charge other mobile devices.
25
Chapter 2: There’s no place like Home
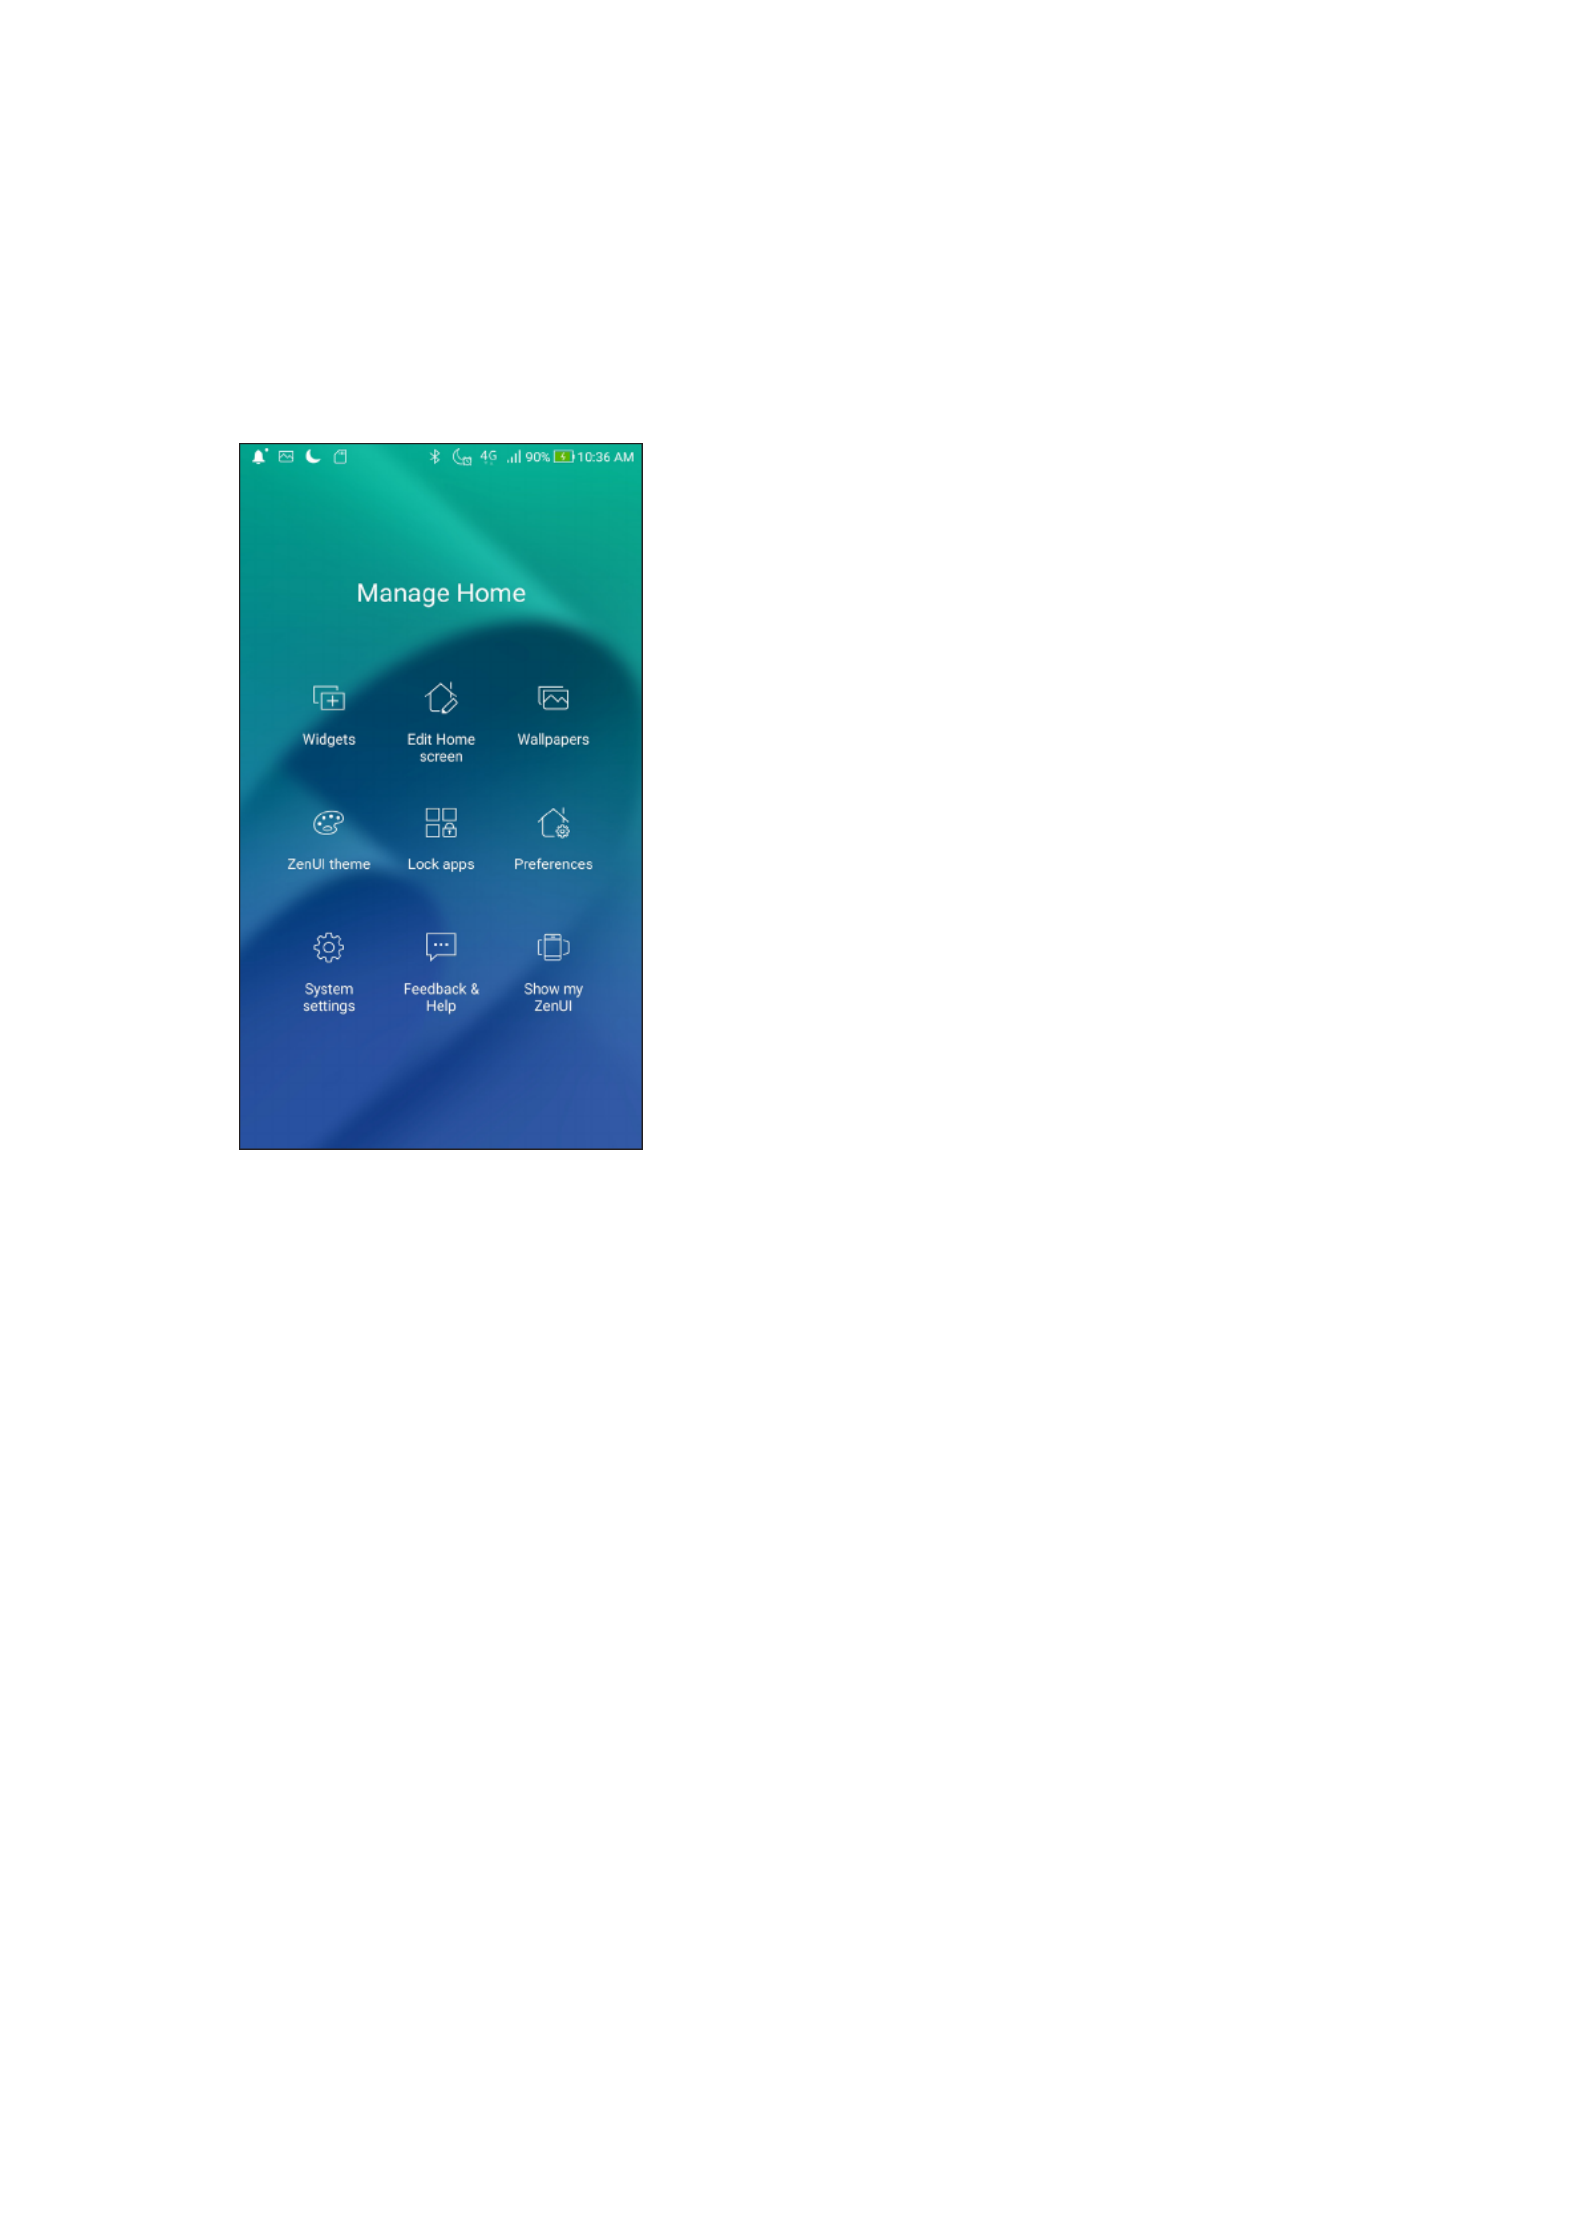
Personalizing your Home screen
Stamp your own personality on your Home screen. Select an attractive design as your wallpaper,
add shortcuts for quick access to your favorite apps, and add widgets for a quick review of
important info. You can also add more pages so you can add and quickly access or view more apps
or widgets on your Home screen.
Widgets
Widgets shortcuts make it easier to quickly-access your often-used or favorite widgets from your
Home screen.
You can put widgets, which are small dynamic apps, on your Home screen. Widgets provide you
with quick-views of the weather forecast, calendar events information, battery status, and more.
Adding widgets
Toaddawidget:
1. Tap and hold an empty area on your Home screen and select .Widgets
2. From the Widgets screen, tap and hold a widget, then drag it to an empty area on your Home
screen.

36
5. Follow the instructions to set up your backup screen lock method.
6. Select how you want to display your notifications on the lock screen, then tap .Done
7. Tap NEXT and follow the instructions to register your fingerprint.
8. When finished, tap .Done
NOTE: Settings Security Fingerprint You can add more fingerprint IDs from > > .

39
Chapter 3: Work hard, play harder
Clearing the browsing data
Clear the browsing data that are temporarily stored in your ASUS Phone to improve the loading
performance of your Chrome browser. The browsing data includes browsing history, cache,
cookies/sitedata,savedpasswords,andautolldata.
1. Launch the browser.
2. Tap > > > Settings Privacy CLEAR BROWSING DATA.
3. Select the browsing data that you want to delete.
4. When done, click CLEAR DATA.
40
Chapter 3: Work hard, play harder
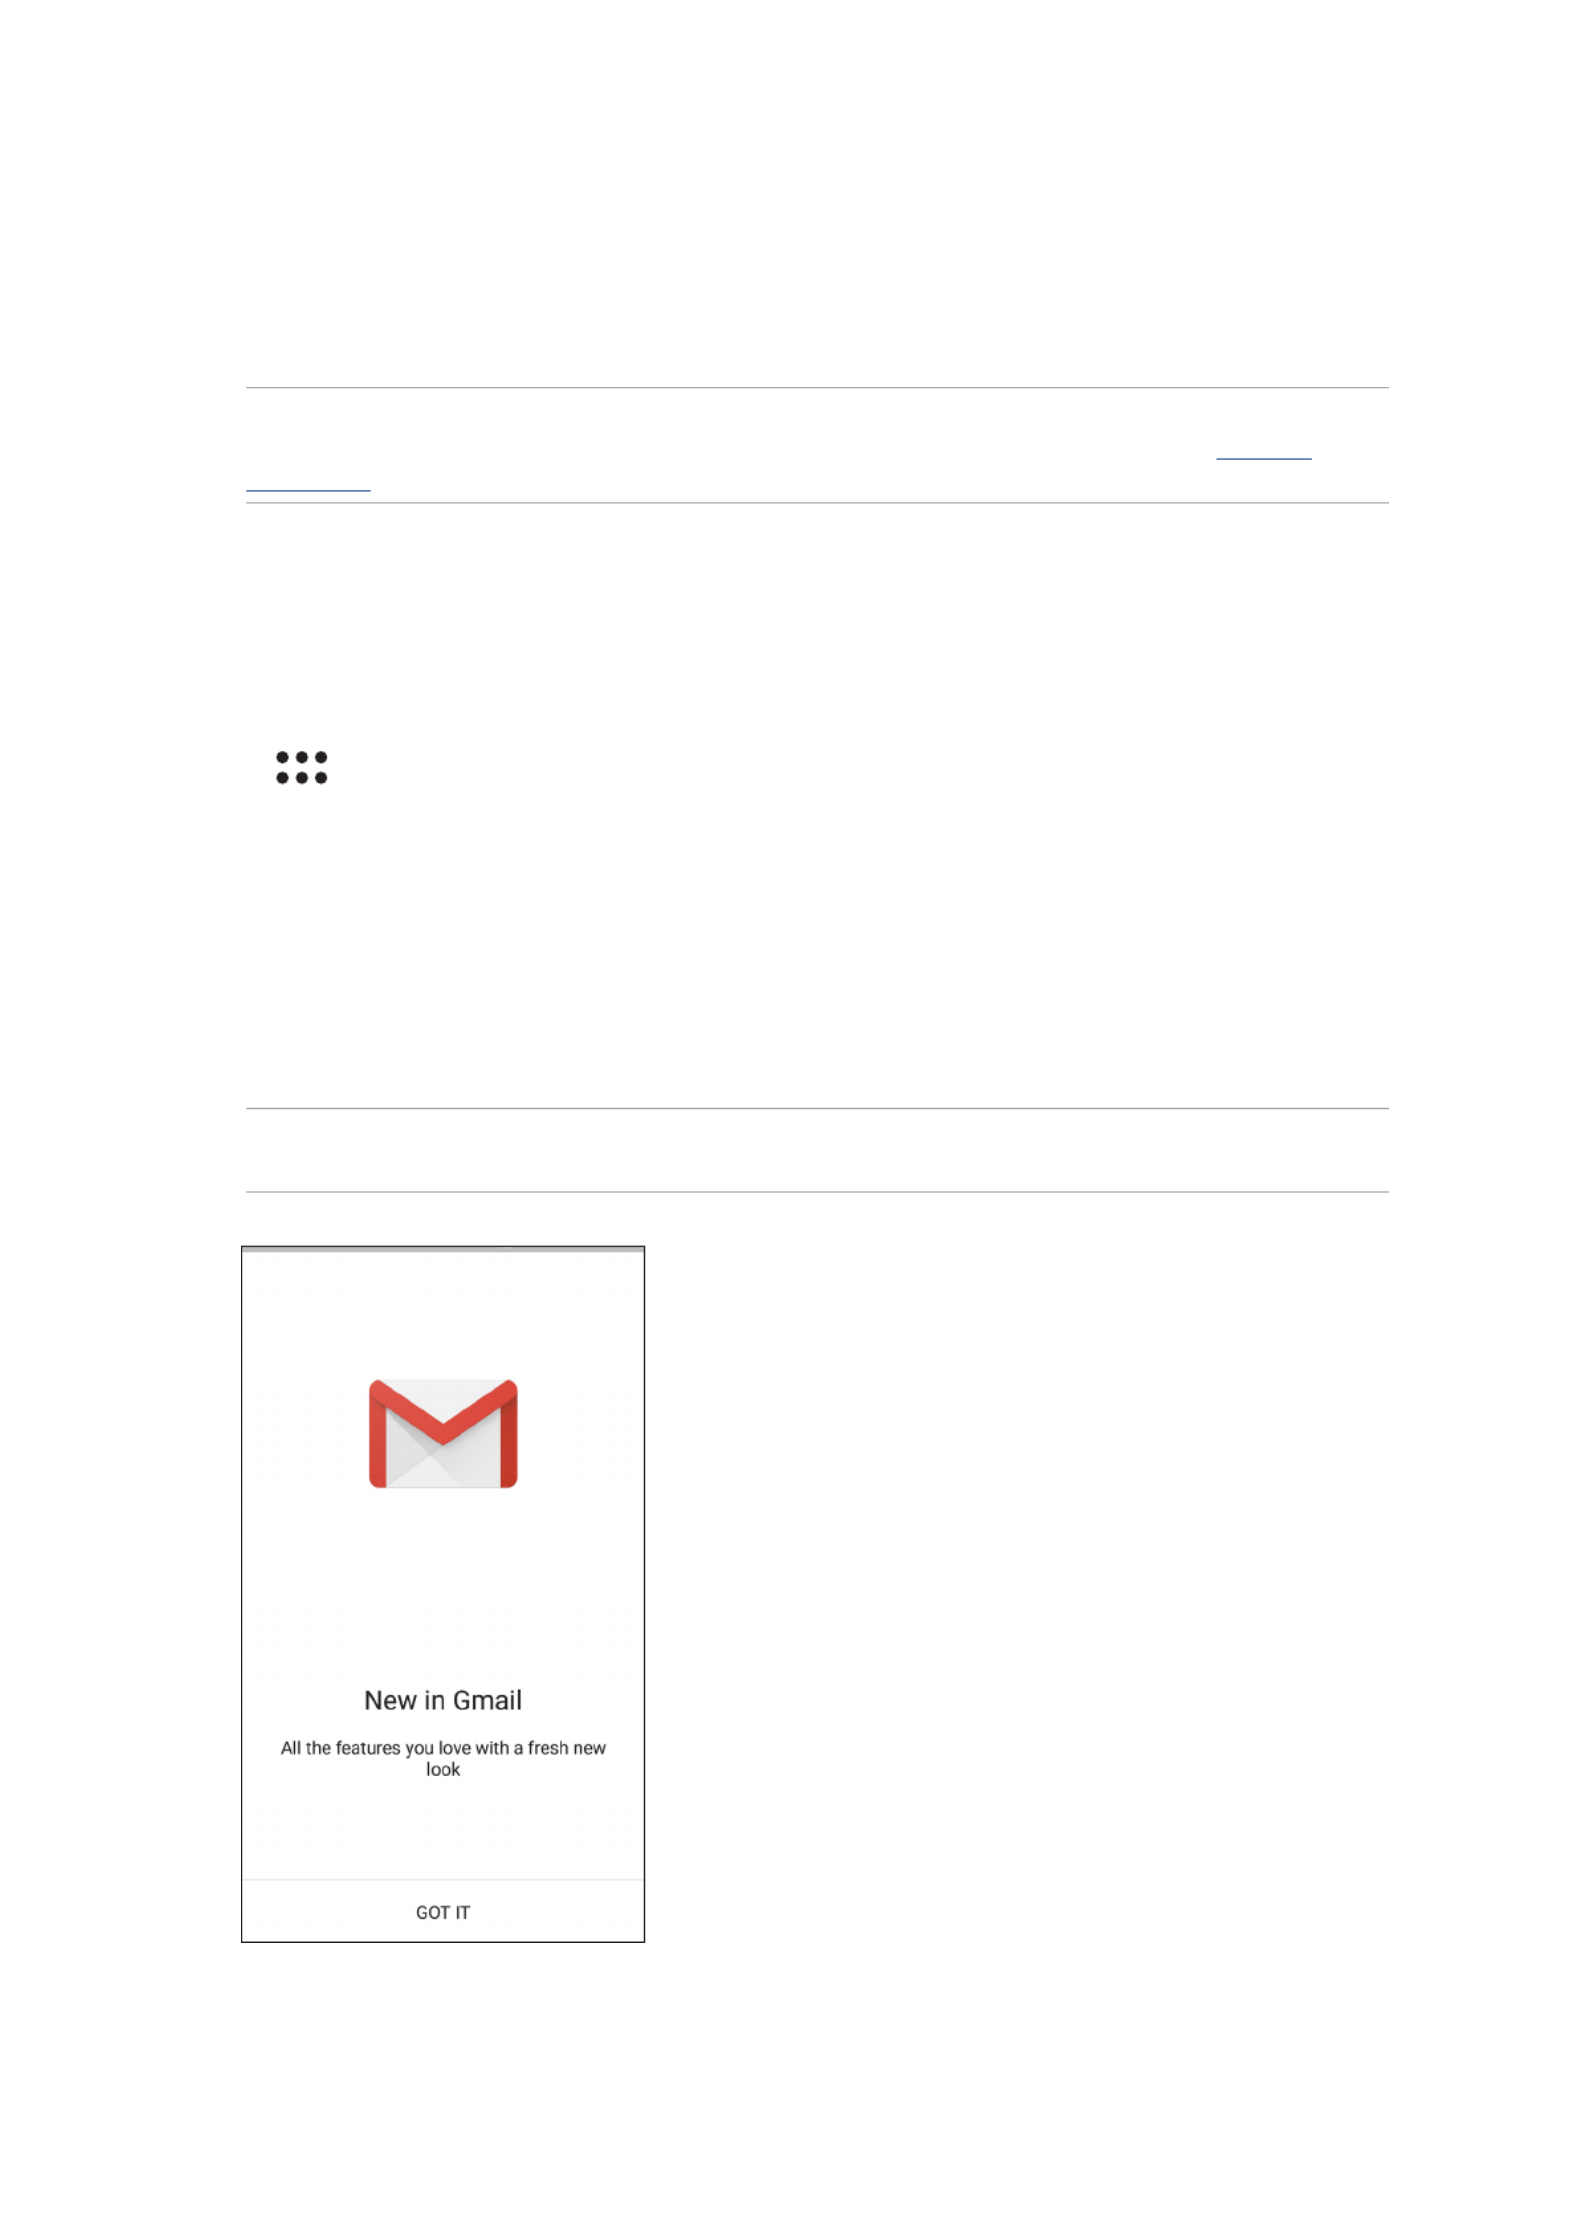
Gmail
Use Gmail to set up your Google account to get into Google-related services and apps as well as
receive, send, and browse emails right from your ASUS Phone. You can also set up other email
accounts such as Yahoo or your work email account via Gmail.
IMPORTANT! Your ASUS Phone must be connected to a Wi-Fi or mobile network so you can add
an email account or send and receive emails from added accounts. For more details, see Staying
connected.
TosetupyourGoogleaccount:
1. FromyourHomescreen,doanyofthefollowingtolaunchGmail:
• TapGoogle > Gmail.
• Tap > .Gmail
2. Tap Add an email address, then tap Next.
3. Select Google, then tap Next.
4. Enter your email address. To create a new Google account, tap Or create a new account.
5. Follow the next steps to sign in to your Google account.
NOTE: If you want to set up your work account on your ASUS Phone, ask for the email settings from
your network administrator.

51
Chapter 4: Keeping in touch
Receiving calls
The touch screen of your ASUS Phone lights up when there is an incoming call. The display of the
incoming call also varies, depending on the status of your ASUS Phone.
Answering calls
TherearetwowaystoansweracalldependingonthestatusofyourASUSPhone:
• Ifyourdeviceisactive,tapAnswer or to reject a call, tap .Decline
• Ifyourdeviceislocked,drag to to answer or to to reject the call.
Setting callbacks for incoming calls
When you can’t answer an incoming call from a mobile number right away, you can set it as a call
later task. You can retrieve and act on this task at a more convenient time from the Do It Later app.
1. On an incoming call from a mobile number, swipe up from the lower part of the screen.
2. Tap Can’t talk now. Text me. An SMS message will be sent to your caller.
Managing your call logs
From your call logs, you can call back your missed calls, save calls to your contacts list, block callers,
or redial your recently-called number or contact.
Saving calls to Contacts
Youcanaddacall/numberfromyourcalllogstoyourcontactslist.
1. From the Phone app, tap to display your call logs.
2. Tap beside the number that you want to add to your contacts list.
3. Tap beside the number.
4. Tap Create new contact to add a new entry to your contacts list.
Tap Add to an existing contact, select a contact, then tap if you want to overwrite the
contact’s number with this new one.

52
Chapter 4: Keeping in touch
Blocking calls
You can add a number or call from your call log to your block list.
1. From the Phone app, tap to display your call logs.
2. Select the number that you want to block, tap > , then tap .Add to block list OK
Redialing your last-called number
Toredialyourlast-callednumber:
1. From the Phone app, tap to display your call logs.
2. Tap Call to display your last-called number, then tap Call again to redial the number.
3. Tap to end the call.

53
Chapter 4: Keeping in touch
Other call options
During an active call, tap and tap any of the possible call options for when a call is in
progress.
Microphone
Turns the microphone for the active call on or off. When the microphone is off or in
mute mode, you can hear the caller but the caller can’t hear you.
Speakerphone
Turns the speakerphone on or off.
Call on hold
Puts an active call on hold.
Conference call
When you have subscribed to a conference call service with your mobile service
provider, this icon allows you to add a contact or contacts in an active call.
NOTES:
• Thenumberofparticipantsintheconferencecalldependonyourconferencecall
subscription. You can inquire from your mobile service provider about this service.
• Formoredetailsonconferencecall,seeManaging multiple calls.
Record
Records an active call.
IMPORTANT! Before recording an active call, it is dictated by most local laws to ask
permission from the other person or persons on the other line.
NOTE: For more details, refer to the section Recording calls.
Produktspecifikationer
| Varumärke: | Asus |
| Kategori: | Smartphone |
| Modell: | Zenfone 4 Selfie Pro |
Behöver du hjälp?
Om du behöver hjälp med Asus Zenfone 4 Selfie Pro ställ en fråga nedan och andra användare kommer att svara dig
Smartphone Asus Manualer

20 September 2024
12 September 2024
3 September 2024
30 Augusti 2024
30 Augusti 2024
28 Augusti 2024
25 Augusti 2024
24 Augusti 2024
24 Augusti 2024
24 Augusti 2024
Smartphone Manualer
- Smartphone Sony
- Smartphone Samsung
- Smartphone Xiaomi
- Smartphone LG
- Smartphone AEG
- Smartphone Huawei
- Smartphone Brondi
- Smartphone HP
- Smartphone Philips
- Smartphone Panasonic
- Smartphone Garmin
- Smartphone Gigaset
- Smartphone Motorola
- Smartphone Medion
- Smartphone Nokia
- Smartphone Toshiba
- Smartphone Wiko
- Smartphone Yarvik
- Smartphone Acer
- Smartphone Aiwa
- Smartphone Alcatel
- Smartphone Albrecht
- Smartphone Alecto
- Smartphone Aligator
- Smartphone Allview
- Smartphone Apple
- Smartphone Amazon
- Smartphone Amplicomms
- Smartphone Amplicom
- Smartphone Archos
- Smartphone Alcatel-Lucent
- Smartphone Prestigio
- Smartphone Google
- Smartphone BenQ
- Smartphone Lexibook
- Smartphone Sharp
- Smartphone Telefunken
- Smartphone Silvercrest
- Smartphone Nedis
- Smartphone Thomson
- Smartphone Manta
- Smartphone OK
- Smartphone Hisense
- Smartphone Hyundai
- Smartphone Sony Ericsson
- Smartphone Trekstor
- Smartphone Micromax
- Smartphone Kodak
- Smartphone Bush
- Smartphone RCA
- Smartphone Sonim
- Smartphone Sencor
- Smartphone Overmax
- Smartphone Blaupunkt
- Smartphone TP Link
- Smartphone Lenovo
- Smartphone Energy Sistem
- Smartphone Polaroid
- Smartphone Doro
- Smartphone Sagem
- Smartphone Lava
- Smartphone Blu
- Smartphone Easypix
- Smartphone Denver
- Smartphone Intex
- Smartphone ZTE
- Smartphone Sanyo
- Smartphone Konrow
- Smartphone Brigmton
- Smartphone Sunstech
- Smartphone TCL
- Smartphone Gigabyte
- Smartphone Mitsubishi
- Smartphone Aspera
- Smartphone Microsoft
- Smartphone Nec
- Smartphone Swissvoice
- Smartphone Sunny
- Smartphone Nordmende
- Smartphone Haier
- Smartphone Krüger And Matz
- Smartphone Binatone
- Smartphone Blackberry
- Smartphone KPN
- Smartphone HTC
- Smartphone Vivo
- Smartphone Olympia
- Smartphone Razer
- Smartphone Mio
- Smartphone Wolder
- Smartphone Audioline
- Smartphone NGM
- Smartphone Goclever
- Smartphone Profoon
- Smartphone Vodafone
- Smartphone NGS
- Smartphone Dell
- Smartphone Hammer
- Smartphone Switel
- Smartphone InFocus
- Smartphone GreatCall
- Smartphone XD
- Smartphone Pantech
- Smartphone Alba
- Smartphone Honor
- Smartphone RugGear
- Smartphone Umidigi
- Smartphone CAT
- Smartphone Intermec
- Smartphone AT&T
- Smartphone Mpman
- Smartphone Trevi
- Smartphone Tesla
- Smartphone Bury
- Smartphone Logicom
- Smartphone Karbonn
- Smartphone Vivax
- Smartphone Emporia
- Smartphone Hannspree
- Smartphone Phicomm
- Smartphone Nevir
- Smartphone Kyocera
- Smartphone Crosscall
- Smartphone Plum
- Smartphone Infinix
- Smartphone OnePlus
- Smartphone Keneksi
- Smartphone Klipad
- Smartphone Iget
- Smartphone T-Mobile
- Smartphone JCB
- Smartphone CRUX
- Smartphone Geemarc
- Smartphone Unnecto
- Smartphone Wileyfox
- Smartphone ITT
- Smartphone MyPhone
- Smartphone Avus
- Smartphone Wolfgang
- Smartphone Oppo
- Smartphone BQ
- Smartphone ORA
- Smartphone Echo
- Smartphone Primux
- Smartphone Tiptel
- Smartphone UTStarcom
- Smartphone Zipy
- Smartphone Mediacom
- Smartphone Beafon
- Smartphone SPC
- Smartphone Billow
- Smartphone Telstra
- Smartphone Ulefone
- Smartphone ToughGear
- Smartphone Benefon
- Smartphone Komu
- Smartphone Doogee
- Smartphone Energizer
- Smartphone Tremay
- Smartphone Realme
- Smartphone Kurio
- Smartphone Piranha
- Smartphone Coolpad
- Smartphone TAG Heuer
- Smartphone Mobistel
- Smartphone Itel
- Smartphone Garmin-Asus
- Smartphone Handheld
- Smartphone Fero
- Smartphone AT Telecom
- Smartphone Xtreamer
- Smartphone O2
- Smartphone General Mobile
- Smartphone Mustang
- Smartphone Syco
- Smartphone Kogan
- Smartphone Maxcom
- Smartphone I.safe Mobile
- Smartphone Pharos
- Smartphone Storex
- Smartphone Fairphone
- Smartphone Freeman
- Smartphone HomTom
- Smartphone EVOLVEO
- Smartphone Auro
- Smartphone Maxx
- Smartphone ITTM
- Smartphone Verykool
- Smartphone Cyrus
- Smartphone Posh Mobile
- Smartphone THL
- Smartphone NGM-Mobile
- Smartphone Media-tech
- Smartphone Nothing
- Smartphone Oukitel
- Smartphone Lark
- Smartphone NUU Mobile
- Smartphone Senifone
- Smartphone Tecno
- Smartphone Telme
- Smartphone UMi
- Smartphone Olitech
- Smartphone Mobiola
- Smartphone Meizu
- Smartphone Neffos
- Smartphone Gionee
- Smartphone TIM
- Smartphone Cubot
- Smartphone Leotec
- Smartphone Leagoo
- Smartphone NTech
- Smartphone Majestic
- Smartphone Nubia
- Smartphone LeEco
- Smartphone Best Buy
- Smartphone GSmart
- Smartphone Bea-fon
- Smartphone Opticon
- Smartphone EStar
- Smartphone Saiet
- Smartphone Facom
- Smartphone Bluebird
- Smartphone Jitterbug
- Smartphone Custom
- Smartphone CSL
- Smartphone POCO
- Smartphone Tecdesk
- Smartphone Aplic
- Smartphone HMD
- Smartphone Opis
- Smartphone Volla
- Smartphone Nothing Tech
- Smartphone Maxwest
- Smartphone Krüger&Matz
- Smartphone Kalley
Nyaste Smartphone Manualer
2 April 2025

30 Mars 2025
10 Mars 2025
7 Mars 2025
6 Mars 2025
5 Mars 2025
3 Mars 2025
2 Mars 2025
26 Februari 2025

26 Februari 2025