Realme C11 Bruksanvisning
Realme
Smartphone
C11
Läs nedan 📖 manual på svenska för Realme C11 (273 sidor) i kategorin Smartphone. Denna guide var användbar för 17 personer och betygsatt med 4.5 stjärnor i genomsnitt av 2 användare
Sida 1/273

realme Smartphone ColorOS 5.2
realme Smartphone ColorOS 5.2
realme Smartphone ColorOS 5.2
realme Smartphone ColorOS 5.2 realme Smartphone ColorOS 5.2 User Guide
User Guide
User Guide
User Guide User Guide
Content
Content
Content
Content Content
1. Welcome Page ........................................................................................................................... 6
2. Safety Information ...................................................................................................................... 7
3. Get started ..................................................................................................................................11
3.1. Quick look ......................................................................................................................... 11
3.1.1. ColorOS 5.2 Features ............................................................................................. 11
3.1.2. Sleep/Wake buon ...............................................................................................23
3.1.3. Menu, Home and Return buttons ......................................................................... 25
3.1.4. Volume buttons ..................................................................................................... 29
3.1.5. Micro-USB port ...................................................................................................... 31
3.1.6. Headset jack .......................................................................................................... 32
3.1.7. SIM and SD cards ................................................................................................... 32
3.1.8. Accessories came with realme phone ................................................................... 34
3.1.9. Charging the battery .............................................................................................36
3.1.10. Gesture & Moon ...............................................................................................37
3.1.11. Key combinaons ................................................................................................ 41
3.1.12. Status Icons ......................................................................................................... 43
3.2. Conguraon Seings ...................................................................................................... 46
3.2.1. Fingerprint, Face and Passcode ............................................................................. 46
3.2.2. Set up other mail and calendar accounts .............................................................. 60
3.2.3. Transfer data from the old phone to realme smartphone .................................... 60
3.2.4. Date and Time ....................................................................................................... 66
3.2.5. Language and Region ............................................................................................ 67
3.2.6. Connect to the Internet ......................................................................................... 69
4. What's new in ColorOS 5.2 .......................................................................................................... 70
4.1. Smart Sidebar ................................................................................................................... 70
4.2 Smart Scan only India version have( ) ............................................................................ 75
4.3 New features of Smart Assistant only India version have ( ).......................................... 84
4.4 ORoaming .......................................................................................................................... 93
4.5 New Features of video .................................................................................................... 100
4.6 Smart Driving ................................................................................................................... 104
4.7 me Space Ga ..................................................................................................................... 112
4.8 Customizing mer for Clock app ..................................................................................... 120
4.9 Scanning names to save on Contacts .............................................................................. 126
4.10 Save more baery with Smart Power Saver .................................................................. 133
4.11 Say hello to Talia, your TouchPal assistant 140 ....................................................................
5 Basics .......................................................................................................................................... 144

5.1 Use apps .......................................................................................................................... 144
5.2 Share from apps .............................................................................................................. 147
5.3 One-click cleanup ............................................................................................................ 147
5.4 Lock the running background apps ................................................................................. 149
5.5 View, zoom in and out ..................................................................................................... 150
5.6 Smart & Convenient Operaon ....................................................................................... 152
5.6.1. Navigaon Keys ................................................................................................... 152
5.6.2. Assisve Ball ........................................................................................................ 158
5.7. Change the screen orientaon ....................................................................................... 161
5.8. Split-screen ..................................................................................................................... 162
5.9. Take and edit a screenshot ............................................................................................. 166
5.10. Control Center, Nocaon and Status Bar
,................................................................ 170
5.11. Search ........................................................................................................................... 175
5.12. Test ............................................................................................................................... 176
5.12.1. Add or change keyboard languages .................................................................. 176
5.12.2. Type, edit, and delete text 178 ................................................................................
5.12.3. Predicon .......................................................................................................... 181
5.12.4. Voice typing ....................................................................................................... 185
5.12.5. TouchPal for realme 187 ...........................................................................................
5.13. Sound, Vibraon, and System Feedback ...................................................................... 189
5.14. Charge and monitor the battery .................................................................................. 192
5.15. Locaon Service ........................................................................................................... 194
5.16. Use the phone internaonally 196 .....................................................................................
5.17. Power Saver .................................................................................................................. 197
6. Personalize your realme phone ................................................................................................. 205
6.1. ColorOS 5.2 device name ............................................................................................... 205
6.2. Personalize the Home screen ......................................................................................... 206
6.2.1. Organize the Home screen .................................................................................. 206
6.2.2. Home screen widgets & Transition Eects .......................................................... 209
6.3. Change the wallpaper .................................................................................................... 212
6.4. Adjust the screen brightness and color temperature .................................................... 213
6.5. Change auto-lock time ................................................................................................... 215
6.6. Change the font size ....................................................................................................... 216
6.7. Keyboard and input method .......................................................................................... 217
6.7.1. Customize the look of the keyboard 217 ...................................................................
6.7.2. Keyboard Layout .................................................................................................. 218
6.7.3. Trends .................................................................................................................. 221
6.7.4. Keyboard general setngs ................................................................................... 221
6.8. Set up Startup Manager ................................................................................................. 223
6.9. Clone Apps 225 .....................................................................................................................
6.10. Manage Default App .................................................................................................... 226
6.11. Gesture & Moon 227 ........................................................................................................
6.12. Preset device on/o me or Automatic on/off ............................................................ 232
6.13. App display in Full-screen 233 .............................................................................................

7. Apps 235 ..........................................................................................................................................
7.1. Phone ............................................................................................................................. 235
7.1.1 Make and Answer Phone Calls ............................................................................. 235
7.1.2. Conference calls 243 ..................................................................................................
7.1.3. Block calls ............................................................................................................ 244
7.1.4. Emergency calls ................................................................................................... 246
7.1.5. Carrier’s Call Seings........................................................................................... 247
7.5. Message 248 .........................................................................................................................
7.5.1. Send and receive messages ................................................................................. 248
7.5.2. Customize message sengs ................................................................................ 251
7.6. Contacts 254 ..........................................................................................................................
7.6.1. Add a contact 254 ......................................................................................................
7.6.2. Edit and delete a contact ..................................................................................... 263
7.6.3. Import and export contacts ................................................................................. 266
7.6.4. SIM contacts ........................................................................................................ 268
7.6.5. Manage contacts ................................................................................................. 270
7.6.6. Back up your contacts ......................................................................................... 272
7.6.7. VIP Contacts ........................................................................................................ 273
7.7. Phone Manager .............................................................................................................. 274
7.7.1. Scan and opmize the phone .............................................................................. 274
7.7.2. Clean Storage 275 ......................................................................................................
7.7.3. Privacy Permissions ............................................................................................. 277
7.7.4. Virus Scan ............................................................................................................ 280
7.7.5. Payment protecon ............................................................................................. 281
7.7.6. Frequently Used Funcons 282 ..................................................................................
7.7.7. Common Problems Detection ............................................................................. 285
7.7.8. WeChat Cleaner 288 ...................................................................................................
7.7.9. Startup Manager ................................................................................................. 290
7.8. Weather 292 ..........................................................................................................................
7.9. Camera ........................................................................................................................... 294
7.9.1. Take photos ......................................................................................................... 294
7.9.2. Take a sele ......................................................................................................... 300
7.9.3. Shoot video 306 .........................................................................................................
7.9.4. Camera setngs ................................................................................................... 309
7.10. Photos 309 ..........................................................................................................................
7.10.1. Photos overview ................................................................................................ 309
7.10.2. Albums 311 ..............................................................................................................
7.10.3. Stories / Memories ............................................................................................ 316
7.10.4. People 319 ................................................................................................................
7.10.5. View and use photos and videos ....................................................................... 322
7.10.6. Edit photos and videos ...................................................................................... 327
7.11. Music ............................................................................................................................ 336
7.11.1. Music ................................................................................................................. 336
7.11.2. Change sort mode ............................................................................................. 338

7.11.3. Scan local songs ................................................................................................. 339
7.12. Videos ........................................................................................................................... 340
7.13. Clock ............................................................................................................................. 343
7.13.1. Set Alarm Clocks ................................................................................................ 343
7.13.2. Add and view clocks for locaons around the world ........................................ 346
7.13.3. Use the stopwatch ............................................................................................. 347
7.13.4. Set the mer 348 .....................................................................................................
7.14. les Fi .............................................................................................................................. 355
7.14.1. Opmized File management ............................................................................. 355
7.14.2. Fast le browsing 358 ...............................................................................................
7.14.3. View and manage les ...................................................................................... 3 59
7.14.4. Clean Storage 361 ....................................................................................................
7.14.5. Remotely Manage Phone Files .......................................................................... 363
7.14.6. Private Safe ........................................................................................................ 364
7.15. Calculator ..................................................................................................................... 365
7.16. Sound Recording .......................................................................................................... 370
7.16.1. Recorder ............................................................................................................ 370
7.16.2. Manage recordings ............................................................................................ 372
7.17. Compass ....................................................................................................................... 374
7.18. Chrome ......................................................................................................................... 375
7.18.1. Search the web .................................................................................................. 375
7.18.2. Browse the web ................................................................................................. 378
7.18.3. Quick accesses ................................................................................................... 383
8. Safety & Privacy ......................................................................................................................... 386
8.1. Device security ............................................................................................................... 386
8.1.1. Lock screen password 386 .........................................................................................
8.1.2. Smart Lock ........................................................................................................... 388
8.1.3. Payment protecon ............................................................................................. 390
8.1.4. Set up a SIM card lock ......................................................................................... 391
8.1.5. Virus Scan ............................................................................................................ 393
8.1.6. Pseudo Base Staon Blocking 393 ..............................................................................
8.1.7. Protect Personal Informaon .............................................................................. 394
8.2. Device administraon .................................................................................................... 395
8.2.1. Allow and install apps from unknown sources .................................................... 395
8.2.2. App permissions .................................................................................................. 397
8.2.3. Hide Home screen icon 398 .......................................................................................
8.2.4. Kids Space ............................................................................................................ 401
8.2.5. Block unwanted calls and messages 403 ...................................................................
8.2.6. Find my device 405 .....................................................................................................
8.3. Privacy ............................................................................................................................ 408
8.3.1. Locaon Service 408 ..................................................................................................
8.3.2. Join User Experience Project ............................................................................... 410
8.3.3. Privacy Protecng and Security Warning ............................................................ 411
8.4. Advanced ........................................................................................................................ 412

8.4.1. Screen pinning ..................................................................................................... 412
8.5. App Lock ......................................................................................................................... 414
9. Share Internet connecon and les .......................................................................................... 419
9.1.1. Tether your phone’s Internet connecon ............................................................ 419
9.2. Share Files ...................................................................................................................... 423
9.2.1. Wireless le sharing ............................................................................................ 423
9.2.2. Wired le sharing ................................................................................................ 428
9.2.3. Share from apps .................................................................................................. 430
10. Restart, update, back up, and restore ..................................................................................... 431
10.1. Restart the phone 431 ........................................................................................................
10.2. Update ColorOS soware ............................................................................................. 432
10.3. Back up and restore the phone .................................................................................... 434
10.3.1. Back up your phone 434 ..........................................................................................
10.3.2. Restore data on your phone .............................................................................. 436
10.3.3. Reset the phone ................................................................................................ 439
11. Barrier-free .............................................................................................................................. 441
11.1. TalkBack ........................................................................................................................ 441
11.2. Magnicaon Gestures ................................................................................................ 444
11.3. Press Power Button to End Call .................................................................................... 446
12. Safety, handling and support 447 ..................................................................................................
12.1. Health & Safety 447 ............................................................................................................
12.1.1. Using Environment ............................................................................................ 447
12.1.2. Baery Safety .................................................................................................... 448
12.1.3. Charger Usage Notes ......................................................................................... 450
12.1.4. Trac Safety .............................................................................................................. 451
12.2. Maintenance and Repair .............................................................................................. 452
12.2.1. Phone Cases .............................................................................................................. 452
12.2.2. Screen Protector 453 ........................................................................................................
12.2.3. Maximize battery life and lifespan ............................................................................ 453
12.2.4. Keep Clean ................................................................................................................. 455
12.2.5. Keep dry and solve water damage ............................................................................ 456
12.2.6. Use connectors, ports, and buons. ......................................................................... 457
12.2.7. Other information ..................................................................................................... 457
12.3. FCC Compliance Statement .......................................................................................... 458

1.
1.
1.
1.1. Welcome Page
Welcome Page
Welcome Page
Welcome Page Welcome Page

2.
2.
2.
2.2. Safety Information
Safety Information
Safety Information
Safety InformationSafety Information
Read through the following information carefully. Failure to follow these safety
precautions could result in danger or illegal activities.
Safe Startup
Safe Startup
Safe Startup
Safe StartupSafe Startup
Do not switch on the device when phone use is prohibited or when it may cause
interference or danger.
Traffic Safety Firs
Traffic Safety Firs
Traffic Safety Firs
Traffic Safety FirsTraffic Safety First
t
t
t t
Traffic safety is always of first importance. Use of phones and headphones
while driving a vehicle or riding a bicycle is not recommended and is illegal in
some areas. Obey and follow all related local laws.
Switching off Device a
Switching off Device a
Switching off Device a
Switching off Device aSwitching off Device at Gas Stations
t Gas Stations
t Gas Stations
t Gas Stations t Gas Stations
Turn off your phone when in any area with a potentially explosive atmosphere,
such as gas stations or any other fueling area. Sparks in such areas could
cause an explosion or fire, resulting in serious injury or even death.
Switching off Devi
Switching off Devi
Switching off Devi
Switching off DeviSwitching off Device When On Board
ce When On Board
ce When On Board
ce When On Boardce When On Board an Airplane
an Airplane
an Airplane
an Airplane an Airplane
Wireless devices might be prohibited while in the air in some countries or
regions. Obey all related local laws and turn off your phone or switch to airplane
mode.

Scanning names to sa
Scanning names to sa
Scanning names to sa
Scanning names to saScanning names to save on Contacts
ve on Contacts
ve on Contacts
ve on Contacts ve on Contacts
Save new contact information in a snap. You just need a name card or
business card. Fast and convenient. No need of typing each information on
your phone.
Save more battery w
Save more battery w
Save more battery w
Save more battery wSave more battery with Smart Power Saver
ith Smart Power Saver
ith Smart Power Saver
ith Smart Power Saver ith Smart Power Saver
Optimize the power of your battery and manage those apps and settings that
used up the most power. Know how to save more power so you can use it
especially when it is most needed.
Say hello to Talia, y
Say hello to Talia, y
Say hello to Talia, y
Say hello to Talia, ySay hello to Talia, your new TouchPal assi
our new TouchPal assi
our new TouchPal assi
our new TouchPal assiour new TouchPal assistant
stant
stant
stantstant
Optimize the power of your battery and manage those apps and settings that
used up the most power. Know how to save more power so you can use it
especially when it is most needed.
ColorOS 5.2 is compatible wi
ColorOS 5.2 is compatible wi
ColorOS 5.2 is compatible wi
ColorOS 5.2 is compatible wiColorOS 5.2 is compatible with this device
th this device
th this device
th this device th this device
Model
realme 2 Pro

Appearance
Black See Blue Ocean Ice Lake No 8+128G) 、 、 (
4+64G / 6+64G / 8+128G 8+128G not has ice lake ( )
Size and Weight
Size and Weight
Size and Weight
Size and WeightSize and Weight
Height
Height
Height
HeightHeight
156.7mm
Width
Width
Width
WidthWidth

74mm
Thickness
Thickness
Thickness
ThicknessThickness
8.5 mm
Weight
Weight
Weight
WeightWeight
1 g with battery74
Basic Parameters
Basic Parameters
Basic Parameters
Basic ParametersBasic Parameters
Operating System
Operating System
Operating System
Operating SystemOperating System
ColorOS 5.2, based on Android 8.1
GPU
GPU
GPU
GPUGPU
Adreno 512
RAM
RAM
RAM
RAMRAM
4GB/6GB/8GB
Storage
Storage
Storage
StorageStorage
64GB/128GB
Battery
Battery
Battery
BatteryBattery
3500mAh (TYP) 3415mAh(MIN)
Processor
Processor
Processor
ProcessorProcessor
SDM660 lite

Display
Display
Display
DisplayDisplay
Size
Size
Size
SizeSize
6.3 inches
Type
Type
Type
TypeType
LTPS TFT
Resolution
Resolution
Resolution
ResolutionResolution
2340 by 1080 pixels)
Colors
Colors
Colors
ColorsColors
16.7 million colors
Touch
Touch
Touch
TouchTouch
Multi-touch, Capacitive Screen
Camera
Camera
Camera
CameraCamera
Rear Sensor
Rear Sensor
Rear Sensor
Rear SensorRear Sensor
16-megapixel & 2-megapixel
Front Sensor
Front Sensor
Front Sensor
Front SensorFront Sensor
16 -megapixel
Flash
Flash
Flash
FlashFlash

LED Flash
Aperture
Aperture
Aperture
ApertureAperture
Rear: f/1.8+f/2.4
Front: f/2.0
Connectivity
Connectivity
Connectivity
ConnectivityConnectivity
Frequencies:
Frequencies:
Frequencies:
Frequencies:Frequencies:
GSM:850/900/1800/1900MHz
WCDMA:850/900/2100MHz
FDD-LTE: Bands 1/3/5/7/8/20
TD-LTE: bands 38/40/41 (2535-2655MHz)
SIM Card Type
SIM Card Type
SIM Card Type
SIM Card TypeSIM Card Type
Dual Nano SIM Cards & Micro SD Card (Total 3 slots)
GPS
GPS
GPS
GPSGPS
GPS/aGPS/Glonass/BeiDou
Bluetooth
Bluetooth
Bluetooth
BluetoothBluetooth
BT5.0
Wi
Wi
Wi
WiWi-
-
-
--Fi
Fi
Fi
FiFi

2.4/5GHz 802.11 a/b/g/n/ac
OTG
OTG
OTG
OTGOTG
Supported
NFC
NFC
NFC
NFCNFC
No
Sensors
Sensors
Sensors
SensorsSensors
M-sensor
Gravity Sensor
Gyro-meter
Fingerprint Sensor
Light and Proximity Sensor
OTG
In the Box
In the Box
In the Box
In the BoxIn the Box
realme 2 pro
Adapter

Micro USB Cable
Important Information Booklet with Warranty Card
Quick Start Guide
SIM Card Ejector
Screen Protect Film
Case
Product ID
Product ID
Product ID
Product IDProduct ID
RMX1801/RMX1803/RMX1807
Buttons and component
Buttons and component
Buttons and component
Buttons and component Buttons and component

Features
Features
Features
Features Features
A.
Front camera Several holes above the front camera is receiver ( )
B.
Receiver Volume up button
C.
Volume down button
D.
Sleep/Wake button
E.
Rear camera1
F.
F.
F.
F.F.
Rear camera2
G.
Flash
H.
SIM tray hole
I.
SIM card tray
J.
Headset jack
K.
Microphone
L.
Micro-USB port

M.
Speaker
Functions for butto
Functions for butto
Functions for butto
Functions for buttoFunctions for buttons and combination ke
ns and combination ke
ns and combination ke
ns and combination kens and combination keys
ys
ys
ys ys
To learn more features, see at realme phone.
Quick Look
3.1.2.
3.1.2.
3.1.2.
3.1.2.3.1.2. Sleep/Wake button
Sleep/Wake button
Sleep/Wake button
Sleep/Wake button Sleep/Wake button
The button on the right side of your phone has a number of
Wake/Sleep
Wake/Sleep
Wake/Sleep
Wake/SleepWake/Sleep
different uses.
When the phone is
When the phone is
When the phone is
When the phone is When the phone is on
on
on
onon

Wake or
Wake or
Wake or
Wake or Wake or lock the
lock the
lock the
lock the lock the screen
screen
screen
screenscreen: With the phone is powered on, press the Wake/Sleep
Wake/Sleep
Wake/Sleep
Wake/SleepWake/Sleep
button once and it will wake the phone up to the point that you can see the lock
screen, like the clock and any notifications that are setup to display there. When
the phone screen is awakened, pressing this button will blacken the screen and
lock the phone.
Take a
Take a
Take a
Take a Take a screenshot
screenshot
screenshot
screenshotscreenshot: Press and hold the Sleep/Wake
Sleep/Wake
Sleep/Wake
Sleep/WakeSleep/Wake and
Volume Down
Volume Down
Volume Down
Volume DownVolume Down buttons
at the same time and your phone will take a picture of whatever is displayed on
the screen. Click the screenshot, and then choose to a take a long screenshot,
send, edit or delete the screenshot. If you save the screenshot, you can view it
on Photos.
End
End
End
End End a
a
a
a a call
call
call
callcall [Settings]
[Settings]
[Settings]
[Settings][Settings] [Ad
[Ad
[Ad
[Ad[Additional
ditional
ditional
ditional ditional Setting
Setting
Setting
SettingSettings]
s]
s]
s]s] [A
[A
[A
[A[Accessibility]
ccessibility]
ccessibility]
ccessibility]ccessibility]: Go to > > and turn on
[Power
[Power
[Power
[Power [Power Button
Button
Button
Button Button Ends
Ends
Ends
Ends Ends Call]
Call]
Call]
Call]Call], then you can press the button to end
S
S
S
SSleep/Wake
leep/Wake
leep/Wake
leep/Wakeleep/Wake
phone calls.
Turn
Turn
Turn
Turn Turn off
off
off
off off the p
the p
the p
the pthe phone
hone
hone
honehone: Press and hold the button for a few seconds,
Sleep/Wake
Sleep/Wake
Sleep/Wake
Sleep/WakeSleep/Wake
whether the phone is on the lock screen or home screen, it will ask you to slide
down to power off the device.
Force
Force
Force
Force Force restart
restart
restart
restart restart the
the
the
the the phone
phone
phone
phonephone: Press and hold the and
Sleep/Wake
Sleep/Wake
Sleep/Wake
Sleep/WakeSleep/Wake
Volume
Volume
Volume
Volume Volume Up
Up
Up
UpUp
buttons for about 10 to 12 seconds until your device is turned on. View force
restart your phone.
When the phone is
When the phone is
When the phone is
When the phone is When the phone is off
off
off
off off

Turn
Turn
Turn
Turn Turn on
on
on
on on the
the
the
the the phone
phone
phone
phonephone
: Press and hold the Sleep/Wake
Sleep/Wake
Sleep/Wake
Sleep/WakeSleep/Wake button for a few seconds
until you see the realme logo.
Force
Force
Force
Force Force Restart
Restart
Restart
Restart Restart the
the
the
the the phone
phone
phone
phonephone: Press and hold the Sleep/Wake
Sleep/Wake
Sleep/Wake
Sleep/WakeSleep/Wake and
Vo
Vo
Vo
VoVolume
lume
lume
lume lume Up
Up
Up
UpUp
buttons until your device is turned on. View force restart your phone.
Enter
Enter
Enter
Enter Enter Recovery
Recovery
Recovery
Recovery Recovery Mode
Mode
Mode
ModeMode
: Press and hold the Slee
Slee
Slee
SleeSleep/Wake
p/Wake
p/Wake
p/Wakep/Wake Vo
Vo
Vo
VoVolume
lume
lume
lume lume Down
Down
Down
DownDown
and
buttons at the same time to enter . Recovery Mode
3.1.3.
3.1.3.
3.1.3.
3.1.3.3.1.3. Menu, Home and R
Menu, Home and R
Menu, Home and R
Menu, Home and RMenu, Home and Return buttons
eturn buttons
eturn buttons
eturn buttons eturn buttons
The traditional hardware buttons have been replaced with on-screen virtual
navigation keys which also offers fast and fluid to operate your
gestures
phone. You can change the order of the virtual keys, and set them to appear
only when needed to free space on the screen.
Enable virtual navigation keys
Enable virtual navigation keys
Enable virtual navigation keys
Enable virtual navigation keysEnable virtual navigation keys. Virtual navigation keys are default on. If you
want to enable them manually, go to [Sett
[Sett
[Sett
[Sett[Settings
ings
ings
ingsings]
]
]
]] [Smart &
[Smart &
[Smart &
[Smart & [Smart & >
Convenient]
Convenient]
Convenient]
Convenient]Convenient] [Navigation K
[Navigation K
[Navigation K
[Navigation K[Navigation Keys]
eys]
eys]
eys]eys] > and click Virtual Key Navigation.

Change the order of virtual navigation
Change the order of virtual navigation
Change the order of virtual navigation
Change the order of virtual navigationChange the order of virtual navigation keys
keys
keys
keys keys. The keys follow the typical order
for realme: Menu, Home, and Return from left to right. If you are left-handed,
you can change them to the return-home-recent order.

Hide the virtual navigation keys
Hide the virtual navigation keys
Hide the virtual navigation keys
Hide the virtual navigation keysHide the virtual navigation keys. When you launch a full-screen app, the keys
will automatically hide, and can be brought back with a simple swipe:
When in portrait mode, swipe up from the bottom.
When in landscape mode, swipe from the bottom to the left.

Manually hide the virtual naviga
Manually hide the virtual naviga
Manually hide the virtual naviga
Manually hide the virtual navigaManually hide the virtual navigation keys
tion keys
tion keys
tion keystion keys. To set the keys to appear only when
needed, go to > > and
[Settings]
[Settings]
[Settings]
[Settings][Settings] [Smart & Convenient]
[Smart & Convenient]
[Smart & Convenient]
[Smart & Convenient][Smart & Convenient] [Navigation Keys]
[Navigation Keys]
[Navigation Keys]
[Navigation Keys][Navigation Keys]
enable Virtual Navigation Keys Can Be Hidden. Then you can click on the
left-lower corner of the screen to hide the keys, and swipe from the bottom to
reveal them.
Immersive navigation background
Immersive navigation background
Immersive navigation background
Immersive navigation backgroundImmersive navigation background.The system set multiple colors for the
navigation background to match the color scheme of the popular apps. The

background color is default white, and it will become translucent or immersive
when you open some of the third-party apps.
3.1.4.
3.1.4.
3.1.4.
3.1.4.3.1.4. Volume buttons
Volume buttons
Volume buttons
Volume buttons Volume buttons
Volume buttons give you easy access to adapt over time to a proper volume
of sound. It refers not simply ringer or media, the phone also keeps track of
the volume level separately in headphone, microphone and speaker.

Media volume
Media volume
Media volume
Media volumeMedia volume: When listening to music, videos and phone calls, use the
buttons on the side of the phone to adjust the volume. For information about
avoiding hearing loss, see .
Security Information
Ringer volume
Ringer volume
Ringer volume
Ringer volumeRinger volume: Use the Volume buttons to control the volume for the ringer
and alerts. When you press and hold the button, your phone will
volume d
volume d
volume d
volume dvolume down
own
own
ownown
switch to silent mode.
Alarm volume
Alarm volume
Alarm volume
Alarm volumeAlarm volume: Use the Volume buttons to set the volume for alarm. The alarm
still plays a sound when the phone is in silent mode.
Call volume
Call volume
Call volume
Call volumeCall volume: When making or receiving phone calls, use the volume buttons
to adjust the volume of the call.
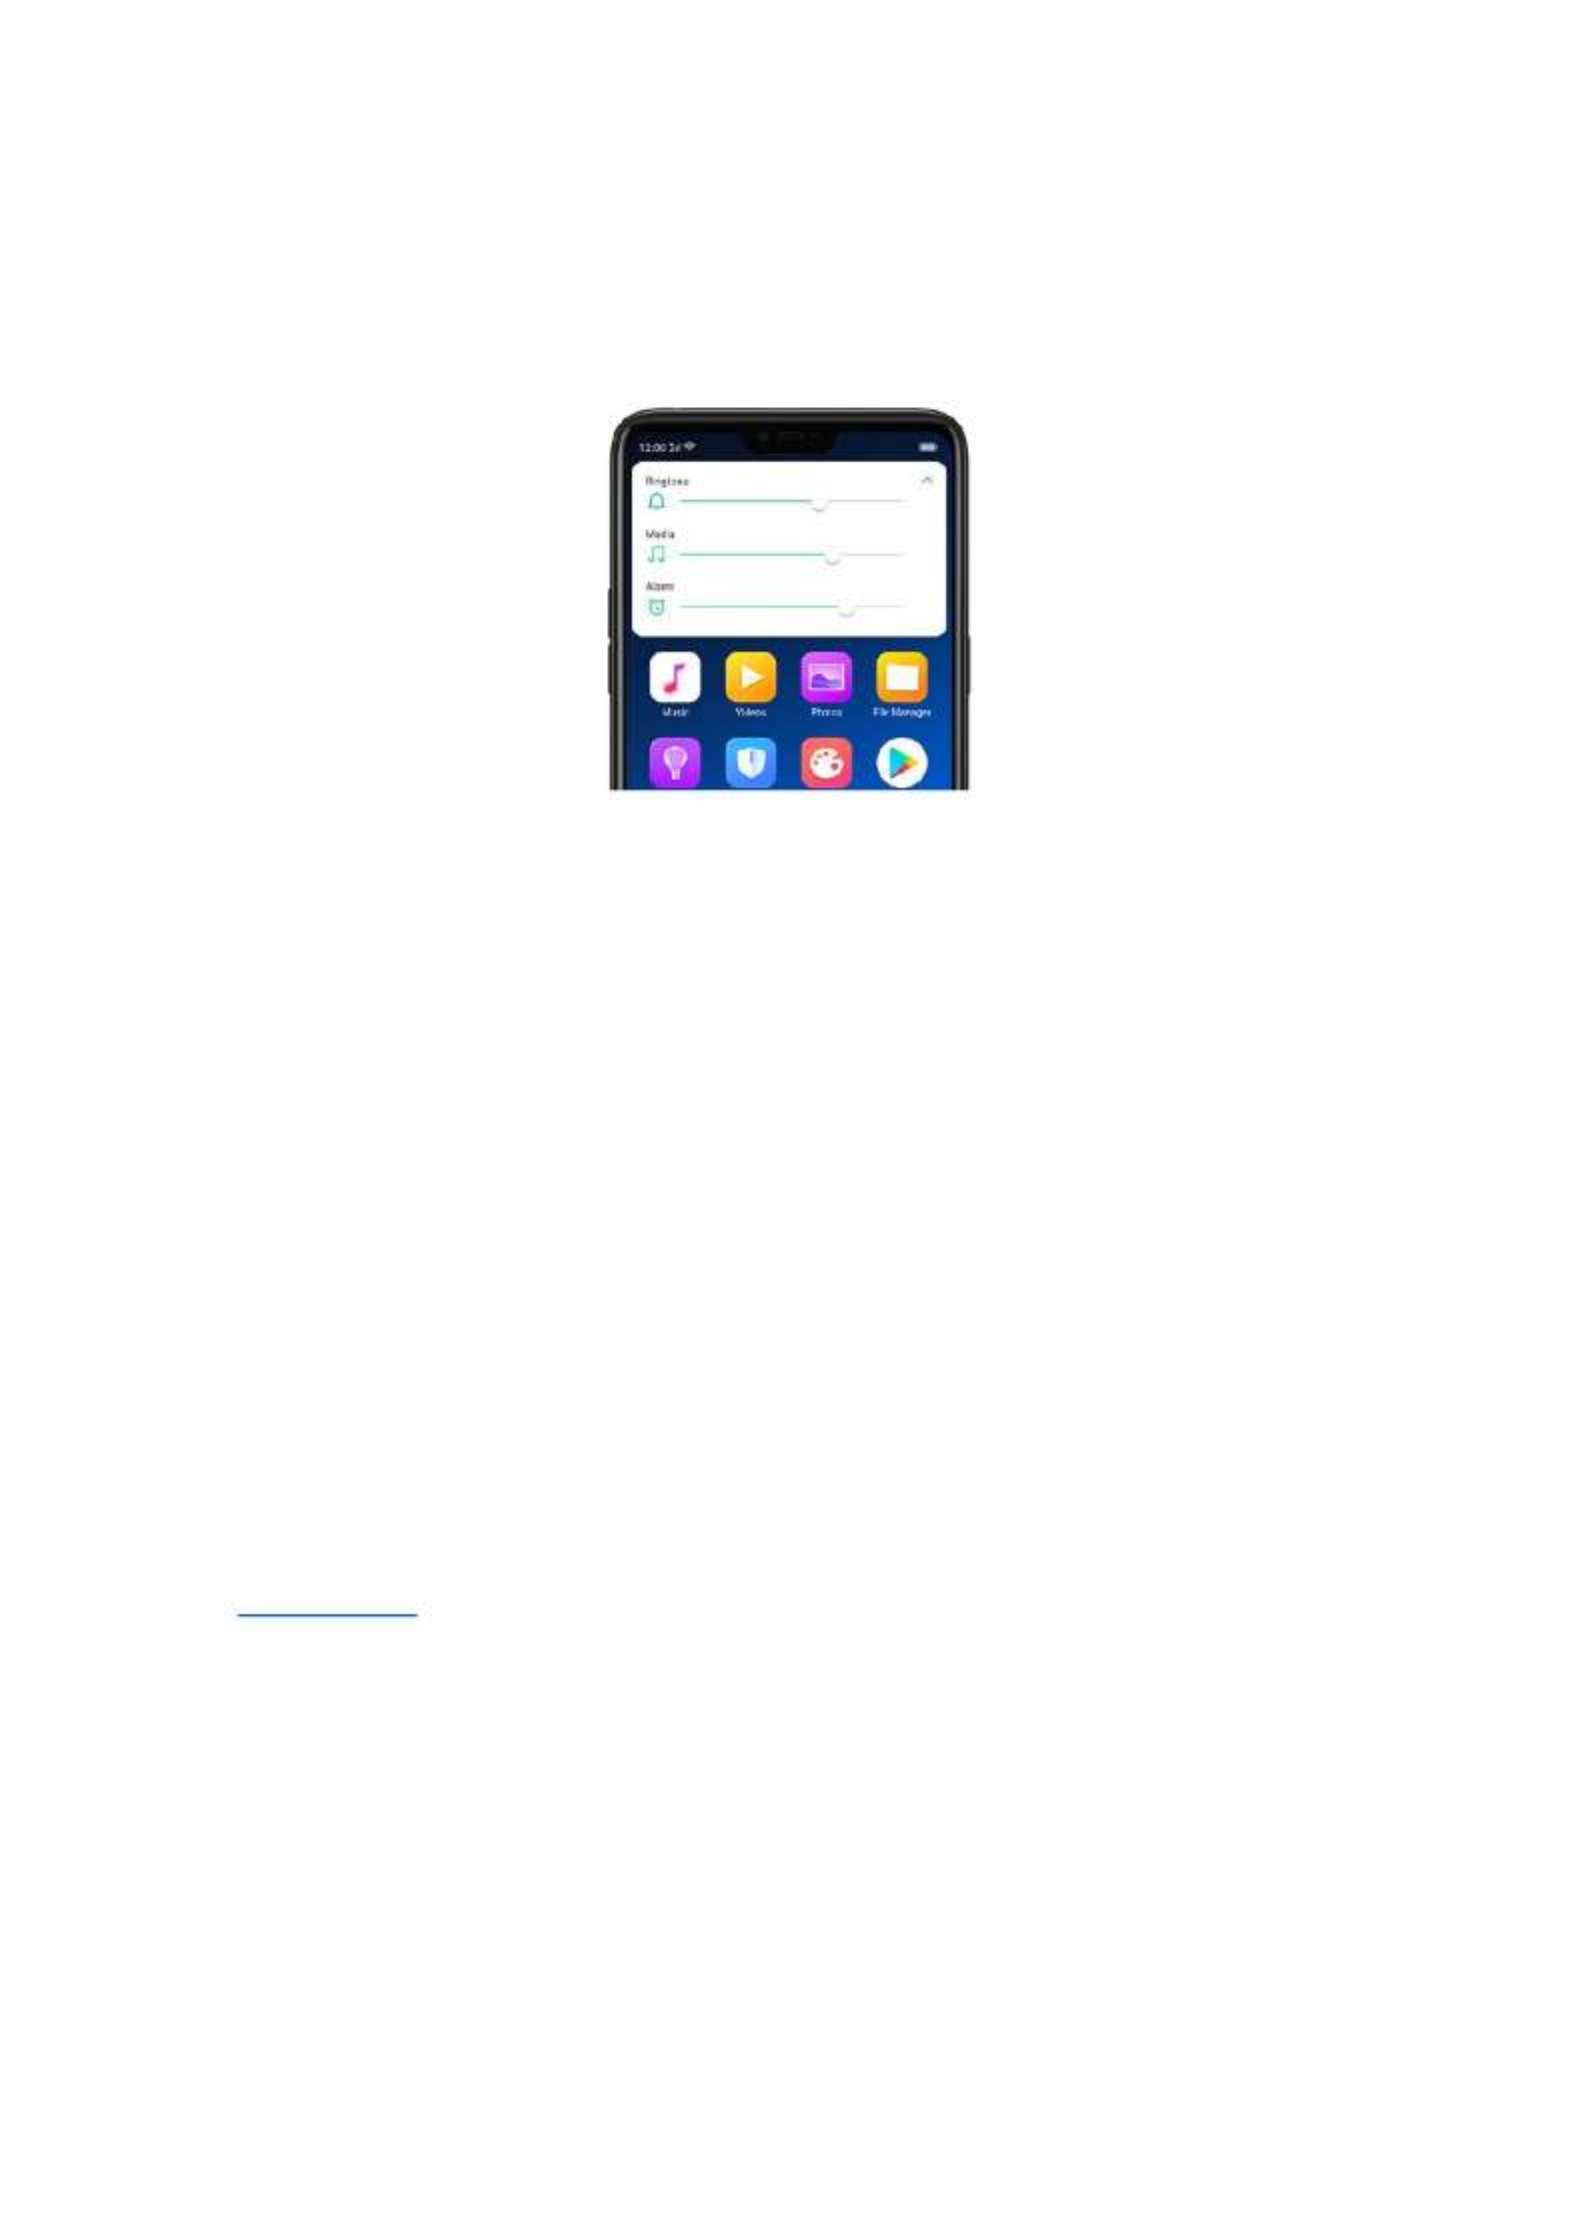
* You can also adjust the volume (except call volume) in
[Settings]
[Settings]
[Settings]
[Settings][Settings] > [Sound &
[Sound &
[Sound &
[Sound & [Sound &
Vibration]
Vibration]
Vibration]
Vibration]Vibration].
Controlling the camera
Controlling the camera
Controlling the camera
Controlling the cameraControlling the camera: Volume buttons can also be used to control your
camera. Go to > and
[Settings]
[Settings]
[Settings]
[Settings][Settings] [System Apps] >[Camera]
[System Apps] >[Camera]
[System Apps] >[Camera]
[System Apps] >[Camera][System Apps] >[Camera] > [Volume B
[Volume B
[Volume B
[Volume B[Volume Button]
utton]
utton]
utton]utton]
set up the volume buttons for Shutter or Zoom.
3.1.5.
3.1.5.
3.1.5.
3.1.5.3.1.5. Micro-USB port
Micro-USB port
Micro-USB port
Micro-USB portMicro-USB port
Micro-USB port is the connector on the bottom of your device where your
battery charger connects. It also doubles as the data port, which lets you
transfer data to and from a personal computer or other USB devices. Plug the
cable in the port to charge or transfer data.
Notice:
Notice:
Notice:
Notice: Notice:
1. Repeated connecting and disconnecting of your cable can cause the port to

wear out, resulting in a poor connection to your cable.
2. Never force a connector into the port, for that might cause damage.
3.1.6.
3.1.6.
3.1.6.
3.1.6.3.1.6. Headset jack
Headset jack
Headset jack
Headset jack Headset jack
The headset jack is an audio socket that accepts a 3.5mm audio plug. Plug
your headset in the jack to listen to music, videos and phone calls. Do not
force a mismatched headset into the jack for that might cause damage.
3.1.7.
3.1.7.
3.1.7.
3.1.7.3.1.7. SIM and SD cards
SIM and SD cards
SIM and SD cards
SIM and SD cardsSIM and SD cards
SIM card
SIM card
SIM card
SIM card SIM card
* Insert the SIM card before turning on your phone. If you hold a new SIM card, you
might need to wait until it is activated by the carrier before you can use it.
A SIM card is provided by your carrier and is used to activate your phone's
mobile network. Because it has a small amount of memory, the SIM card not
only enables communications between two persons, but stores information
such as phone numbers, security data and more. When using the mobile
network, you need to pay charges. To avoid high charges, you can shop data
plans with your carrier, or shop international data roaming plans when traveling
abroad.

SIM1, SIM2 and SD cards share the same card tray. Insert your SD card in the
same way that you insert the SIM card(s).
3.1.8.
3.1.8.
3.1.8.
3.1.8.3.1.8. Accessories came with
Accessories came with
Accessories came with
Accessories came with Accessories came with realme phone
realme phone
realme phone
realme phone realme phone
Along with the handset, the accessories came with are headset, USB
Connecting cable, Power adapter, SIM card tool and Phone case. (Some
models not have headset)
Notice
Notice
Notice
NoticeNotice:All photos shown are for illustration purpose ONLY. Actual products
may vary due to product enhancement.
Headset
Headset
Headset
HeadsetHeadset: A standard headset with 3.5 mm headset plug. Use to listen to
music, videos, and phone calls. Use the built-in microphone to talk. When
playing the music or videos, click the button once to pause or play a song or
video.

USB Connecting cable
USB Connecting cable
USB Connecting cable
USB Connecting cableUSB Connecting cable: Use the cable to connect your phone to the computer
to , or use it with the power adapter to charge.
charge and transfer files
Power adapter
Power adapter
Power adapter
Power adapterPower adapter: Connect the power adapter to your phone using the included
cable, then plug it into a standard power outlet to charge the phone.
SIM card tool
SIM card tool
SIM card tool
SIM card toolSIM card tool: Use to pop out the SIM card tray.
Phone Case
Phone Case
Phone Case
Phone CasePhone Case: Use to protect against drops and shock damage on the corners
and rear of your phone.

3.1.9.
3.1.9.
3.1.9.
3.1.9.3.1.9. Charging the battery
Charging the battery
Charging the battery
Charging the batteryCharging the battery
How to charge the
How to charge the
How to charge the
How to charge the How to charge the battery:
battery:
battery:
battery: battery:
Notice
Notice
Notice
NoticeNotice:All photos shown are for illustration purpose ONLY. Actual products
may vary due to product enhancement.
Charge
Charge
Charge
Charge Charge with
with
with
with with the
the
the
the the jack
jack
jack
jackjack: Connect adapter to your phone using the USB cable, then
plug it into a standard power outlet to charge the phone.

Draw
Draw
Draw
Draw Draw V to to turn on Flashlight
V to to turn on Flashlight
V to to turn on Flashlight
V to to turn on FlashlightV to to turn on Flashlight
a
a
a
a a : When turn it on, you can draw V on the
locked screen to turn on flashlight.
Music control
Music control
Music control
Music controlMusic control: When turn it on, you can draw to pause/play a track, or draw ‖
< or > to switch the track when the screen is off.
Add a screen-off ge
Add a screen-off ge
Add a screen-off ge
Add a screen-off geAdd a screen-off gestures
stures
stures
sturesstures: realme smart phone of Color OS gives you 7 5.2
options, which are Draw ^, Slide up, Slide down, Slide left
Draw ^, Slide up, Slide down, Slide left
Draw ^, Slide up, Slide down, Slide left
Draw ^, Slide up, Slide down, Slide leftDraw ^, Slide up, Slide down, Slide left, Slide right, Draw M
, Slide right, Draw M
, Slide right, Draw M
, Slide right, Draw M , Slide right, Draw M
and Draw W
and Draw W
and Draw W
and Draw Wand Draw W. Choose one to unlock the phone, call someone or start an app.
3-Finger Gesture
3-Finger Gesture
3-Finger Gesture
3-Finger Gesture 3-Finger Gesture
Take a screenshot
Take a screenshot
Take a screenshot
Take a screenshotTake a screenshot. Swipe down the screen with three fingers.
Use Split-screen
Use Split-screen
Use Split-screen
Use Split-screenUse Split-screen. Under the interface of an app, swipe ups the screen with
three fingers to enter split-screen mode.

Raise to Turn On Screen
Raise to Turn On Screen
Raise to Turn On Screen
Raise to Turn On ScreenRaise to Turn On Screen
Use it to raise to turn on screen.
Smart call
Smart call
Smart call
Smart call Smart call
Auto call when place at the ear
Auto call when place at the ear
Auto call when place at the ear
Auto call when place at the earAuto call when place at the ear: Before you can use auto call, you need to set
the default SIM card for calling. Go to a contact detail, call detail, message
conversation or info interface, put the phone near your ear and your phone
will automatically call that specific person.
Auto answer when near the ear
Auto answer when near the ear
Auto answer when near the ear
Auto answer when near the earAuto answer when near the ear: This function lets your phone to answer any
incoming calls automatically when putting the phone near your ear.
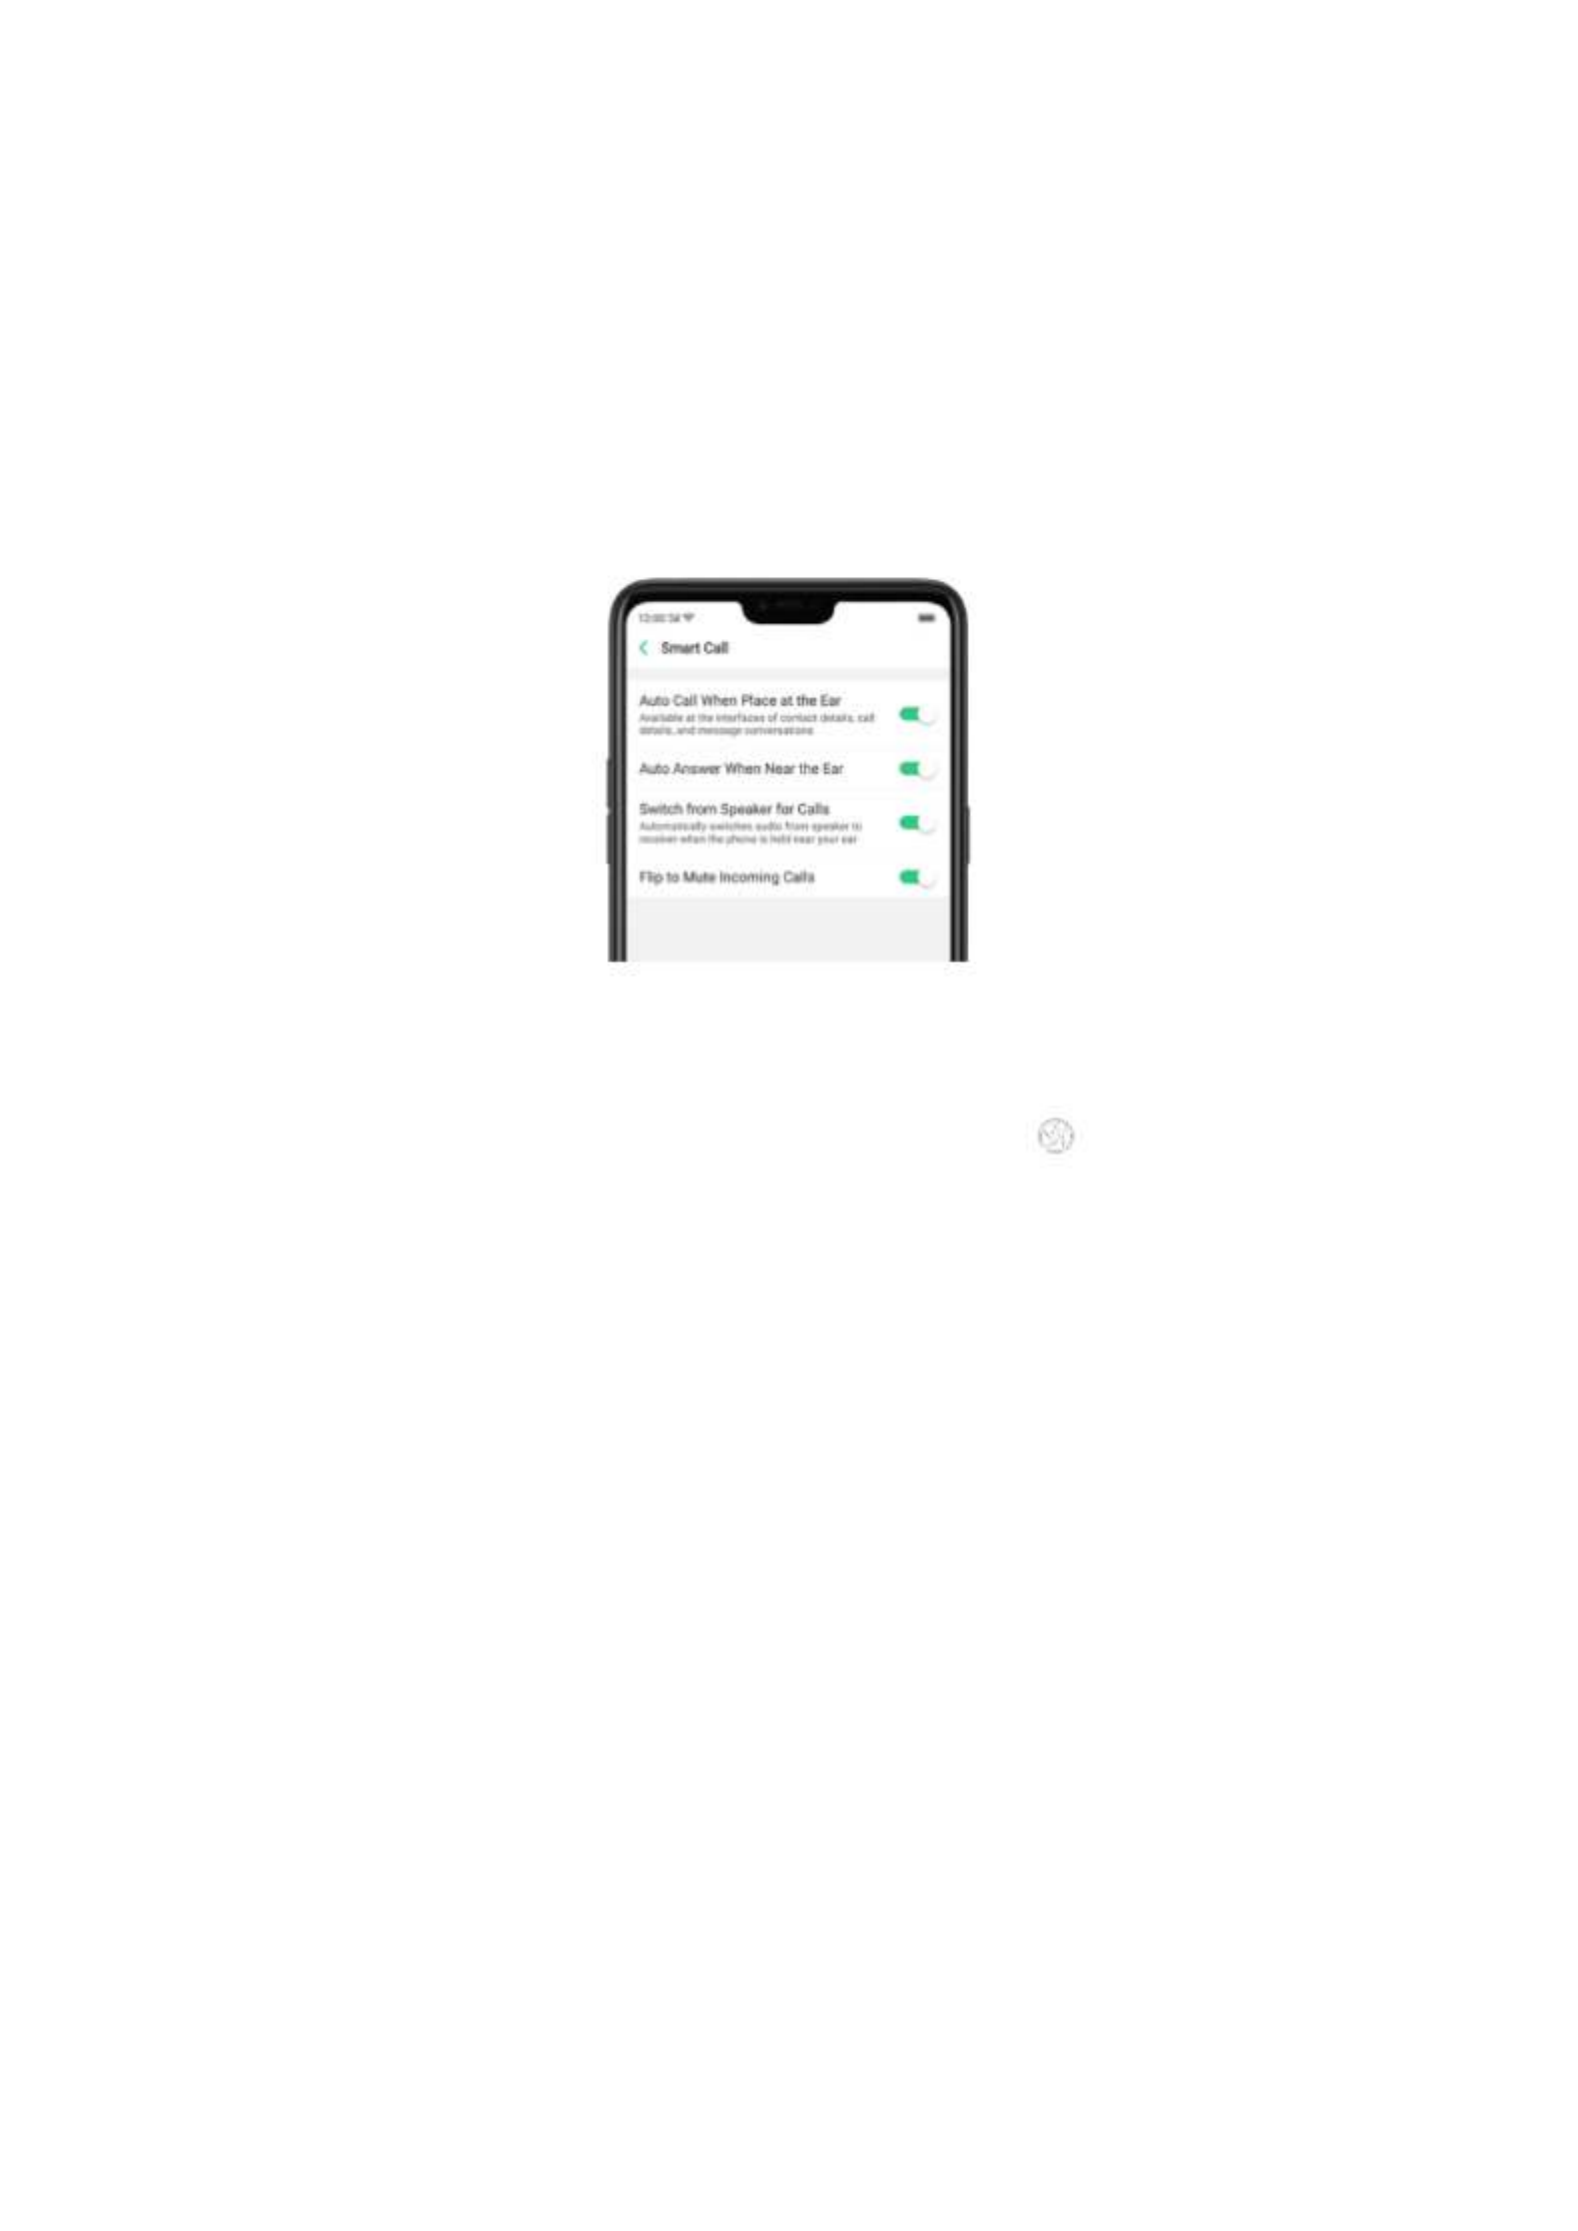
Switch from speaker for calls
Switch from speaker for calls
Switch from speaker for calls
Switch from speaker for callsSwitch from speaker for calls: Use it to automatically switch from speaker to
receiver when you put the phone near your ear during phone calls.
Flip to mute incoming calls
Flip to mute incoming calls
Flip to mute incoming calls
Flip to mute incoming callsFlip to mute incoming calls: Use it to silence the ringer by turning the phone
over on a table or other flat surfaces.
Take selfies
Take selfies
Take selfies
Take selfies Take selfies
Open Camera app and switch to the front camera. Click > Gesture on the
top of the screen. Pose the same hand gesture towards the camera, once the
camera captures that, it will take a photo automatically after two seconds. You
can change your pose and expression within this two seconds.
3.1.11.
3.1.11.
3.1.11.
3.1.11.3.1.11. Key combinations
Key combinations
Key combinations
Key combinations Key combinations
Generally, you can use two buttons of your phone to generate a specific
result. The common key combinations include:
When phone is on
When phone is on
When phone is on
When phone is on When phone is on
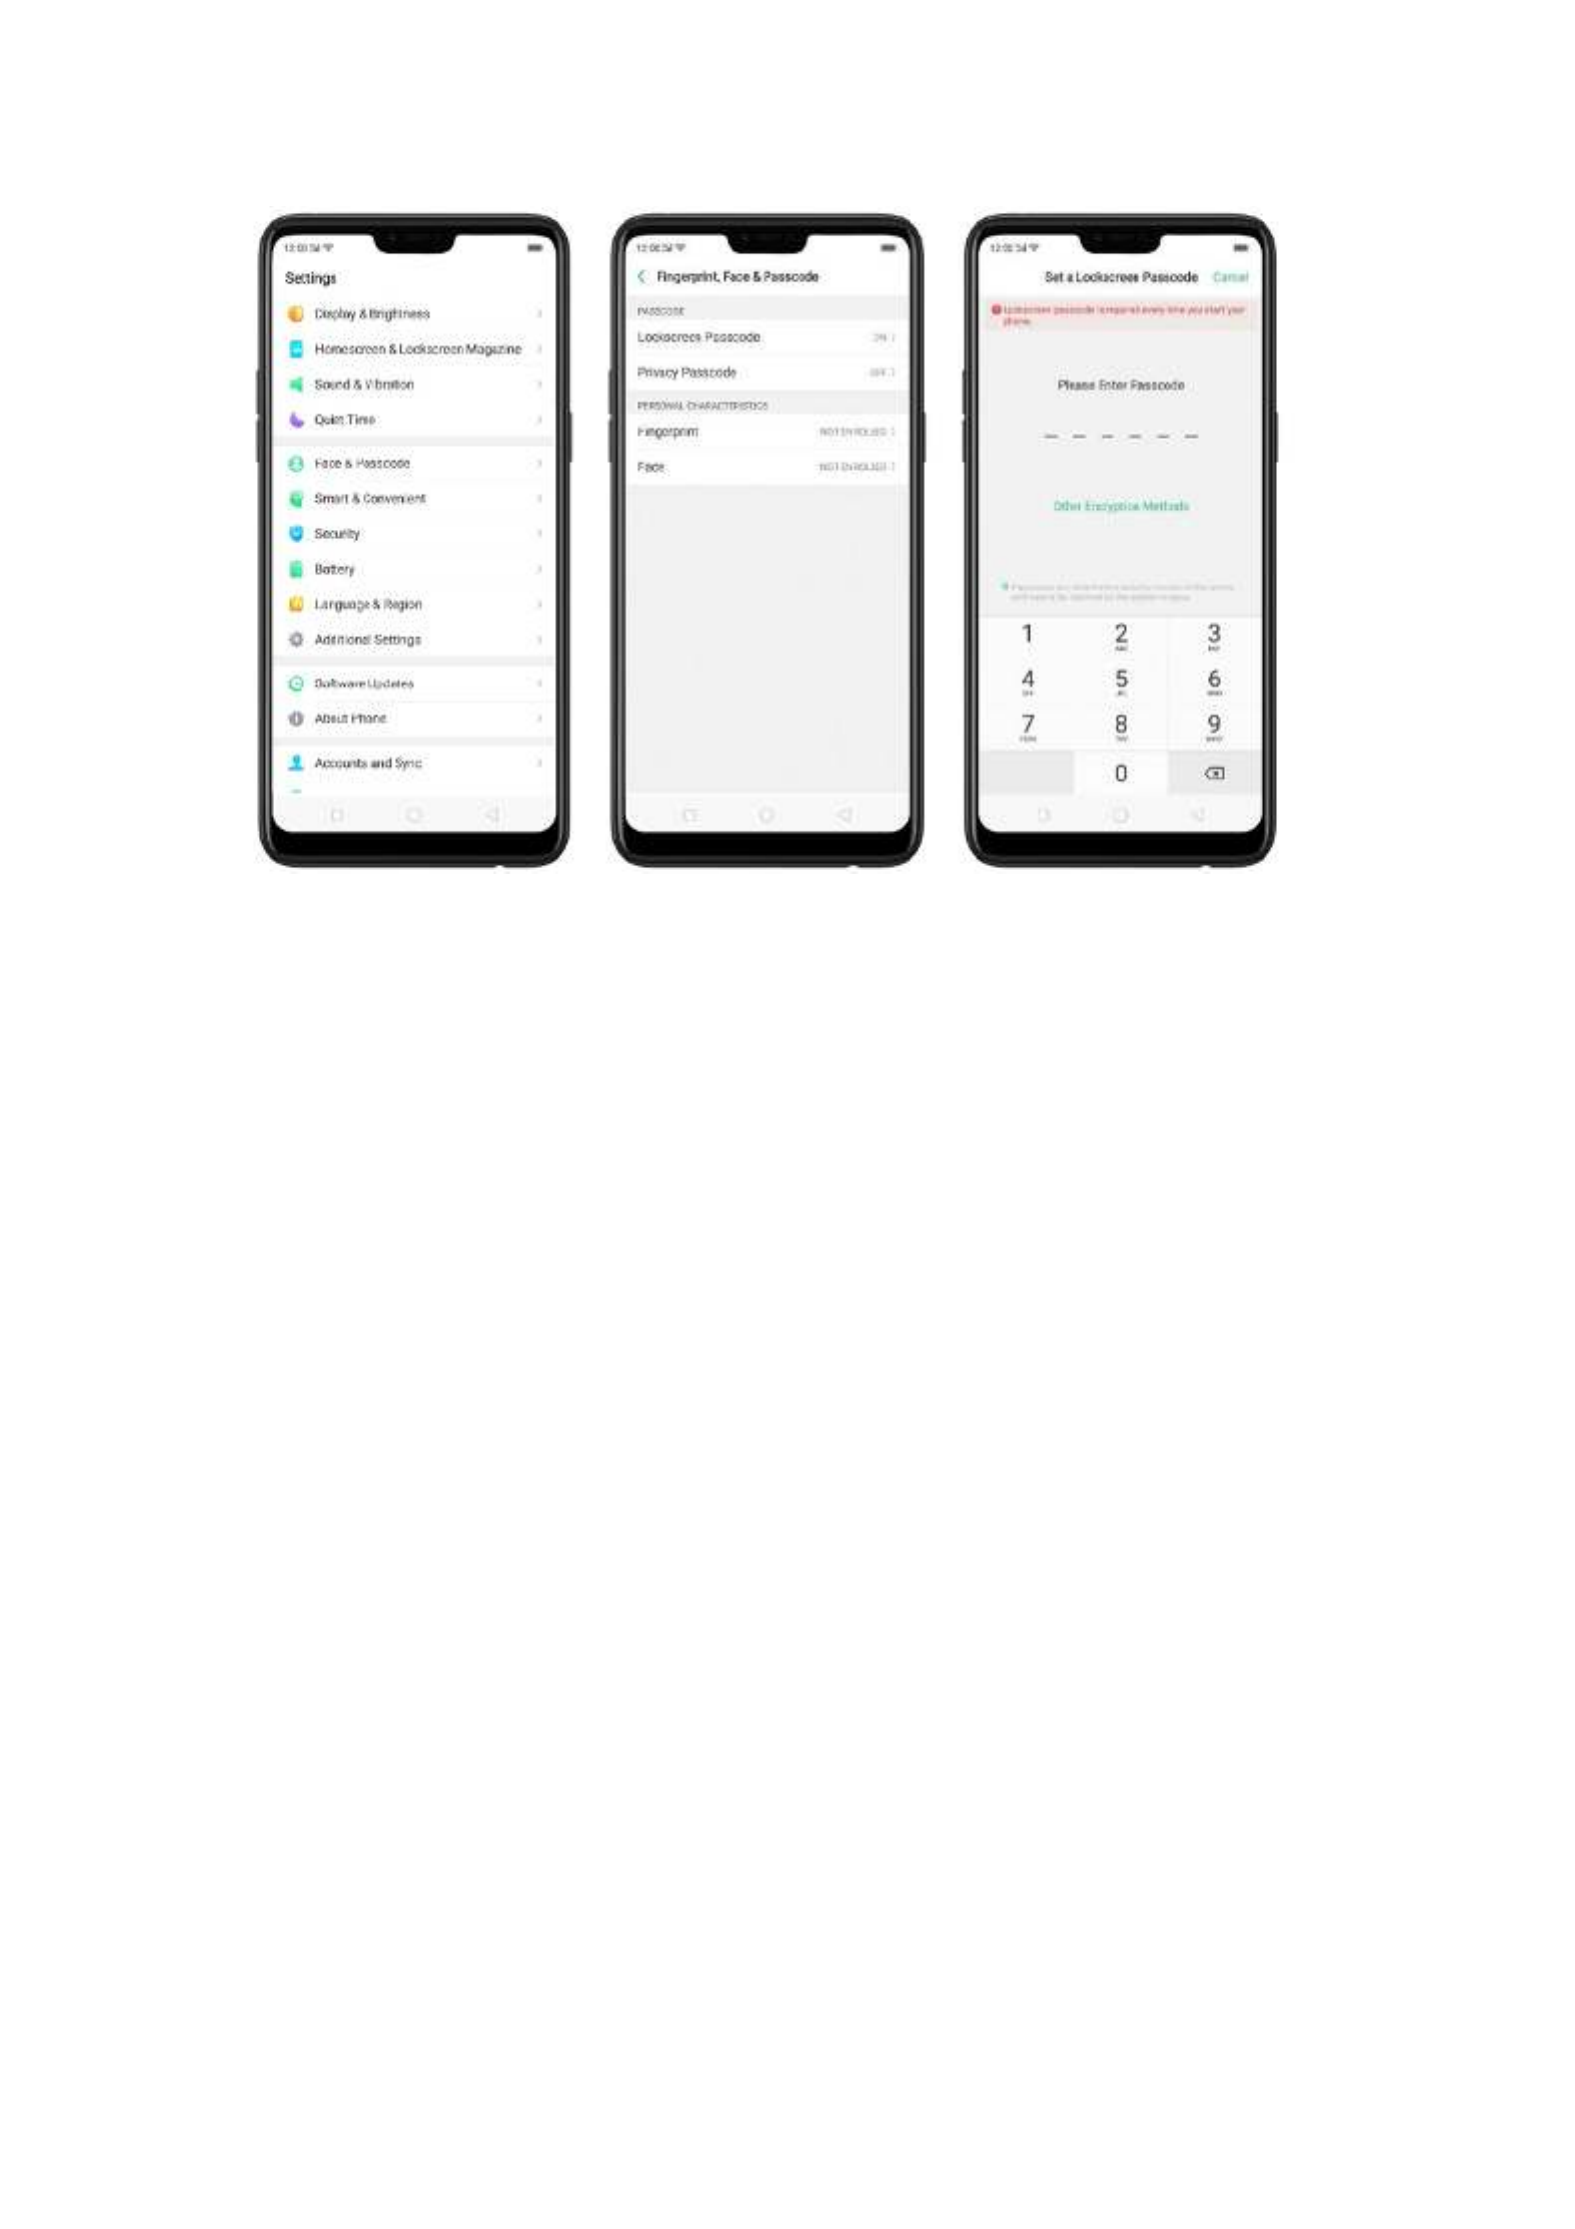
3. Choose from four types of passcodes:
Pattern Code
Pattern Code
Pattern Code
Pattern CodePattern Code: Allows you to draw a pattern with at least four dots connected.
4-Digit Numeric
4-Digit Numeric
4-Digit Numeric
4-Digit Numeric 4-Digit Numeric Passcode
Passcode
Passcode
PasscodePasscode:
:
:
: : Allows you to set a numbers-only passcode that contains four
characters.
4-16 Digit Numer
4-16 Digit Numer
4-16 Digit Numer
4-16 Digit Numer4-16 Digit Numeric Passc
ic Passc
ic Passc
ic Passcic Passcode:
ode:
ode:
ode:ode: Allows you to set a numbers-only passcode that contains
four to sixteen characters.
4-16 Digit Alph
4-16 Digit Alph
4-16 Digit Alph
4-16 Digit Alph4-16 Digit Alphanumeric Passcod
anumeric Passcod
anumeric Passcod
anumeric Passcodanumeric Passcode:
e:
e:
e:e: Allows you to set a passcode that contains four to
sixteen numbers and/or letters as your preference.

4. Draw your pattern or enter your passcode.
5. Re-draw or re-enter your pattern or passcode to confirm it and activate it.
Change the passco
Change the passco
Change the passco
Change the passcoChange the passcode
de
de
de de
1. Go to >
[Settings]
[Settings]
[Settings]
[Settings] [Settings] [Fingerprint,
[Fingerprint,
[Fingerprint,
[Fingerprint, [Fingerprint, Face & Passcode] > [Lockscreen
Face & Passcode] > [Lockscreen
Face & Passcode] > [Lockscreen
Face & Passcode] > [Lockscreen Face & Passcode] > [Lockscreen
Passcode] > [Modify Passcode]
Passcode] > [Modify Passcode]
Passcode] > [Modify Passcode]
Passcode] > [Modify Passcode]Passcode] > [Modify Passcode], click [
Modify Passcode
Modify Passcode
Modify Passcode
Modify PasscodeModify Passcode].
2.
2.
2.
2.2.
Draw or enter your current pattern or passcode.
Draw or enter your new pattern or passcode. If you want to use other
passcode types, click at the bottom of the screen.
Other Encrypt
Other Encrypt
Other Encrypt
Other EncryptOther Encryption Methods.
ion Methods.
ion Methods.
ion Methods.ion Methods.
Re-draw or re-enter your pattern or passcode to confirm it and activate it.

Turn off the passco
Turn off the passco
Turn off the passco
Turn off the passcoTurn off the passcode
de
de
de de
1. Go to >
[Settings]
[Settings]
[Settings]
[Settings] [Settings] [Fingerprint,
[Fingerprint,
[Fingerprint,
[Fingerprint, [Fingerprint, Face & Passcode] > [Lockscreen
Face & Passcode] > [Lockscreen
Face & Passcode] > [Lockscreen
Face & Passcode] > [Lockscreen Face & Passcode] > [Lockscreen
Passcode]
Passcode]
Passcode]
Passcode]Passcode], click [
Turn off P
Turn off P
Turn off P
Turn off PTurn off Passcode
asscode
asscode
asscodeasscode].
2. Draw or enter your current pattern or passcode to confirm.
View more details in
Set and use a passcode with your
Set and use a passcode with your
Set and use a passcode with your
Set and use a passcode with your Set and use a passcode with your realme smartphone
realme smartphone
realme smartphone
realme smartphonerealme smartphone.
.
.
..
Privacy Passcode
Privacy Passcode
Privacy Passcode
Privacy Passcode Privacy Passcode
When this is turned on, the validation will be used for all privacy features such
as App Encryption and Private Safe.
1. Manage Privacy Passcode:
1. Manage Privacy Passcode:
1. Manage Privacy Passcode:
1. Manage Privacy Passcode:1. Manage Privacy Passcode:
[Settings
[Settings
[Settings
[Settings[Settings [Fingerprint, Face &
[Fingerprint, Face &
[Fingerprint, Face &
[Fingerprint, Face & [Fingerprint, Face & Go to ] >
Passcode
Passcode
Passcode
PasscodePasscode Privacy Passcode
Privacy Passcode
Privacy Passcode
Privacy PasscodePrivacy Passcode] > [ ] create an encryption code, then set or
customize a security question, then click .
Done
Done
Done
DoneDone
Note
Note
Note
NoteNote: The security question can be used to reset the passcode.

2. Change or turn off privacy pa
2. Change or turn off privacy pa
2. Change or turn off privacy pa
2. Change or turn off privacy pa2. Change or turn off privacy passcodes:
sscodes:
sscodes:
sscodes: sscodes: Go to [Settings
Settings
Settings
SettingsSettings Fingerprint, Face
Fingerprint, Face
Fingerprint, Face
Fingerprint, Face Fingerprint, Face ] > [
& Passcode
& Passcode
& Passcode
& Passcode& Passcode Privacy Passcode
Privacy Passcode
Privacy Passcode
Privacy PasscodePrivacy Passcode] > [ ] enter the encryption code then click [Turn
Turn
Turn
Turn Turn
off Privacy Passcode
off Privacy Passcode
off Privacy Passcode
off Privacy Passcodeoff Privacy Passcode Change Privacy Passcode
Change Privacy Passcode
Change Privacy Passcode
Change Privacy PasscodeChange Privacy Passcode
] or [ ].
3. Modify the security questions:
3. Modify the security questions:
3. Modify the security questions:
3. Modify the security questions:3. Modify the security questions:
Settings
Settings
Settings
SettingsSettings Fingerprint, Face &
Fingerprint, Face &
Fingerprint, Face &
Fingerprint, Face & Fingerprint, Face & Go to [ ] > [
Passcode
Passcode
Passcode
PasscodePasscode Privacy Passcode
Privacy Passcode
Privacy Passcode
Privacy PasscodePrivacy Passcode Modify the
Modify the
Modify the
Modify the Modify the ] > [ ] enter the encryption code click [
Security Questions
Security Questions
Security Questions
Security QuestionsSecurity Questions] enter the encryption code again then set or customize a
new security question, click .
Done
Done
Done
DoneDone
4. Bind security email address: The email used will be ab
4. Bind security email address: The email used will be ab
4. Bind security email address: The email used will be ab
4. Bind security email address: The email used will be ab4. Bind security email address: The email used will be able to retrieve the
le to retrieve the
le to retrieve the
le to retrieve the le to retrieve the
privacy passcode:
privacy passcode:
privacy passcode:
privacy passcode: privacy passcode: Settings
Settings
Settings
SettingsSettings Fingerprint, Face & Passcode
Fingerprint, Face & Passcode
Fingerprint, Face & Passcode
Fingerprint, Face & PasscodeFingerprint, Face & PasscodeGo to [ ] > [ ] >
[ ] enter the encryption code click [
Privacy Passcode
Privacy Passcode
Privacy Passcode
Privacy PasscodePrivacy Passcode Bind S
Bind S
Bind S
Bind SBind Security Email
ecurity Email
ecurity Email
ecurity Email ecurity Email
Address
Address
Address
AddressAddress] enter the encryption code again then enter email address, click .
Use
Use
Use
UseUse
5. Update bind security email address:
5. Update bind security email address:
5. Update bind security email address:
5. Update bind security email address:5. Update bind security email address:
Settings
Settings
Settings
SettingsSettings Fingerprint, Fa
Fingerprint, Fa
Fingerprint, Fa
Fingerprint, FaFingerprint, Face &
ce &
ce &
ce & ce & Go to [ ] > [
Passcode
Passcode
Passcode
PasscodePasscode Fingerprint, Face & Passcode
Fingerprint, Face & Passcode
Fingerprint, Face & Passcode
Fingerprint, Face & PasscodeFingerprint, Face & Passcode] > [ ] enter the encryption code click
[ ] click then enter the
Bind Security Email Address
Bind Security Email Address
Bind Security Email Address
Bind Security Email AddressBind Security Email Address Change Email Address
Change Email Address
Change Email Address
Change Email AddressChange Email Address
encryption code again, enter the new email address, click .
Use
Use
Use
UseUse

APP Encryption
APP Encryption
APP Encryption
APP Encryption APP Encryption
1.. App Encryption: Go to [ ] > [
Settings
Settings
Settings
SettingsSettings Fingerprint, Face & Passcode
Fingerprint, Face & Passcode
Fingerprint, Face & Passcode
Fingerprint, Face & PasscodeFingerprint, Face & Passcode >
[ ] enter the encryption code click [App Encryption] select the
Privacy Passcode
Privacy Passcode
Privacy Passcode
Privacy PasscodePrivacy Passcode
apps to be encrypted then press . Once it is encrypted, you
Enable Encryption
Enable Encryption
Enable Encryption
Enable EncryptionEnable Encryption
will see a padlock symbol on the app that has been encrypted. Also see App
Lock.

Note:
Note:
Note:
Note: Note: You have to enter an encrypted passcode and a security question
before you can use the other functions on Privacy Passcode.
Use a fingerprint on your realme
Use a fingerprint on your realme
Use a fingerprint on your realme
Use a fingerprint on your realme Use a fingerprint on your realme phone
phone
phone
phonephone
Before you can add a fingerprint, you need to create a passcode for your
realme phone. You can use fingerprints for:
Unlocking the phone from the lock scre
Unlocking the phone from the lock scre
Unlocking the phone from the lock scre
Unlocking the phone from the lock screUnlocking the phone from the lock screen.
en.
en.
en.en.
1. Go to [ ] > [ ], click [
Settings
Settings
Settings
SettingsSettings Fingerprint, Fa
Fingerprint, Fa
Fingerprint, Fa
Fingerprint, FaFingerprint, Face & Passcode
ce & Passcode
ce & Passcode
ce & Passcodece & Passcode Add a Fingerprint
Add a Fingerprint
Add a Fingerprint
Add a FingerprintAdd a Fingerprint].
2. Follow the on-screen instructions, placing your finger gently on the Home
button until your fingerprint is recorded.

Repeat step 1 and 2 for as many fingers as you like.
Delete or Rename a fingerprint
1. Go to [ ] > [ ], click the fingerprint
Settings
Settings
Settings
SettingsSettings Fingerprint, Face & Passcode
Fingerprint, Face & Passcode
Fingerprint, Face & Passcode
Fingerprint, Face & PasscodeFingerprint, Face & Passcode
you've added.
2, Enter a name for your fingerprint, or click [Delete Fingerprint
Delete Fingerprint
Delete Fingerprint
Delete FingerprintDelete Fingerprint].

Reset Passcode m
Reset Passcode m
Reset Passcode m
Reset Passcode mReset Passcode methods
ethods
ethods
ethods ethods
Use fingerprint to reset passcode
Use fingerprint to reset passcode
Use fingerprint to reset passcode
Use fingerprint to reset passcodeUse fingerprint to reset passcode
Before you can use the reset feature, you must add at least one fingerprint to
your phone and enabled Fingerprint Unlock.
When your password is entered incorrectly, the bottom of the phone keypad
will prompt you to . Clicking the prompt will enter the reset
forget the password
forget the password
forget the password
forget the passwordforget the password
password interface.
Reset passcode with fingerp
Reset passcode with fingerp
Reset passcode with fingerp
Reset passcode with fingerpReset passcode with fingerprint when the phone i
rint when the phone i
rint when the phone i
rint when the phone irint when the phone is unlocked.
s unlocked.
s unlocked.
s unlocked.s unlocked.

When your phone is unlocked, you can change the lock screen password
directly from the Settings page.
1. Go to > , after you enter the wrong
[Settings]
[Settings]
[Settings]
[Settings][Settings] [Fingerprint, Face & Passcode]
[Fingerprint, Face & Passcode]
[Fingerprint, Face & Passcode]
[Fingerprint, Face & Passcode][Fingerprint, Face & Passcode]
password, your realme phone will have a reminder to .
forge
forge
forge
forge forget the password
t the password
t the password
t the passwordt the password
2. Click
Forgot
Forgot
Forgot
ForgotForgot password.
password.
password.
password.password.
1. Place your finger on the fingerprint sensor, then enter your new passcode and confirm
it.

Reset password with bind se
Reset password with bind se
Reset password with bind se
Reset password with bind seReset password with bind security email address
curity email address
curity email address
curity email address curity email address
When you have forgotten your lockscreen passcode and you also haven't
enrolled face recognition or for some reason it did not work, you can still reset
the password as long as you have bounded your security email address at the
initial phase of password creation. See bind security email address.
How to reset password using bind email:
1.Enter the email address that you have bounded on the phone, then enter
the verification code that was sent thru your email, click . Now you can
Done
Done
Done
DoneDone
set a new lockscreen passcode for your phone.

Enroll a Face on yo
Enroll a Face on yo
Enroll a Face on yo
Enroll a Face on yoEnroll a Face on your realme
ur realme
ur realme
ur realme ur realme
phone
phone
phone
phonephone
Before you can add a face you need to create a passcode for your realme
phone. You can use face for:
Unlocking the phone from the lock screen.

Encrypting apps
Protecting files
Enroll a face
Enroll a face
Enroll a face
Enroll a faceEnroll a face
1. Go to [ ] > [ ], click [
Settings
Settings
Settings
SettingsSettings Fingerprint, Fa
Fingerprint, Fa
Fingerprint, Fa
Fingerprint, FaFingerprint, Face & Passcode
ce & Passcode
ce & Passcode
ce & Passcodece & Passcode Enroll Face
Enroll Face
Enroll Face
Enroll FaceEnroll Face].
2. Follow the on-screen instructions. To get the ideal effect, keep the phone
20-50cm away from your face and position your whole face in the circle until
the enrollment is done. Avoid very bright or dim environment when enrolling
your face.
3.2.2.
3.2.2.
3.2.2.
3.2.2.3.2.2. Set up other mail and calen
Set up other mail and calen
Set up other mail and calen
Set up other mail and calenSet up other mail and calendar accounts
dar accounts
dar accounts
dar accounts dar accounts
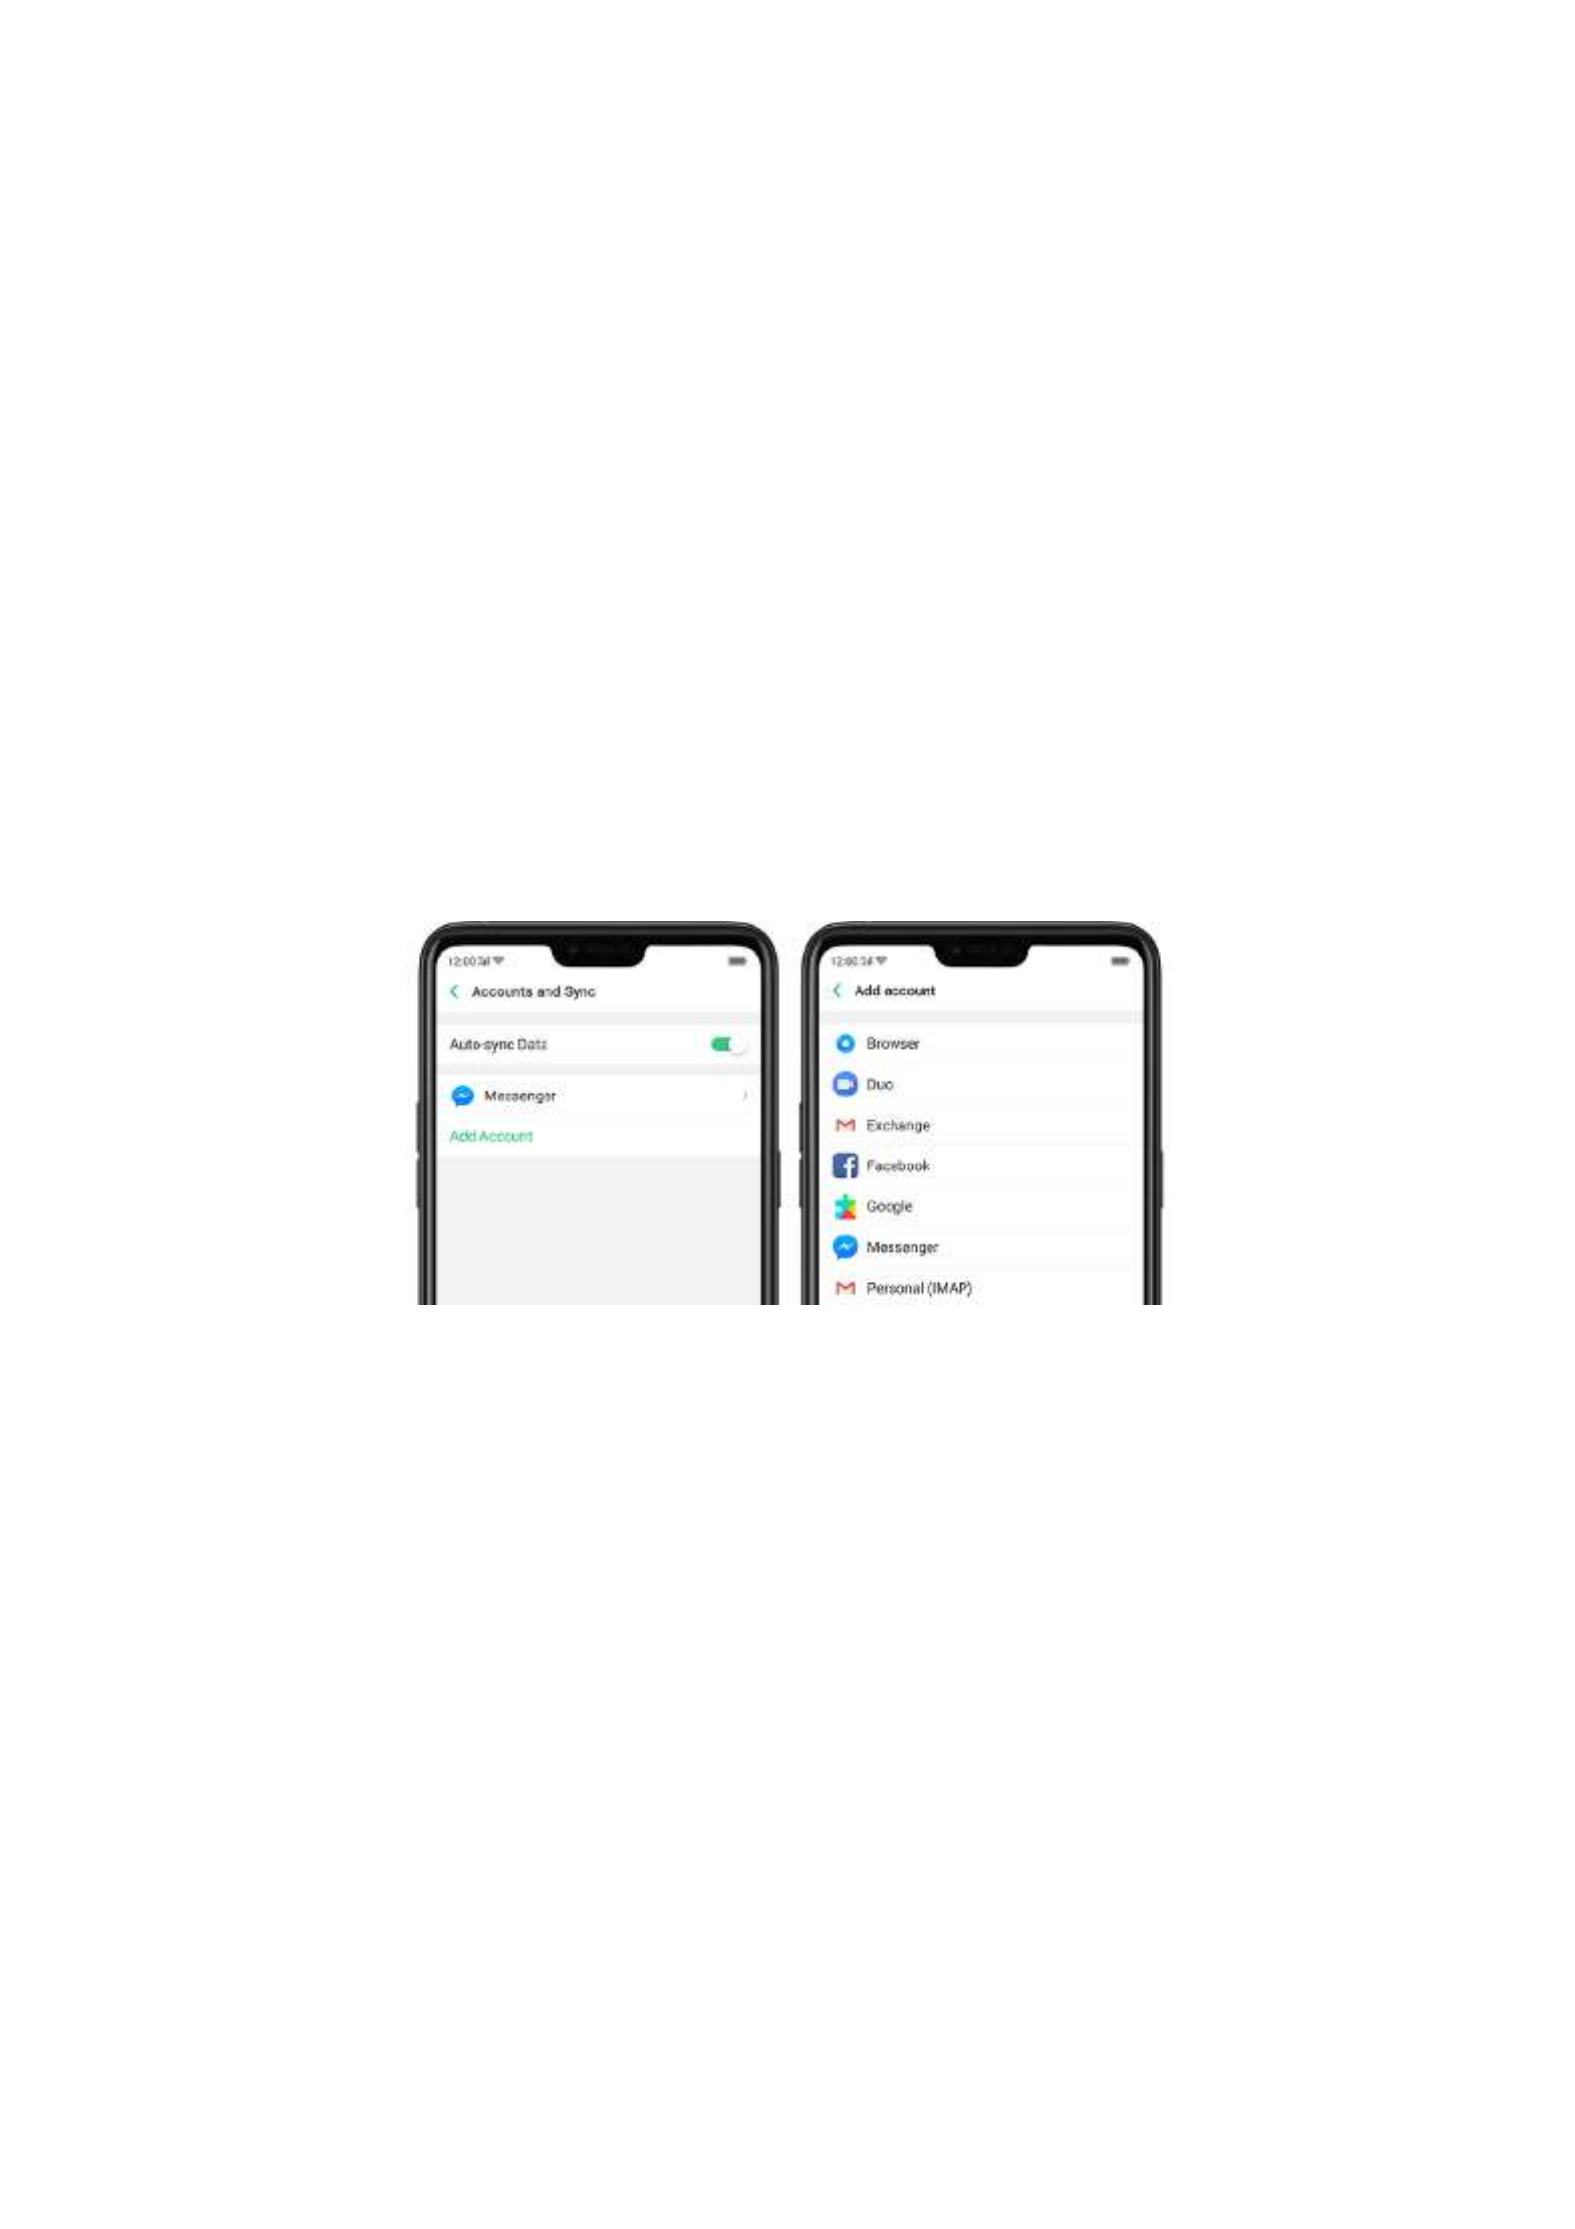
In addition to the apps that come with your phone, if you want to use other
mail and calendar apps, add the accounts to your phone to let the apps
associated with those accounts sync with your phone.
Set up an account.
Set up an account.
Set up an account.
Set up an account.Set up an account. [Settings]
[Settings]
[Settings]
[Settings][Settings] [Accounts and Sync]
[Accounts and Sync]
[Accounts and Sync]
[Accounts and Sync][Accounts and Sync] [Add
[Add
[Add
[Add [Add
Go to > , then click
Account]
Account]
Account]
Account]Account].
Repeat the steps for as many accounts as you like.
3.2.3.
3.2.3.
3.2.3.
3.2.3.3.2.3. Transfer data from the o
Transfer data from the o
Transfer data from the o
Transfer data from the oTransfer data from the old phone to
ld phone to
ld phone to
ld phone to ld phone to realme
realme
realme
realme realme
smartphone
smartphone
smartphone
smartphone smartphone
You can transfer over all of your data - with no risk or loss of quality,
using . With , you don't need to leave any of your
Clone Phone
Clone Phone
Clone Phone
Clone PhoneClone Phone Clone Phone
Clone Phone
Clone Phone
Clone PhoneClone Phone
data behind with your previous device. Take it all with you in three easy steps:

From an iPhone to
From an iPhone to
From an iPhone to
From an iPhone to From an iPhone to an realme Phone
an realme Phone
an realme Phone
an realme Phone an realme Phone
1. On your realme Phone, go to , then select "This is the
[Tools] > [Clone Phone]
[Tools] > [Clone Phone]
[Tools] > [Clone Phone]
[Tools] > [Clone Phone][Tools] > [Clone Phone]
new phone" and "Import From an iPhone". Connect your phone to the Internet
when promoted.
2. Sign in the iCloud account of your old iPhone. Enter the Apple ID verification
code you received on your iPhone or in the SMS and start computing cloud
data.

From an Android P
From an Android P
From an Android P
From an Android PFrom an Android Phone to an realme
hone to an realme
hone to an realme
hone to an realme hone to an realme
Phone
Phone
Phone
PhonePhone
1. On your realme phone, go to then select "This is the
[Tools] > [Clon
[Tools] > [Clon
[Tools] > [Clon
[Tools] > [Clon[Tools] > [Clone Phone],
e Phone],
e Phone],
e Phone],e Phone],
new phone" and "Import from an Android Phone".
2. On your old phone, click select "This is
[Clone Phone] from the
[Clone Phone] from the
[Clone Phone] from the
[Clone Phone] from the[Clone Phone] from the Home screen,
Home screen,
Home screen,
Home screen, Home screen,
the old phone" and scan the QR Code generated by the new phone to start
cloning.
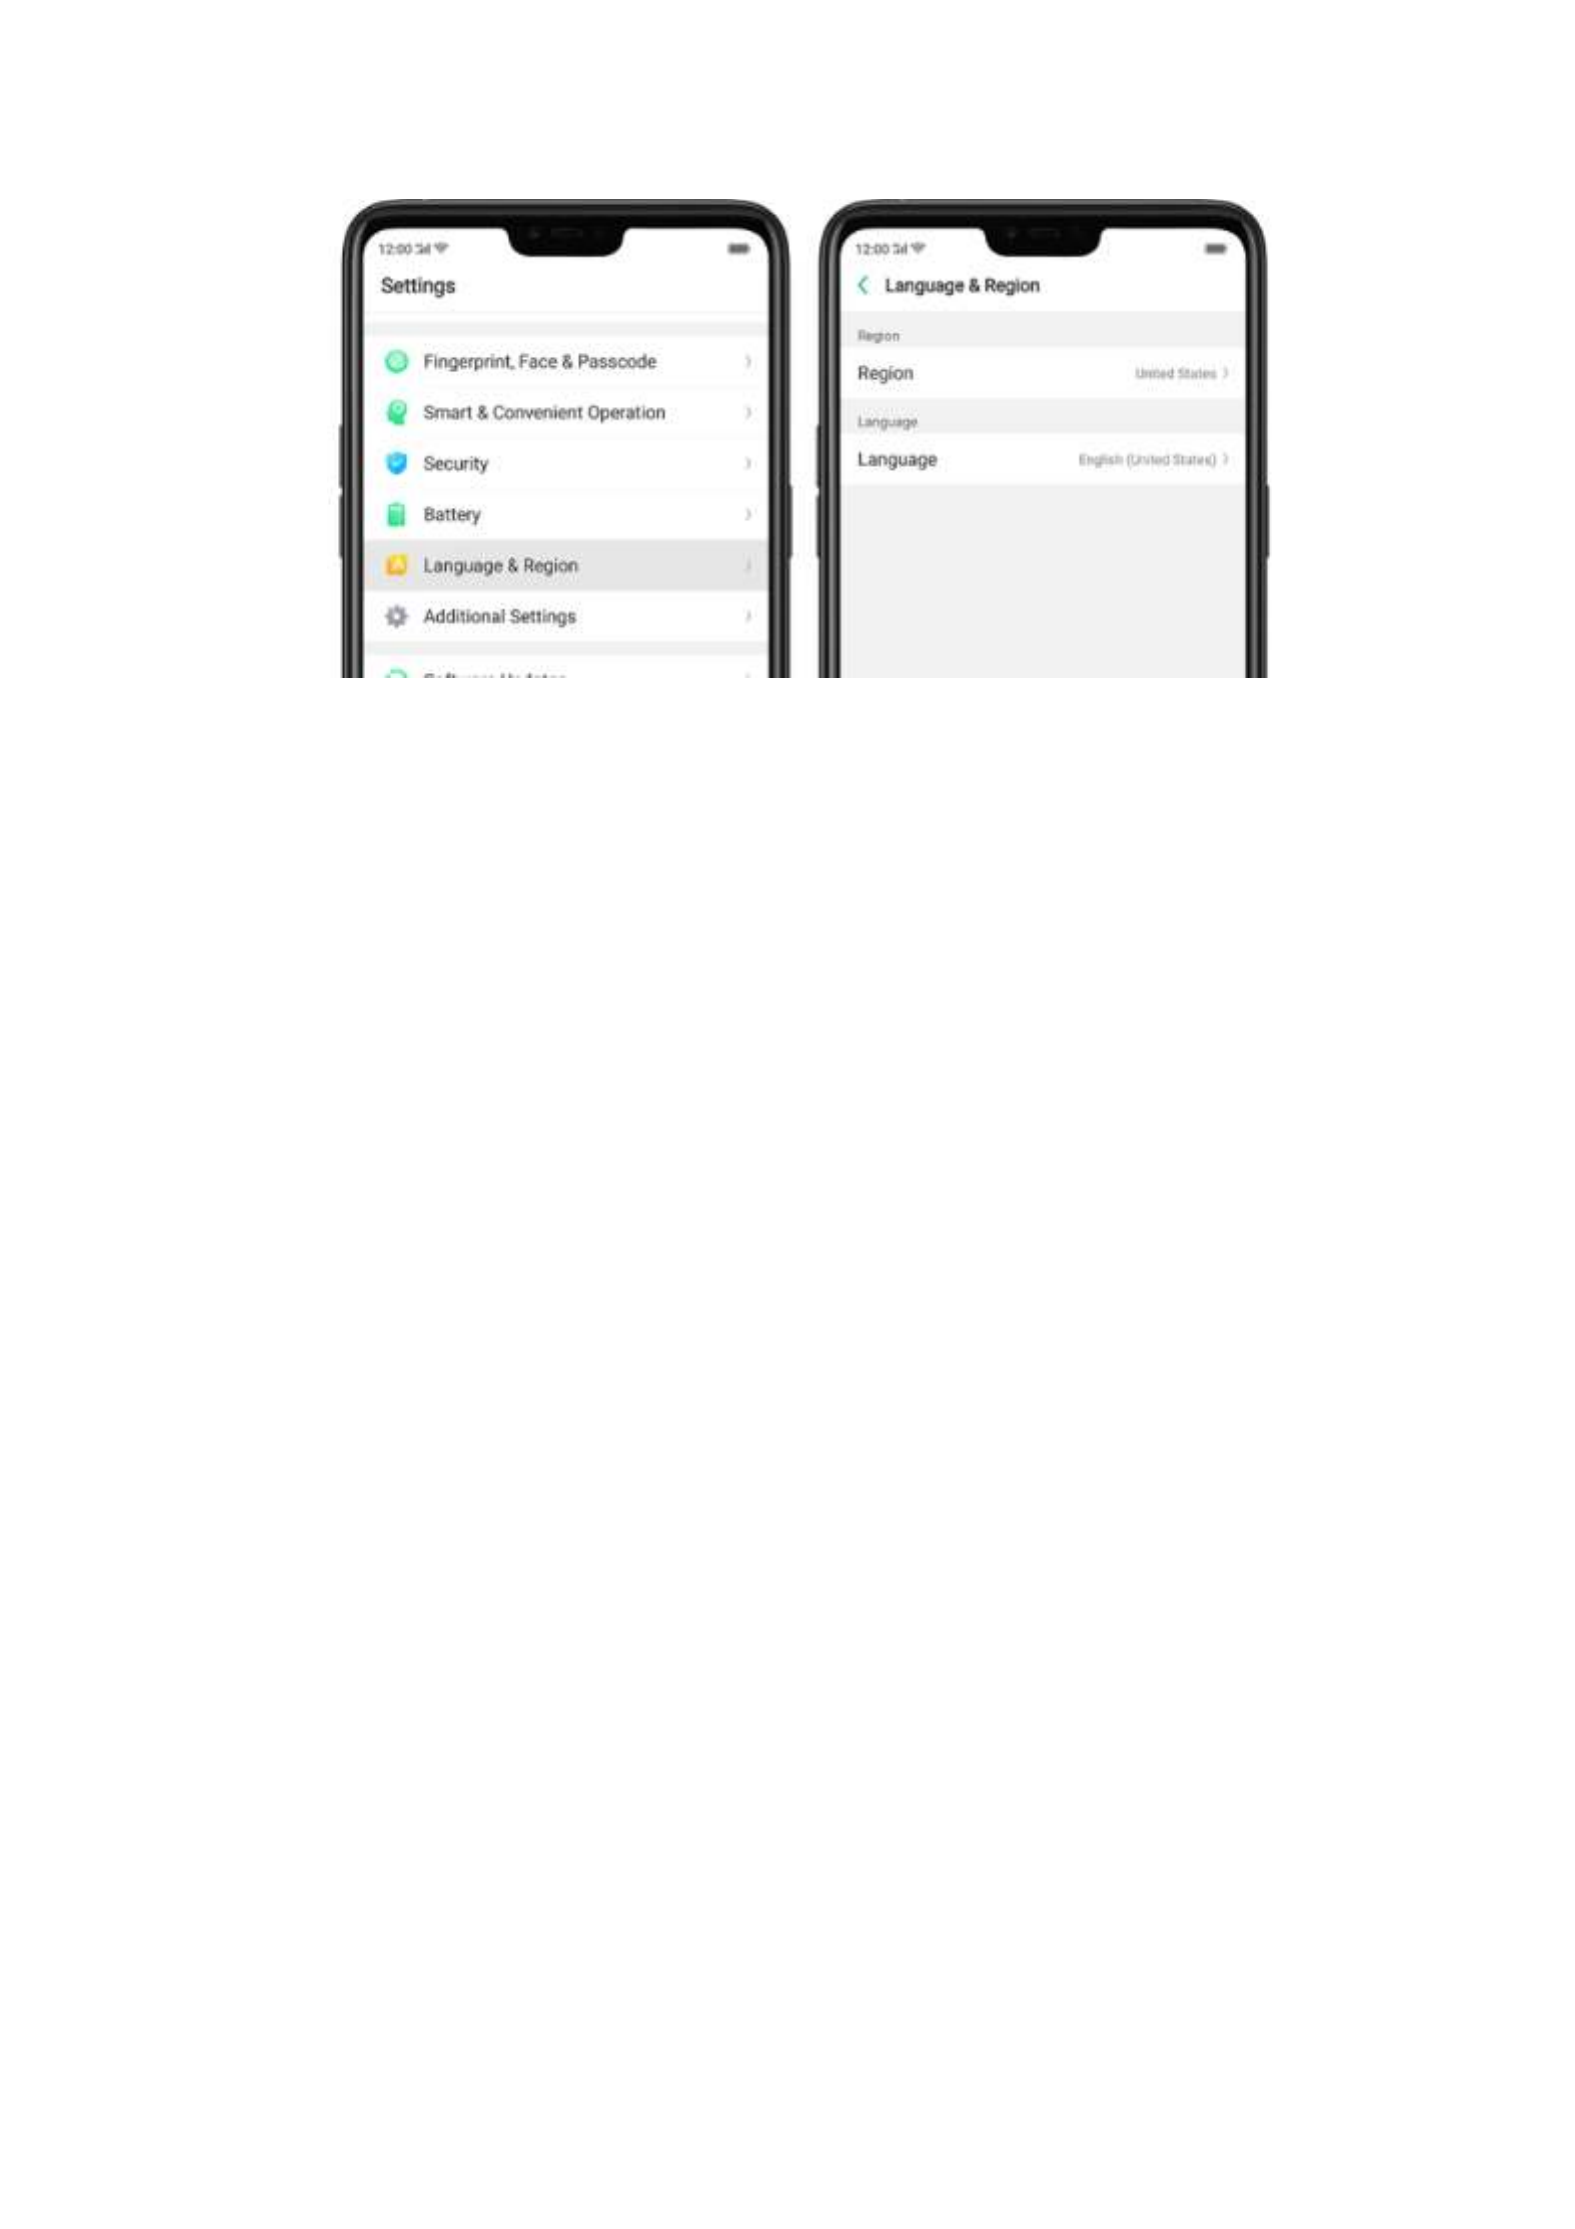
2. Find your desired region. Click Region and change the region you want to
use.
3. Find your desired language.
Click [ ], you will see a list of languages. Scroll down to find the
Language
Language
Language
LanguageLanguage
language you wish to use.
Select your desired language and click "Done." A confirmation message
will appear at the bottom of your screen. Confirm the change by clicking
"Change to ____." Then your realme phone will be in the new desired
language.

3.2.6.
3.2.6.
3.2.6.
3.2.6.3.2.6. Connect to the Int
Connect to the Int
Connect to the Int
Connect to the IntConnect to the Internet
ernet
ernet
ernet ernet
realme smartphone connects to the Internet whenever necessary, using a -Wi
Fi connection mobile network. or
Wi
Wi
Wi
WiWi-Fi connection
-Fi connection
-Fi connection
-Fi connection-Fi connection
1. Go to [ ] > [ ], or swipe down from the top of your screen to open
Settings
Settings
Settings
SettingsSettings Wi
Wi
Wi
WiWi-
-
-
--Fi
Fi
Fi
FiFi
Control Center, then tap . The detected Wi-Fi networks will be displayed.
2. Tap the Wi-Fi network you want to connect to.
3. Fill in the password if required.
Mobile data connection
Mobile data connection
Mobile data connection
Mobile data connectionMobile data connection
Go to [ ] > [ ] and enable [ ], or swipe
Settings
Settings
Settings
SettingsSettings Dual
Dual
Dual
Dual Dual SIM
SIM
SIM
SIM SIM &
&
&
& & Cellular
Cellular
Cellular
CellularCellular Mobile
Mobile
Mobile
Mobile Mobile Data
Data
Data
DataData
down from the top of your screen to open Control Center, then tap .

You can also lock the word so it won’t read other words/phrases. Click and
you will be able to lock and unlock word or phrases. You will see a padlock in
the center of the frame once a word is locked.
Shoot
Shoot
Shoot
Shoot Shoot &
&
&
& & Translate
Translate
Translate
TranslateTranslate This only available for English to Hindi and vice –
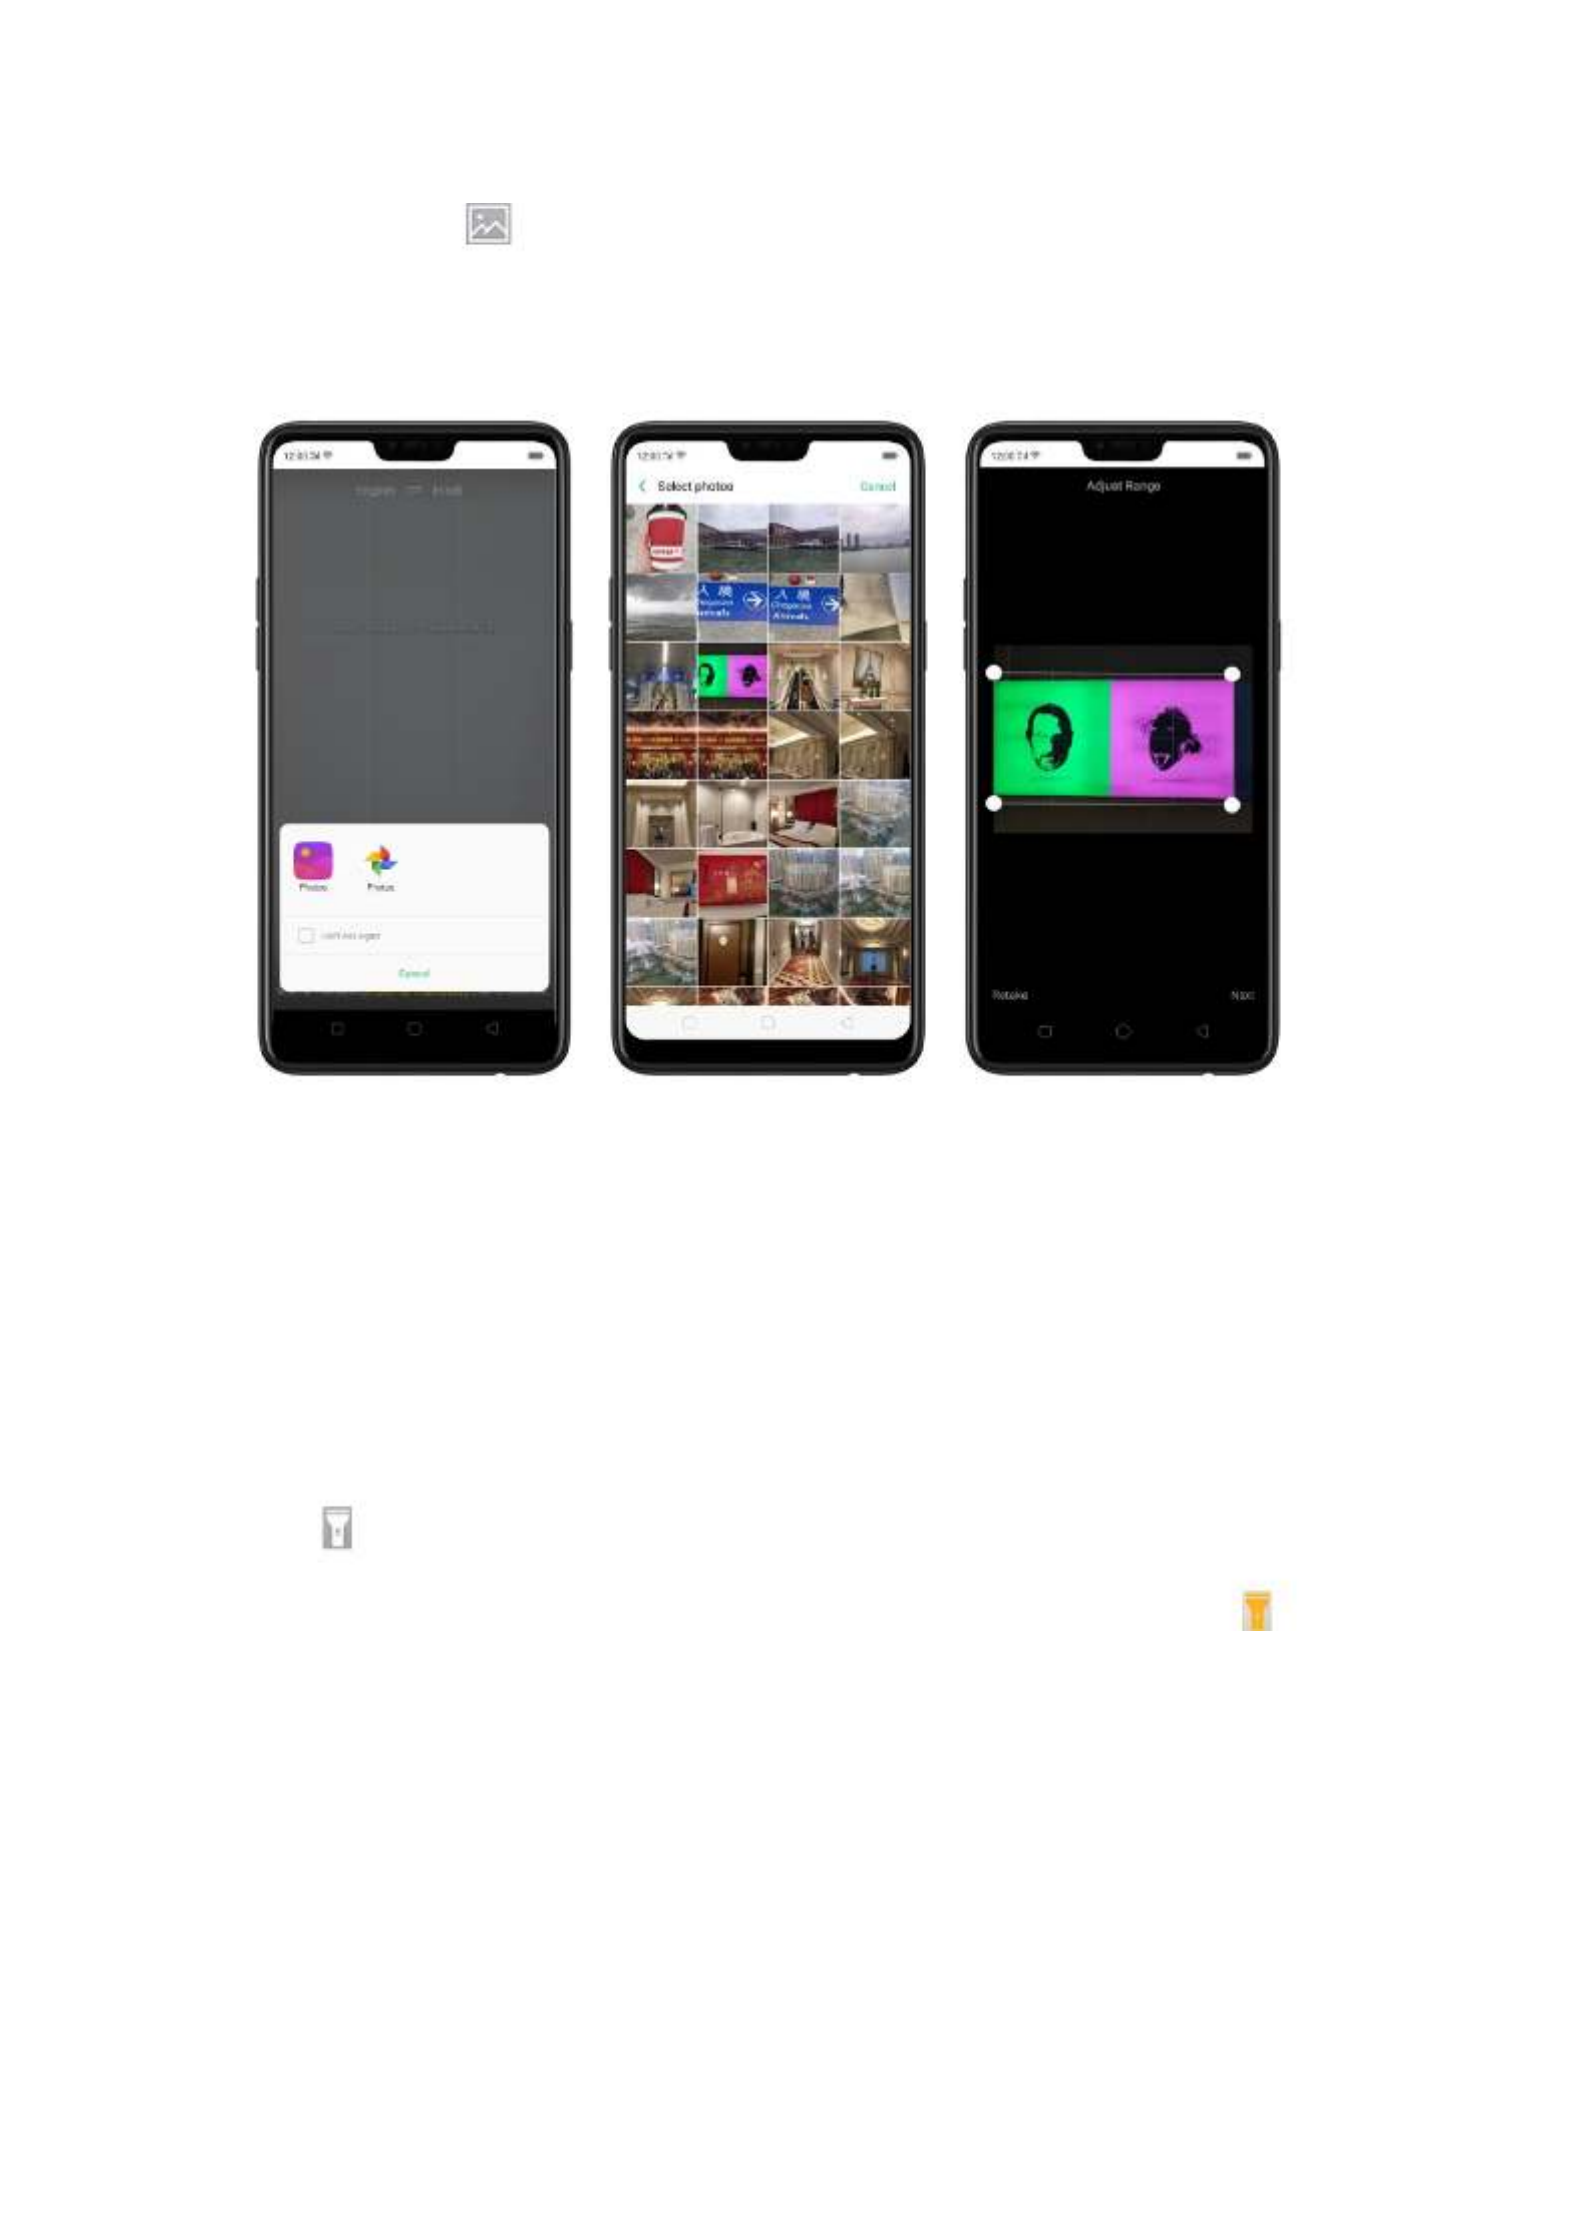
3. Click and choose the Photo app you want to use.
4. Choose an image you want to Shoot
Shoot
Shoot
Shoot Shoot & Tr
& Tr
& Tr
& Tr& Translate
anslate
anslate
anslateanslate or Scan Document
Scan Document
Scan Document
Scan DocumentScan Document.
Flashlight.
Flashlight.
Flashlight.
Flashlight.Flashlight. When the area you are taking a picture or scanning a
document is too dark, or dimly lit or you just want a clearer view of the
image.
Click to open flashlight and enjoy a better shot of the image or document
you want to scan. Once flashlight is on, flashlight icon will turn into this .

See:
Smart Scan
Scan namecard.
Scan namecard.
Scan namecard.
Scan namecard.Scan namecard. Click to launch Contacts app and open this
feature directly. Before scanning the business card or namecard, click
for the namecard recognition language. Make sure to fit the
namecard or business card on the frame.
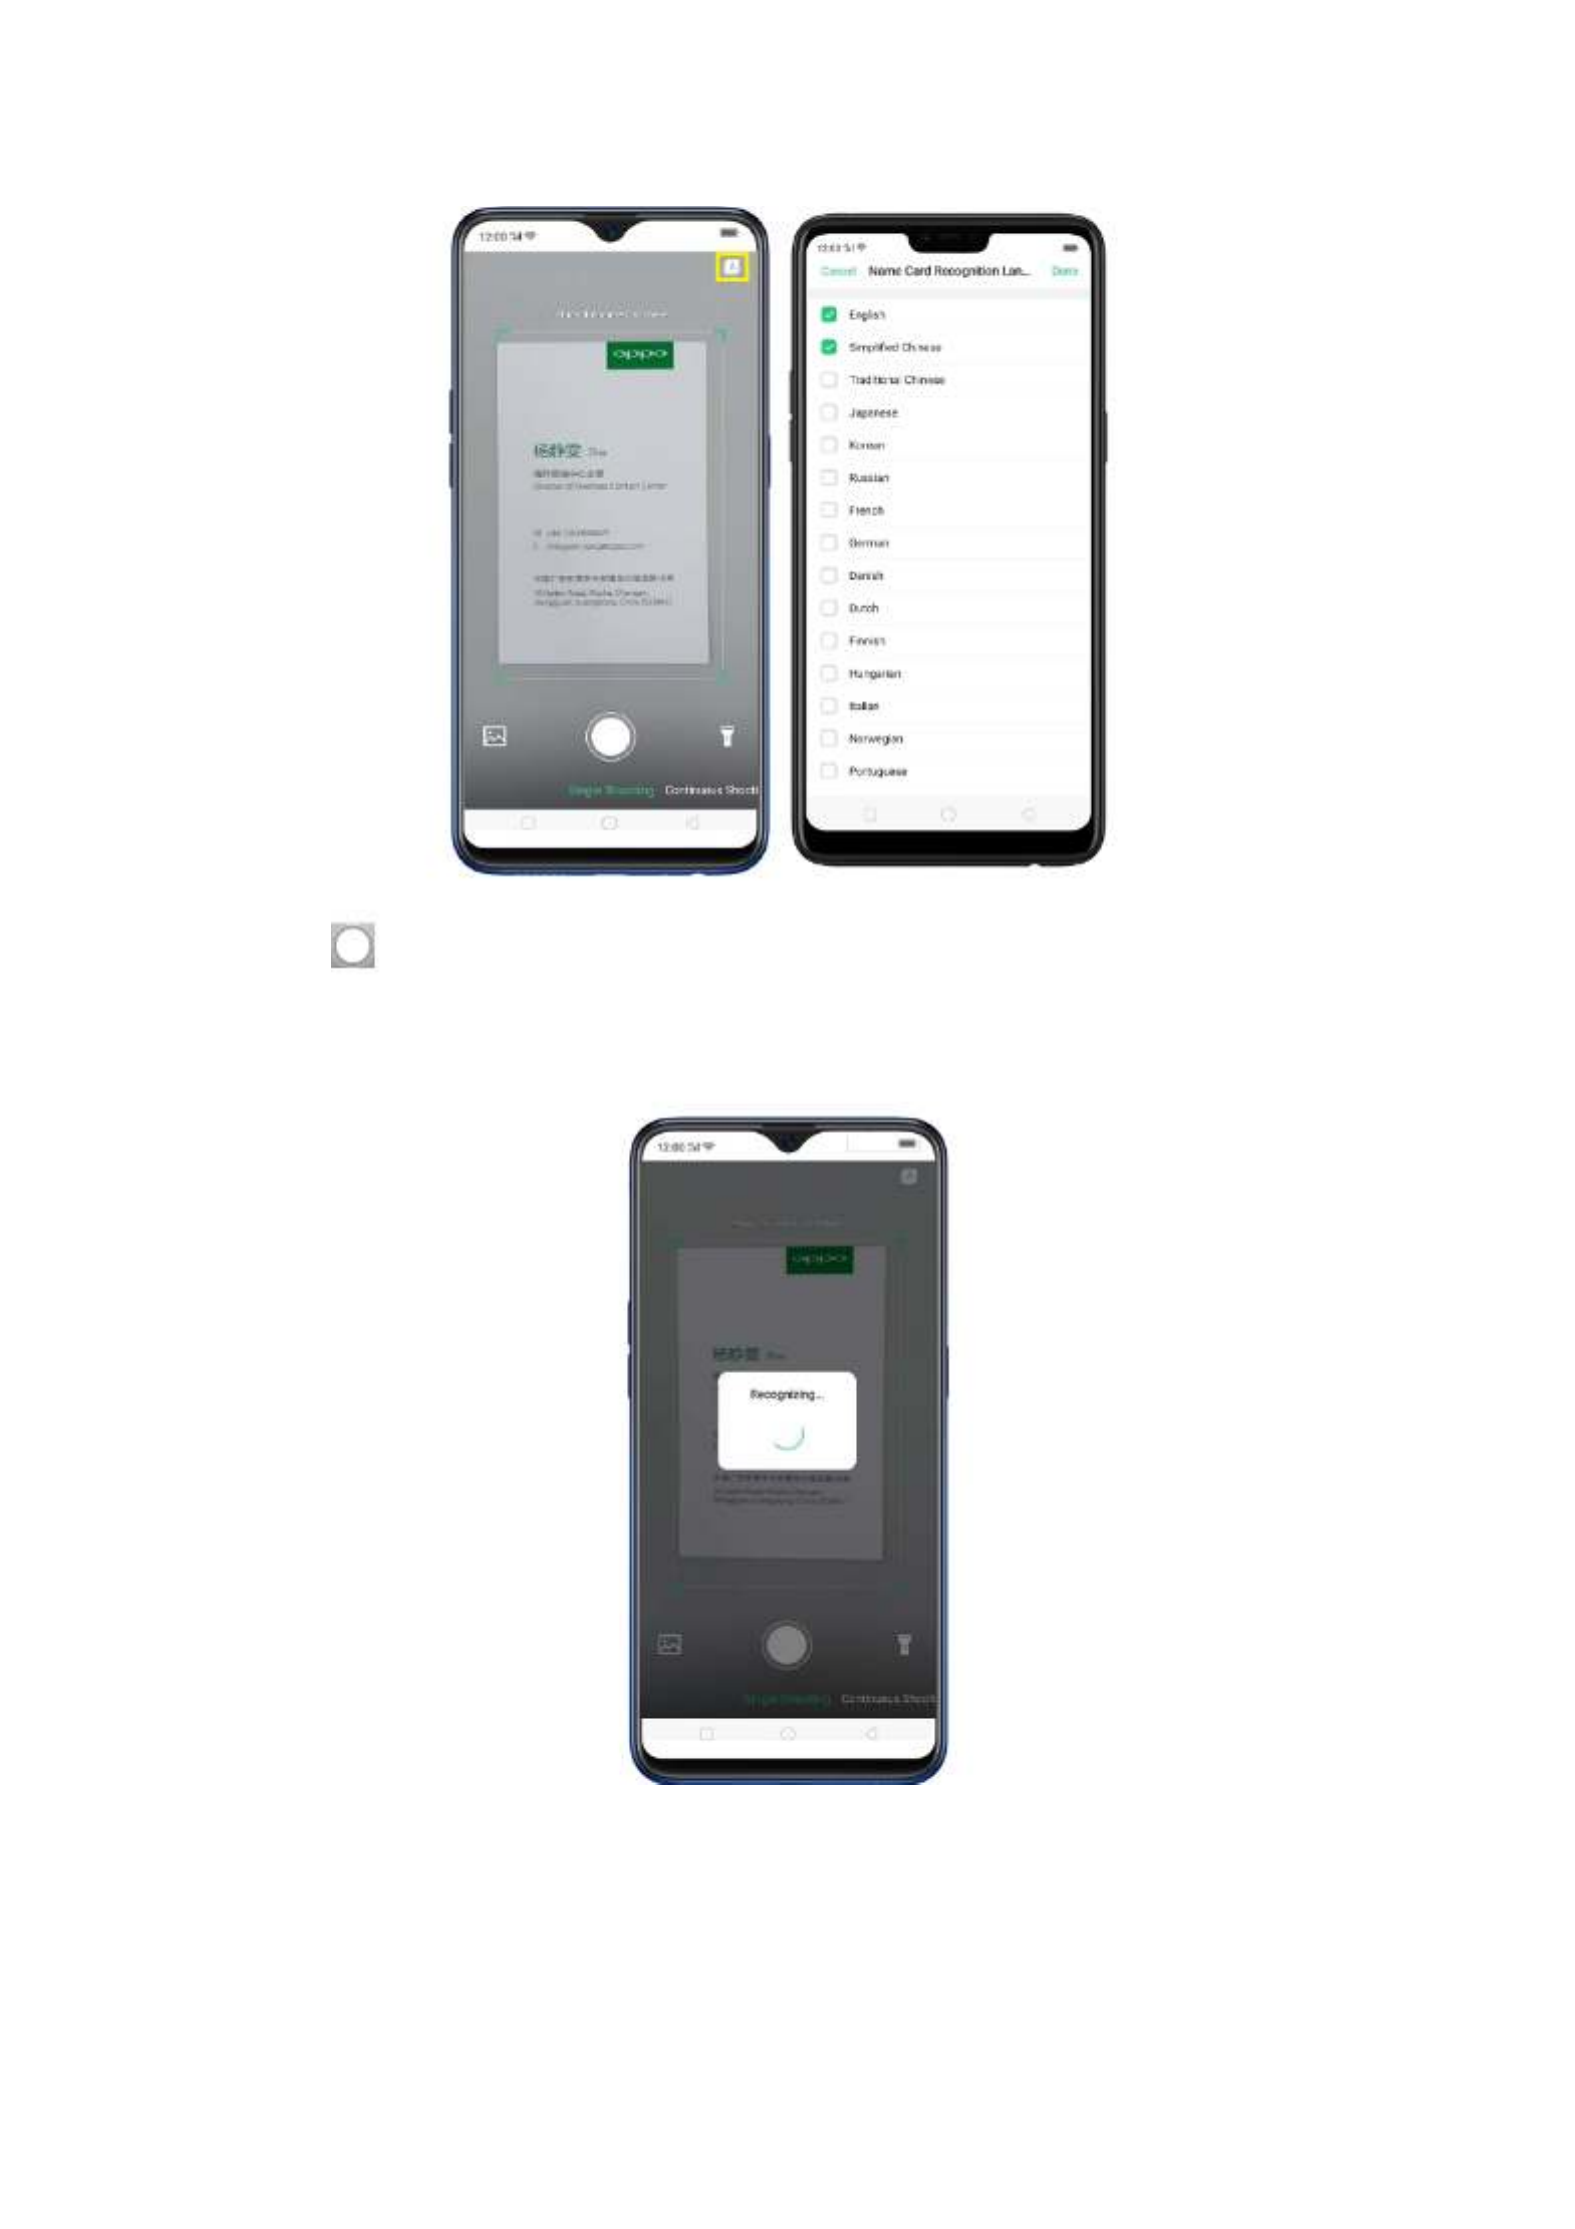
Click to start recognizing the namecard or business card and all
information will directly be stored on your Contacts app then click Save
Save
Save
SaveSave.
.
.
. .
You also have an option to do , open Photos app if a
Con
Con
Con
ConContinuous
tinuous
tinuous
tinuous tinuous Shooting
Shooting
Shooting
ShootingShooting
namecard or business card is saved there, or use the flashlight if area to scan
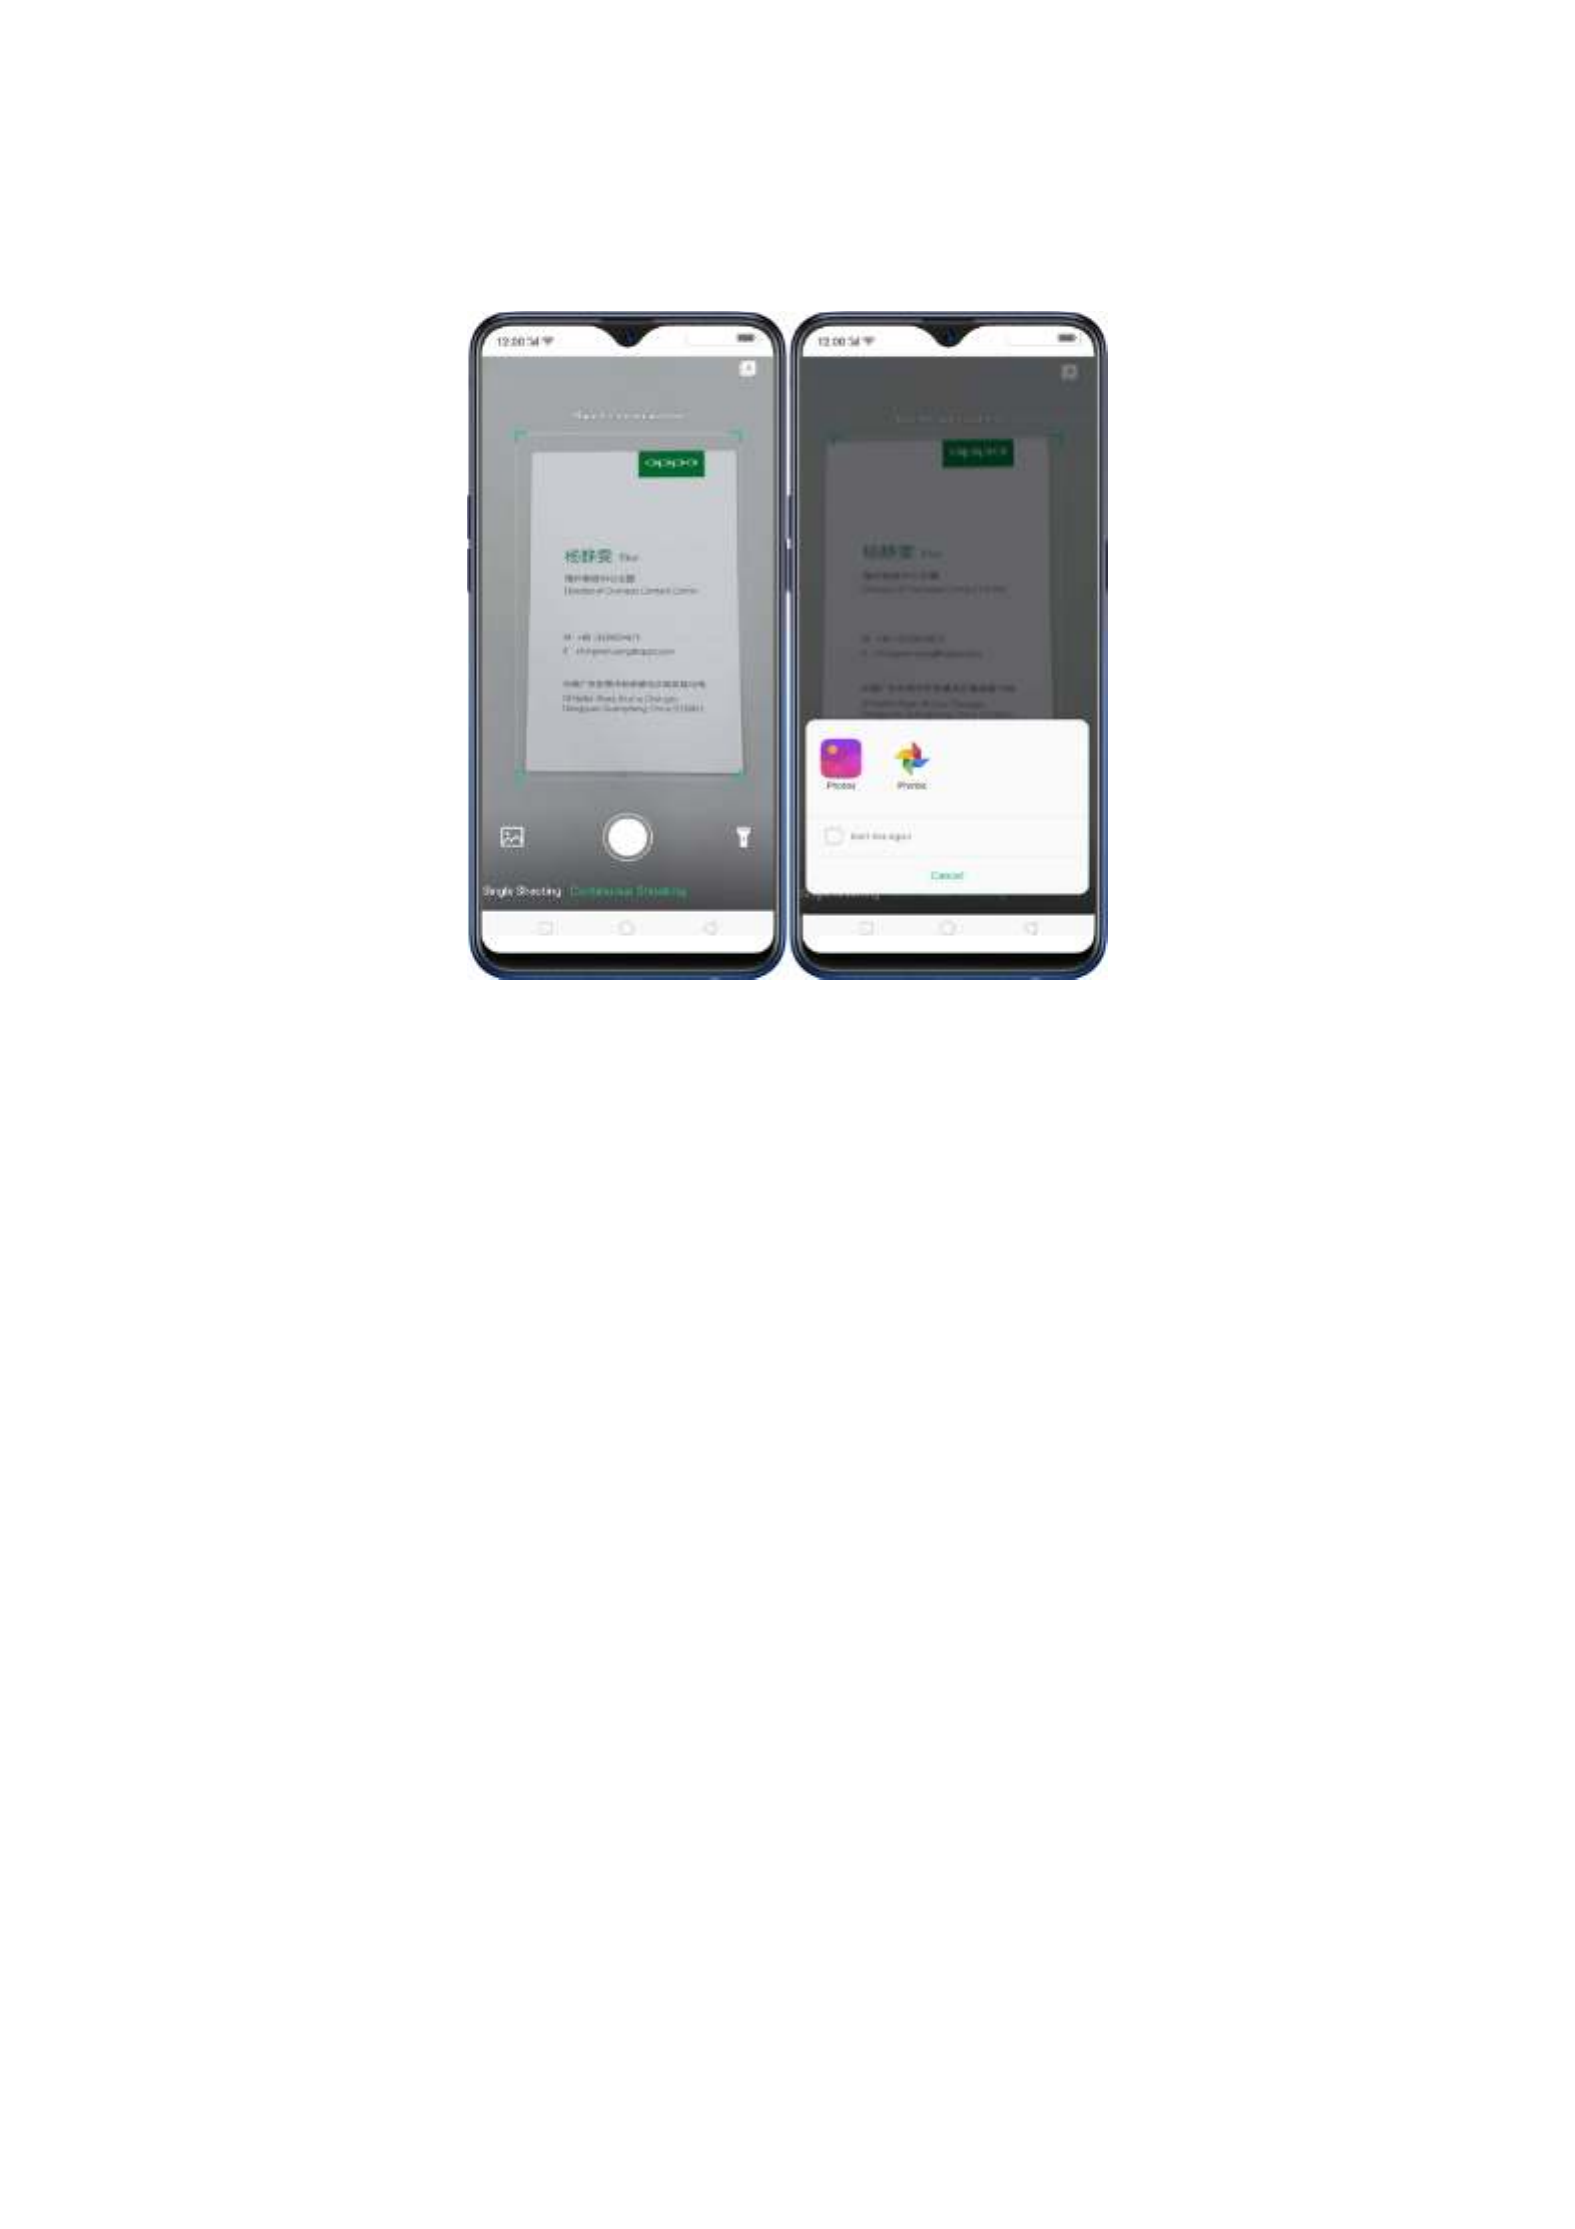
is dimly lit.
4.4. ORo
4.4. ORo
4.4. ORo
4.4. ORo4.4. ORoaming
aming
aming
aming aming
To stay connected with loved ones and to still check business and work from
time to time, we need data. It is now a necessity and we know it and we would
want to make things easier for you. ORoaming makes you purchase
international data package without the need of buying a SIM card. It supports
60+ countries/regions. Now you can truly enjoy your trip.
1. To purchase ORoaming, go to [Settings]
[Settings]
[Settings]
[Settings] [Settings] >
>
>
> > [SIM
[SIM
[SIM
[SIM [SIM Card
Card
Card
Card Card &
&
&
& & Cellular]
Cellular]
Cellular]
Cellular] Cellular] >
>
>
> >
[ORoaming]
[ORoaming]
[ORoaming]
[ORoaming][ORoaming]. You can also open the ORoaming app on your home screen.

3.
3.
3.
3.3. Click and you will be asked what speed you would like the video to
Ed
Ed
Ed
EdEdit
it
it
itit
play. The slowest is 0.25X and fastest is at 2X. The normal one is 1X.
Once done choosing the speed, click
Next
Next
Next
NextNext.

Theme of the video
Theme of the video
Theme of the video
Theme of the video Theme of the video
1. To choose a theme for your video, click [E
E
E
EEdi
di
di
didit]
t]
t]
t] t] >
>
>
> > [Cho
[Cho
[Cho
[Cho[Choose
ose
ose
ose ose the
the
the
the the Speed]
Speed]
Speed]
Speed] Speed] >
>
>
> >
[ ] > [ ]. You can choose from None, Old Days, Lens, Memory,
Next
Next
Next
NextNext Themes
Themes
Themes
ThemesThemes
Tasty Food/Delicacy, Joy, Travel, and Simplicity.
2. Click to play and pause the preview and click when you /
have chosen a theme, then click Done
Done
Done
DoneDone. Click to exit Theme and click
Cancel
Cancel
Cancel
CancelCancel if you don't want to add a theme to your video.
Add Special Effect to the Video
1. To choose a special effect for your video, click [Edit]
Edit]
Edit]
Edit] Edit] >
>
>
> > [Choose
[Choose
[Choose
[Choose [Choose the
the
the
the the
Speed]
Speed]
Speed]
Speed] Speed] >
>
>
> > [ ] > [
Next
Next
Next
NextNext Fx
Fx
Fx
Fx Fx Special
Special
Special
Special Special Effect
Effect
Effect
EffectEffect]. You can choose from None, Close-

up, and Pulsation.
2. Click to play and pause the preview and click when you /
have chosen a special effect, then click Done
Done
Done
DoneDone. Click to exit Fx Special
Effect and click Cancel
Cancel
Cancel
CancelCancel if you don't want to add any special effect to your
video.
4.6.
4.6.
4.6.
4.6. 4.6.
Smart Driv
Smart Driv
Smart Driv
Smart DrivSmart Driving
ing
ing
ing ing
A small distraction when driving can cause accident. Even if we really don't
want to answer a phone call or have glimpse about who messaged us or what
the notification is for, but the urge to check it is so strong and our focus on the

road is diverted. It has been said that checking the phone is one of the biggest
reasons for senseless accidents on the road and we wanted to avoid that and
save lives instead.
The features of Smart Driving:
Blocks notifications and reminders to reduce disturbance.
Announce incoming calls and messages.
Answer or end calls via voice control.
1. To enable Smart Driving, go to [Settings]
Settings]
Settings]
Settings] Settings] >
>
>
> > [Smart
[Smart
[Smart
[Smart [Smart &
&
&
& & Convenient]
Convenient]
Convenient]
Convenient] Convenient] >
>
>
>>
[Smart
[Smart
[Smart
[Smart [Smart
Driving]
Driving]
Driving]
Driving] Driving] Turn
Turn
Turn
Turn Turn On
On
On
On On Smart
Smart
Smart
Smart Smart Driving
Driving
Driving
DrivingDrivingtoggle [ ] to green to enable. Once enabled you
will see on the top-right corner of your phone and also you will receive a
notification that smart driving is on.

You can also quickly launch Smart Driving on the Control Center, just swipe
down from the very top of any screen then click to enable it.

To enjoy Game Space, Go to [Setting
Setting
Setting
SettingSettings]
s]
s]
s] s] >
>
>
> > [Game
[Game
[Game
[Game [Game Space]
Space]
Space]
Space] Space] >
>
>
> > [Game
[Game
[Game
[Game [Game Sp
Sp
Sp
SpSpace
ace
ace
ace ace on
on
on
on on
Homescreen]
Homescreen]
Homescreen]
Homescreen]Homescreen] Sho
Sho
Sho
ShoShow Ga
w Ga
w Ga
w Gaw Game
me
me
me me Icons
Icons
Icons
Icons Icons in
in
in
in in Game
Game
Game
Game Game Sp
Sp
Sp
SpSpace
ace
ace
ace ace only
only
only
onlyonly and switch [ ] to green to
show on the home screen. ( : Disabling Game space on the home screen
Note
Note
Note
NoteNote
means Game Space app will not show any more on the home screen).

You can also go to [Settings]
Settings]
Settings]
Settings] Settings] >
>
>
> > [Game
[Game
[Game
[Game [Game Space]
Space]
Space]
Space] Space] >
>
>
> > [Manage
[Manage
[Manage
[Manage [Manage my
my
my
my my games]
games]
games]
games] games] >
>
>
> > [
[
[
[[Ad
Ad
Ad
AdAdd
d
d
d d
More Games
More Games
More Games
More GamesMore Games]
]
]
] ] then toggle to green the game that you want to transfer to Game
Space.

For quick shortcut to Game Space settings, click on the top-right corner of
the Game Space app.
Game Space Settings
Game Space Settings
Game Space Settings
Game Space Settings Game Space Settings
Add
Add
Add
Add Add games
games
games
games games automatically
automatically
automatically
automaticallyautomatically. For games to be added to Game Space
automatically, click [ and toggle
Settings]
Settings]
Settings]
Settings] Settings] >
>
>
> > [Game
[Game
[Game
[Game [Game Space]
Space]
Space]
Space] Space]
[Add
[Add
[Add
[Add [Add ga
ga
ga
gagames
mes
mes
mes mes
au
au
au
auautomatically]
tomatically]
tomatically]
tomatically]tomatically] to green to enable.
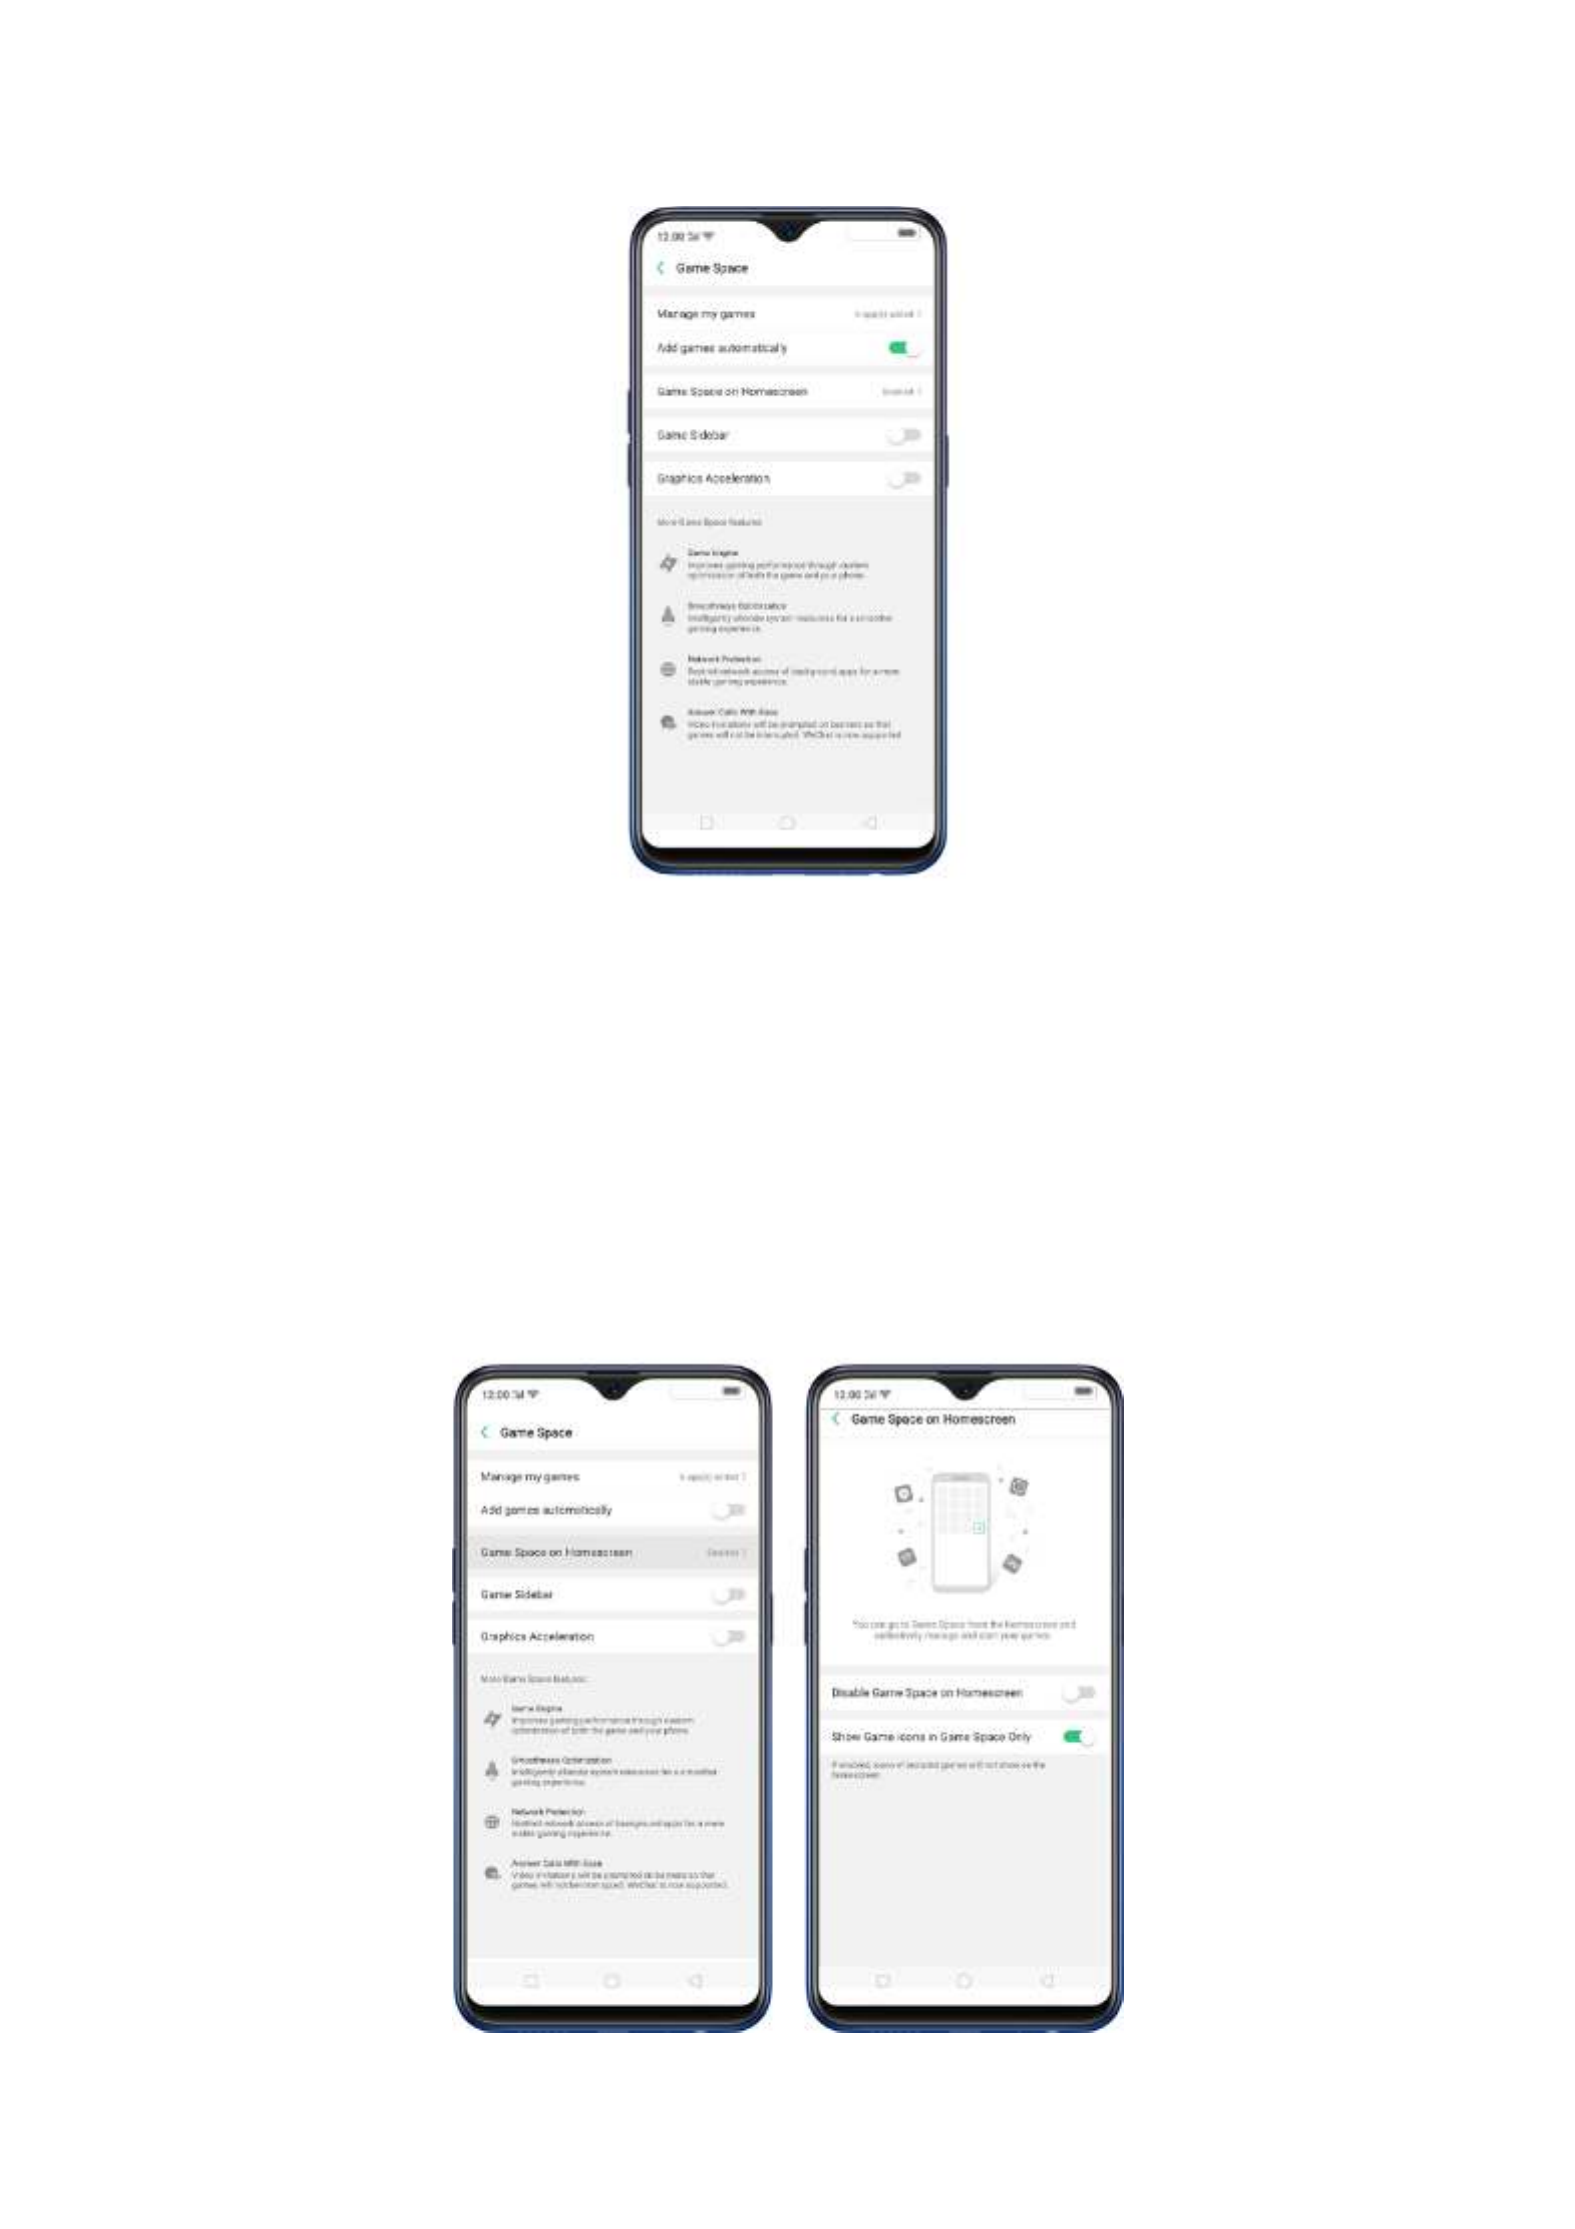
Game
Game
Game
Game Game Space
Space
Space
Space Space on
on
on
on on Home
Home
Home
HomeHomescreen.
screen.
screen.
screen.screen. Go to [Settings]
Settings]
Settings]
Settings] Settings] >
>
>
> > [Game
[Game
[Game
[Game [Game Space]
Space]
Space]
Space] Space] >
>
>
> > [Game
[Game
[Game
[Game [Game
Space
Space
Space
Space Space on Homescre
on Homescre
on Homescre
on Homescreon Homescreen]
en]
en]
en]en] Show
Show
Show
Show Show Game Icons
Game Icons
Game Icons
Game Icons Game Icons in
in
in
in in Game
Game
Game
Game Game Space
Space
Space
Space Space and switch [
only
only
only
onlyonly] to green to show on the home screen. ( : Disabling Game
Note
Note
Note
NoteNote
space on the home screen means Game Space app will not show any
more on the home screen).
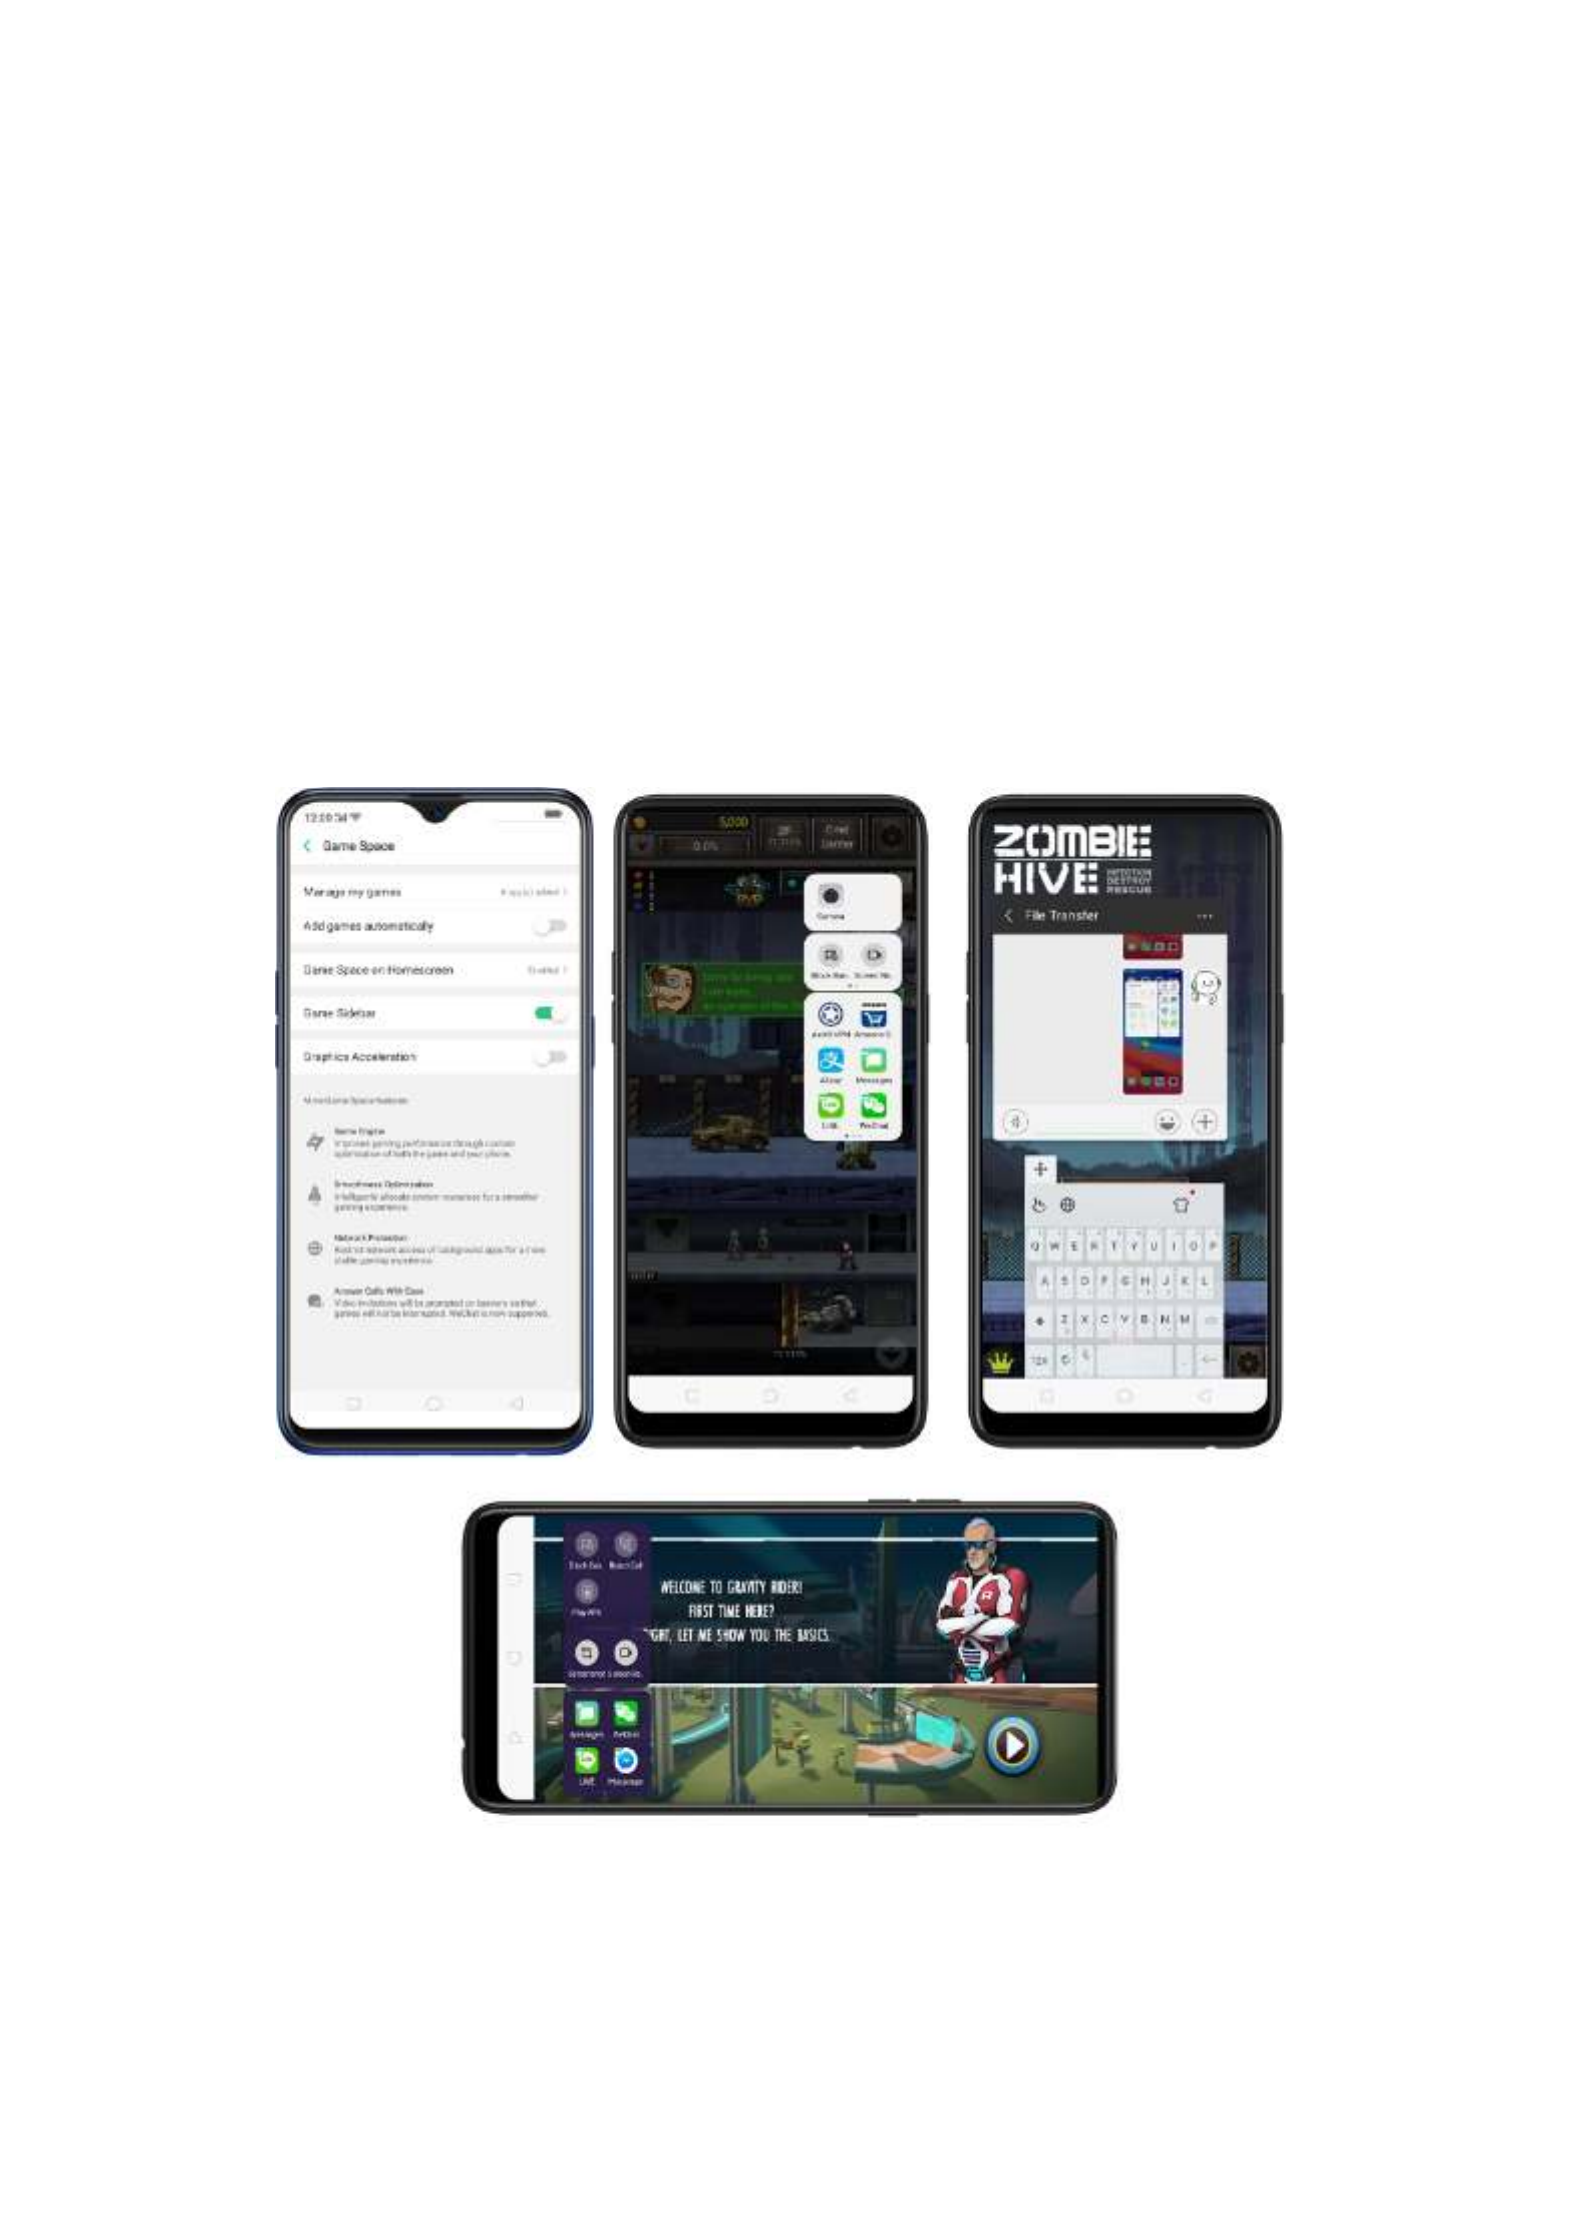
Game
Game
Game
Game Game Space
Space
Space
Space Space Sidebar.
Sidebar.
Sidebar.
Sidebar.Sidebar. This will enable Smart Sidebar to show on the
side when you are playing games. To enable, go to [Setting
Setting
Setting
SettingSettings] >
s] >
s] >
s] > s] > [Game
[Game
[Game
[Game [Game
Space] >
Space] >
Space] >
Space] > Space] > Game Sidebar
Game Sidebar
Game Sidebar
Game SidebarGame Sidebarand toggle [ ] to green to enable.
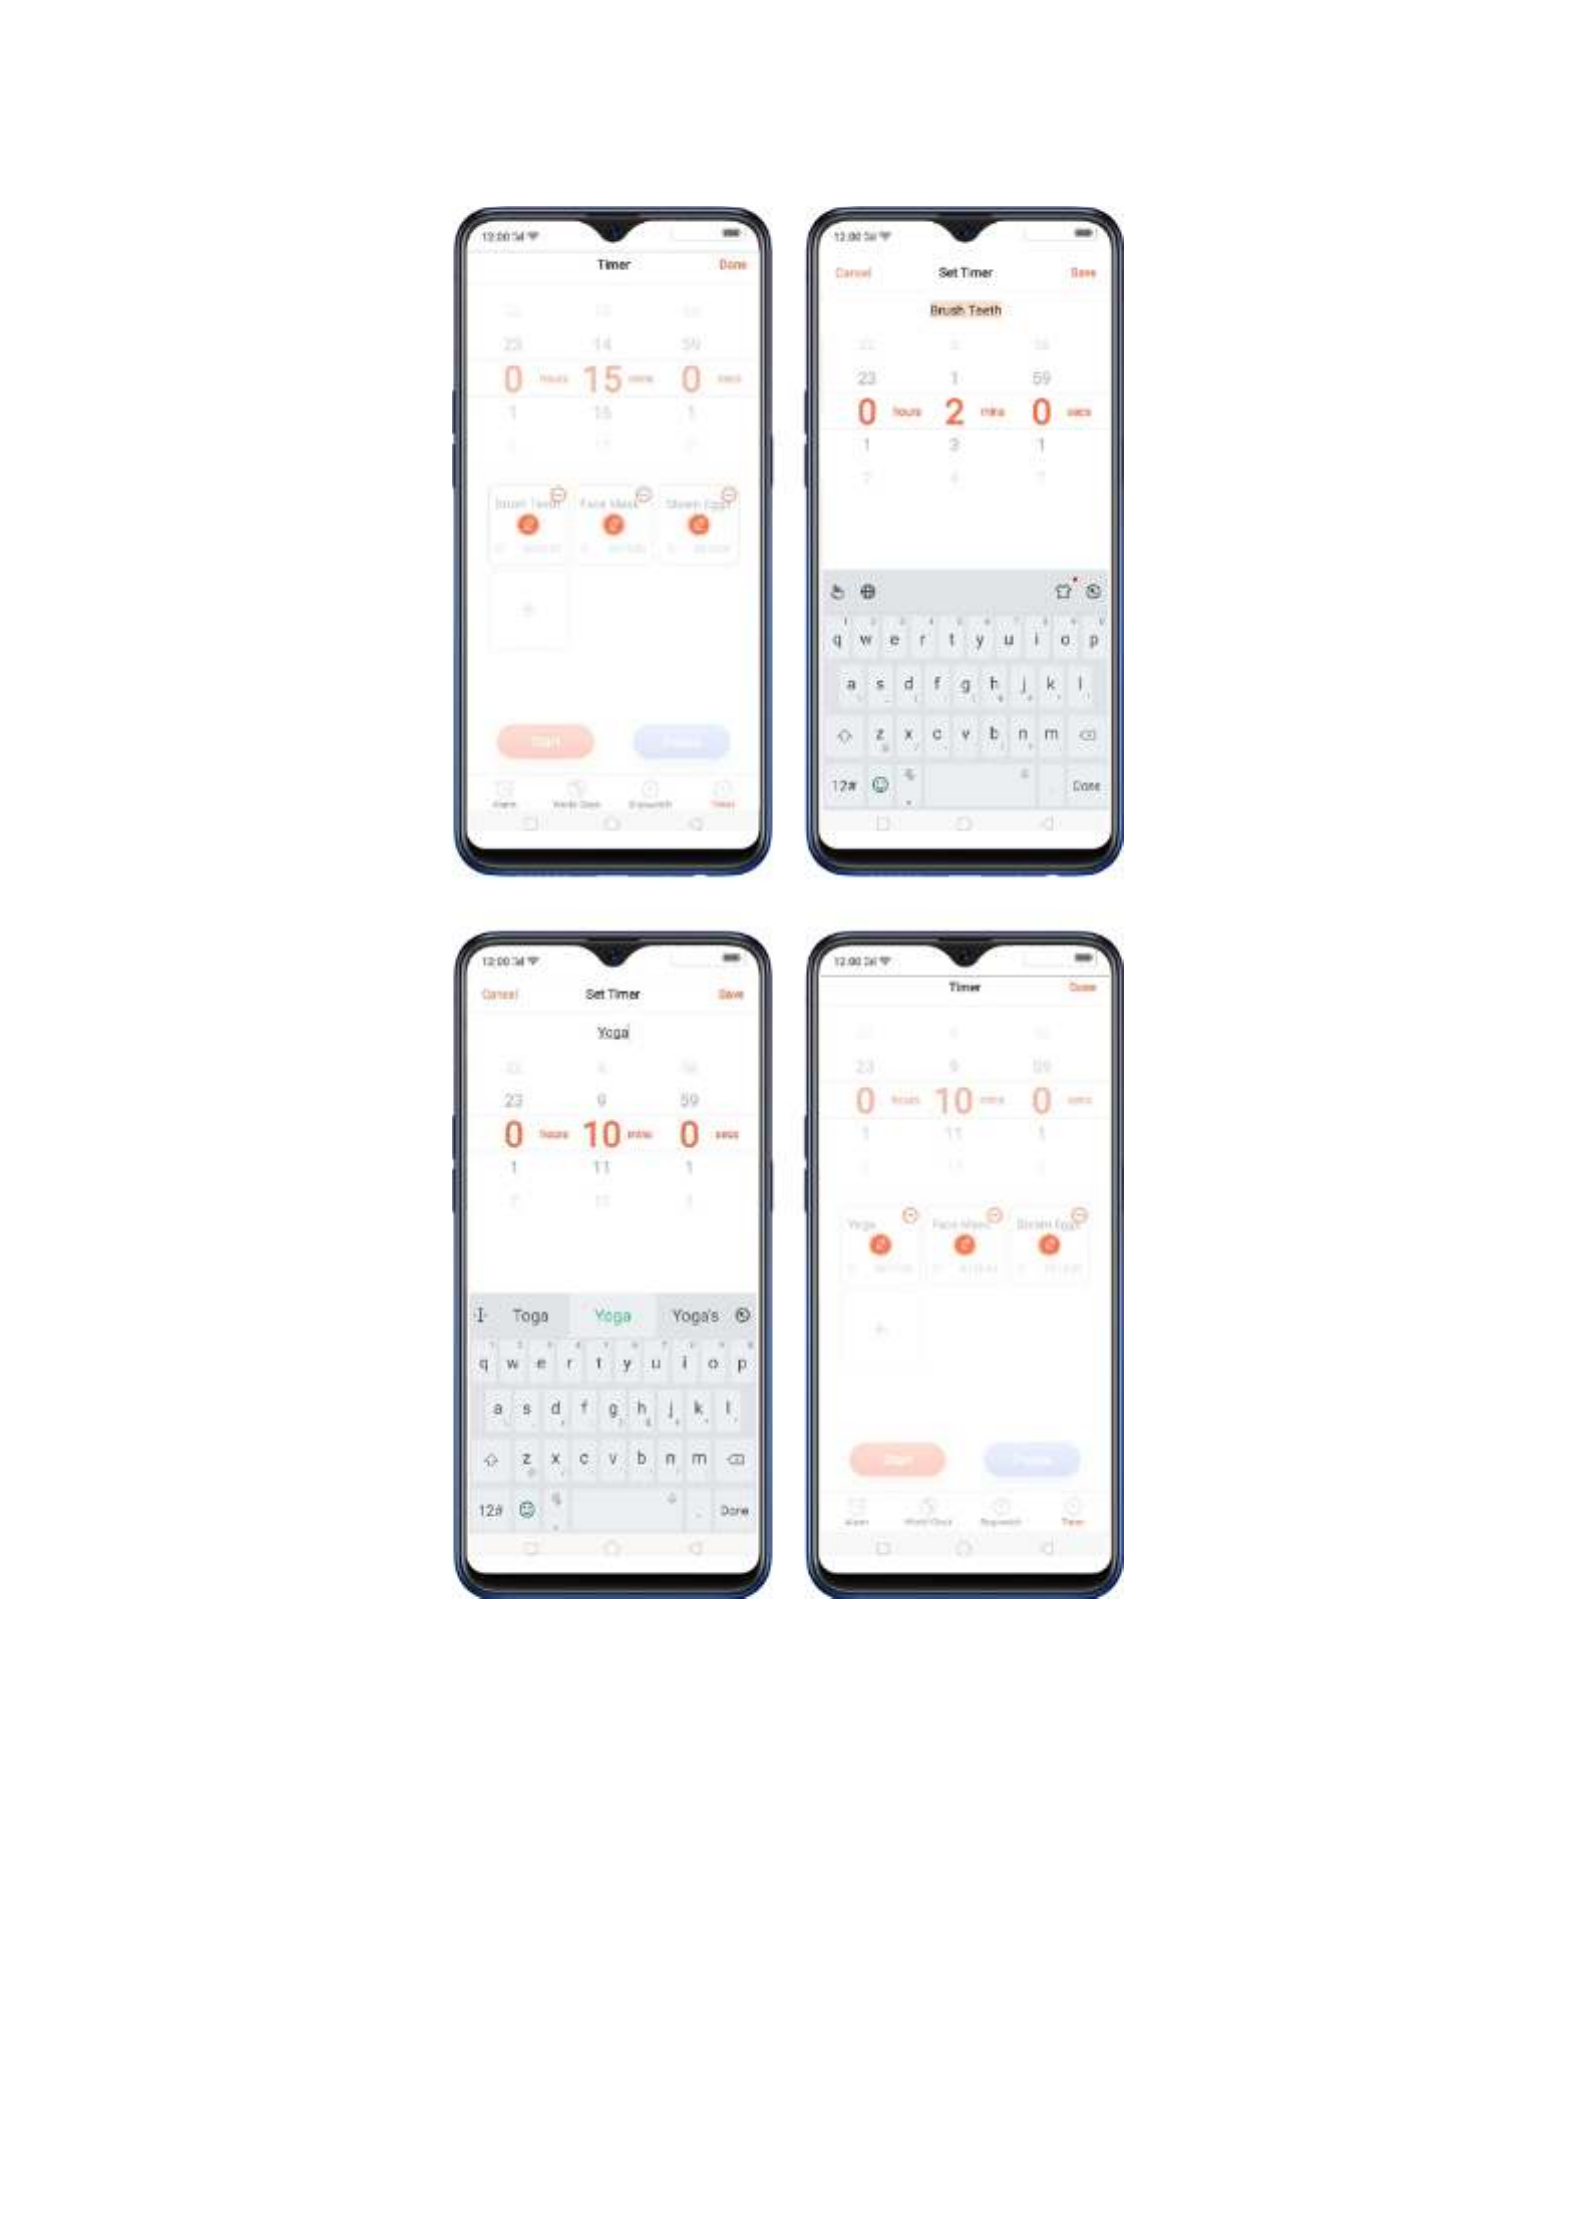
4. Click Start
Start
Start
StartStart so timer starts and choose to either Pause
Pause
Pause
PausePause or Cancel
Cancel
Cancel
CancelCancel the timer.

Delete an activity
To delete an activity, click then click , choose the activity you want to
Edit
Edit
Edit
Edit Edit
delete and click .
Done
Done
Done
DoneDone
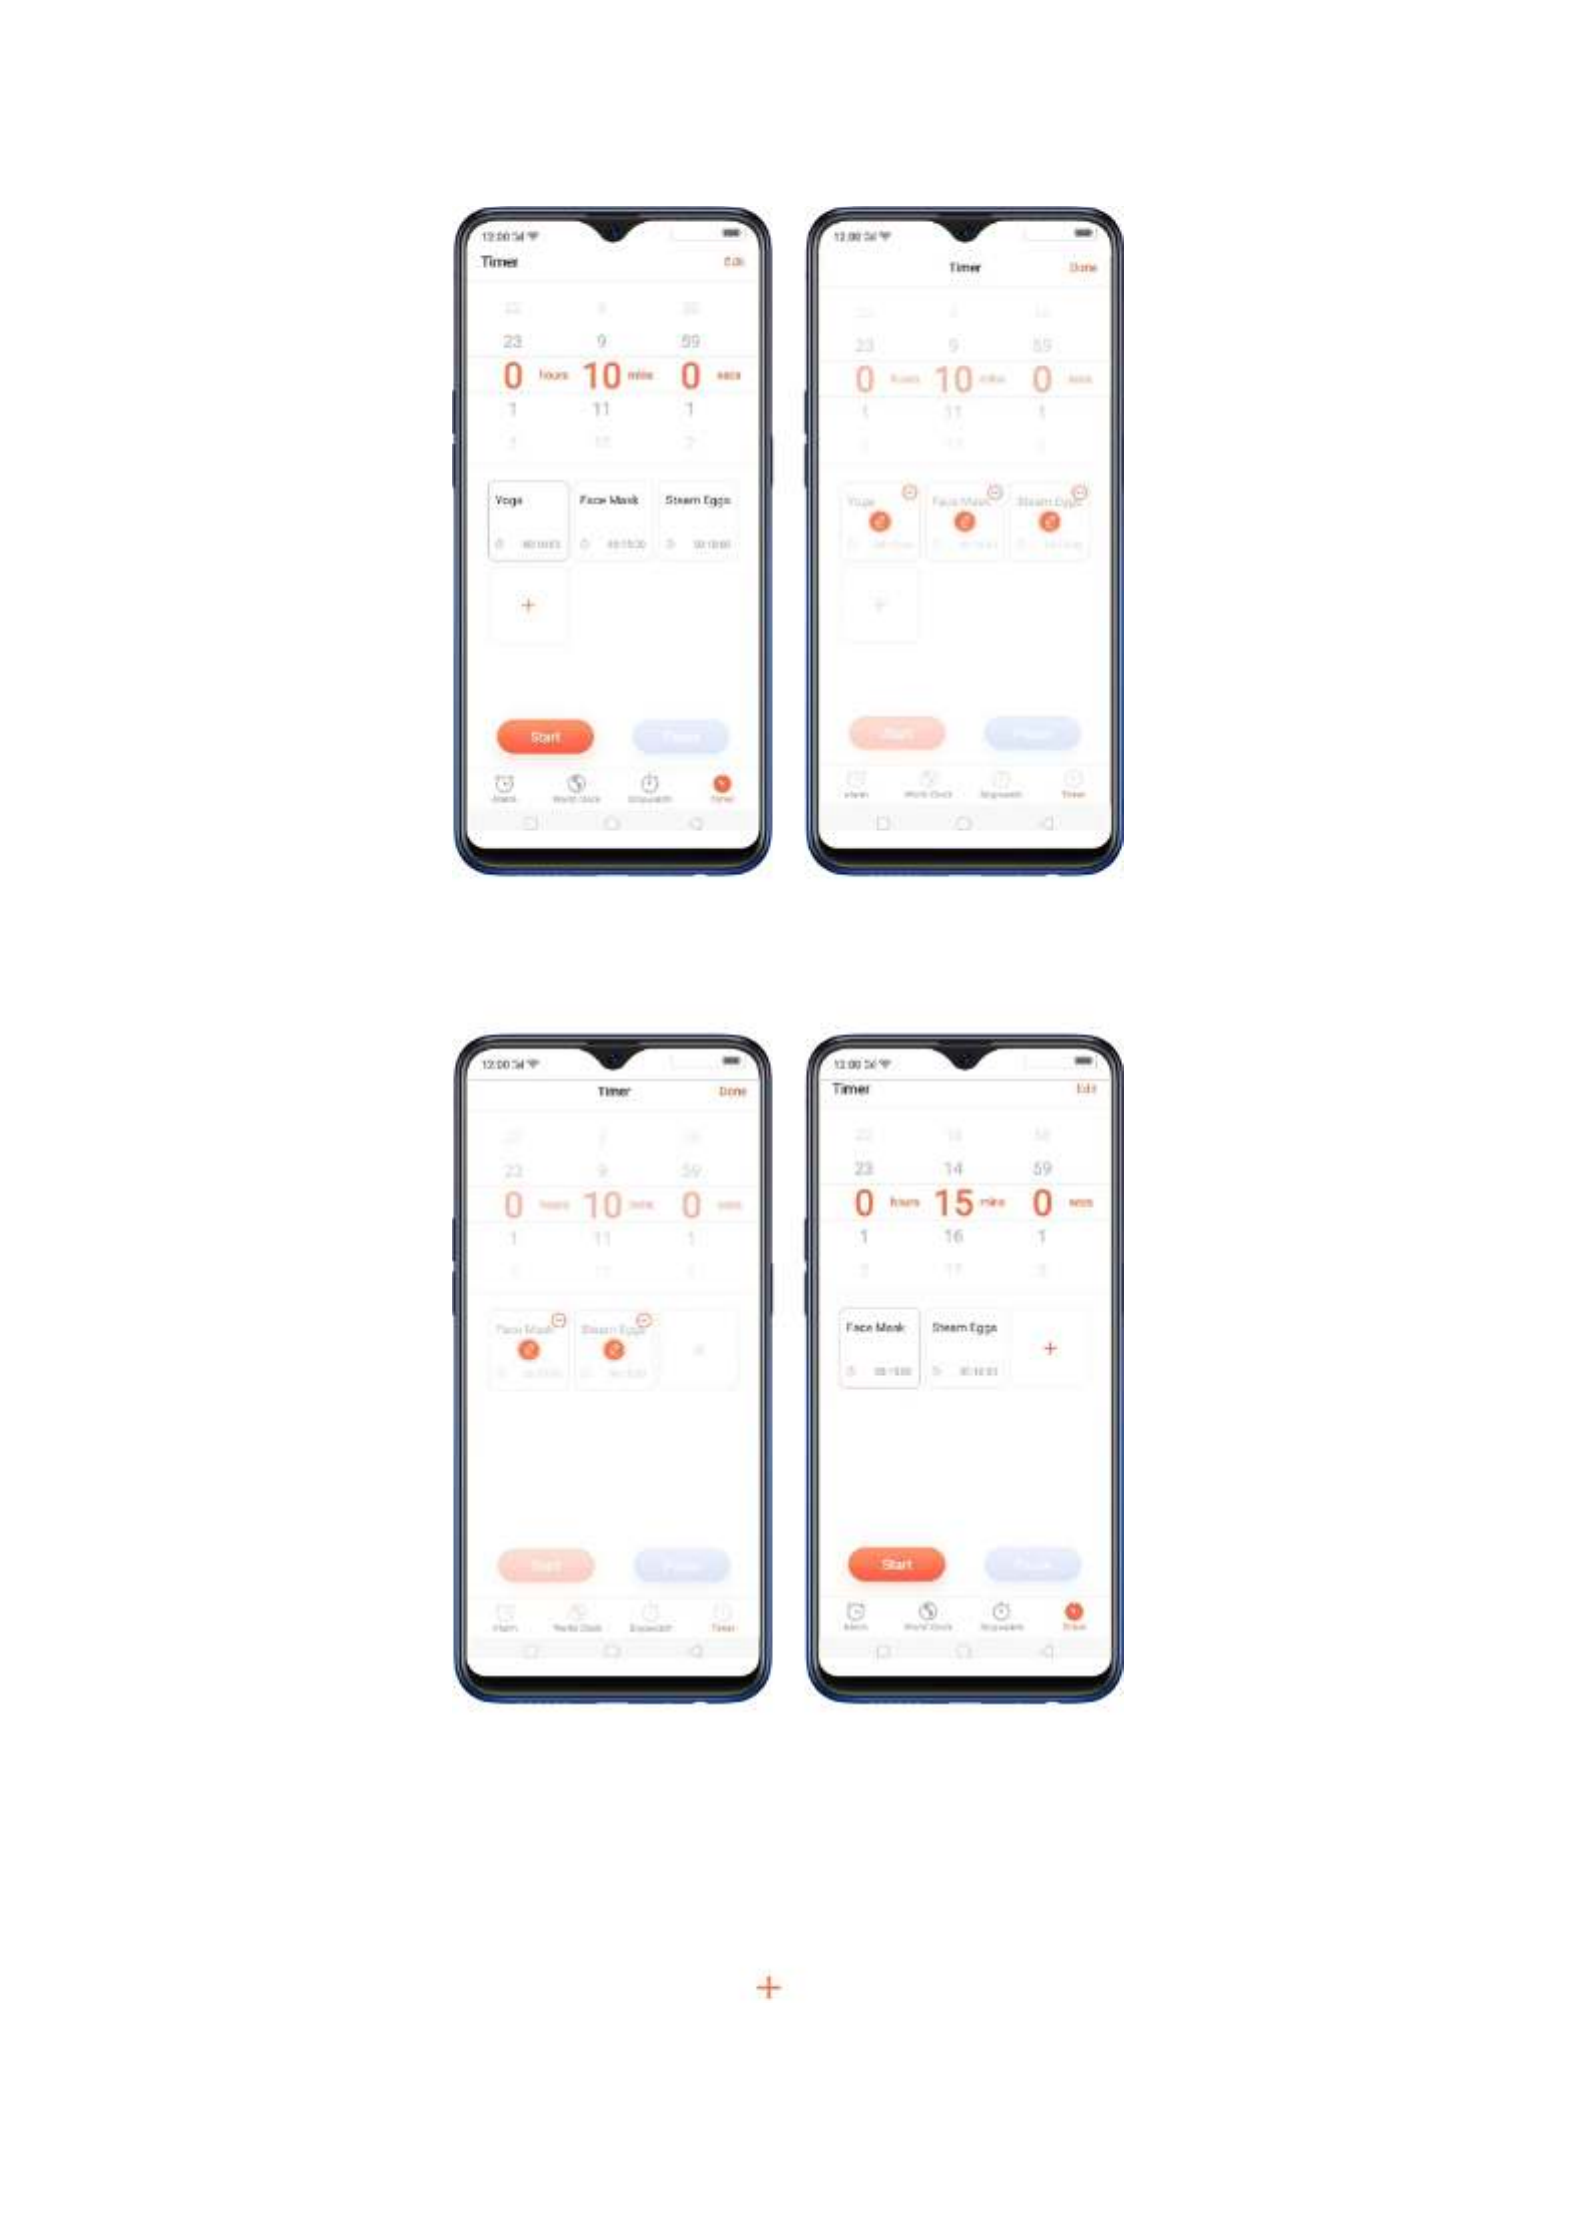
Add an activity
To add an activity on the timer, click , type the timer name and the time, then

You also have an option to do Continuous
Continuous
Continuous
Continuous Continuous Shooting
Shooting
Shooting
ShootingShooting, open Photos app if a name
card or business card is saved there, or use the flashlight if area to scan is dimly
lit.

2. Through the Phone App. On your home screen, click [ ] >
Phone
Phone
Phone
PhonePhone
app
app
app
appapp
[ ] then click on the top-right corner of the screen.
Contacts
Contacts
Contacts
ContactsContacts
Then click for the name card recognition language. Make sure to fit the
name card or business card on the frame.

Click to start recognizing the name card or business card and all
information will directly be inputted on your Contacts app then click Sa
Sa
Sa
SaSave
ve
ve
veve.
.
.
. .

You also have an option to do , open Photos app if a
Con
Con
Con
ConContinuous
tinuous
tinuous
tinuous tinuous Shooting
Shooting
Shooting
ShootingShooting
namecard or business card is saved there, or use the flashlight if area to scan
is dimly lit.
On Smart Assistant, Click to launch Contacts app and open this
feature directly. Before scanning the business card or namecard, click
for the namecard recognition language. Make sure to fit the
namecard or business card on the frame.

Click to start recognizing the namecard or business card and all
information will directly be stored on your Contacts app then click Save
Save
Save
SaveSave.
.
.
. .
You also have an option to do , open Photos app if a
Con
Con
Con
ConContinuous
tinuous
tinuous
tinuous tinuous Shooting
Shooting
Shooting
ShootingShooting
namecard or business card is saved there, or use the flashlight if area to scan

is dimly lit.
4.10.
4.10.
4.10.
4.10. 4.10. Save
Save
Save
Save Save more
more
more
more more battery
battery
battery
battery battery with
with
with
with with Smart
Smart
Smart
Smart Smart
Power
Power
Power
Power Power Saver
Saver
Saver
Saver Saver
Optimize the power of your battery and manage those apps and settings that
used up the most power. Know how to save more power so you can use it
especially when it is most needed.
To enable Smart Power Saver, go to [ ] > [ ] > toggle [
Settings
Settings
Settings
SettingsSettings Battery
Battery
Battery
BatteryBattery Smart
Smart
Smart
Smart Smart
Power Saver (Recommended)
Power Saver (Recommended)
Power Saver (Recommended)
Power Saver (Recommended)Power Saver (Recommended)] to green to enable.

When Optimization is needed
When Optimization is needed
When Optimization is needed
When Optimization is neededWhen Optimization is needed
When issue or issues are found, then it will prompt you that optimization is
recommended. Just click on and check those that needed
Save
Save
Save
SaveSave
Po
Po
Po
PoPower
wer
wer
werwer
optimization, click , and then click when finished.
Lengthen
Lengthen
Lengthen
Lengthen Lengthen Battery
Battery
Battery
Battery Battery Life
Life
Life
LifeLife Done
Done
Done
DoneDone
(Note: Expected usage will be shown but this still depends on the usage and
running apps on the background).

Other Power Saving features
Other Power Saving features
Other Power Saving features
Other Power Saving features Other Power Saving features
Power
Power
Power
Power Power Saving.
Saving.
Saving.
Saving.Saving. When this is enabled, the system will close some
background apps to pause functions such as auto-sync. It will also
reduce screen brightness, turn off vibrate, and would be displaying
the battery icon in blue. To enable, just toggle [ ] to
Power
Power
Power
Power Power Saving
Saving
Saving
SavingSaving
gree n.

Smart
Smart
Smart
Smart Smart Power
Power
Power
Power Power Saver
Saver
Saver
Saver Saver (Recommended).
(Recommended).
(Recommended).
(Recommended).(Recommended). This will intelligently identify
the running status of Apps when enabled. Just toggle [S
S
S
SSmart
mart
mart
mart mart Power
Power
Power
Power Power
Saver (Recommended)]
Saver (Recommended)]
Saver (Recommended)]
Saver (Recommended)] Saver (Recommended)] to green to enable.
Custom
Custom
Custom
Custom Custom Po
Po
Po
PoPower
wer
wer
wer wer Saver.
Saver.
Saver.
Saver.Saver. You can customize apps that will intelligently

identify the running status of Apps when enabled. Just click on
Custom Power
Custom Power
Custom Power
Custom Power Custom Power Saver
Saver
Saver
SaverSaver Inte
Inte
Inte
InteIntelligently Restrict
lligently Restrict
lligently Restrict
lligently Restrict lligently Restrict , choose an app then click
Background Running (Recommended)
Background Running (Recommended)
Background Running (Recommended)
Background Running (Recommended)Background Running (Recommended).
Power
Power
Power
Power Power Consumption
Consumption
Consumption
Consumption Consumption Details.
Details.
Details.
Details.Details. This will show you the apps, settings,
or features that consumed the most power. You can check Today,
Yesterday, and 2 Days ago for consumption details.
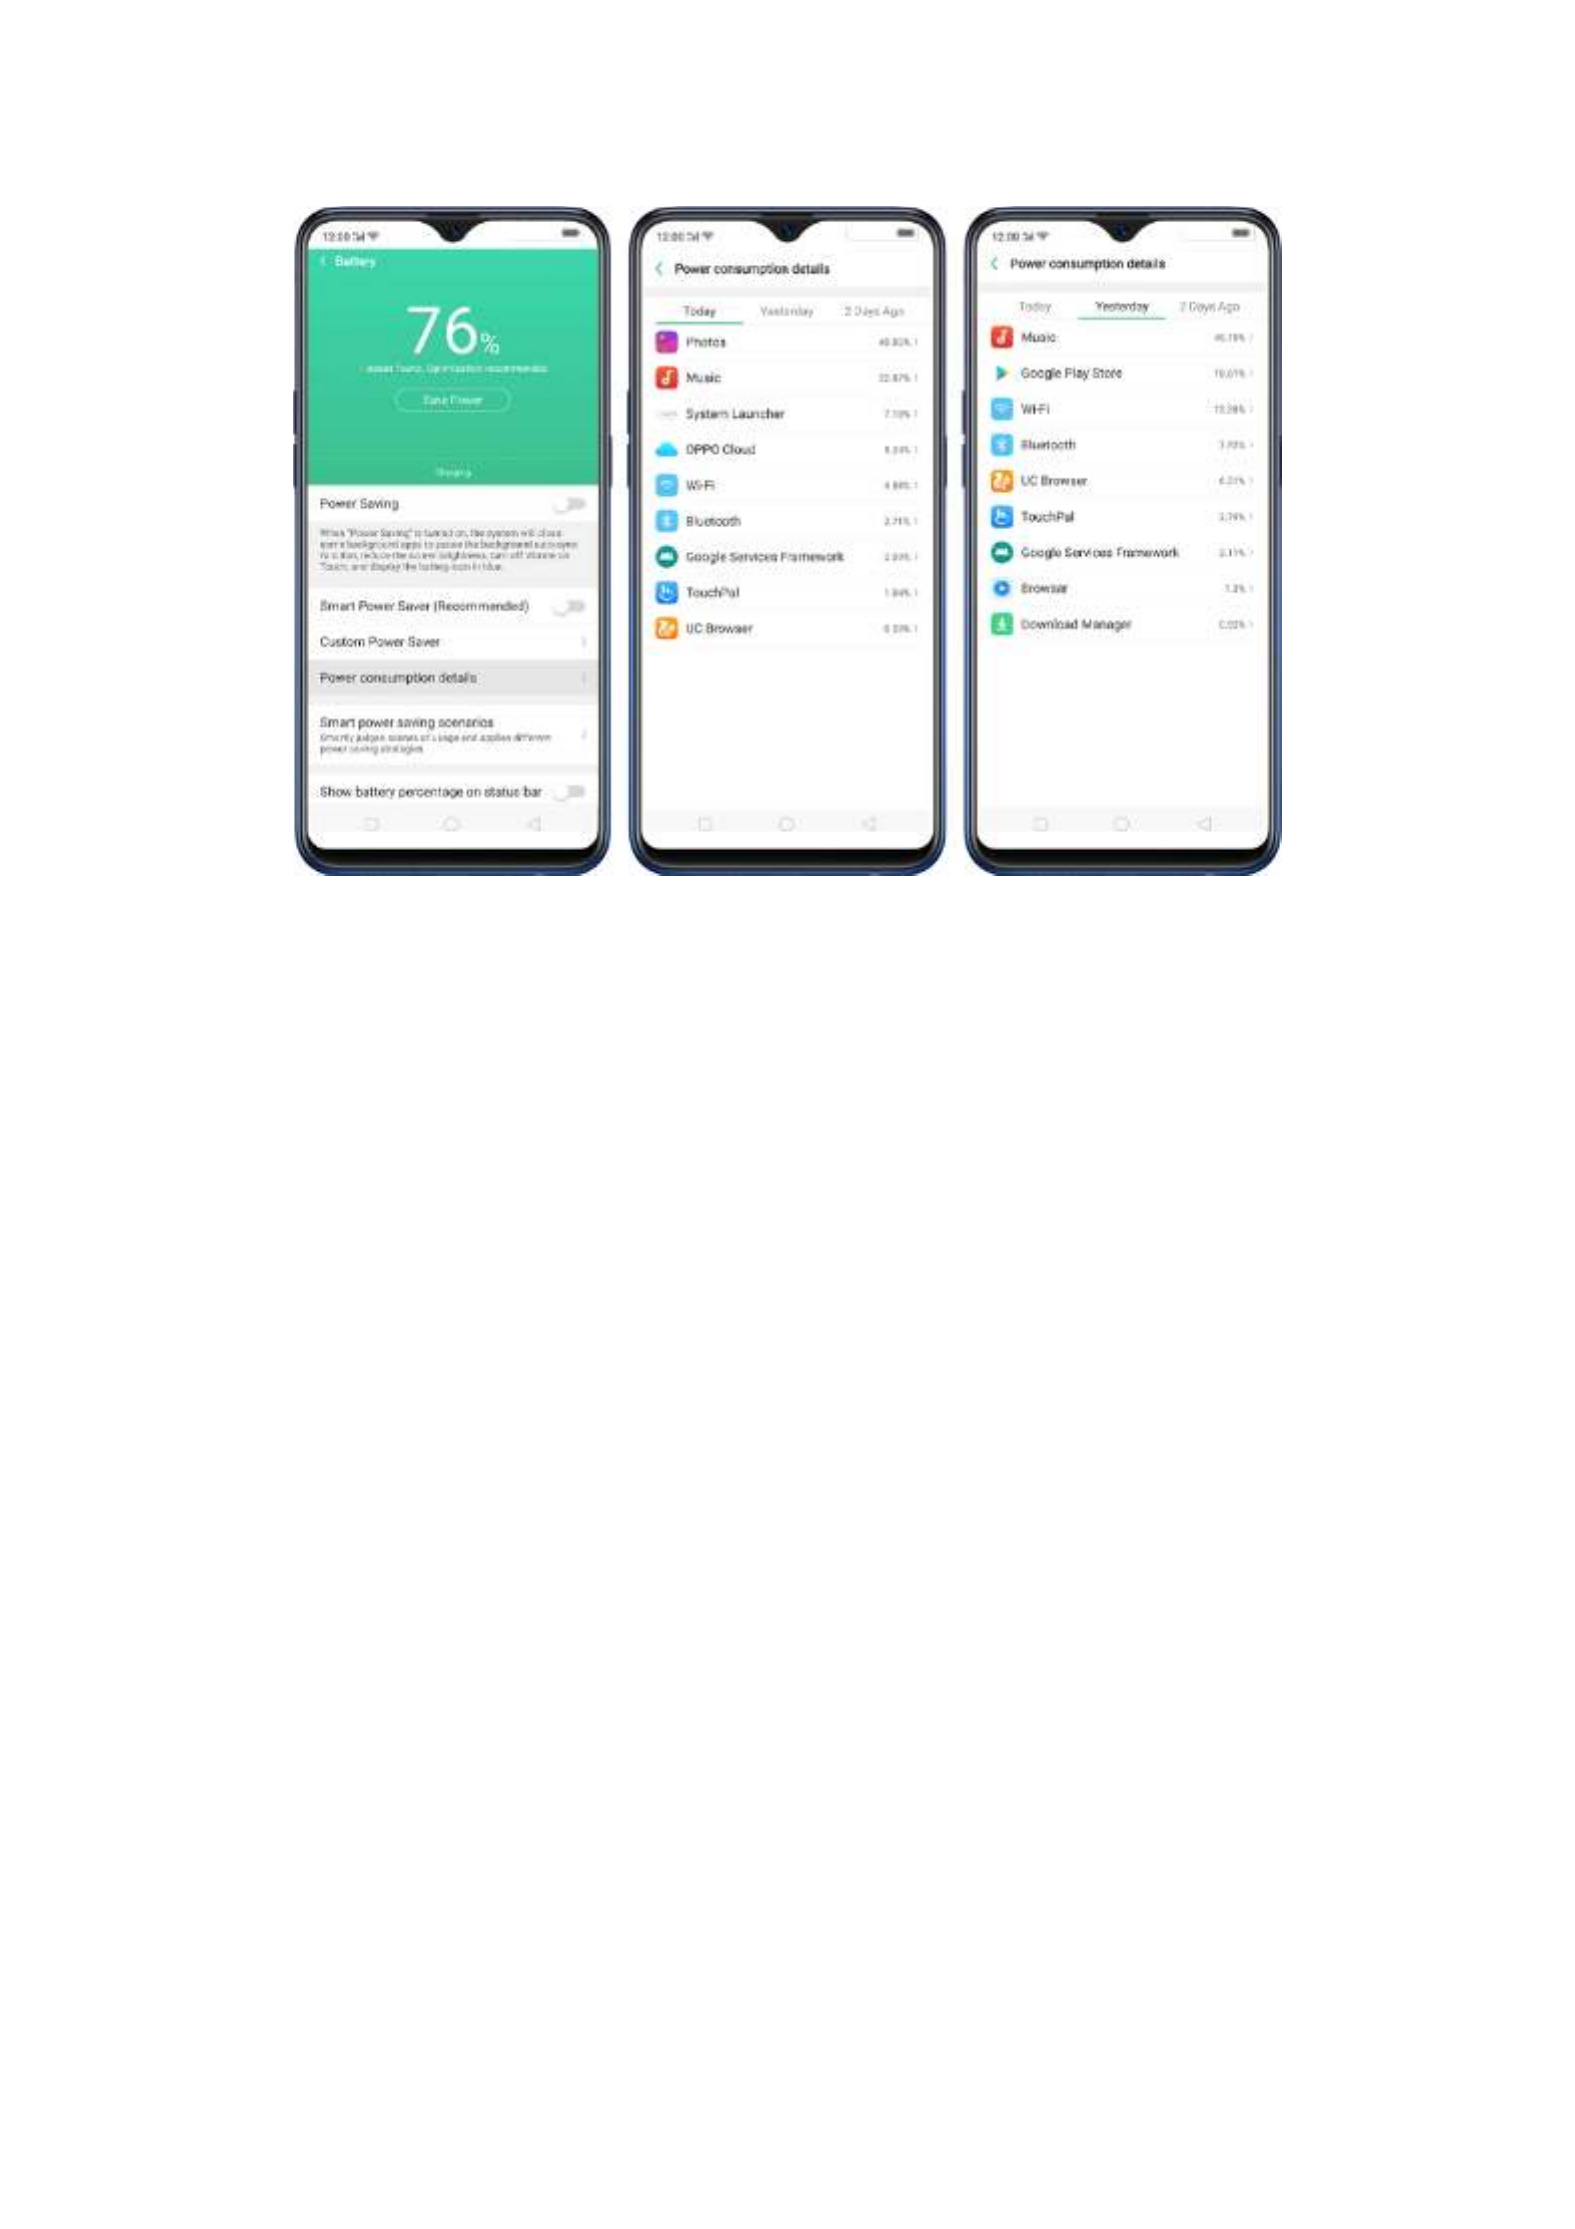
Smart
Smart
Smart
Smart Smart power
power
power
power power saving
saving
saving
saving saving scenarios.
scenarios.
scenarios.
scenarios.scenarios. This will smartly judge scenes of
usage and applies different power saving strategies like sensing
when you might be sleeping. Click Smart
Smart
Smart
Smart Smart power
power
power
power power saving
saving
saving
saving saving scenarios
scenarios
scenarios
scenariosscenarios,
the toggle to green.
Sleeping Mode
Sleeping Mode
Sleeping Mode
Sleeping ModeSleeping Mode
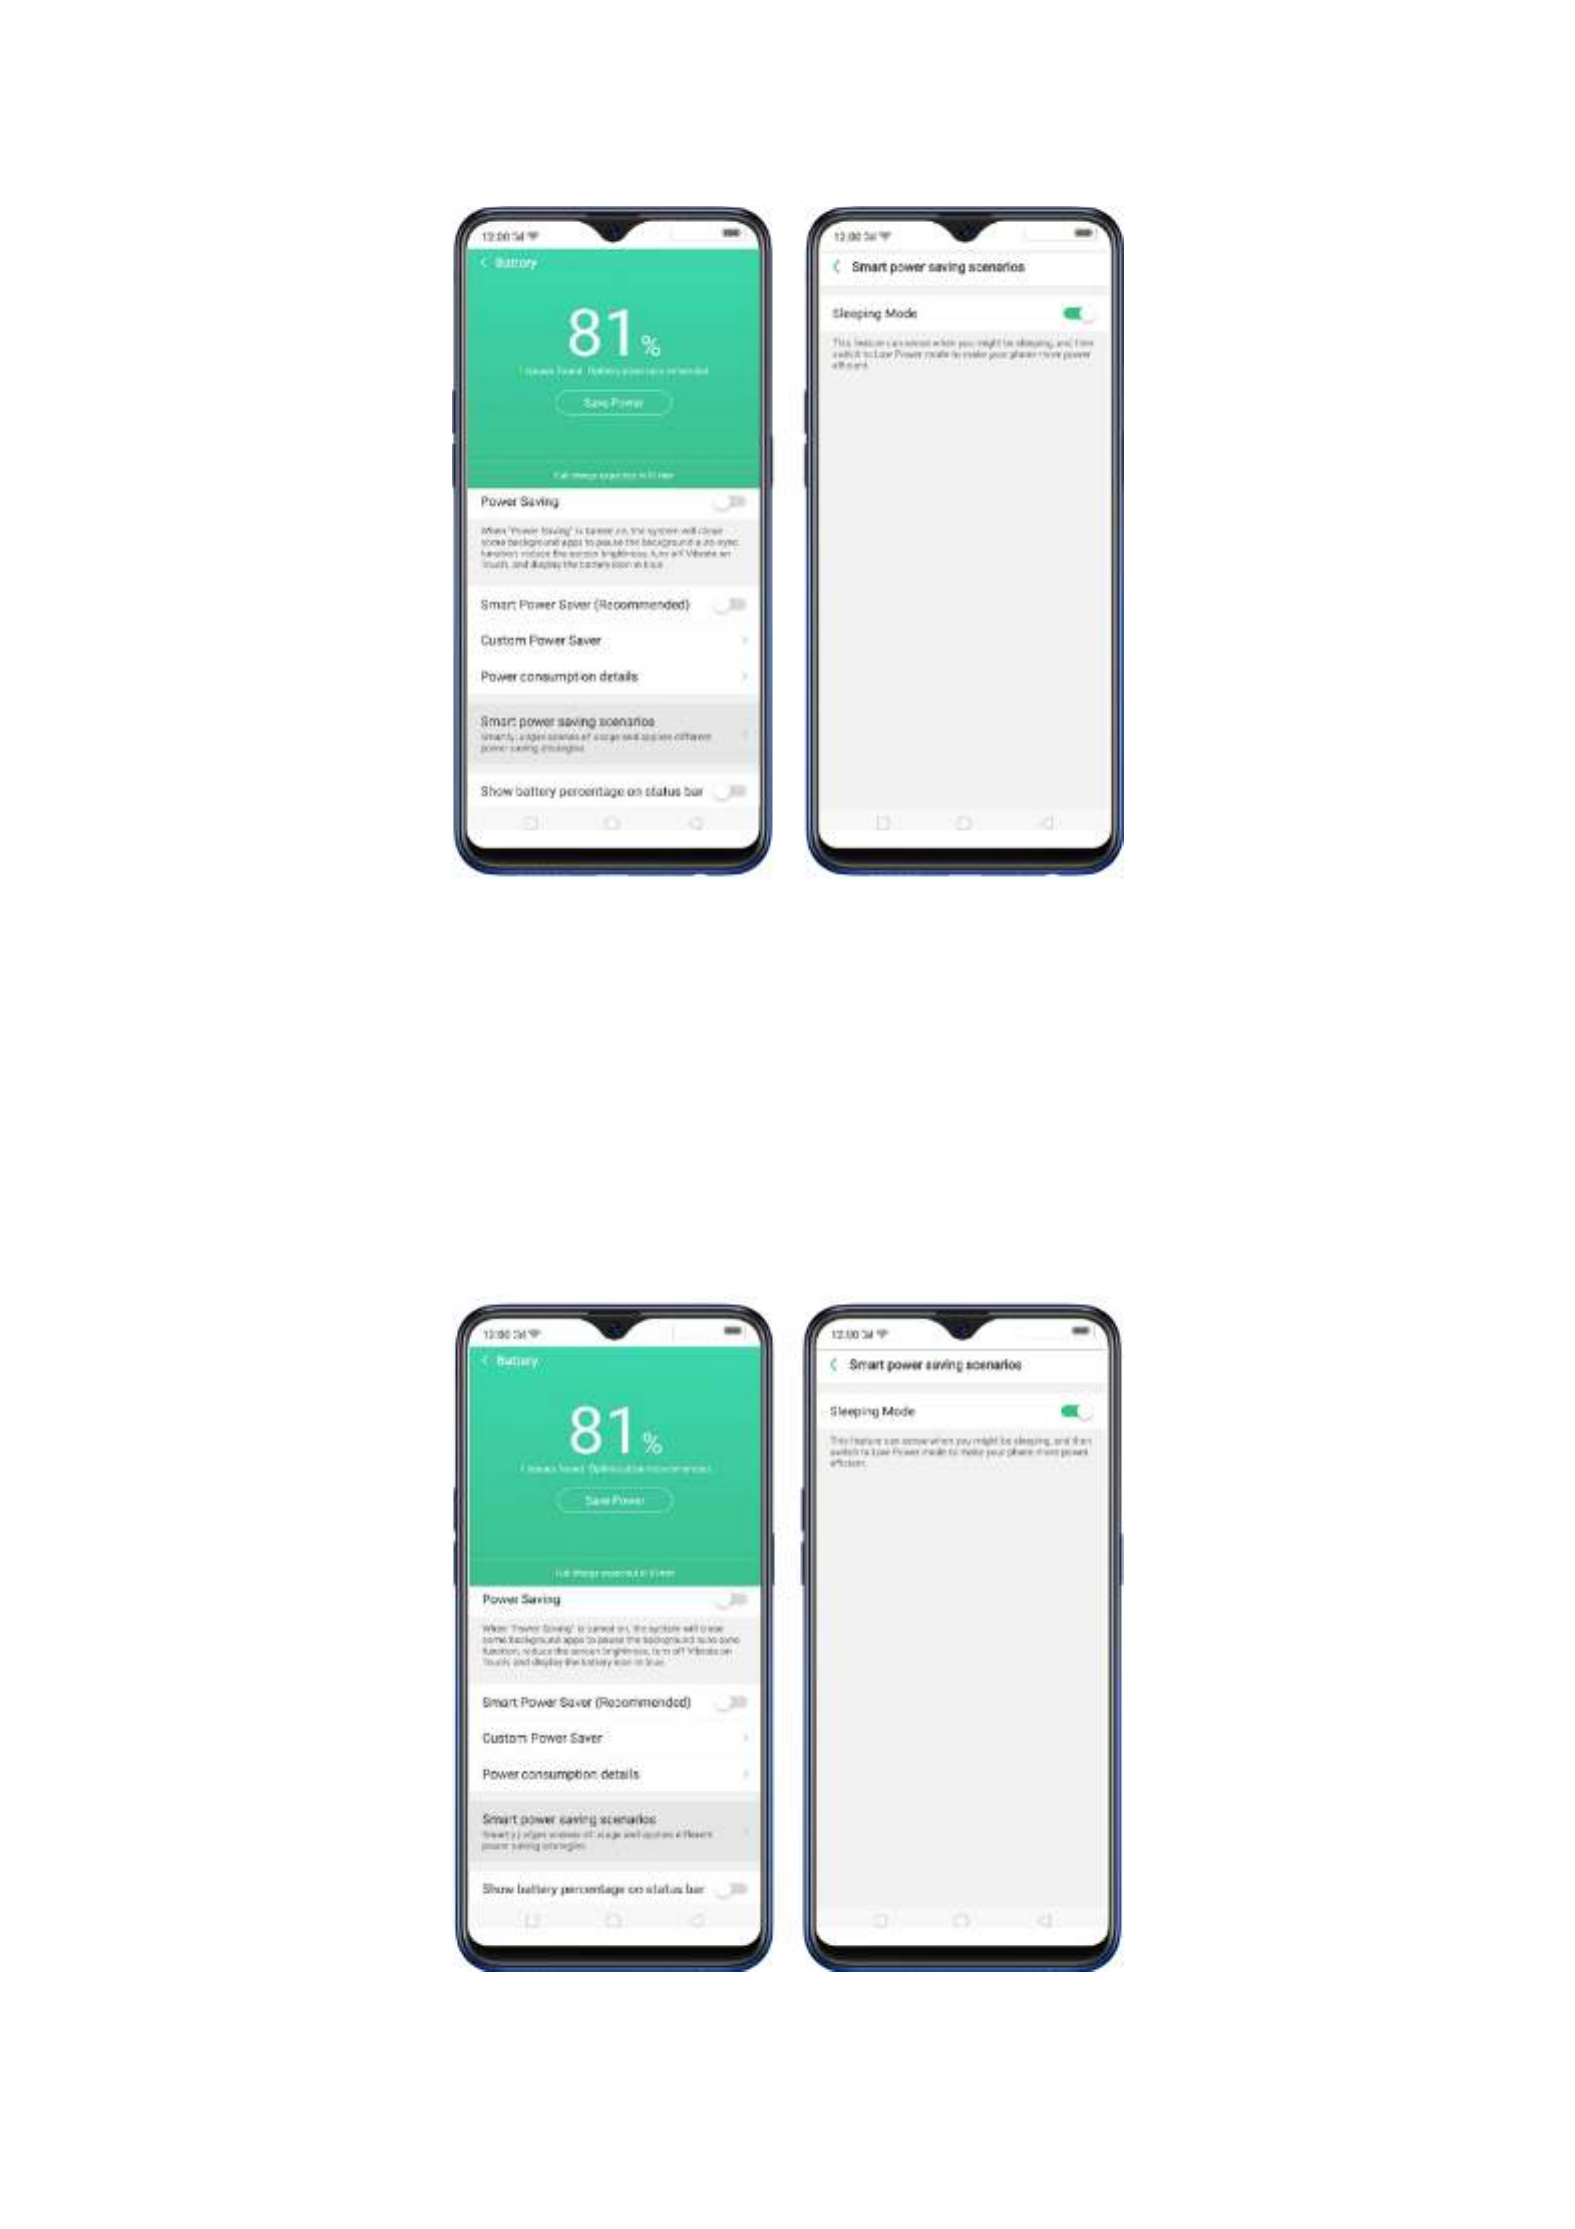
Show
Show
Show
Show Show battery
battery
battery
battery battery percentage
percentage
percentage
percentage percentage on
on
on
on on the
the
the
the the st
st
st
ststatus
atus
atus
atus atus bar.
bar.
bar.
bar.bar. If you want to see how
much battery is left just enable this feature by toggling [Sho
Sho
Sho
ShoShow
w
w
w w battery
battery
battery
battery battery
percentage on the status bar]
percentage on the status bar]
percentage on the status bar]
percentage on the status bar] percentage on the status bar] to green to enable.
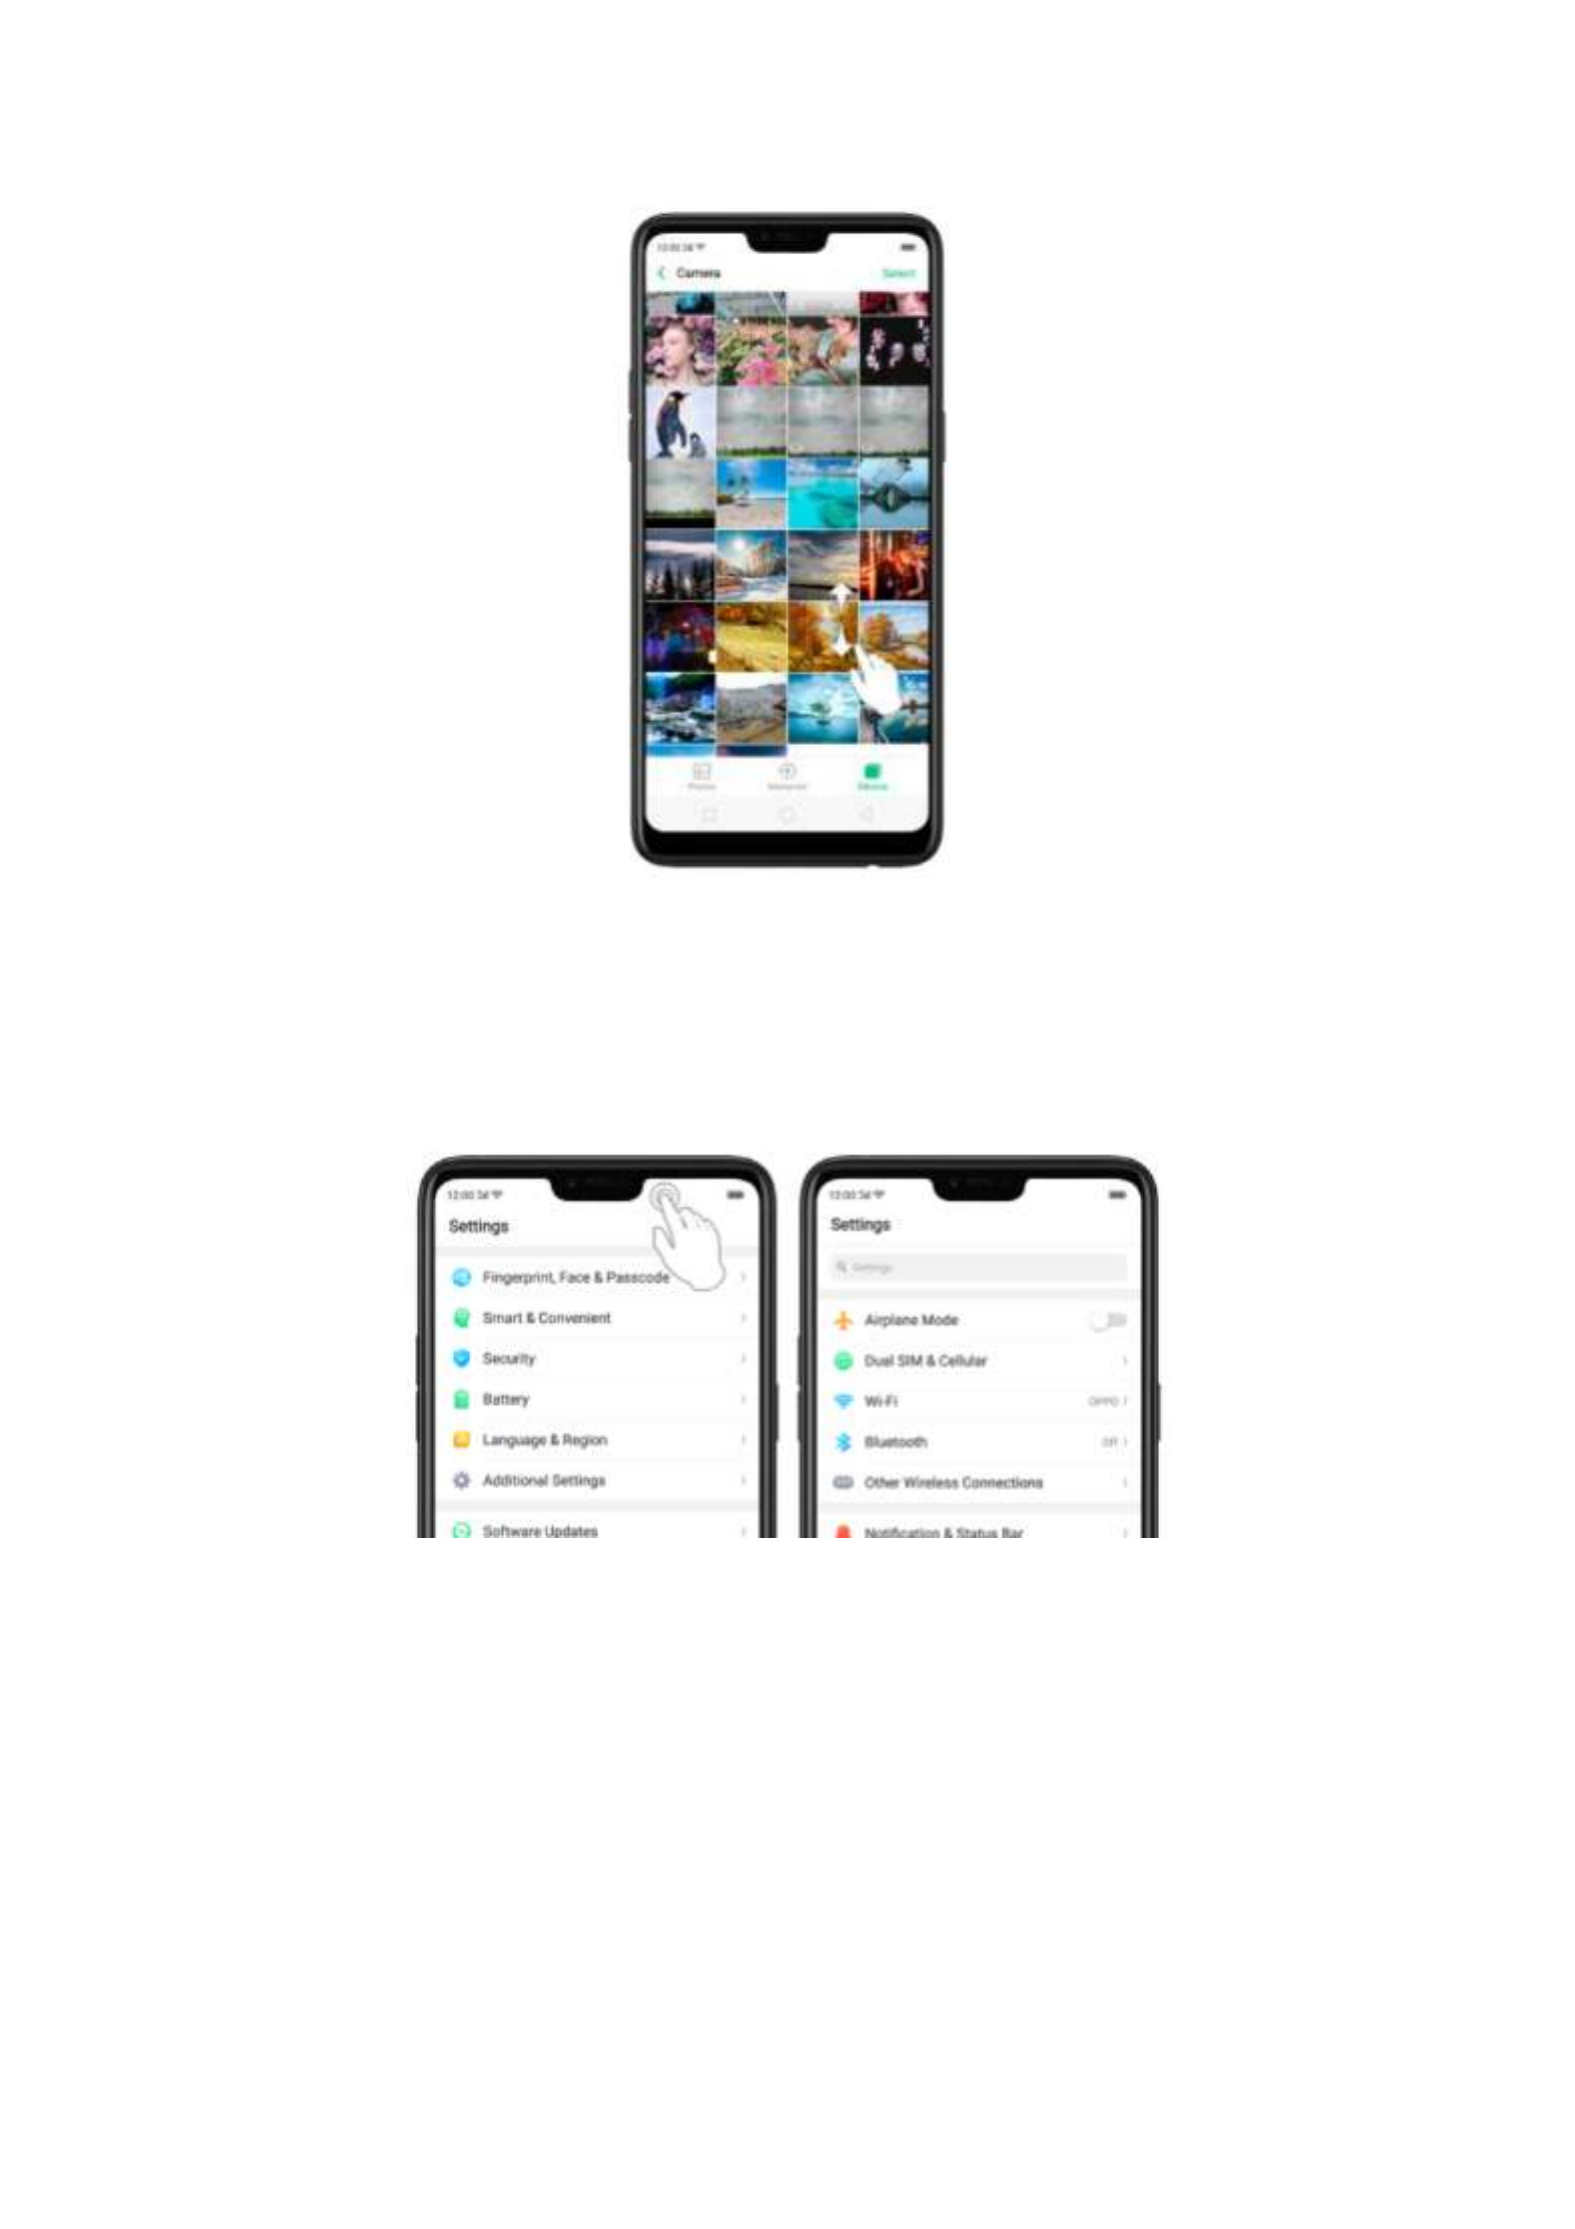
On some screens such as Settings and Contacts page, double-click the status
bar to quickly scroll to the top.
Zoom in and out
Zoom in and out
Zoom in and out
Zoom in and outZoom in and out. When viewing photos, maps, or web pages, you can zoom in
and out. Pinch your fingers together or apart. For photos and web pages, you
can double-click to zoom in, then double-click again to zoom out. For maps,
double-click to zoom in and click once with two fingers to zoom out.

Note:
Note:
Note:
Note:Note: Memories and Stories are terms that can be interchangeably used and
doesn't affect the full functionality of the phone.
5.5
5.5
5.5
5.55.5 Smart & Conv
Smart & Conv
Smart & Conv
Smart & ConvSmart & Convenient Operat
enient Operat
enient Operat
enient Operatenient Operation
ion
ion
ionion
5.
5.
5.
5.5.6.1. Navig
6.1. Navig
6.1. Navig
6.1. Navig6.1. Navigation Keys
ation Keys
ation Keys
ation Keys ation Keys
With ColorOS 5.2, all navigation is handled with the on-screen virtual keys and
gestures. The three virtual navigation keys appear at the bottom of every screen,
and can be hidden when not in use. You can also arrange the order of "Back"
and "Recent" depending on your preference. Besides, if you are in love with
gesture navigation control, you can use a gesture-based system to navigate
around the phone instead of the traditional navigation key.
To switch between navigation keys and gestures, go to [Settings]
[Settings]
[Settings]
[Settings] [Settings] > [Smart
[Smart
[Smart
[Smart [Smart &
&
&
& &
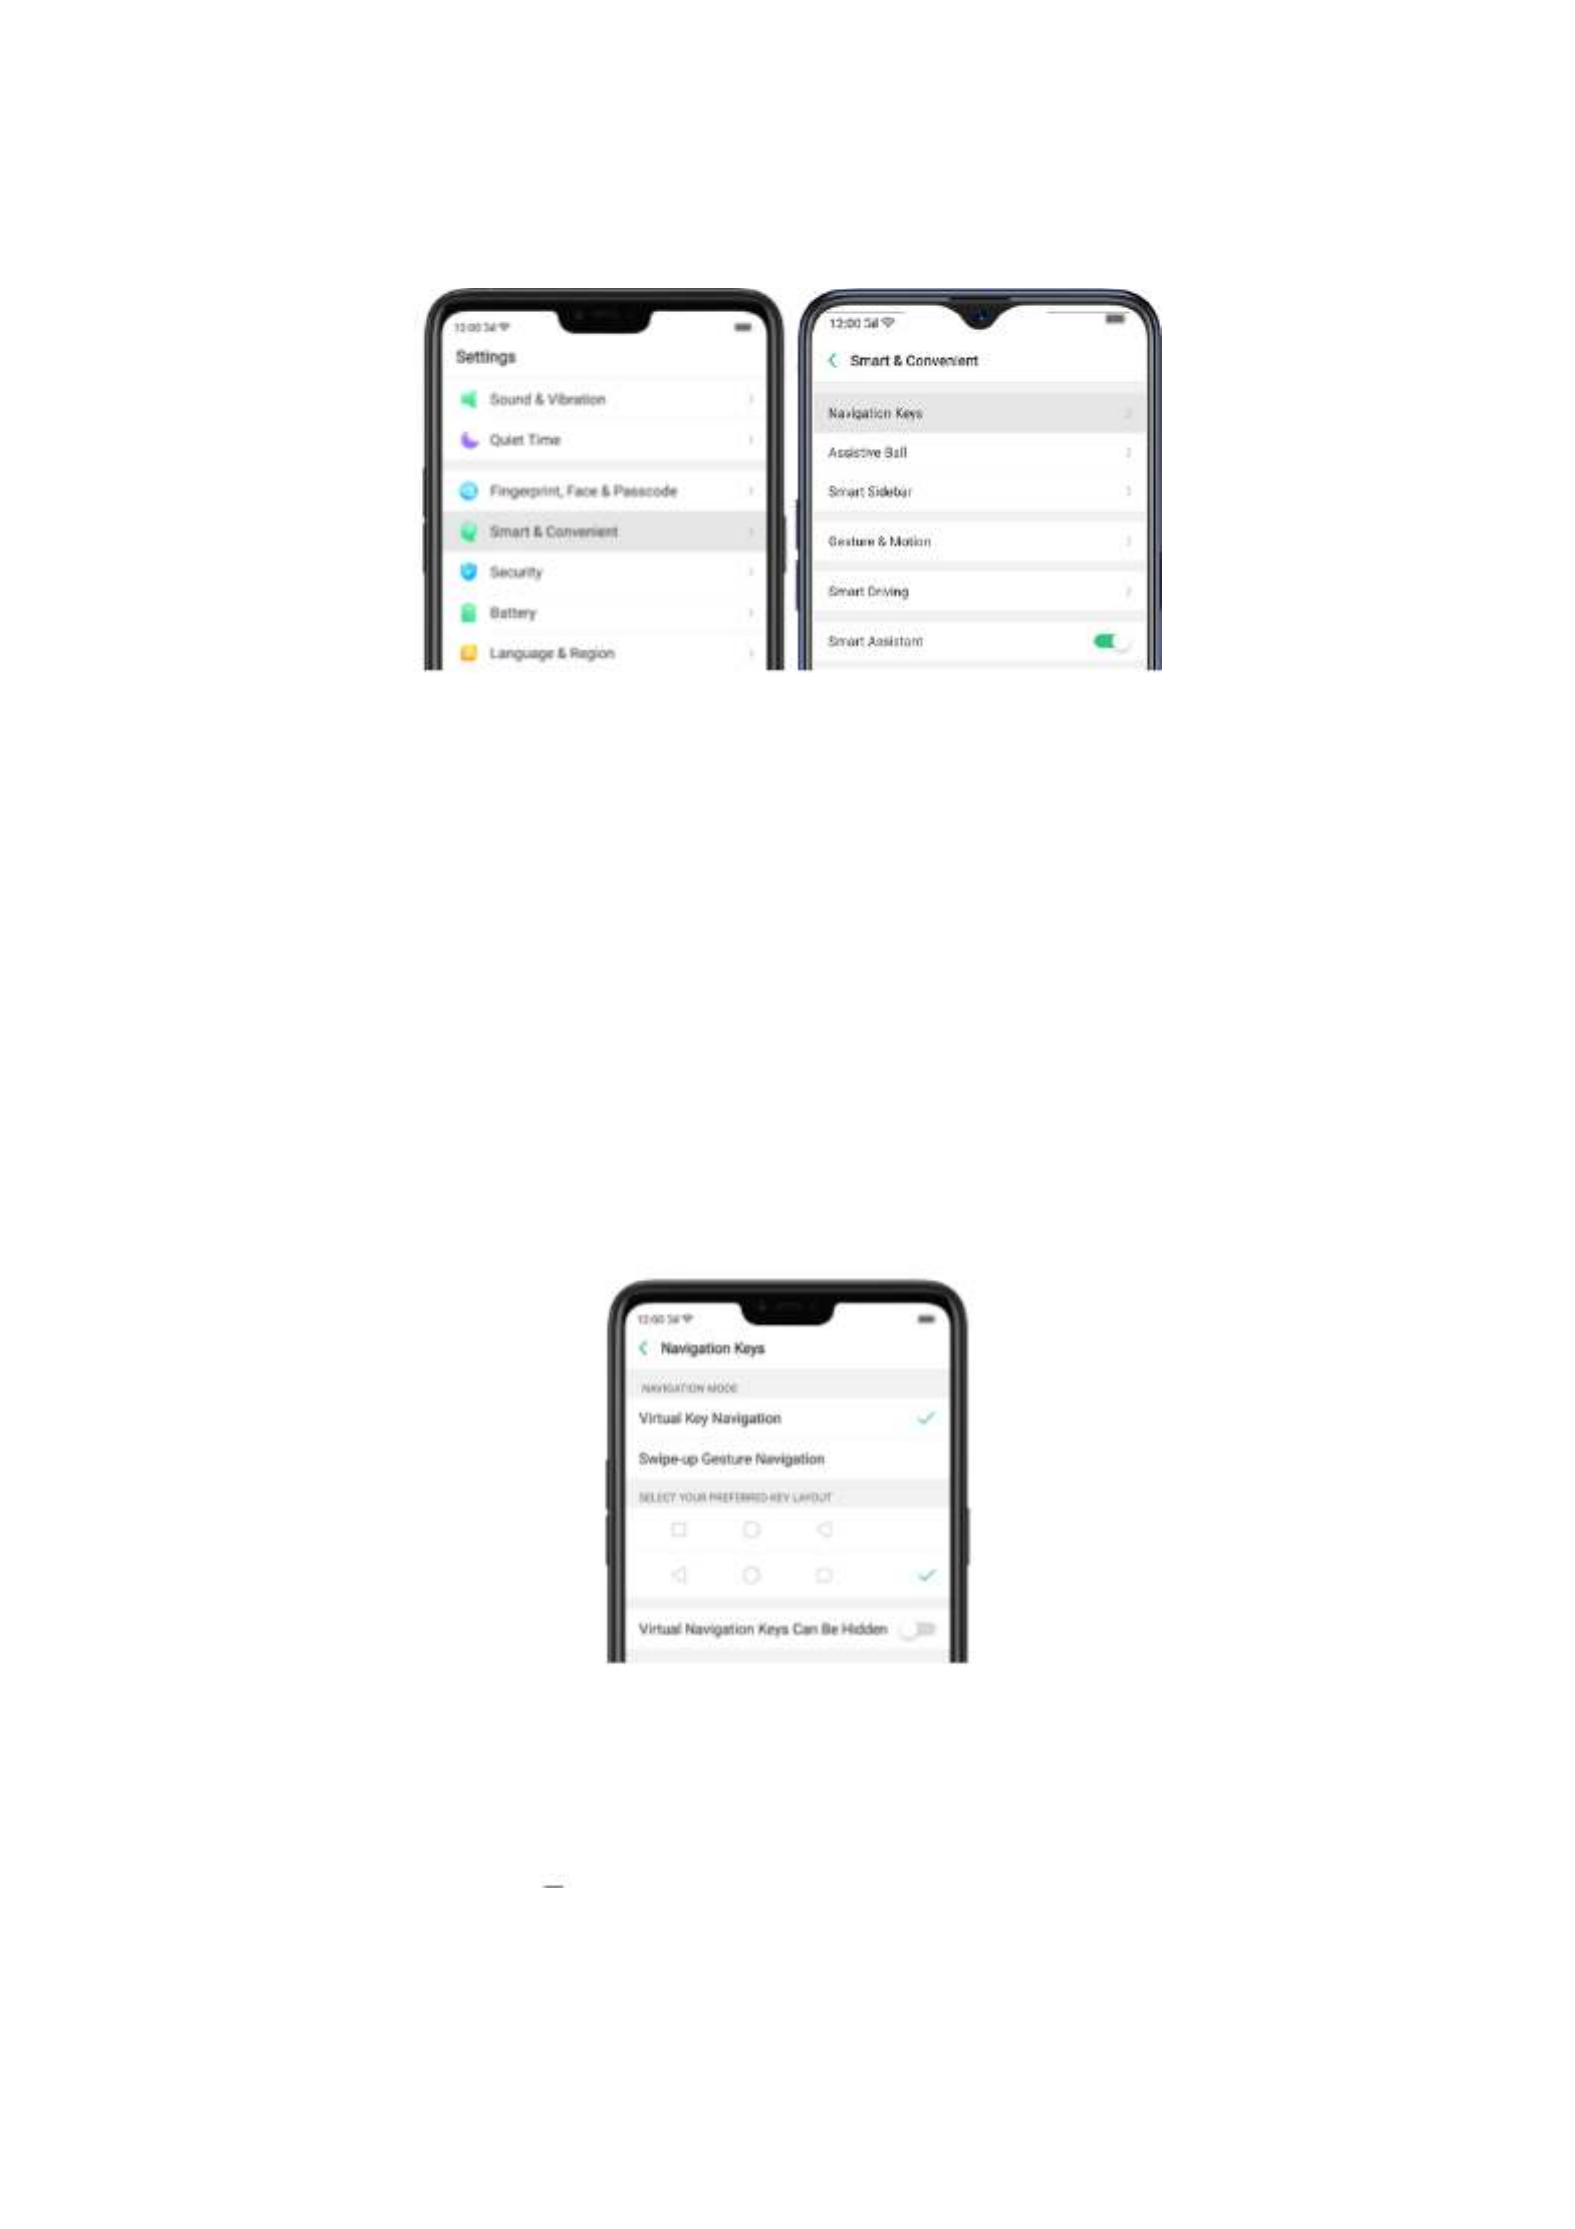
Convenient]
Convenient]
Convenient]
Convenient] Convenient] [Navigation
[Navigation
[Navigation
[Navigation[Navigation Keys]
Keys]
Keys]
Keys] Keys]> .
Virtual Key Navigati
Virtual Key Navigati
Virtual Key Navigati
Virtual Key NavigatiVirtual Key Navigation
on
on
on on
Enable
Enable
Enable
Enable Enable virtual
virtual
virtual
virtual virtual key
key
key
key key navigation
navigation
navigation
navigationnavigation. Virtual key navigation the default setting. If you
want to enable it manually, click .
Virtual Key Navigation
Virtual Key Navigation
Virtual Key Navigation
Virtual Key NavigationVirtual Key Navigation
Change
Change
Change
Change Change the
the
the
the the order
order
order
order order of
of
of
of of virtual
virtual
virtual
virtual virtual navigation
navigation
navigation
navigation navigation keys
keys
keys
keyskeys. The keys follow the typical order
for realme: Menu, Home, and Return from left to right. If you are left-handed,
you can change them to the order.
Return-Home Menu
Return-Home Menu
Return-Home Menu
Return-Home Menu Return-Home Menu
Hide
Hide
Hide
Hide Hide the
the
the
the the virtual
virtual
virtual
virtual virtual navigation
navigation
navigation
navigation navigation keys
keys
keys
keyskeys. When you launch a full-screen app, the keys
will automatically hide and can be brought back with a simple swipe: ,
When in portrait mode, swipe up from the bottom.
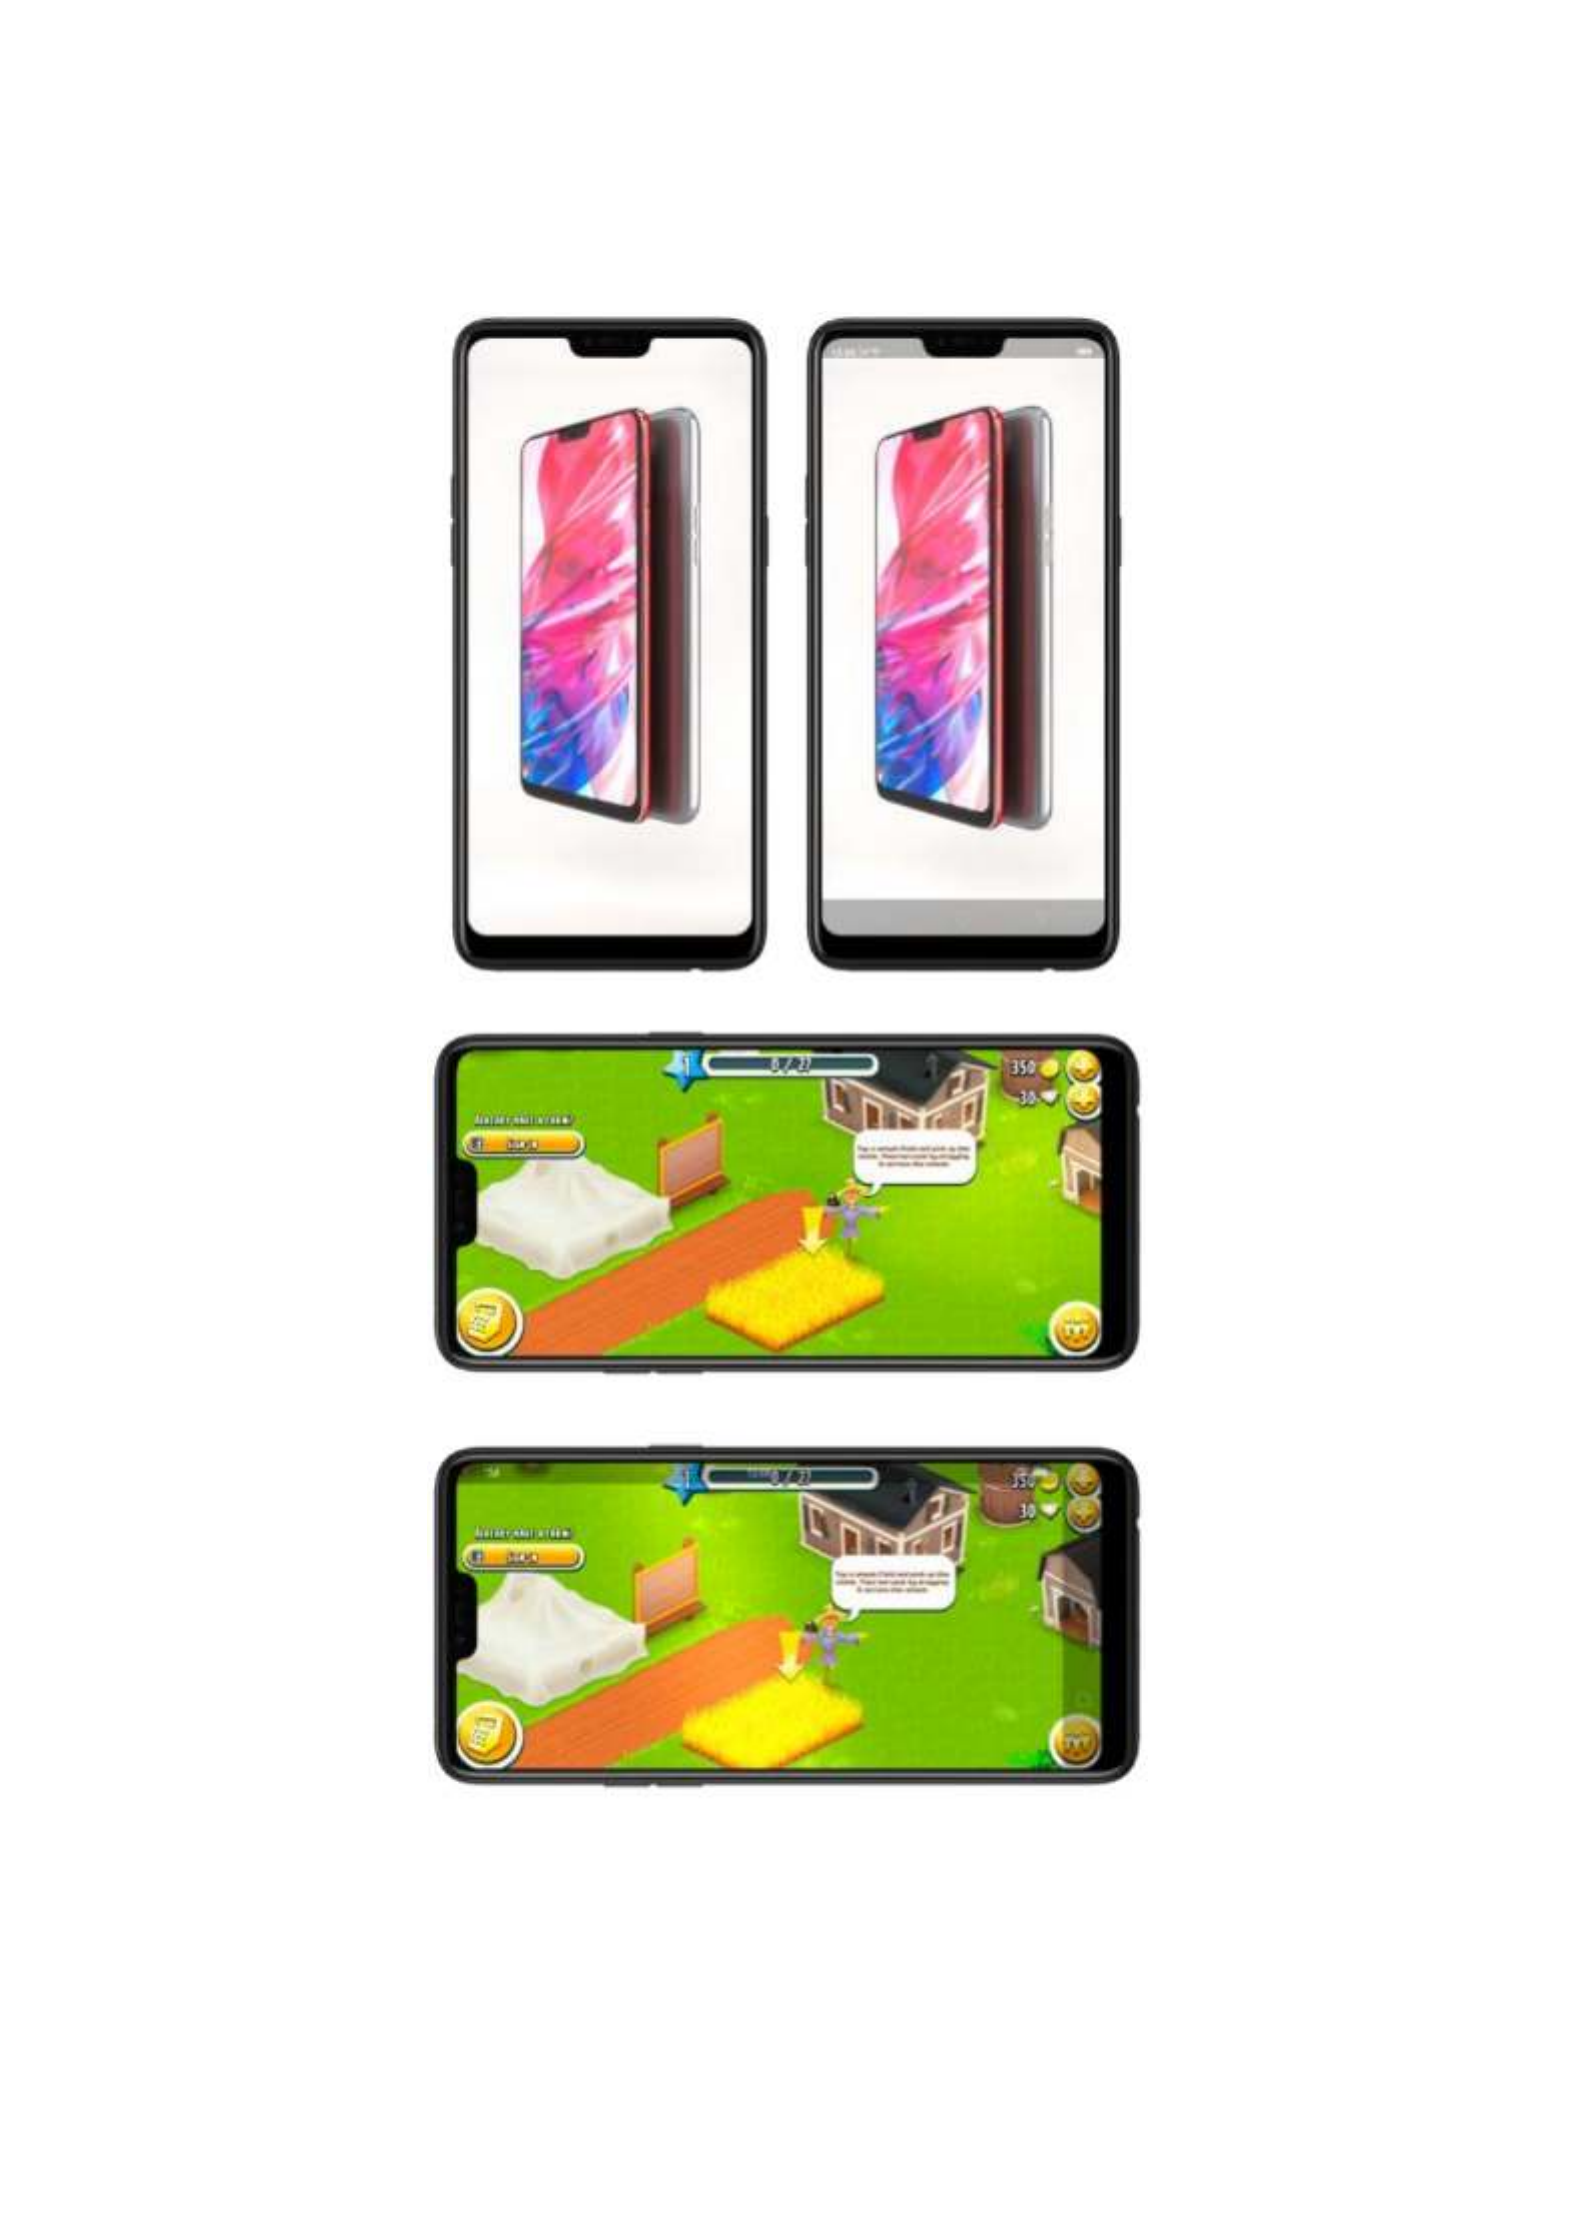
When in landscape mode, swipe from the bottom to the left.
Manually hide
Manually hide
Manually hide
Manually hideManually hide the virtual navigation keys
the virtual navigation keys
the virtual navigation keys
the virtual navigation keys the virtual navigation keys. To set the keys to appear only when
needed, turn on . Then you can click
Virtual
Virtual
Virtual
Virtual Virtual Navigation
Navigation
Navigation
Navigation Navigation Keys
Keys
Keys
Keys Keys Can
Can
Can
Can Can Be
Be
Be
Be Be Hidden
Hidden
Hidden
HiddenHidden

on the left-lower corner of the screen to hide the keys, and swipe from the
bottom to reveal them.
Swipe-up Gesture
Swipe-up Gesture
Swipe-up Gesture
Swipe-up Gesture Swipe-up Gesture Navigation
Navigation
Navigation
Navigation Navigation
Four kinds of new swipe-up navigation gestures are added to your phone, and
you can choose one that suits you most.
Use
Use
Use
Use Use swipe-up
swipe-up
swipe-up
swipe-up swipe-up navigation
navigation
navigation
navigation navigation gestures
gestures
gestures
gesturesgestures [Se
[Se
[Se
[Se[Settings]
ttings]
ttings]
ttings] ttings] [Smart
[Smart
[Smart
[Smart [Smart &
&
&
& & Convenient]
Convenient]
Convenient]
Convenient] Convenient] . Go to > >
[Navigation Keys]
[Navigation Keys]
[Navigation Keys]
[Navigation Keys] [Navigation Keys] [Swipe-up Gesture Navigation]
[Swipe-up Gesture Navigation]
[Swipe-up Gesture Navigation]
[Swipe-up Gesture Navigation][Swipe-up Gesture Navigation]and click .

Back
Back
Back
Back Back at
at
at
at at both
both
both
both both sides
sides
sides
sidessides. Swipe up from the left or right bottom to return to upper
page, swipe up from the middle bottom to get to the Home screen, and swipe
up from the middle bottom and pause 1 second to view recent tasks.
Simple
Simple
Simple
Simple Simple gestures
gestures
gestures
gesturesgestures. Swipe up from the middle bottom to get to the Home screen,
and swipe up from the middle bottom and pause 1 second to view recent tasks.

Back on the right
Back on the right
Back on the right
Back on the rightBack on the right. Swipe up from the left bottom to view recent tasks, swipe up
from the middle bottom to get to the Home screen, and swipe up from the right
bottom to return to upper page.

Back
Back
Back
Back Back on
on
on
on on the
the
the
the the left
left
left
leftleft. Swipe up from the left bottom to return to upper page, swipe
up from the middle bottom to get to the Home screen, and swipe up from the
right bottom to view recent tasks.
Hide
Hide
Hide
Hide Hide Gesture
Gesture
Gesture
Gesture Gesture Guide
Guide
Guide
Guide Guide Bar
Bar
Bar
BarBar. Gesture Guide Bar is the translucent line at the bottom
of the screen, which allows you to quickly distinguish the left, middle and right
,
,
,
,,
swipe-up regions. To hide the guide bar, turn on .
[Hide G
[Hide G
[Hide G
[Hide G[Hide Gesture Guide Bar]
esture Guide Bar]
esture Guide Bar]
esture Guide Bar]esture Guide Bar]
Prevent
Prevent
Prevent
Prevent Prevent mistakenly
mistakenly
mistakenly
mistakenly mistakenly touching
touching
touching
touchingtouching [Mistouch
[Mistouch
[Mistouch
[Mistouch [Mistouch Prevention]
Prevention]
Prevention]
Prevention]Prevention]. Turn on . To use gesture
navigation when the app is in Landscape Mode, you need to swipe up to bring
up the guide bar first, then swipe up again in the same area.
5.6.2.
5.6.2.
5.6.2.
5.6.2.5.6.2. Assistive Ball
Assistive Ball
Assistive Ball
Assistive Ball Assistive Ball
Applying the Assistive Ball feature provides options to access several regular
phone features through the touchscreen, rather than the tactile buttons. It
enables you to use the virtual navigation keys with just one finger, and also
open the notification center, take a screenshot, and more. When you perform
gestures that are difficult for you, Assistive Ball can help.
Assistive Ball lets you perform a wide range of features:
Return to upper page
Go to the Home screen
View recent tasks
Open Notification Center
Lock the screen
Enter One-hand Mode

appears in the status bar.
5.8.
5.8.
5.8.
5.8.5.8. Split-sc
Split-sc
Split-sc
Split-scSplit-screen
reen
reen
reen reen
ColorOS 5.2 lets you set multiple modes to fulfil your personal needs. The split-
screen mode allows you to divide the screen into two areas, with each area
showing a different scene at the same time. Now you can watch a movie and
chat with friends at the same screen.

Under the interface of an app, press and hold the Multitask button to
enter split-screen mode.

Gesture Screenshot:
Gesture Screenshot:
Gesture Screenshot:
Gesture Screenshot:Gesture Screenshot: [Settings]
[Settings]
[Settings]
[Settings][Settings] [Smart& Convenient]
[Smart& Convenient]
[Smart& Convenient]
[Smart& Convenient][Smart& Convenient] [Gesture &
[Gesture &
[Gesture &
[Gesture & [Gesture &
Go to > >
Motion]
Motion]
Motion]
Motion]Motion] -Finger Screen
-Finger Screen
-Finger Screen
-Finger Screen-Finger Screenshot]
shot]
shot]
shot]shot] and turn on [3
[3
[3
[3[3 . Then swipe down the screen
with three fingers to take a screenshot.

Capture a long scre
Capture a long scre
Capture a long scre
Capture a long screCapture a long screenshot
enshot
enshot
enshot enshot
With realme smartphone, you can easily take longer and scrolling screenshot
with simple clicks. Long screenshot allows you to take scrolling screenshot of
your conversations on messaging apps or a full webpage.
To capture long screenshots
To capture long screenshots
To capture long screenshots
To capture long screenshotsTo capture long screenshots:
1. Press and hold the
Press and hold the
Press and hold the
Press and hold thePress and hold the
Power
Power
Power
PowerPower and
and
and
andand
Volume Down
Volume Down
Volume Down
Volume DownVolume Down buttons
buttons
buttons
buttonsbuttons for about 2 seconds,
or swipe down the screen with three fingers to take a screenshot of the
current page.
2. Click the screenshot, click , scroll the page up or
Long Screenshot
Long Screenshot
Long Screenshot
Long ScreenshotLong Screenshot then
then
then
thenthen
down and stop whenever you want to.
3. Click to generate a long screenshot. The image is saved in
Done
Done
Done
DoneDone
the app.
Photos
Photos
Photos
PhotosPhotos
Edit a screensho
Edit a screensho
Edit a screensho
Edit a screenshoEdit a screenshot
t
t
tt
After you've taken a screenshot, click it, then click . You can use the fancy Edit
Edit
Edit
EditEdit
new markup features to optimize it instantly, such as adding text, light, filters,
and more. Click to save your changes.
Done
Done
Done
DoneDone

Use a Marker Pen
Use a Marker Pen
Use a Marker Pen
Use a Marker Pen Use a Marker Pen
After you've taken a screenshot, click it, then click . You can
Marker Pe
Marker Pe
Marker Pe
Marker PeMarker Pen
n
n
nn
highlight a word or write a note on the image. Click to save your
Done
Done
Done
DoneDone
changes. (Note: Marker pen is only available in red color).you can easily take
longer and
5.10.
5.10.
5.10.
5.10.5.10.
Control
Control
Control
Control Control Center,
Center,
Center,
Center, Center, Notification
Notification
Notification
NotificationNotification,
,
,
,,
and
and
and
and and
Status Bar
Status Bar
Status Bar
Status BarStatus Bar
Control Center
Control Center
Control Center
Control Center Control Center
Control Center gives you instant access to the most frequently used features,
and allows you to view recent and earlier notifications with just a swipe. You
can open Control Center from anywhere on your phone-from any app or
screen, even from the lock screen.
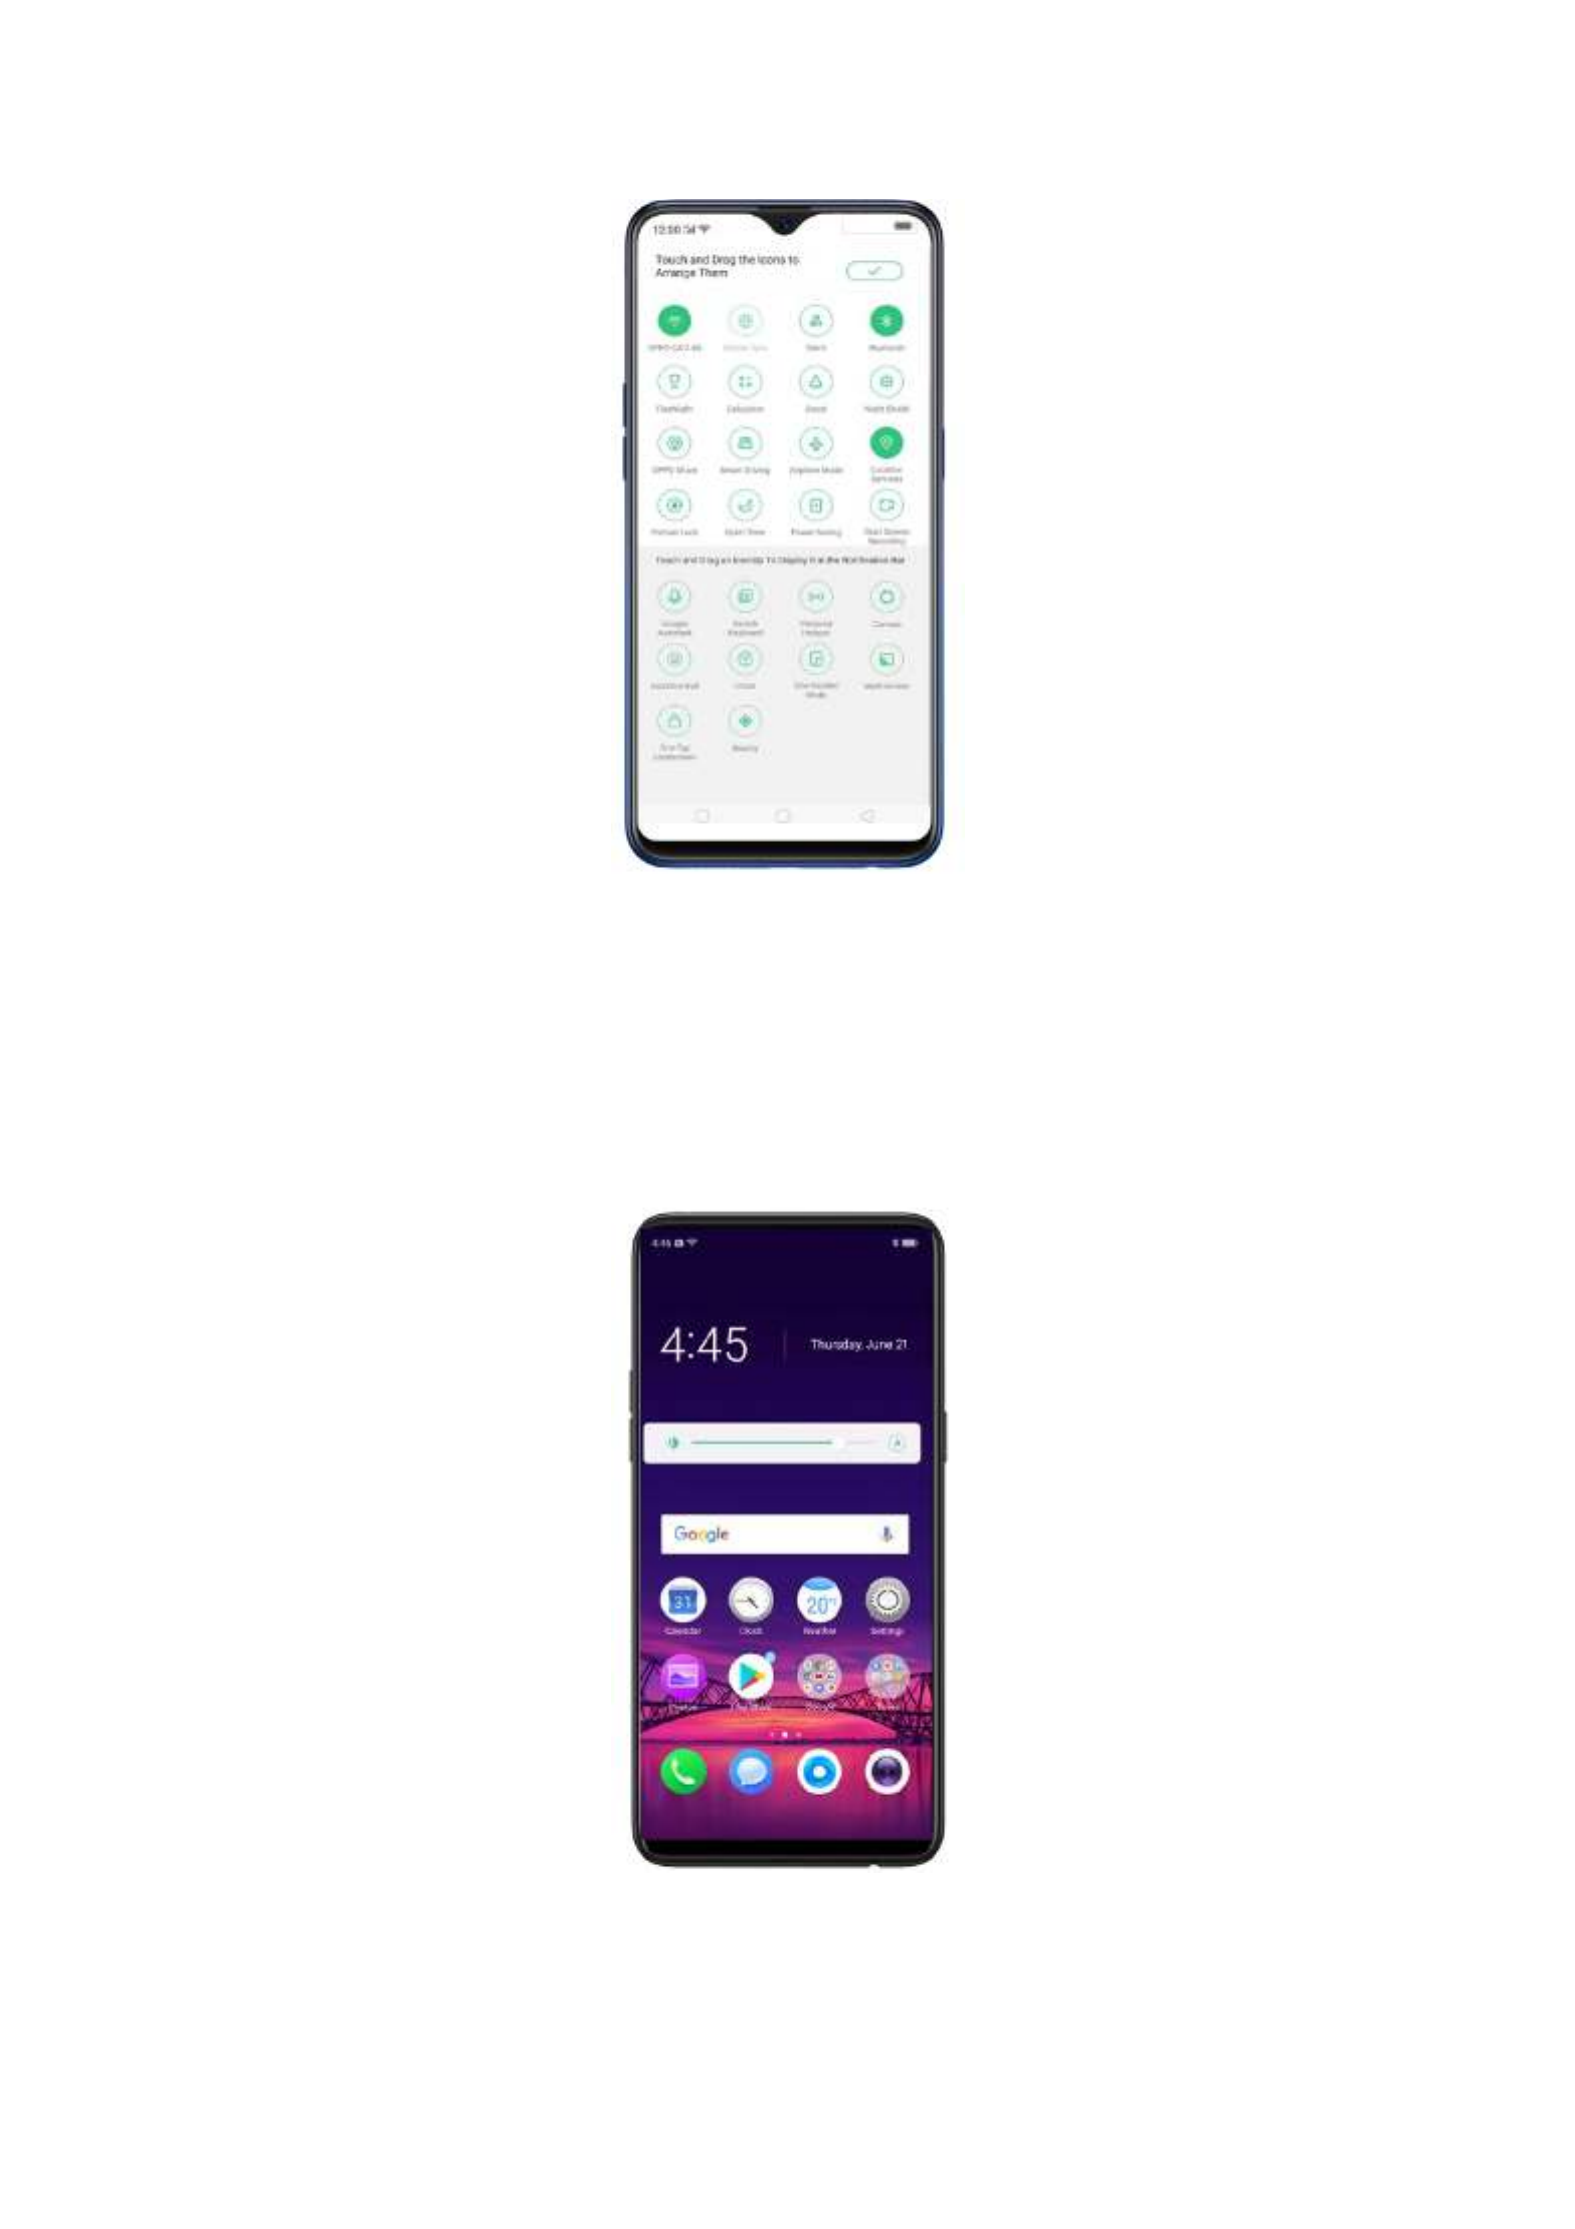
Control the brightness
Control the brightness
Control the brightness
Control the brightnessControl the brightness. Drag the slider to adjust the brightness of the screen.
When you drag the slider, other parts of Control Center will be temporarily
hidden.

Notifications
Notifications
Notifications
Notifications Notifications
View all notifications
View all notifications
View all notifications
View all notificationsView all notifications. Swipe down from the very top to view recent
notifications.
Open the app to respond
Open the app to respond
Open the app to respond
Open the app to respondOpen the app to respond. Click a notification to go to the related app.
When phone screen is locked, swipe the notification to the right. You may
need to enter your passcode.
Dismiss notifications
Dismiss notifications
Dismiss notifications
Dismiss notificationsDismiss notifications. Swipe the notification to the left, then click . To
Delete
Delete
Delete
DeleteDelete
dismiss all notifications, Click .

Manage your notification settings
Manage your notification settings
Manage your notification settings
Manage your notification settingsManage your notification settings. Swipe the notification to the left,
click , or go to
Settings
Settings
Settings
SettingsSettings [Settings] > [Notification & Status Bar] > [Manage
[Settings] > [Notification & Status Bar] > [Manage
[Settings] > [Notification & Status Bar] > [Manage
[Settings] > [Notification & Status Bar] > [Manage [Settings] > [Notification & Status Bar] > [Manage
notifications]
notifications]
notifications]
notifications]notifications].
Select an app from the list to customize whether new notifications from that
app appear on the lock screen or notification bar, display a banner, play a
sound or vibrate, or whether show icon badges on the Home screen. You can
also allow ringing for notifications when Do Not Disturb is on.
Show data usage at the bottom
Show data usage at the bottom
Show data usage at the bottom
Show data usage at the bottomShow data usage at the bottom [Settings] > [Notification & Status
[Settings] > [Notification & Status
[Settings] > [Notification & Status
[Settings] > [Notification & Status [Settings] > [Notification & Status . Go to
Bar]
Bar]
Bar]
Bar]Bar] and turn its slider to green. Your daily and monthly data usage will
display at the bottom of the notification bar.
Turn on screen for notifications
Turn on screen for notifications
Turn on screen for notifications
Turn on screen for notificationsTurn on screen for notifications [Settings] > [Notification & Status
[Settings] > [Notification & Status
[Settings] > [Notification & Status
[Settings] > [Notification & Status [Settings] > [Notification & Status . Go to
Bar]
Bar]
Bar]
Bar]Bar] and turn its slider to green.

Enter
Enter
Enter
Enter Enter numbers,
numbers,
numbers,
numbers, numbers, punctuation,
punctuation,
punctuation,
punctuation, punctuation, or
or
or
or or symbols
symbols
symbols
symbolssymbols. Click 12#. To type alternate
characters, touch and hold a key, then slide to choose one of the options.
Switch
Switch
Switch
Switch Switch language
language
language
languagelanguage. Go to
[Settings]
[Settings]
[Settings]
[Settings][Settings] > [Additional
[Additional
[Additional
[Additional [Additional Setting
Setting
Setting
SettingSettings]
s]
s]
s]s] > [Keyboard
[Keyboard
[Keyboard
[Keyboard [Keyboard &
&
&
& & Input
Input
Input
Input Input

Method]
Method]
Method]
Method]Method] [Tou
[Tou
[Tou
[Tou[TouchPal for realme]
chPal for realme]
chPal for realme]
chPal for realme]chPal for realme] [Languages]
[Languages]
[Languages]
[Languages][Languages] > > .
Tick the languages to use, then switch language by clicking or swiping on
EN
EN
EN
ENEN
spacebar.
Revise text
Revise text
Revise text
Revise textRevise text. Click on your text to move the cursor to the insertion point.
Edit text
Edit text
Edit text
Edit text Edit text
Select
Select
Select
Select Select text
text
text
texttext. Touch and hold the target text, or double-click the target text to
select. Drag the control points on either side of the highlighted word to select
more or less text, or click to highlight all of the text.
[Select all]
[Select all]
[Select all]
[Select all][Select all]
Y can cut, copy, paste or share your text then. ou
Delete text
Delete text
Delete text
Delete text Delete text
Click to delete the selected text or characters before the cursor.
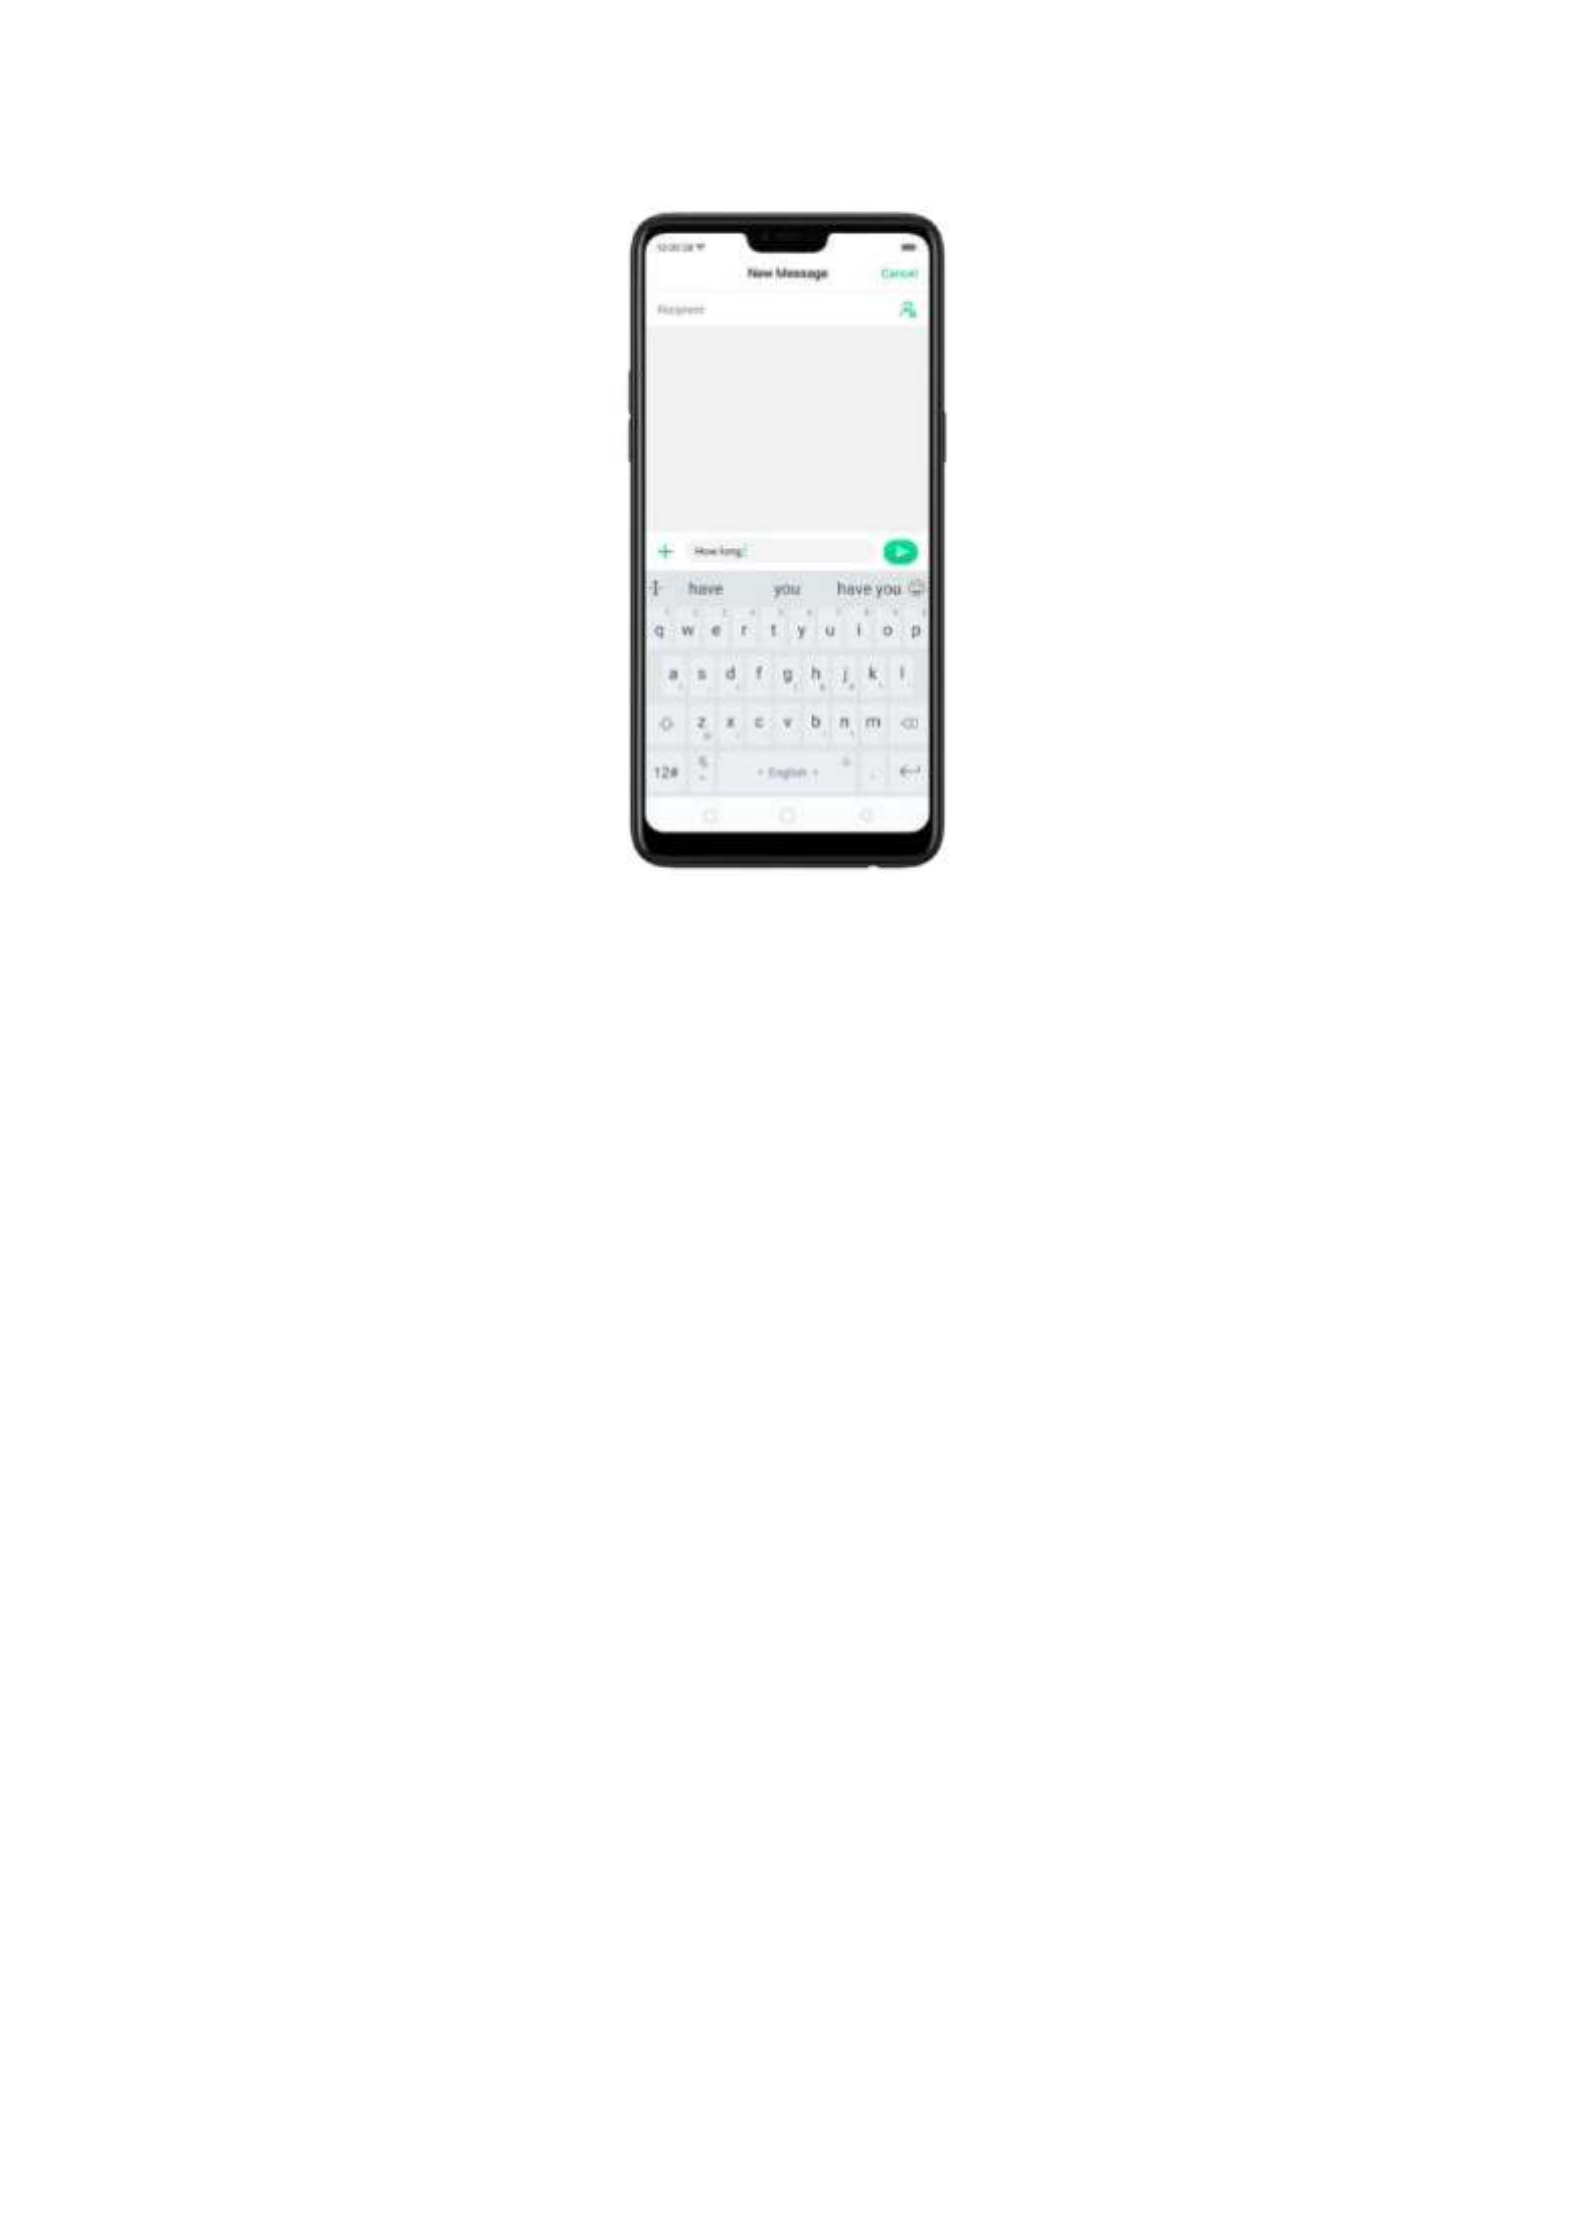
Correct spelling automatically
Correct spelling automatically
Correct spelling automatically
Correct spelling automaticallyCorrect spelling automatically. The keyboard will automatically check and
correct the spelling of the text.
Auto
Auto
Auto
Auto Auto saving
saving
saving
saving saving new
new
new
new new words, adding
words, adding
words, adding
words, adding words, adding space,
space,
space,
space, space, and
and
and
and and capitalizing
capitalizing
capitalizing
capitalizingcapitalizing. As you type, the
keyboard will also automatically save new words to the dictionary, add space
after a word and capitalize the first word of each sentence.
Predict Emojis
Predict Emojis
Predict Emojis
Predict EmojisPredict Emojis. As you type, the keyboard predicts what emoji comes next.

Contextual
Contextual
Contextual
Contextual Contextual prediction
prediction
prediction
predictionprediction. The keyboard will suggest what it thinks are the most
likely words based on what you're typing.
Import
Import
Import
Import Import contact
contact
contact
contact contact names
names
names
namesnames. The names of your contacts will be added to user
dictionary.
Learn
Learn
Learn
Learn Learn from
from
from
from from messages
messages
messages
messagesmessages. Let the keyboard learn from your conversations and
predict words you use most.
User
User
User
User User dictionary
dictionary
dictionary
dictionarydictionary Edit
Edit
Edit
Edit Edit user
user
user
user user words
words
words
wordswords. Click , then add your own words into the
dictionary so that they appear in the word prediction fields when typing. You
can also back up or restore your dictionary to or from the SD card, or rebuild,
or clear your dictionary.

Select
Select
Select
Select Select input
input
input
input input languages
languages
languages
languageslanguages [Settings]
[Settings]
[Settings]
[Settings][Settings]. Click on the panel, or go to >
[Additional
[Additional
[Additional
[Additional [Additional Settings]
Settings]
Settings]
Settings]Settings] [Keyboard
[Keyboard
[Keyboard
[Keyboard [Keyboard &
&
&
& & Input
Input
Input
Input Input Method]
Method]
Method]
Method]Method] [Goo
[Goo
[Goo
[Goo[Google
gle
gle
gle gle voice
voice
voice
voice voice typing]
typing]
typing]
typing]typing] > > >
[Languages]
[Languages]
[Languages]
[Languages][Languages].
Select your preferred languages. To select a primary language, touch and hold
the language.
Insert
Insert
Insert
Insert Insert and
and
and
and and delete
delete
delete
delete delete text
text
text
texttext. To insert or delete text, click to place the insertion point
first. Click to the right of the microphone icon to delete text.
To
To
To
To To enable
enable
enable
enable enable voice
voice
voice
voice voice input
input
input
input input while
while
while
while while offline
offline
offline
offlineoffline:
:
:
::Click on the panel to manage [Offline
[Offline
[Offline
[Offline [Offline
speech recognition].
speech recognition].
speech recognition].
speech recognition]. speech recognition].

identify the running status of Apps when enabled. Just click on
Custom Power
Custom Power
Custom Power
Custom Power Custom Power Saver
Saver
Saver
SaverSaver Inte
Inte
Inte
InteIntelligently Restrict
lligently Restrict
lligently Restrict
lligently Restrict lligently Restrict , choose an app then click
Background Running (Recommended)
Background Running (Recommended)
Background Running (Recommended)
Background Running (Recommended)Background Running (Recommended).
Power
Power
Power
Power Power Consumption
Consumption
Consumption
Consumption Consumption Details.
Details.
Details.
Details.Details. This will show you the apps, settings,
or features that consumed the most power. You can check Today,
Yesterday, and 2 Days ago for consumption details.

6.2.
6.2.
6.2.
6.2.6.2. Personali
Personali
Personali
PersonaliPersonalize the Home screen
ze the Home screen
ze the Home screen
ze the Home screenze the Home screen
6.2.1.
6.2.1.
6.2.1.
6.2.1.6.2.1. Organize the Home screen
Organize the Home screen
Organize the Home screen
Organize the Home screen Organize the Home screen
From the Home screen, you can access all your apps and widgets. To keep
everything in order, you can organize your home screen to make it more
manageable and keep it looking neat.
Add or Remove a H
Add or Remove a H
Add or Remove a H
Add or Remove a HAdd or Remove a Home screen page
ome screen page
ome screen page
ome screen page ome screen page
Add
Add
Add
Add Add a
a
a
a a Home
Home
Home
Home Home screen
screen
screen
screen screen page
page
page
pagepage. Swipe to the rightmost screen and drag an app or
widget off the screen to the right.
Produktspecifikationer
| Varumärke: | Realme |
| Kategori: | Smartphone |
| Modell: | C11 |
Behöver du hjälp?
Om du behöver hjälp med Realme C11 ställ en fråga nedan och andra användare kommer att svara dig
Smartphone Realme Manualer

5 Mars 2025
27 Oktober 2024
19 September 2024
19 September 2024
9 September 2024
9 September 2024
8 September 2024
8 September 2024
7 September 2024
6 September 2024
Smartphone Manualer
- Smartphone Sony
- Smartphone Samsung
- Smartphone Xiaomi
- Smartphone LG
- Smartphone AEG
- Smartphone Huawei
- Smartphone Brondi
- Smartphone HP
- Smartphone Philips
- Smartphone Panasonic
- Smartphone Garmin
- Smartphone Gigaset
- Smartphone Motorola
- Smartphone Medion
- Smartphone Nokia
- Smartphone Toshiba
- Smartphone Wiko
- Smartphone Yarvik
- Smartphone Acer
- Smartphone Aiwa
- Smartphone Alcatel
- Smartphone Albrecht
- Smartphone Alecto
- Smartphone Aligator
- Smartphone Allview
- Smartphone Apple
- Smartphone Amazon
- Smartphone Amplicomms
- Smartphone Amplicom
- Smartphone Archos
- Smartphone Alcatel-Lucent
- Smartphone Prestigio
- Smartphone Google
- Smartphone BenQ
- Smartphone Lexibook
- Smartphone Sharp
- Smartphone Telefunken
- Smartphone Silvercrest
- Smartphone Nedis
- Smartphone Thomson
- Smartphone Manta
- Smartphone Asus
- Smartphone OK
- Smartphone Hisense
- Smartphone Hyundai
- Smartphone Sony Ericsson
- Smartphone Trekstor
- Smartphone Micromax
- Smartphone Kodak
- Smartphone Bush
- Smartphone RCA
- Smartphone Sonim
- Smartphone Sencor
- Smartphone Overmax
- Smartphone Blaupunkt
- Smartphone TP Link
- Smartphone Lenovo
- Smartphone Energy Sistem
- Smartphone Polaroid
- Smartphone Doro
- Smartphone Sagem
- Smartphone Lava
- Smartphone Blu
- Smartphone Easypix
- Smartphone Denver
- Smartphone Intex
- Smartphone ZTE
- Smartphone Sanyo
- Smartphone Konrow
- Smartphone Brigmton
- Smartphone Sunstech
- Smartphone TCL
- Smartphone Gigabyte
- Smartphone Mitsubishi
- Smartphone Aspera
- Smartphone Microsoft
- Smartphone Nec
- Smartphone Swissvoice
- Smartphone Sunny
- Smartphone Nordmende
- Smartphone Haier
- Smartphone Krüger And Matz
- Smartphone Binatone
- Smartphone Blackberry
- Smartphone KPN
- Smartphone HTC
- Smartphone Vivo
- Smartphone Olympia
- Smartphone Razer
- Smartphone Mio
- Smartphone Wolder
- Smartphone Audioline
- Smartphone NGM
- Smartphone Goclever
- Smartphone Profoon
- Smartphone Vodafone
- Smartphone NGS
- Smartphone Dell
- Smartphone Hammer
- Smartphone Switel
- Smartphone InFocus
- Smartphone GreatCall
- Smartphone XD
- Smartphone Pantech
- Smartphone Alba
- Smartphone Honor
- Smartphone RugGear
- Smartphone Umidigi
- Smartphone CAT
- Smartphone Intermec
- Smartphone AT&T
- Smartphone Mpman
- Smartphone Trevi
- Smartphone Tesla
- Smartphone Bury
- Smartphone Logicom
- Smartphone Karbonn
- Smartphone Vivax
- Smartphone Emporia
- Smartphone Hannspree
- Smartphone Phicomm
- Smartphone Nevir
- Smartphone Kyocera
- Smartphone Crosscall
- Smartphone Plum
- Smartphone Infinix
- Smartphone OnePlus
- Smartphone Keneksi
- Smartphone Klipad
- Smartphone Iget
- Smartphone T-Mobile
- Smartphone JCB
- Smartphone CRUX
- Smartphone Geemarc
- Smartphone Unnecto
- Smartphone Wileyfox
- Smartphone ITT
- Smartphone MyPhone
- Smartphone Avus
- Smartphone Wolfgang
- Smartphone Oppo
- Smartphone BQ
- Smartphone ORA
- Smartphone Echo
- Smartphone Primux
- Smartphone Tiptel
- Smartphone UTStarcom
- Smartphone Zipy
- Smartphone Mediacom
- Smartphone Beafon
- Smartphone SPC
- Smartphone Billow
- Smartphone Telstra
- Smartphone Ulefone
- Smartphone ToughGear
- Smartphone Benefon
- Smartphone Komu
- Smartphone Doogee
- Smartphone Energizer
- Smartphone Tremay
- Smartphone Kurio
- Smartphone Piranha
- Smartphone Coolpad
- Smartphone TAG Heuer
- Smartphone Mobistel
- Smartphone Itel
- Smartphone Garmin-Asus
- Smartphone Handheld
- Smartphone Fero
- Smartphone AT Telecom
- Smartphone Xtreamer
- Smartphone O2
- Smartphone General Mobile
- Smartphone Mustang
- Smartphone Syco
- Smartphone Kogan
- Smartphone Maxcom
- Smartphone I.safe Mobile
- Smartphone Pharos
- Smartphone Storex
- Smartphone Fairphone
- Smartphone Freeman
- Smartphone HomTom
- Smartphone EVOLVEO
- Smartphone Auro
- Smartphone Maxx
- Smartphone ITTM
- Smartphone Verykool
- Smartphone Cyrus
- Smartphone Posh Mobile
- Smartphone THL
- Smartphone NGM-Mobile
- Smartphone Media-tech
- Smartphone Nothing
- Smartphone Oukitel
- Smartphone Lark
- Smartphone NUU Mobile
- Smartphone Senifone
- Smartphone Tecno
- Smartphone Telme
- Smartphone UMi
- Smartphone Olitech
- Smartphone Mobiola
- Smartphone Meizu
- Smartphone Neffos
- Smartphone Gionee
- Smartphone TIM
- Smartphone Cubot
- Smartphone Leotec
- Smartphone Leagoo
- Smartphone NTech
- Smartphone Majestic
- Smartphone Nubia
- Smartphone LeEco
- Smartphone Best Buy
- Smartphone GSmart
- Smartphone Bea-fon
- Smartphone Opticon
- Smartphone EStar
- Smartphone Saiet
- Smartphone Facom
- Smartphone Bluebird
- Smartphone Jitterbug
- Smartphone Custom
- Smartphone CSL
- Smartphone POCO
- Smartphone Tecdesk
- Smartphone Aplic
- Smartphone HMD
- Smartphone Opis
- Smartphone Volla
- Smartphone Nothing Tech
- Smartphone Maxwest
- Smartphone Krüger&Matz
- Smartphone Kalley
Nyaste Smartphone Manualer
2 April 2025

30 Mars 2025
10 Mars 2025
7 Mars 2025
6 Mars 2025
3 Mars 2025
2 Mars 2025
26 Februari 2025

26 Februari 2025
26 Februari 2025