Uniwell SX-8000 Bruksanvisning
Uniwell
Kassaapparat
SX-8000
Läs nedan 📖 manual på svenska för Uniwell SX-8000 (170 sidor) i kategorin Kassaapparat. Denna guide var användbar för 4 personer och betygsatt med 4.5 stjärnor i genomsnitt av 2 användare
Sida 1/170

OPERATION
MANUAL
SX-7000/7500
SX-8000/8500
SX-700/800
Jan. 23. 2004 [SX7k/8k] ORN-009

THE SOCKET-OUTLET SHALL BE INSTALLED NEAR THE EQUIPMENT AND SHALL BE
EASILY ACCESSIBLE.
LA PRISE DOIT ETRE PRES DE L'APPAREIL ET FACILE D'ACCES.
Note: This equipment has been tested and found to comply with the limits for a Class B digital device,
pursuant to part 15 of the FCC Rules. These limits are designed to provide reasonable protection
against harmful interference in a residential installation. This equipment generates, uses and can
radiate radio frequency energy and, if not installed and used in accordance with the instructions, may
cause harmful interference to radio communications. However, there is no guarantee that interference
will not occur in a particular installation. If this equipment does cause harmful interference to radio or
television reception, which can be determined by turning the equipment off and on, the user is
encouraged to try to correct the interference by one or more of the following measures:
-- Reorient or relocate the receiving antenna.
-- Increase the separation between the equipment and receiver.
-- Connect the equipment into an outlet on a circuit different from that to which the receiver is connected.
-- Consult the dealer or an experienced radio/TV technician for help.
===== Notes =====================================
1. The contents of this manual are subject to change without notice.
2. Uniwell cannot be held responsible if other products, which are not approved by Uniwell, are used
for options or expendable supplies.
CONTENTS
Refer to the separate User's manual for the specifications, installation, display and screen layout.
1. FUNCTION KEY LIST................................................................................................................... 1
2. CLERK OPERATIONS .................................................................................................................. 3
2-1. Clerk systems........................................................................................................................................ 3
2-2. Signing on a clerk ................................................................................................................................. 3
a) Using hard clerk keys........................................................................................................................................ 3
b) Using secret clerk codes.................................................................................................................................... 3
c) Using clerk card ................................................................................................................................................ 4
d) Using iButton.................................................................................................................................................... 4
2-3. Signing off a clerk................................................................................................................................. 4
2-4. Assign HARD CLERK keys in X key position [SF-21.C] ................................................................... 4
2-5. Clerk log-on/off - time and attendance operation ................................................................................. 5
2-6. Clerk training mode .............................................................................................................................. 7
3. PLU SALES OPERATIONS........................................................................................................... 8
3-1. PLU registration.................................................................................................................................... 8
a) Hard PLU keys / Scanner .................................................................................................................................. 8
b) Coded PLUs...................................................................................................................................................... 8
3-2. Look up PLU keys ................................................................................................................................ 8
3-3. PLU multiplication................................................................................................................................ 9
a) Hard PLU keys / Scanner .................................................................................................................................. 9
b) Coded PLUs...................................................................................................................................................... 9
c) Look up PLUs ................................................................................................................................................... 9
d) 4-digit multiplication [Flash firmware only]................................................................................................... 10
3-4. Manual price entry .............................................................................................................................. 11
a) Hard PLU keys / Scanner ................................................................................................................................ 11
b) Coded PLUs.................................................................................................................................................... 12
c) Look up PLUs ................................................................................................................................................. 12
3-5. Prices................................................................................................................................................... 13
a) How to change price levels.............................................................................................................................. 13
b) How to change price within each level............................................................................................................ 13
3-6. PLU modifiers (half / double, small / large, or programmable value) ................................................ 14
3-7. PLU menu levels................................................................................................................................. 15
3-8. Price inquiry (display only)................................................................................................................. 16
3-9. Single item .......................................................................................................................................... 16
3-10. Complimentary PLUs ......................................................................................................................... 17
3-11. Coupon PLUs...................................................................................................................................... 18
3-12. Special PLUs....................................................................................................................................... 19
3-13. Cooking instructions ........................................................................................................................... 22
a) By linking them directly to specified PLUs in programming (SP-122 PLUs: COOK = 1~20) ....................... 22
b) By pressing a COOKING 1 ~ 64 keys (SP-122 PLUs: COOK = 0)................................................................ 22
c) Cooking instruction group 1 is listed by pressing COOKING MESSAGE key (SP-122 PLUs: COOK = 0).. 23
d) Manual cooking message entry by pressing MANUAL COOKING key........................................................ 23
3-14. Condiments ......................................................................................................................................... 24
a) Condiment entry from the condiment group [PF-05.A=NO]........................................................................... 24
b) Independent condiment PLU entry [PF-05.A=YES]....................................................................................... 25
3-15. Category Change................................................................................................................................. 27
3-16. Automatic link PLUs (expanded Look Up PLU function).................................................................. 29
a) Chained up to 40 PLUs [SF-20.E=YES, PF-04.F=YES]................................................................................. 29
b) One link PLU (unchained) [SF-20.E=NO, PF-04.F=YES] ............................................................................. 31
3-17. Set menu - Course (expanded Look Up PLU function) ...................................................................... 32
3-18. Topping (expanded Look Up PLU function) ...................................................................................... 36
a) Selectable topping lists - by pressing one of Look Up PLU keys.................................................................... 36
b) Pre-programmed topping list - automatic topping list..................................................................................... 37
3-19. Take out / Eat in system with Combo menu (expanded Look Up PLU function)............................... 38
a) Eat in/Take out operation ................................................................................................................................ 39
b) Eat in/Take out operation with Price Level Shift ............................................................................................ 39
c) Eat in/Take out operation with Combo Menu ................................................................................................. 41
d) Mode selection for take-out system................................................................................................................. 42
e) Kitchen Printer for take-out and delivery items............................................................................................... 43
f) Automatic tax shift in take-out system ............................................................................................................ 44
h) Grouped PLU report used as Eat in/Take out/Delivery sales report................................................................ 47
3-20. Mix & Match....................................................................................................................................... 49
a) Programming Contents.................................................................................................................................... 49
b) Operation Samples .......................................................................................................................................... 50
c) Mix & Match Report....................................................................................................................................... 57
d) Operational Restrictions.................................................................................................................................. 59
4. OTHER FUNCTIONS................................................................................................................... 60
4-1. No sale ................................................................................................................................................ 60
4-2. Item correction (CR) ........................................................................................................................... 61
4-3. Void .................................................................................................................................................... 62
4-4. Refund................................................................................................................................................. 63
4-5. Media Refund...................................................................................................................................... 64
4-6. Non-add number (Message Entry) ...................................................................................................... 65
4-7. Tip....................................................................................................................................................... 66
4-8. Amount discount................................................................................................................................. 67
a) Preset amount discount.................................................................................................................................... 67
b) Manual amount discount ................................................................................................................................. 67
4-9. Adjustments ........................................................................................................................................ 68
4-10. Percentages ......................................................................................................................................... 69
a) Preset percentage on subtotal .......................................................................................................................... 69
b) Manual percentage on subtotal........................................................................................................................ 69
c) Item discount / add-on charge ......................................................................................................................... 69
4-11. Repeat transaction............................................................................................................................... 70
4-12. Media (Total) to finalize transaction................................................................................................... 70
a) Tendering (Closing methods) .......................................................................................................................... 71
b) Preset tender.................................................................................................................................................... 71
c) Special media .................................................................................................................................................. 72
d) Media multiplication ....................................................................................................................................... 73
e) Pre-payment (partial payment) media for track operation ............................................................................... 74
f) Card payment................................................................................................................................................... 75
f) National (Local) currency symbol print........................................................................................................... 77
4-13. Euro currency...................................................................................................................................... 78
4-14. Foreign currency ................................................................................................................................. 79
4-15. Paid out ............................................................................................................................................... 80
4-16. Deposit................................................................................................................................................ 81
a) Deposit in ........................................................................................................................................................ 81
b) Deposit out...................................................................................................................................................... 82
4-17. Persons................................................................................................................................................ 83
4-18. Track systems (Billing systems) ......................................................................................................... 85
a) Characteristics................................................................................................................................................. 85
b) Operation Sequence --- same for both bill and table number systems............................................................. 86
c) Split Bill - Item Transfer [SF-37.E=NO]......................................................................................................... 91
d) Track Transfer................................................................................................................................................. 93
e) Clerk Track Transfer ....................................................................................................................................... 93
f) Floating Track................................................................................................................................................ 101
4-19. Seat number assignment.................................................................................................................... 103
a) Seat assignment - assigning seat numbers to each person ............................................................................. 103
b) Seat change - changing seat numbers on registered items............................................................................. 104
c) Seat transfer - splitting seats to another transaction....................................................................................... 105
d) Notes............................................................................................................................................................. 108
4-20. Tax system ........................................................................................................................................ 109
a) Tax System Outline....................................................................................................................................... 109
b) Automatic Tax Exemption --- only for add-on tax items calculated by add-on tax method.......................... 111
b) Manual Tax Exemption --- only for add-on tax items calculated by add-on tax method .............................. 112
c) Tax Shift --- for add-on tax system and VAT system.................................................................................... 114

1
1. FUNCTION KEY LIST
Page Function Key Remarks
69 %1 - 3 Enters a percentage rate for mark-up or mark-down of an item or the
subtotal amount depending on the programming. [SF-28~30]
0, 00, 000, 1-9, [ . ] Ten-keys for entry of numeric values.
ACCOUNT # Enters account number automatically by swiping the bank card.
68 ADJUSTMENT 1, 2
Gives a fixed percentage discount/surcharge on specific items. [PF-
3.E,D] Note that adjustment does not affect PLU sales memory
which is shown on the reports.
ASSORTED REPORT 1 ~ 3 Assorted reports (up to five reports programmed by SP-170) can be
issued in X, Z1/P, Z2 position with this key.
85 BILL # Assigns a bill number to a track or used to pick up the track.
153 BUFFER PRINT Allows you to select information for printing. Normally it is used to
print a receipt for a recent transaction under the receipt off.
CLEAR Cancels any information that is entered by ten-key or function key
and clears error conditions.
3 CLERK (CLERK (ID)) Signs on a clerk by entering CLERK (ID).
93 CLERK TRACK TRANSFER Used for a clerk to take over the pending tracks used by another clerk
who has finished his job.
87 CLERK TRACK LIST Shows the open track list immediately after the clerk sign-on
operation.
17 COMPLIMENTARY Allows you to sell PLUs at zero prices.
22 COOKING 1 - 64 Enters a cooking message after a KP item entry.
22 COOKING MESSAGE Enters a cooking message followed by number or lists up to 8
cooking messages after a KP item entry. [SF-21.F]
61 CR (CORRECTION) Corrects entered items in a transaction.
119 CUSTOMER FILE Adds/picks up a customer file.
DECLARATION PRINT Prints German invoice for German restaurant declaration.
[SF-88.H], SP-112
38 DELIVERY Used in Take Out system.
81 DEPOSIT Enters a deposit amount.
81 DEPOSIT USED Uses a previous deposit as part of the final payment.
67 DISCOUNT Subtracts a preset amount or manually entered amount from the
subtotal of a sale.
38 EAT IN Used in Take Out system.
ENTER Used to fix the selection.
3 HARD CLERK 1 - 16 Signs on a clerk on or off without the clerk code entry.
8 HARD PLU 1 - 165 Registers a PLU with the preset price directly.
JOURNAL PAPER FEED Advances the journal paper.
154 KP REDIRECT Allows a manual redirection of KP data to its backup kitchen printer.
LOCATION 1 - 8 Enters the area where the customers are seated at or selects from the
location list [SF-19.G]. It is printed on KP and receipt.
5 LOG ON Records clerk log on time and date.
5 LOG OFF Records clerk log off time and date.
8 LOOK UP PLU 1 - 165 Shows a list of up to 40 associated PLUs.
MACRO KEY 1 - 10 Up to 5s0 function keys may be placed in a single MACRO key.
23 MANUAL COOKING
MESSAGE
A maximum of 20 characters of the cooking message can be entered
manually. [SF-65.C]
15 MENU SHIFT 1 - 5 Changes the Hard PLU key layout. PLUs must be assigned to Hard
PLU keys by using SP-111 PLU menu. [SF-20.H, 24.G]
14 MODIFIER 1, 2 Shifts to 2nd price, 3rd price.
85 N.B./STORAGE Stores a transaction temporarily.
60 NO SALE Opens the drawer for no sale operations.
65 NONADD# Used to enter a message manually. (X key can also be used.)
PAGE UP, PAGE DOWN Moves a cursor by a page on the screen.

2
80 PAID OUT
Records an amount of money withdrawn from the cash drawer when
no customer transaction has taken place. Eight forms of paid-out are
available.
83 PERSON Enters the number of customers in a group. Eight different types can
be selected.
PLU / REPEAT
- Used for manual code-entry PLU registrations. Press this key after
entering the PLU code.
- Repeats the previous item registered.
71 PRESET TENDER 1 - 5 Automatically tenders a preset amount.
10,16 PRICE - Manually overrides the price of a code-entry PLU.
- Shows the price of a PLU without selling it.
12 PRICE SHIFT 1, 2, 3 Shifts to price level 1, level 2, level 3.
RECEIPT OFF Toggles between receipt issue (on) and not issue (off).
RECEIPT PAPER FEED Advances the receipt paper.
63 REFUND Refunds previously sold items.
70 REPEAT TRANSACTION Registers the PLUs sold in the last sale.
127 ROOM Used for Room system. [SF-58.H]
SCROLL BACK
SCROLL FORWARD
- Moves a cursor on the screen.
- Adjusts the contrast of the display providing no clerk is signed on.
103 SEAT # Assigns a seat number to the transaction.
154 SEND Sends all KP items to KP during a transaction without closing.
126 SERVER Used to enter a server number.
32 SET MENU OPT 1, OPT 2 Offers 4th menu, 5th menu.
153 SHORT BUFFER PRINT Prints categories.
155 SLIP PRINT Print bills on the slip printer.
72 SPECIAL MEDIA Shows a media list to select.
91 SPLIT BILL Used to transfer the selected item to the new transaction.
SUBTOTAL Displays the total amount of the sale before finalizing. It is printed
or not printed depending on programming.
85 TABLE # Assigns a table number to a track and accesses tracks by calling up a
table.
38 TAKE OUT Used in Take Out system.
114 TAX 1 - 4 SHIFT
- Add-on tax system: used to change the tax status.
- VAT system: used to shift VAT 1 item to VAT 3 and VAT 2 item
to VAT 4.
112 TAX EXEMPTION
(only for add-on tax system)
Used at the end of a transaction to exempt the whole transaction
from a particular tax rate selecting by TAX SHIFT key.
66 TIP Enters a tip amount.
70
TTL 1 - 7
TTL 8/CASH
TTL 9/EURO
TTL 10 - 19
TTL 20/COUPON
[SF-84.H], [TTL9: MF-01.D]
[SF-71.H]
62 VOID Voids items in a transaction.
X Used for a multiplication. Also used to enter a message manually.
3
2. CLERK OPERATIONS
2-1. Clerk systems
ECR is used under one of the following clerk systems (programmed by your Uniwell reseller before delivery);
Interrupt system
Allows clerks to interrupt one another during the middle of sale so that several customers may be handled
at the same time on the same terminal. Individual clerk keys (maximum 16) can be assigned to the
keyboard for single touch sign-on operation.
Floating interrupt system
Same as above but also allows clerks to serve the same customer from any terminal in the network.
For example, sign on at one terminal and register a lemonade, log off.
Sign on another terminal at the other end of the bar and register a lager then sign off.
Normal clerk system - Or 'non-interrupt' or 'non-floating' clerk system.
Clerk sign-on is compulsory at the start of each sale. A clerk must finalize or store their sale and sign off
before another clerk can sign on.
2-2. Signing on a clerk
A clerk must be signed on before starting a sale. Check that the control key is turned to R position. There are
two standard methods by which you can sign on a clerk:
a) Using hard clerk keys
Up to 16 clerks can have their own personal key. To sign on a clerk simply press one of the HARD
CLERK keys, the name of the clerk will be displayed at the top of the screen. The clerk is now signed on
and it is possible to register items.
When using an interrupt system, if another HARD CLERK key is pressed when a clerk is already signed
on, then that first clerk will be signed off and his transaction is stored. The clerks may be set so that after a
certain period of time the clerk is automatically signed off by [SF-17.E-A].
b) Using secret clerk codes
By using the secret clerk codes it is possible to use up to 255 clerks.
1. Enter the secret clerk code.
2. Press CLERK (ID) key.
The clerk is signed onto the machine. If CLERK (ID) key is pressed again, the clerk is signed off.
4
c) Using clerk card
To use this option ECR must have a card reader fitted and be specially programmed to recognize the cards
by SP-104 and [SF-76.G].
To sign on a clerk using a card, swipe the card through the reader with the magnetic stripe facing down and
to the front.
d) Using iButton
For this system ECR must have an iButton reader fitted and be programmed to recognize the clerk iButtons
by SP-117 and [SF-76.C].
To sign on a clerk using an iButton, touch the iButton to the iButton reader.
2-3. Signing off a clerk
A clerk is automatically signed off:
- When a clerk finalizes a transaction by Media/NB closing in the clerk interrupt system [SF-113.H=NO].
- When a clerk is interrupted by another clerk (only in the clerk interrupt system).
- When a clerk stores a transaction to a bill or a table (see track systems).
- When the clerk timeout period is reached (programmable).
- By pressing CLERK (ID) key, which stores any transaction.
- If using a magnetic card, the clerk can be signed off by any of the above methods but NOT by swiping the card
again.
- When using a non-magnetic iButton, the clerk can sign off by touching the iButton reader with an iButton.
- When using a magnetic iButton, the clerk can sign off by removing the iButton.
Note: Under the non clerk interrupt system, a clerk stays on all the time when clerk time-out is not set.
2-4. Assign HARD CLERK keys in X key position [SF-21.C]
In case there's clerk shift, it may be necessary to change HARD CLERK keys on ECRs. Normally,
programming is restricted to SP key position, however, changing HARD CLERK keys can be done in X key
position if permitted in programming [SF-21.C].
When an IRC system (several terminals connected) is in use, assigning HARD CLERK keys in X key position
on one ECR automatically sends this information to all the other terminals even if they are in use at that time.
This automatic broadcast function can be switched on or off in programming [SF-56.E].
Assigning HARD CLERK keys in X key position:
1. Turn the control key to X position.
2. Sign on a clerk.
3. Select Program functions.
4. Select X-103 Hard Clerks.
5. Select a clerk from the list.
6. Press HARD CLERK key on which you wish to assign that clerk to.
7. Press CLEAR or select another clerk.

5
2-5. Clerk log-on/off - time and attendance operation
Each clerk should log on to record the beginning of his/her labor hours when he/she starts to work. Also, they
should log off to record the end of their labor hours at the end of a working day. In order to use this function,
"ATTENDANCE" memory should be secured by SP-112 Maximums program.
By log-on and log-off operations, clerk's attendance date and time and labor hours are memorized in ECR.
These are printed on the clerk attendance report (#19).
Note: Some clerks are not allowed to register sales but must LOG-ON and LOG-OFF to calculate labor cost.
Sales are registered accidentally by the clerk who is not allowed the registrations. This causes balancing
problems. This is avoided by Clerk flag [CF-2.G] "REGISTRATION PROHIBITED".
Log-On Operation
1. Turn the control key to R position.
2. Sign on a clerk.
3. WARNING 98 "clerk log-on compulsory" is displayed with one second buzzer under [SF-89.B, CF-2.A =
YES] condition.
4. Enter job code if required.
If [SF-76.A] = YES, a job code MUST be entered, if [SF-76.B] = YES, the job code entered must match one
of the clerk's set job codes.
5. Press LOG ON key.
Receipt Sample
************
* Your *
*
Receipt
*
*
Thank You
*
************
LOGIN 1
16/10/2000 10:00
CLERK 001
log-on message and job code if entered
log-on date and time
6. In order to continue the registration, sign on a clerk.
Log-Off Operation
1. Turn the control key to R position.
2. Sign on a clerk.
3. Press LOG OFF key.
Receipt Sample
LOGOUT
16/10/2000 17:00
CLERK 001
6
Note for Clerk iButton
It is possible to allow log-on/off with iButton for those clerks who do not have his/her own clerk iButton by
following measure:
Prepare one dummy iButton used for their log-on/off operation only:
Dummy Clerk iButton Setting
Set following clerk flags:
[CF-1.H=YES] TRAINING CLERK
This setting is recommended not to affect a dummy clerk's sales memory in case the
clerk did the clerk log-on operation without entering his/her clerk code.
[CF-2.A=YES] LOGON COMPULSORY SF89.B
Log-on/off Operations with Dummy Clerk iButton
Log-on Operation
1. Turn the control key to R position.
2. Set Dummy Clerk iButton to sign on a dummy clerk.
3. Enter clerk code.
4. WARNING 98 "Clerk log-on compulsory" is displayed with one second buzzer under [SF-89.B, CF-2.A =
YES] condition.
5. Enter job code if required.
If [SF-76.A] = YES, a job code MUST be entered.
If [SF-76.B] = YES, the job code entered must match one of the clerk's set job codes.
6. Press LOG ON key. Log-on confirmation receipt is printed.
7. In order to continue the registration, sign on a clerk.
Log-off Operation
1. Turn the control key to R position.
2. Set Dummy Clerk iButton to sign on a dummy clerk.
3. Enter clerk code.
4. Press LOG OFF key. Log-off confirmation receipt is printed.

7
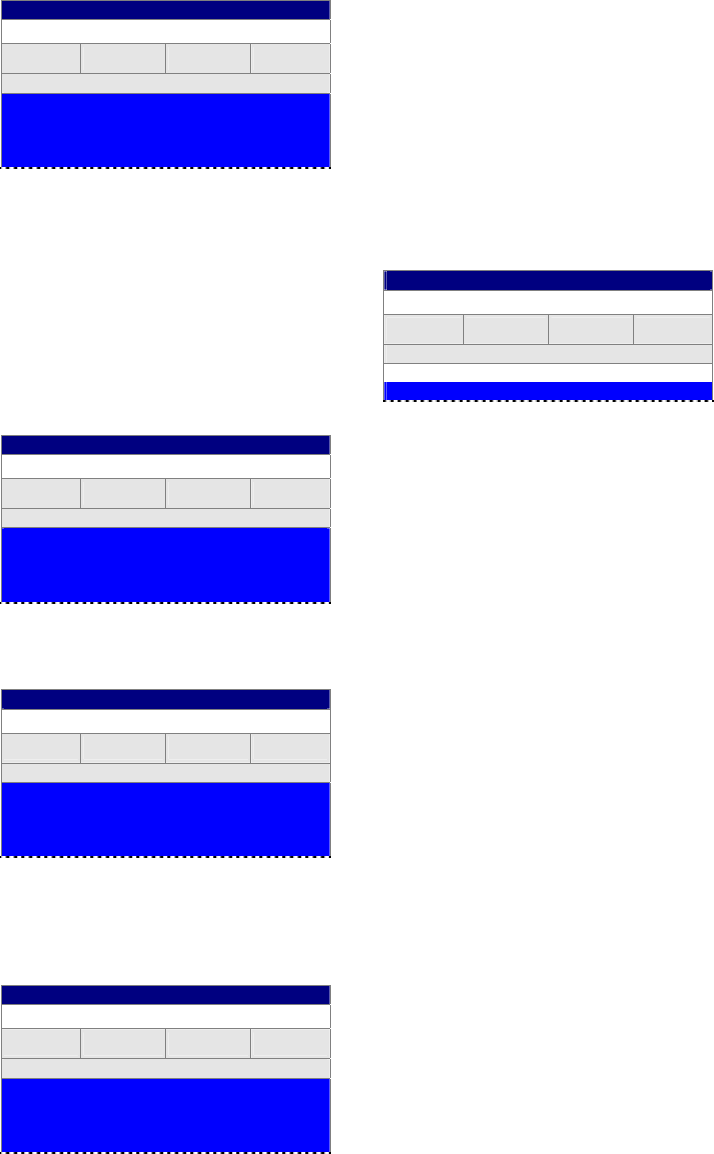
2-6. Clerk training mode
A clerk can be set up as a training clerk. When a training clerk is signed on, their sales do not update the sales
figures and a training message is displayed on the screen to highlight that the clerk is a training clerk.
TRAINING
Std Prices
TABLE BILL SERVER PERSON
Location
All issues will have a training message:
Receipt Sample
************
* Your *
*
Receipt
*
*
Thank You
*
************
TRAINING
PLU 1 1.00
PLU 2 2.00
TRAINING
-------------
TRAINING
MEDIA 08 3.00
CLERK 005
#888-005-0008-0001 12/01/2001 14:30-R
TRAINING
THANK YOU FOR YOUR
VALUED CUSTOM
PLEASE CALL AGAIN
Program Options
[CF-1.H] Training clerk
[SF-38.G] Drawer opens in training mode
Training Reports
- X/Z-01~04 transaction and X/Z-11~16 clerk reports show training count and amount.
- X-80, X/Z-81~83 track reports show training tracks.
- Z2-71 audit report shows clerk log on in training operations.

8
3. PLU SALES OPERATIONS
3-1. PLU registration
PLU stands for "price look up". Each item you sell is a PLU. The PLU system allows each item to have various
settings associated with it. For example, a price, a sales group (drink, food), description, tax information,
cooking instructions, etc. There are different methods of selling PLUs, these are described below:
a) Hard PLU keys / Scanner
One PLU is sold, when you press a Hard PLU key or scan the barcode attached to commodities.
1. Turn the control key to R position.
2. Sign on a clerk.
3. Press one of HARD PLU keys or scan the barcode.
b) Coded PLUs
Coded PLUs are any PLUs which are not allocated to the keyboard.
1. Turn the control key to R position.
2. Sign on a clerk.
3. Enter the PLU code.
4. Press PLU/REPEAT key.
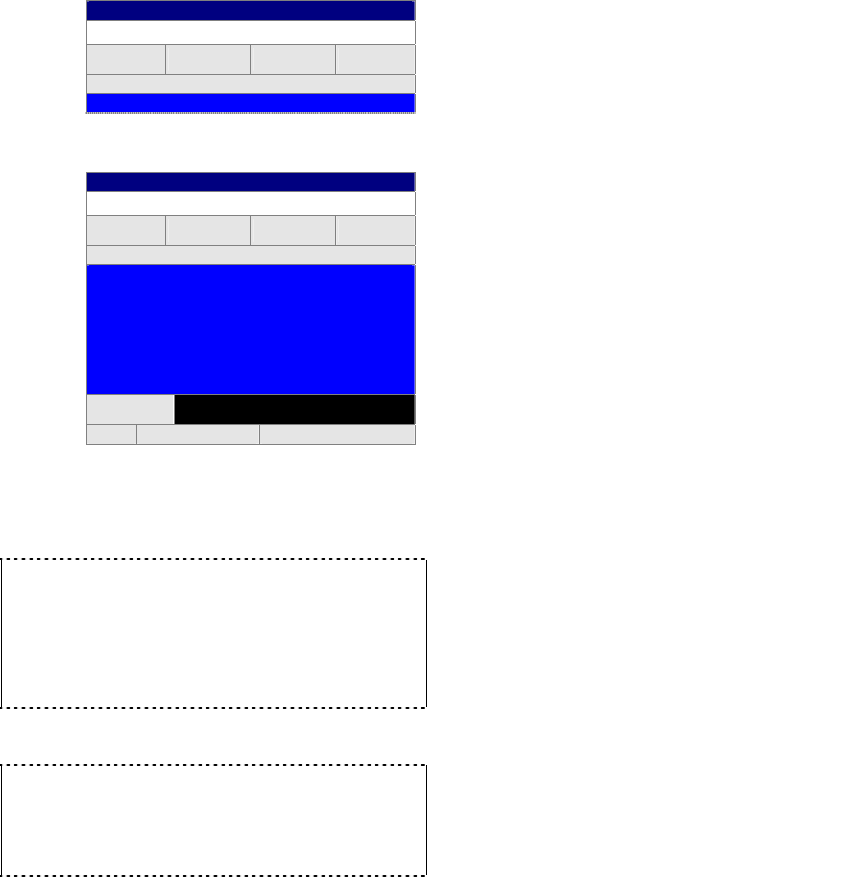
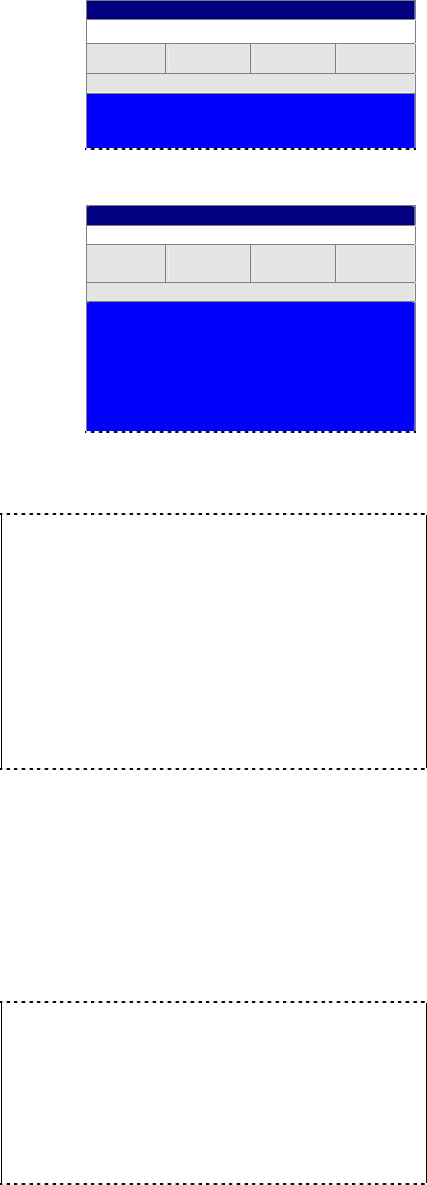
3-2. Look up PLU keys
LOOK UP PLU keys enable a list of up to 40 associated PLUs to be displayed by depression of a single key.
For example, a SALAD key automatically displays a list of all available salads for easy selection.
1. Sign on a clerk in R position.
2. Press the required LOOK UP PLU key.
3. A list of PLUs are displayed.
SELECT OPTION
Salad
TABLE BILL SERVER PERSON
Location
1 Ham Salad
2 Seafood Salad
3 Fruit Salad
SUBTOTAL 0.00
R RECEIPT IS ON 23/08/2000 12:45
4. Select a PLU from the list by SCROLL keys, or by numeric key.
5. Press ENTER (and press CLEAR to end under the setting for the list to remain until CLEAR).
LOOK UP PLU key name

9
3-3. PLU multiplication
When you want to enter more than one of the same PLU, it is quicker using X key. A PLU may be multiplied by
a maximum of 99.
a) Hard PLU keys / Scanner
1. Sign on a clerk.
2. Enter the quantity of PLUs using the numeric keys. Entry of decimal quantity is permitted by programming
[PF-02.D].
3. Press X key. The number you entered will be temporarily displayed in the location area.
CLERK 001
TABLE BILL SERVER PERSON
x 5.000
4. Press one of HARD PLU keys or scan the barcode attached to commodities you wish to multiply.
CLERK 001
Std Prices
TABLE BILL SERVER PERSON
Location
5.000 PLU 1 5.00
SUBTOTAL 5.00
R RECEIPT IS ON 23/08/2000 12:45
b) Coded PLUs
1. Sign on a clerk.
2. Enter the quantity of PLUs using the numeric keys.
3. Press X key.
4. Enter the required PLU code.
5. Press PLU/REPEAT key.
c) Look up PLUs
1. Sign on a clerk.
2. Enter the quantity of PLUs using the numeric keys.
3. Press X key.
4. Press the required LOOK UP PLU key.
5. Select a PLU.
Note: Multiplication of Look Up PLU is operational when "SHOW LOOKUP PLUs UNTIL CLEAR" [SF-20.D] is set to
NO.
Receipt Sample
************
* Your *
*
Receipt
*
*
Thank You
*
************
5x PLU 1 1.00 2.00

10
d) 4-digit multiplication [Flash firmware only]
Up to 4 digits integral number 9999 (without decimal points) can be entered by using two flags below. This is
convenient for copy service, tobacco shop, admission tickets, party service and so on where it is required to enter
more than 99 unit entry.
Setup
1. Set "4-DIGITS MULTIPLICATION" [SF-106.F] to "YES".
2. Set "4-DIGITS MULTIPLICATION ITEM" [PF-5.C] to "YES" for PLUs which you want to permit 4-digits
multiplication.
[PF-2.D=YES] [PF-2.D=NO]
[PF-5.C=YES] 9999 and 99.99 * See Note. 9999 only
[PF-5.C=NO] 99 and 99.99 99 only
* Note: Even "4-digits multiplication permitted item" [PF-5.C=YES] can have the decimal quantity entry under
"DECIMAL QTY PERMITTED" [PF-2.D=YES].
Display and Print Formats
• DISPLAY FORMAT
Under "4-DIGITS MULTIPLICATION" [SF-106.F=YES], decimal points are not shown as follows when you
perform multiplication without decimal quantity.
CLERK 001
Std Prices
TABLE BILL SERVER PERSON
99.000x
[SF-106.F=NO]
• PRINT FORMAT
PLU printing positions are different between "4-DIGITS MULTIPLICATION" [SF-106.F] "YES" and "NO".
[SF-106.F=NO]
9x PLU 1 1.00 9.00
9.990x PLU 1 1.00 9.99
99x PLU 1 1.00 99.00
99.990x PLU 1 1.00 99.99
[SF-106.F=YES]
9x PLU 1 1.00 9.00
99x PLU 1 1.00 99.00
999x PLU 1 1.00 999.00
9999x PLU 1 1.00 9999.00
9x PLU 2 1.00 9.00
9.990x PLU 2 1.00 9.99
99x PLU 2 1.00 99.00
99.990x PLU 2 1.00 99.99
PLU 1 :
4-digits multiplication permitted item
[PF-5.C=YES]
PLU 2 :
4-digits multiplication prohibited item
[PF-5.C=NO]
All aligned by integer digit.
CLERK 001
Std Prices
TABLE BILL SERVER PERSON
99x
[SF-106.F=YES]

11
Note for PLU Consolidation on Receipt
- Up to 32767 pcs can be consolidated for 4-digits multiplication permitted item while 327.67 pcs for
prohibited item.
- The same PLU of 4-digits multiplication item entered with and without decimal quantity are consolidated
separately as follows:
KEY ENTRY RECEIPT
7x PLU 1 1.00 7.00
0.700x PLU 1 1.00 0.70
------------
MEDIA 08 7.70
5 X PLU 1
.5 X PLU 1
2 X PLU 1
.2 X PLU 1
CASH
[SF-35.B=YES] CONSOLIDATE BUFFER PRINT
PLU 1: [PF-2.D=YES] [PF-5.C=YES]
3-4. Manual price entry
The preset price for a PLU is over-ridden with a manually entered price (up to 7 digits).
Each PLU can have a High Amount Lock Out set to prevent large amounts from being entered.
Note: HALO is not effective unless "HALO OVERRIDE" is enabled in either X or Z1/P key positions by [SF-11.B,A].
a) Hard PLU keys / Scanner
1. Sign on a clerk.
2. Enter the price using the numeric keys.
CLERK 001
TABLE BILL SERVER PERSON
0.80
3. Press PRICE key.
4. Press one of HARD PLU keys or scan the barcode attached to commodities you wish to multiply.
The PLU will then be registered at the entered price instead of its preset price.
CLERK 001
Std Prices
TABLE BILL SERVER PERSON
Location
PLU 1 0.80
SUBTOTAL 0.80
R RECEIPT IS ON 23/08/2000 12:45
Receipt Sample
PLU 1 0.80

12
b) Coded PLUs
1. Sign on a clerk.
2. Enter the price using the numeric keys.
3. Press PRICE key.
4. Enter the PLU code.
5. Press PLU/REPEAT key.
c) Look up PLUs
1. Sign on a clerk.
2. Enter the price using the numeric keys.
3. Press PRICE key.
4. Press the required LOOK UP PLU key.
5. Select the PLU you want.
Program Options
Manually entered price can be printed in red on TP-420/422/522 or in double-height and width characters on other printers
under the setting of:
[SF-65 - KP AND DATA STREAMING]
D - EXT KP W/MANUAL PRICE
This sample is printed by TP-722.

13
3-5. Prices
PLUs have three price levels. Each price level has three prices. The best way to describe how price levels might
be used is by example;
The price levels are standard, happy hour and evening.
PLU: Whisky
Price Level 1: Standard Prices
1st price Single 1.20
2nd price Double 2.20 -- accessed by MODIFIER 1
3rd price Triple 3.20 -- accessed by MODIFIER 2
Price Level 2: Happy Hour
1st price Single 1.00
2nd price Double 2.00 -- accessed by MODIFIER 1
3rd price Triple 3.00 -- accessed by MODIFIER 2
Price Level 3: Evening Prices
1st price Single 1.30
2nd price Double 2.40 -- accessed by MODIFIER 1
3rd price Triple 3.50 -- accessed by MODIFIER 2
a) How to change price levels
You can change price levels using either PRICE SHIFT key or automatic price shift.
'Standard Prices' (price level 1) is the default price level. The price level is shifted to 'Happy Hour' or 'Evening'
using one of four methods as follows:
- Price level shift in programming
The price level is changed using the PRICE LEVEL program (SP, Z1/P-108).
- Price level shift by a PRICE SHIFT key
PRICE SHIFT key shows a list of the different price levels for selection by [SF-23.G=NO].
SELECT OPTION
SELECT PRICES
TABLE BILL SERVER PERSON
Location
1 Std Prices
2 Happy Hou
r
3 Evening
- Price level shift using individual PRICE SHIFT keys
Each price level can be selected by pressing one of PRICE SHIFT 1 ~ 3 keys by [SF-23.G=YES].
- Automatic Timed Price Shift
The price level is changed by changing the setting of PRICE LEVEL program (SP, Z1/P-108). This is convenient if
you want to change the price levels on all the ECRs in the same network at a time (using program download).
- Automatic Price Shift by Location
The price level is automatically shifted into the programmed price level by LOCATION program (SP-134).
b) How to change price within each level
The three prices within each level are accessed using MODIFIER 1 and MODIFIER 2 keys. Within each price
level 'single' is the default price; half and double (or zero) or programmable value are accessed using
MODIFIER keys. See the next section.

14
3-6. PLU modifiers (half / double, small / large, or programmable value)
There are two keys to modify a PLU's price; MODIFIER 1 key selects the second price set for each of the price
levels. MODIFIER 2 key selects the third price set (see the previous section). MODIFIER changes the price
of a PLU in accordance with its quantity value - half, double or programmed value. PLU modifier is available
on the condiment PLU as well.
[PF-2 - PLU Flag 2], H-E: for either "1", "2", "0.5" or "0" quantity value. [SF-16.E = Yes]
SP-100 PLU Modifiers for any programmable quantity, such as 10.00 or 2.22, etc. [SF-16.E = No]
In order to use this function, set [PF-2.B,A]. MODIFIER key must be pressed immediately before HARD PLU
key, Look Up PLU key or PLU code entry. (MODIFIER 1 or 2 key need to be allocated on the keyboard first.)
1. Sign on a clerk.
2. Press MODIFIER 1 or 2 key.
3. Enter PLU.
CLERK 001
Std Prices
TABLE BILL SERVER PERSON
HALF SMALL
HALF PLU 1 0.50
SUBTOTAL 0.50
R RECEIPT IS ON 23/08/2000 12:45
CLERK 001
Std Prices
TABLE BILL SERVER PERSON
DOUBLE LARGE
HALF PLU 1 0.50
DOUBLE PLU 1 2.00
SUBTOTAL 2.50
R RECEIPT IS ON 23/08/2000 12:45
Program Options
[SF-16 - Condiments]
E - PRESET MODIFIERS
[PF-2 - PLU Flag 2]
H,G - MODIFIER 2 UPDATE METHOD
F,E - MODIFIER 1 UPDATE METHOD
C - MODIFIER MESSAGES 3 & 4 NOT 1 & 2
B - MODIFIER 2 PERMITTED
A - MODIFIER 1 PERMITTED
[PF-3 - PLU Flag 3]
F - CONDIMENT NOT PRINT MODIFIER
[LUPF - Look Up PLU Flag]
F - MODIFIER REMAINS ON LOOP
Receipt Sample
HALF PLU 1 0.50
DOUBLE PLU 1 2.00
In case of fixed quantity value [SF-16.E = Yes]
Programmable texts are shown by MODIFIER 1 key.
[MODIFIER 1]-[PLU 1]
Modifier message either 'HALF' or 'SMALL' is added before PLU
name in accordance with [PF-02.C].
Programmable texts are shown by MODIFIER 2 key.
[MODIFIER 2]-[PLU 1]
Modifier message either 'DOUBLE' or 'LARGE' is added before
PLU name in accordance with [PF-02.C].
15
3-7. PLU menu levels
Up to 5 different menu levels with programmable name (SP-130, #47~49,69,70) may be programmed into the
ECR, e.g. 'Drink Menu', 'Lunch Menu', 'Dinner Menu', etc. These can be accessed at any time by either pressing
one key which brings up a choice of menu levels or by pressing the relevant menu key for each menu required
[SF-24.G], then the menu brings the pre-programmed or the standard PLUs (SP-111 & [SF-20.H]). Or you can
set the menu level by SP-109 Menu Level.
The PLU menu level may also be set to change at certain times during the day, by programming a start & finish
time by using the MENU SHIFT TIMES program (SP-162 & [SF-24.A]). There can be up to 3 start & finish
times for 4 menus (not available for Menu 1). Also, "days when menu not changed" can be selected by
programming [SF-73].
This function can be restricted to work in the X or Z1/P key positions instead of R by programming [SF-
13.H,G]. When the clerk is stored by CLERK key, the current menu level will be saved if programmed so [SF-
24.H].
Look-up PLU menu shift
A Look-up PLU is a function key, therefore menu shifts cannot be allocated in the same way as a PLU. SP-154
Look-up PLU menu shift program allows you to setup a menu shift value for the 2nd ~ 5th menu level. When
the 2nd, 3rd, 4th or 5th menu level is selected, the look-up PLU menu shift value is added to the look-up PLU
number - the look-up PLU is now shifted to the new number. For example, Look-up PLU 5 is assigned to menu
level 1 - the Look-up PLU menu shift value for menu level 2 is 10. When the menu level is changed to menu
level 2, look-up PLU number 15 is assigned to the keyboard.
Program Options
[SF-13 - Functions in X or Z <4>]
H - MENU LEVEL CHANGE - Z ONLY
G - MENU LEVEL CHANGE - Z OR X
[SF-20 - PLU]
H - ENABLE PLU MENU
[SF-24 - Menu Changes]
H - CLERK STORE RESETS LEVEL
G - KEY PRESS MENU CHANGE
F - CHANGE FOR 1 ITEM ONLY
E - CHANGE JUST FOR 1 SALE
A - TIMED MENU CHANGE
[SF-73 - Not Menu Change Days]
G - SATURDAY - DON'T CHANGE MENU LEVELS
F - FRIDAY - DON'T CHANGE MENU LEVELS
E - THURSDAY - DON'T CHANGE MENU LEVELS
D - WEDNESDAY - DON'T CHANGE MENU LEVELS
C - TUESDAY - DON'T CHANGE MENU LEVELS
B - MONDAY - DON'T CHANGE MENU LEVELS
A - SUNDAY - DON'T CHANGE MENU LEVELS

16
3-8. Price inquiry (display only)
The price enquiry function allows you to find out the price of a PLU without selling it.
1. Sign on a clerk.
2. Press PRICE.
3. Enter the PLU number and press ENTER for code entry PLU.
Or press a HARD PLU key or scan a barcode.
PRICE ENQUIRY
TABLE BILL SERVER PERSON
Location
SUBTOTAL PLU No ? <_ >
R RECEIPT IS ON 23/08/2000 12:45
4. Press CLEAR to end the price enquiry mode.
PRESS CLEAR
PLU 1 1.00
TABLE BILL SERVER PERSON
Location
SUBTOTAL
R RECEIPT IS ON 23/08/2000 12:45
3-9. Single item
Entry of a PLU programmed as a single item closes the transaction by CASH/TTL 8 automatically. This
function is especially useful for the bar.
1. Sign on a clerk.
2. Enter the PLU number and press ENTER for code entry PLU.
Or press a HARD PLU key or scan a barcode.
The transaction is closed by CASH/TTL 8 automatically.
When a PLU programmed as non-single item is entered first, the transaction is not closed even by a next single
item entry.
Program Options
[SF-70 - Tickets]
G - SINGLE ITEM ENABLED
Set "TICKET ITEM" [PF-03.C] to YES.
PLU name and price are displayed.
17
3-10. Complimentary PLUs
COMPLIMENTARY key allows you to sell PLUs at zero prices. The receipt shows the price of the
complimentary PLU but will not add it to the subtotal. Full transaction report shows the complimentary PLU
amount.
1. Sign on a clerk.
2. Press COMPLIMENTARY key.
COMPLMNTRY
TABLE BILL SERVER PERSON
Location
3. Press the required PLU.
CLERK 001
Std Prices
TABLE BILL SERVER PERSON
Location
HAMBURGER 4.00
COMPLMNTRY ORANGE JUICE 1.20
SUBTOTAL 4.00
R 23/08/2000 12:45
4. Make any further sales and cash off.
Receipt Sample
HAMBURGER 4.00
COMPLMNTRY
ORANGE JUICE 1.20
-----------
MEDIA 08 4.00
COMPLMNTRY 1.20
Complimentary PLU amount is not added to the subtotal.
printed by [SF-75.G]
Report Sample
X-03
------------FULL TRANS REPORT-------------
:
COMPLMNTRY
1 1.20
:
Complimentary PLU count, amount
Program Options
[SF-75.G] complimentary total is shown on buffer print
Complimentary PLU amount is not added to the subtotal.
18
3-11. Coupon PLUs
A coupon PLU is registered to make discount for a certain PLU or a transaction when the customer presents a
coupon or voucher.
For example if your restaurant makes an advertisement which includes two kinds of vouchers, one for 5.00 off,
one for 10.00 off. Two coupon PLUs can be set up, one for each voucher.
When a customer presents a voucher, the appropriate coupon PLU is registered. This automatically deducts the
right amount from the receipt and allows you to keep a count of each voucher that has been used by taking a
coupon PLU report.
Receipt Sample
COUPON PLU 1 -5.00
PLU 8 8.00
PLU 9 9.00
-----------
MEDIA 08 12.00
COUPON TOT 5.00
TOTAL 17.00
Coupon PLU is set by [PF-04.G] and negative polarity is
set by [SF-71.G].
Coupon total is printed by [SF-71.F].
Total sales is printed when a coupon PLU is registered.
Refer to [SF-71.C].
Report Sample
X-35
-----------COUPON PLU REPORT--------------
COUPON PLU 1
1.00 5.00
------------------------------------------
Manual price entry for coupon PLU
It is possible when manual price entry is permitted by [SF-71.E].
"TOTAL 20" memory for coupon PLU sales
The memory of "TOTAL 20" is used to accumulate coupon PLU sales (quantity and amount) by [SF-71.H]. The
coupon PLU sales is shown on the transaction reports at media section. If this is set, TOTAL 20 key can not be
used for a media key.
Program Options
[PF-4.G] COUPON PLU
[SF-71 - Coupon PLUs]
H - TOTAL 20 IS COUPON
YES = TOTAL 20 memory is used to accumulate coupon PLU sales (quantity and amount). If this is set, TOTAL 20
can not be used for a media key.
G - COUPON PLUs CAN GO NEGATIVE
F - DO NOT PRINT COUPON PLU TOTAL
E - MANUAL PRICE ENTRY OK
YES = It is possible to enter a coupon value at the time of the transaction (similar to an open PLU).
NO = Programmed coupon values are used.
D - TICKETS PRINT AT STORE
C - TOTAL SALE ALWAYS PRINTS

19
3-12. Special PLUs
This is a function to register a PLU, but not add it to sales memory. It is convenient for a special item like
Tobacco or cigarette, when it is not treated as sales commodity in a restaurant. A clerk often supplies such an
item to a customer by paying in advance in his/her place (buying from vending machines, etc.) and get
reimbursed later.
Receipt Sample
HAMBURGER 4.00
ORANGE JUICE 1.20
CIGARETTE 2.00
-----------
MEDIA 08 7.20
normal PLU
normal PLU
special PLU
Report Sample
X-41
---------------FULL PLU REPORT----------------
HAMBURGER
1.00 4.00a
------------
1.00 4.00
ORANGE JUICE
1.00 1.20a
------------
1.00 1.20
----------------------------------------------
ALL PLUS
Std Prices <a>
2.00 5.20
------------
2.00 5.20
X-39
-----------FULL SPECIAL PLU REPORT------------
CIGARETTE
1.00 2.00a
------------
1.00 2.00
----------------------------------------------
ALL PLUS
Std Prices <a>
1.00 2.00
------------
1.00 2.00

20
When a transaction is closed by the media which is set to "not to reimburse SPECIAL PLU amount to clerk"
[MF-04.A], it is considered that SPECIAL PLU charge amount is not reimbursed to the clerk, so the amount is
accumulated in SPECIAL PLU NOT REIMBURSED AMOUNT to be paid back from Manager after his job
finished.
For instance, in case of CARD MEDIA closing, SPECIAL PLU charge amount can not be collected by the
clerk. In case of CASH/TTL 8 (local media) closing, it is considered as collectable regardless of this flag
setting.
Example:
HAMBURGER 4.00 NORMAL PLU
ORANGE JUICE 1.20 NORMAL PLU
CIGARETTE 2.00 SPECIAL PLU
MEDIA 01 CARD MEDIA [MF-04.A=NO]
MEDIA 08 LOCAL MEDIA
Registration
BILL#
1
ENTER
HAMBERGER
ORANGE JUICE
CIGARETTE
NB
(no receipt is printed here)
Clerk Report
User Text #111
User Text #109
X-11
----------------FULL CLERK REPORT-------------
CLERK 001
COMMISSION
%0.00 0.00
NET CHARGE 7.20
TRANS.OUT 0.00
------------
TOTAL 7.20
SALES TYPE 1 5.20
------------
TOTAL 5.20
ADD-ON TAX 0.00
TRAN.IN 0.00
------------
TOTAL 5.20
S.PLU SALE 2.00
------------
TOTAL 7.20
----------------------------------------------
VAT TAX 0.00
NET SALES 5.20
----------------------------------------------
S.PLU CHRG 2.00
media total
sales total
special PLU sales total
sales total + special PLU sales
special PLU charge
incremented by NB closing

21
Registration
1 BILL#
100 MEDIA 08
MEDIA 01
----------------------------------------------
BILL 1
----------------------------------------------
HAMBURGER 4.00
ORANGE JUICE 1.20
CIGARETTE 2.00
-----------
SUBTOTAL 7.20
MEDIA 08 1.00
CARD 6.20
4504481404124
EXP DATE : 11/01
Clerk Report
"1.00" tendered by MEDIA 08
is deducted from SPECIAL
PLU charge amount, and the
rest is accumulated in
NOT REIMBURSED AMOUNT
User Text #110
MEDIA 01
1 6.20
MEDIA 08
1 1.00
------------
TOTAL 7.20
NET CHARGE 7.20
TRANS.OUT 0.00
------------
TOTAL 7.20
X-REPORTS 1
TRANSACTIONS 1
SALES TYPE 1 5.20
------------
TOTAL 5.20
ADD-ON TAX 0.00
TRAN.IN 0.00
------------
TOTAL 5.20
S.PLU SALE 2.00
------------
TOTAL 7.20
----------------------------------------------
VAT TAX 0.00
NET SALES 5.20
----------------------------------------------
S.PLU NRCV 1.00
media total does not match
Sales Total because Special
PLU is not added to sales
amount:
Media Total = Sales Total +
Special PLU Sales Total
sales total
special PLU sales total
sales total + special PLU sales
special PLU not reimbursed
amount
Program Options
[PF-05 - PLU Flag 5]
F - SPECIAL PLU
[MF-04 - Media Flag 4]
A - Media to reimburse SPECIAL PLU amount to clerk (CASH/TTL 8 always reimbursed)
Limitations
- Do not set "COUPON PLU" [PF-04.G].
- ITEM % is prohibited after SPECIAL PLU registration.
- SUBTOTAL % affects the subtotal excluding SPECIAL PLU subtotal.
- In order to prevent Price Shift for SPECIAL PLU, set the same price for all price levels.
- Not transferred to kitchen printer.
Note for Clerk Track Transfer with Special PLU --- Refer to page 100.
22
3-13. Cooking instructions
Cooking instructions are messages which are sent to the order (kitchen) printer with PLUs. They can be entered
by following methods:
a) By linking them directly to specified PLUs in programming
b) By pressing a COOKING 1 ~ 64 keys
c) Cooking instruction group 1 is listed by pressing COOKING MESSAGE key
d) Manual cooking message entry by pressing MANUAL COOKING key
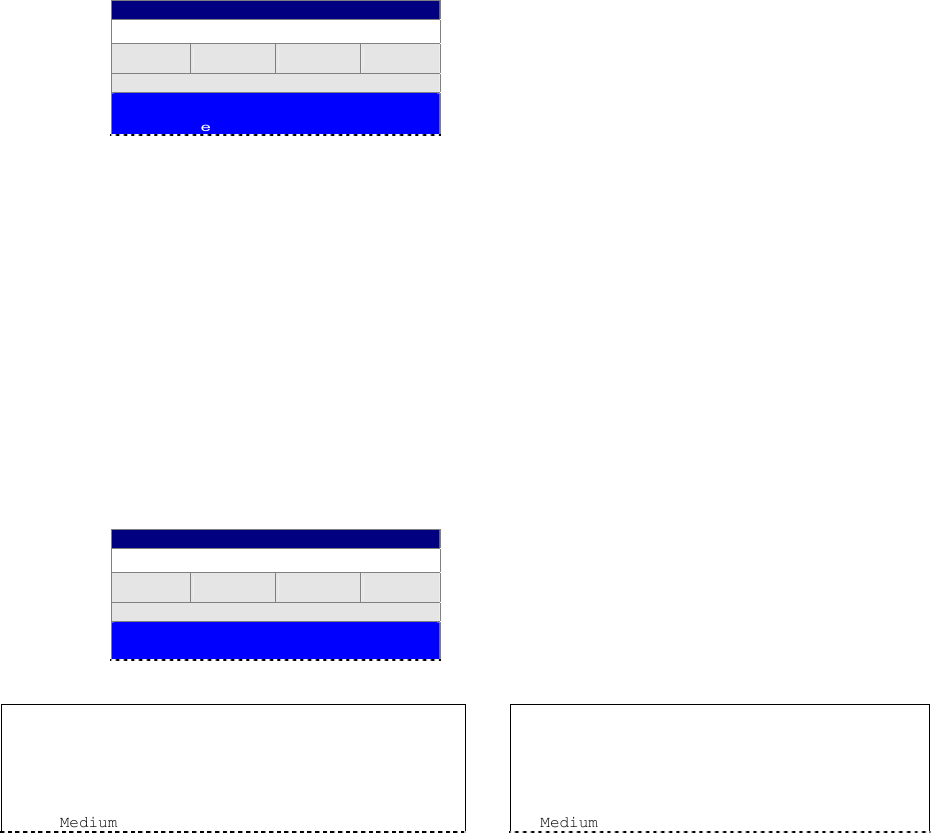
a) By linking them directly to specified PLUs in programming (SP-122 PLUs: COOK = 1~20)
Up to 8 of 64 cooking instructions (by SP-132) can be linked to one of 20 cooking instruction groups (by SP-
126). A cooking instruction group can be linked to a PLU (by SP-122) so that up to 8 cooking instructions are
automatically displayed for selection when a PLU is registered.
1. For example, PLU "STEAK" could have Cooking Instruction Group 1. Cooking Instruction Group 1 includes
cooking instructions; "rare", "medium" and "well-done".
2. Press PLU "STEAK". Then following programmed cooking instructions are displayed.
SELECT OPTION
STEAK
TABLE BILL SERVER PERSON
Location
1 rare
2 medium
3 well-done
3. Select one of cooking instructions by ENTER or by numeric key or press CLEAR to end.
b) By pressing a COOKING 1 ~ 64 keys (SP-122 PLUs: COOK = 0)
By pressing one of COOKING 1~64 keys or COOKING MESSAGE key followed by cooking message
number, the cooking instructions (programmed by SP-132) are registered after a PLU entry.
1. For example, if COOKING 1 to 3 keys for the following purpose are allocated on the keyboard.
COOKING 1: rare
COOKING 2: medium
COOKING 3: well-done
2. Press PLU "STEAK".
3. Press one of COOKING 1 ~ 3.
CLERK 001
Std Prices
TABLE BILL SERVER PERSON
Location
STEAK 10.00
medium
Internal KP Receipt
----------------------------------------------
--> KP: 1
----------------------------------------------
--CATEGORY 3--
STEAK
Medium
************
* Your *
*
Receipt
*
*
Thank You
*
************
STEAK 10.00
Medium

23
c) Cooking instruction group 1 is listed by pressing COOKING MESSAGE key (SP-122
PLUs: COOK = 0)
By pressing COOKING MESSAGE key followed by a KP item, the cooking instruction group 1 (by SP-126) is
listed by [SF-21.F=YES] to allow the selection of a cooking instruction.
d) Manual cooking message entry by pressing MANUAL COOKING key
MANUAL COOKING key is used to enter a maximum of 20 characters of the cooking message. It can be
pressed after any KP item entered. In order to use this function, set MANUAL COOKING INSTRUCTION
[SF-65.C=YES].
1. Sign on a clerk.
2. Enter a PLU for KP.
3. Press MANUAL COOKING key.
4. Type in the characters (max. 20) by using the alphabet keys.
5. Press ENTER.
CLERK 001
Std Prices
TABLE BILL SERVER PERSON
Location
STEAK 10.00
medium
Program Options
[PF-04 - PLU Flag 4]
H - COOKING INSTRUCTIONS COMPULSORY
[SF-21 - Groups/GT/Clerks]
F - COOKING GROUP 1 LISTED
NO = COOKING MESSAGE key does not list Cooking Instruction Group 1 but registers COOKING 1 message.
[SF-36 - Buffer Print <2>]
A - DO NOT PRINT COOKING MESSAGES
NO = Cooking instructions are printed on receipt.
[SF-39 - Correction]
H - CANNOT DELETE COOKING INSTRUCTIONS
[SF-42 - KP Control]
E - COOKING INSTRUCTIONS PRINT IN RED
Manual cooking message is displayed in red while
preprogrammed cooking message is in yellow.
Print format is the same for manual and
preprogrammed cooking message.

24
3-14. Condiments
A condiment PLU is a supplementary item subject to a main PLU. It is always sold together with a main PLU.
There are two entry methods by programming [PF-05.A] as follows:
- Condiment entry from the condiment group [PF-05.A=NO]
- Independent condiment PLU entry [PF-05.A=YES]
a) Condiment entry from the condiment group [PF-05.A=NO]
Condiment PLUs are organized into condiment groups which are linked to normal PLUs. Max. 25 groups are
programmable with up to 8 condiment PLUs included in each group.
A maximum of 5 condiment groups can be linked to a PLU (by SP-122) so that 8 condiment PLUs of each group
are automatically displayed for selection when the PLU is registered.
1. For example, PLU "FILLET STEAK" linked to condiment group 1. Condiment group 1 contains condiment
PLUs "NEW POTATOES" and "CHIPS".
2. Press PLU "FILLET STEAK". Then the screen is automatically showing the condiment PLUs, thus
prompting the clerk to ask the customer to select an option.
SELECT CONDIMENT
CONDIMENT GRP 1
TABLE BILL SERVER PERSON
Location
1 NEW POTATOES
2 CHIPS
3. Choose an item by cursor and press ENTER to select the condiment PLU, or enter the number by numeric
key. The condiment screen can be cleared after one condiment selection or can stay to choose more until
CLEAR key pressed depending on the settings.
CLERK 001
Std Prices
TABLE BILL SERVER PERSON
Location
FILLET STEAK 20.00
NEW POTATOES
Order Print Sample (Internal KP Print)
Internal KP Receipt
----------------------------------------------
--> KP: 1
----------------------------------------------
--CATEGORY 3--
FILLET STEAK
NEW POTATOES
************
* Your *
*
Receipt
*
*
Thank You
*
************
FILLET STEAK 20.00
NEW POTATOES

25
b) Independent condiment PLU entry [PF-05.A=YES]
Independent condiment PLUs can be directly entered immediately after a main PLU.
If you allocate a condiment PLU to a Hard PLU, then you can enter it by a single key depression. If you assign
condiment PLUs to a Look Up PLU, then the potentiality of choice of condiments expands up to the sum of the
kinds of Look Up PLU x 40 condiments. It is not limited to 8 condiments (linked to a condiment group) any
more.
Operation
1. Enter a main PLU.
2. Enter a condiment PLU by pressing a Hard PLU key or by entering PLU code with PLU/REPEAT key.
3. Enter a next condiment PLU if required.
Multiplication
1. Enter a quantity and press X key.
2. Enter a main PLU.
3. Enter a condiment PLU.
In case [SF-16.A=NO]
CLERK 001
Std Prices
TABLE BILL SERVER PERSON
Location
5.00 STEAK 50.00
5.00 GARLIC BREAD
MULTIPLE PLU WITH INDIVIDUAL CONDIMENT [SF-16.A]
YES = For Condiment entry from the condiment group:
When a main PLU is multiplied (e.g. 5 X Steak), each linked condiment group list is shown as many times as
multiplication (e.g. 5 times each) , allowing different condiments to be selected individually.
For Independent condiment PLU entry:
Even if a main PLU is multiplied, a condiment PLU is registered with quantity 1 so the condiment PLU must be
entered for the appropriate times if required.
NO = For both ways of condiment entry:
When a main PLU is multiplied (e.g. 5pcs), a condiment PLU is registered with the same quantity as a main PLU
automatically (e.g. 5pcs as well).
Notes
- Independent condiment PLU can not be entered without a main PLU entry.
- Multiplication and manual price entry is not possible either for independent condiment PLU entry.
- If "Independent condiment PLU" [PF-05.A] is set, the PLU is only sold as condiment even if "Only sold as
condiment" [PF-01.F] is not set.
In case [SF-16.A=YES]
CLERK 001
Std Prices
TABLE BILL SERVER PERSON
Location
5.00 STEAK 50.00
GARLIC BREAD
Only one condiment PLU is registered so repeat the
entry if required more.
26
Program Options
[PF-01 - PLU Flag 1]
F - ONLY SOLD AS CONDIMENT
[PF-03 - PLU Flag 3]
G - SOLD AS CONDIMENT - CHARGEABLE
F - CONDIMENT NOT PRINT MODIFIER
[PF-04 - PLU Flag 4]
F - CONDIMENT GROUP 5 IS LINK
YES = Condiment Group 5 of this PLU refers to Look Up PLU and it is used for link PLUs. See [SF-20.E] also.
NO = Condiment Group 5 of this PLU is used for the normal condiment group same as 1 - 4.
E - DISPLAY CONDIMENT GROUP 5 UNTIL CLEAR
D - DISPLAY CONDIMENT GROUP 4 UNTIL CLEAR
C - DISPLAY CONDIMENT GROUP 3 UNTIL CLEAR
B - DISPLAY CONDIMENT GROUP 2 UNTIL CLEAR
A - DISPLAY CONDIMENT GROUP 1 UNTIL CLEAR
[PF-05 - PLU Flag 5]
A - INDEPENDENT CONDIMENT PLU
[SF-16 - Condiments]
H - MANUAL PLU PRICE PROHIBITED
D - PLU FOLLOWS CONDIMENT TO KP
C - CONDIMENT USES OWN KP
B - CONDIMENT WITH ZERO PRICE PRINTED
A - MULTIPLE PLU WITH INDIVIDUAL CONDIMENT
[SF-39 - Correction]
G - CANNOT DELETE CONDIMENTS
[SF-42 - KP Control]
D - CONDIMENTS PRINT IN RED
[SF-85 - Item Count]
G - PLU CONDIMENT COUNT IS PRINTED

29
3-16. Automatic link PLUs (expanded Look Up PLU function)
Automatic link PLU function provides a fixed set menu by a main PLU entry. Main PLU will have either up to
40 chained PLUs or only one link PLU. This function uses:
- a look up PLU
- 5th condiment group
- "Condiment group 5 is link" [PF-04.F] of the main PLU
- "Linked PLU is / is not chained" [SF-20.E].
Note: The number of condiment groups that can be linked to a PLU is reduced to 4 because 5th condiment group is used as
link.
a) Chained up to 40 PLUs [SF-20.E=YES, PF-04.F=YES]
You can register a main PLU and other PLUs in a linked look up PLU by a depression of single key. According
to the setting, there are several format on demand. For example,
Receipt Sample 1 -- zero priced main PLU with chargeable linked PLUs
When a main PLU is registered, three chargeable linked PLUs are automatically registered.
CHILD'S PIZZA
SMALL PIZZA 2.99
MEDIUM DRINK 1.29
TOY 0.99
-----------
MEDIA 08 5.27
main PLU (if it is not zero price, price is always printed)
link PLU
link PLU
link PLU
(main PLU price is added to the total if it is not zero price)
Settings
Set "LINKED PLU IS CHAINED" [SF-20.E] to YES by SP-113 - System Function Flags.
Main PLU
Child's Pizza
Set main PLU price to zero by SP-122 - PLUs.
Set look up PLU key number (in this case "3") to COND 5 by SP-122.
Set PLU function flags:
[PF-01.G=YES] Zero price permitted
[PF-04.F=YES] Condiment group 5 is link
Look Up PLU 3 Assign following link PLUs by SP-140 - Look Up PLUs.
(set this look up PLU number to condiment group 5 of main PLU setting)
Link PLU #1
Small Pizza
Set PLU price.
Set [PF-03.G=YES] Sold as condiment - chargeable
Link PLU #2
Medium Drink
Same setting as above.
Link PLU #3
Toy
Same setting as above.

30
Receipt Sample 2 -- main PLU entry with non-chargeable linked PLUs
When a main PLU is registered, three non-chargeable linked PLUs are automatically registered. There are several print
formats as shown below:
CHILD'S PIZZA 5.00
SMALL PIZZA
MEDIUM DRINK
TOY
-----------
MEDIA 08 5.00
main PLU
Zero priced link PLUs are printed without price
by [SF-16.B=NO], [SF-36.B=NO].
CHILD'S PIZZA 5.00
-----------
MEDIA 08 5.00
Zero priced link PLUs are not printed by [SF-36.B=YES].
Link PLUs are always printed on kitchen printer and
always displayed.
Settings
Set "LINKED PLU IS CHAINED" [SF-20.E] to YES by SP-113 - System Function Flags.
Main PLU
Child's Pizza
Set main PLU price by SP-122 - PLUs.
Set look up PLU key number (in this case "3") to COND 5 by SP-122.
Set PLU function flag: [PF-04.F=YES] Condiment group 5 is link
Look Up PLU 3 Assign following four link PLUs by SP-140 - Look Up PLUs.
(set this look up PLU number to condiment group 5 of main PLU setting)
Link PLU
Small Pizza
[PF-01.G=YES] Zero price permitted
[PF-03.G=NO] condiment - non-chargeable
Link PLU
Medium Drink
Same setting as above.
Link PLU
Toy
Same setting as above.
31
b) One link PLU (unchained) [SF-20.E=NO, PF-04.F=YES]
When "LINKED PLU IS NOT CHAINED" [SF-20.E] is selected, each main PLU can have only one PLU.
When the main PLU is pressed, one of the pre-programmed PLUs contained in the look up PLU 1 is sold
automatically (can not be selected manually at transaction time).
When a main PLU is registered, one linked PLU is automatically registered. Then set PLUs as follows:
HAMBURGER 5.00
MEDIUM DRINK
-----------
MEDIA 08 5.00
main PLU
Zero priced link PLU [PF-01.G=YES] is printed without
price by [SF-16.B=NO], [SF-36.B=NO].
HAMBURGER 5.00
-----------
MEDIA 08 5.00
Zero priced link PLUs are not printed by [SF-36.B=YES].
Link PLU is always printed on kitchen printer and always
displayed.
HAMBURGER 5.00
MEDIUM DRINK 1.29
-----------
MEDIA 08 6.29
-- always printed when price is set to link PLU
Settings
Set "LINKED PLU IS CHAINED" [SF-20.E] to NO by SP-113 - System Function Flags.
Main PLU
Hamburger
Set main PLU price by SP-122 - PLUs.
Set a PLU number assigned in LOOK UP PLU 1 key (in this case link PLU # 2) to COND 5 by
SP-122.
Set PLU function flag: [PF-04.F=YES] Condiment group 5 is link
Look Up PLU 1
Assign link PLUs to look up PLU 1 by SP-140 - Look Up PLUs.
Link PLU #1
Link PLU #2
Medium Drink
Set [PF-03.G=YES] Sold as condiment - chargeable
Link PLU #3
33
Operation
1. Sign on a clerk.
2. Enter a main PLU which has been programmed as "set menu item". The first course (Starter) is appeared.
SELECT OPTION
Sunday Special - Starter
TABLE BILL SERVER PERSON
Location
1 Scotch Broth
2 Garlic Bread
3 Prawn Cocktail
4 Smoked Salmon
3. Select a required item and any cooking instructions/condiments are offered as well if linked to the item.
Note: If you want to cancel the Set Menu, press CLEAR key at this point.
CLERK 001
Std Prices
TABLE BILL SERVER PERSON
Location
Sunday Special CORRECTED
4. The second course (Side Dish) is appeared.
SELECT OPTION
Sunday Special - Side Dish
TABLE BILL SERVER PERSON
Location
1 Seafood Salad
2 Fruit Salad
3 Ham Omelet
5. Select an item for Side Dish and any cooking instructions/condiments if linked.
6. Third course is offered if it is programmed.
SELECT OPTION
Sunday Special - Main Dish
TABLE BILL SERVER PERSON
Location
1 Roast Beef
2 Halibut Steak
3 Roast Turkey
7. A bill/table number may be allocated and the transaction stored.
When the remaining courses are required to be added, pick-up the track. For the first of the remaining courses
- the 4th course (Desserts) - may be offered by programming option "PLUs offered at track pickup" [SF-16.G].
8. Press SET MENU OPTION 1 key for the 4th course. CLEAR key cancels the 4th course selection.
SELECT OPTION
Sunday Special - Desserts
TABLE BILL SERVER PERSON
Location
1 Sherry Trifle
2 Apple Pie
3 Fruit Cocktail
34
9. SET MENU OPTION 2 key will offer the final course. CLEAR key cancels the 5th course selection.
SELECT OPTION
Sunday Special - Beverages
TABLE BILL SERVER PERSON
Location
1 Coffee
2 Tea
10. Assign bill and table numbers if required.
CLERK 001
Std Prices
TABLE
5
BILL
1 SERVER PERSON
Location
Sunday Special 10.00
Scotch Broth 0.00
Seafood Salad 0.00
Halibut Steak 5.00
Apple Pie 0.00
Coffee 0.00
Receipt Sample
------------------------------------------
BILL 1
TABLE 5
------------------------------------------
Sunday Special 10.00
Scotch Broth
Seafood Salad
Halibut Steak 5.00
Apple Pie
Coffee
-----------
MEDIA 08 15.00
supplementary charge is set by PLU program "Extra Price" field.
Options
1. "PLU offers at pick up" [SF-16.G] automatically prompts the operator for remaining courses when the track is picked up.
If both 4th and 5th courses exist, at this time only the first one is presented. In order for the last course to be presented,
the operator must either store the track and pick it up again or press SET MENU OPTION 2 key.
2. Individual set menu items are not printed if "Do not print set menu items on bill or buffer" [SF-64.F] is set. However,
they will appear if they have an extra price for a supplementary charge.
------------------------------------------
BILL 1
TABLE 5
------------------------------------------
Sunday Special 10.00
Halibut Steak 5.00
-----------
MEDIA 08 15.00
supplementary charge is set by PLU program "Extra Price" field.

36
3-18. Topping (expanded Look Up PLU function)
Look Up PLUs may be designated to be Topping Lists. Selection of Topping Lists is only permitted when
immediately proceeded by a main PLU which is programmed as "Topping is permitted".
All item selections from Topping List are treated as condiment PLUs and as such will be sent to the same KP as
the main PLU. Topping List always remains until clear thus allowing for multiple selection from the list of up to
40 toppings.
a) Selectable topping lists - by pressing one of Look Up PLU keys
Immediately after a main PLU entry, one of LOOK UP PLU keys shows the topping list by the settings below:
Settings
Look Up PLU This Look Up PLU is treated as a Topping List [LUPF-E]
Main PLU Topping is permitted [PF-05.G]
Operation
1. Enter a main PLU which is programmed to "Topping is permitted".
2. Press one of LOOK UP PLU keys and select Topping item from the list.
SELECT OPTION
Pizza Topping
TABLE BILL SERVER PERSON
Location
1 onion
2 corn
3 tomato
4 olive
5 green pepper
6 tuna
7 salmon
8 crab
---MORE---
3. Select more Topping items as required. To end the selection, press CLEAR key.
Once CLEAR key has been pressed it will NOT be possible to select any more Topping items until another
Main PLU programmed to "Topping is permitted" has been sold.
Receipt Sample
SEAFOOD PIZZA 10.00
tuna
crab
tomato
-----------
MEDIA 08 10.00
main PLU
Zero priced Topping PLUs are printed by [SF-16.B=NO],
[SF-36.B=NO].
(Toppings are chargeable if "Sold as condiment -
chargeable" [PF-03.G] is selected.)

37
b) Pre-programmed topping list - automatic topping list
Immediately after a main PLU entry, pre-programmed Look Up PLU for Topping List is appeared by the
settings below:
Settings
Look Up PLU This Look Up PLU is treated as a Topping List [LUPF-E]
Main PLU Topping is permitted [PF-05.G]
Set menu [PF-05.H]
Set one of Look Up PLUs to Condiment 1.
Operation
1. Enter a main PLU. Then Topping List is appeared automatically. Select Topping items from the list.
SELECT OPTION
Pizza Topping
TABLE BILL SERVER PERSON
Location
1 onion
2 corn
3 tomato
4 olive
5 green pepper
6 tuna
7 salmon
8 crab
---MORE---
2. Select more Topping items as required. To end the selection, press CLEAR key.
Once CLEAR key has been pressed, it will NOT be possible to select any more Topping items until another
Main PLU programmed to "Topping is permitted" has been sold.
Receipt Sample
SEAFOOD PIZZA 10.00
tuna
crab
tomato
-----------
MEDIA 08 10.00
main PLU
Zero priced Topping PLUs are printed by [SF-16.B=NO],
[SF-36.B=NO].
(Toppings are chargeable if "Sold as condiment -
chargeable" [PF-03.G] is selected.)
38
3-19. Take out / Eat in system with Combo menu (expanded Look Up PLU function)
This function is convenient for the business where different prices are adopted depending on the way of sales -
for instance between Take Out and Eat In.
There are keys EAT IN, TAKE OUT and DELIVERY to be pressed to indicate the way of sales for a
transaction, which is shown on the front display and printed as the header on each receipt. You can program
different price levels to "EAT IN", "TAKE OUT" and "DELIVERY", which is automatically adopted. Thus you
can have the analysis of transaction sales data of "EAT IN", "TAKE OUT", "DELIVERY" and PLU sales data of
each price level.
The idea of Combo menu is to make a transaction by single key as a set menu, but with original price data of
each PLU and discounted amount for a set menu. Hence precise stock/sales control is possible.
Before using this function,
- Allocate EAT IN, TAKE OUT and DELIVERY keys by SP-110.
- Select "TAKE OUT SYSTEM" [SF-100.H] by SP-113.
- Set other flags SF-100 for the link with Price Level Shift (refer to b) and SF-101 if required.
Program Options
[SF-100 - Take Out System <1>]
H - TAKE OUT SYSTEM
G - COMPULSORY AT START
[SF-101 - Take Out System <2>]
H - DONT PRINT TOTAL SALES
NO = Total sales including coupon PLU sales printed.
When coupon PLU is not registered, this line is not printed.
G - RELEASE BILL# COMPULSORY IF TAKE OUT
F - RELEASE TABLE# COMPULSORY IF TAKE OUT
E - RELEASE SERVER COMPULSORY IF TAKE OUT
D - RELEASE PERSON COMPULSORY IF TAKE OUT
C - RELEASE LOCATION COMPULSORY IF TAKE OUT
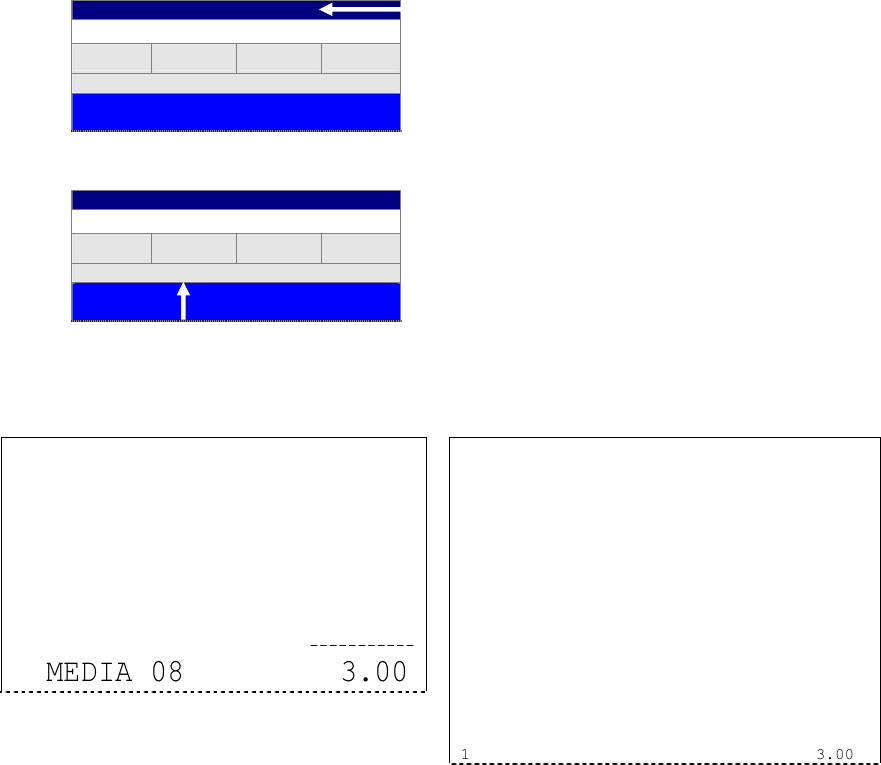
39
a) Eat in/Take out operation
1. Turn the control key to R position.
2. Sign on a clerk.
3. WARNING 99 "EAT IN/ TAKE OUT?" is displayed with buzzer if [SF-100.G] is set to YES.
EAT IN/TAKE OUT?
Std Prices
TABLE BILL SERVER PERSON
Location
4. Press EAT IN or TAKE OUT key.
CLERK 001
Std Prices
TABLE BILL SERVER PERSON
EAT IN Location
5. Entry of item and finalization of the transaction proceeds as normal.
Receipt Sample Report Sample
************
* Your *
*
Receipt
*
*
Thank You
*
************
------------------------------------------
EAT IN
------------------------------------------
PLU 1 1.00
PLU 2 2.00
-----------
MEDIA 08 3.00
X-03
-------------FULL TRANS REPORT------------
:
:
------------------------------------------
MEDIA 08
3 12.60
-----------
12.60
TRANSACTIONS 3
EAT IN
1 3.00
TAKE OUT
1 6.60
DELIVERY
1 3.00
b) Eat in/Take out operation with Price Level Shift
The price level of items entered with EAT IN/TAKE OUT/DELIVERY keys can be programmed by [SF-100
and 107]. Then you will see the sales amount of items sold as EAT IN, TAKE OUT and DELIVERY
respectively on the PLU price level 1 ~ 3 reports #51 ~ 56.
For example,
Price level 1 is used for EAT IN [SF-100.C-A = NNY].
Price level 2 is used for TAKE OUT [SF-100.F-D = NYN].
Price level 3 is used for DELIVERY [SF-107.C-A = NYY].
In this case, items entered with EAT IN key are automatically shifted to price level 1, TAKE OUT key shifts
the price level of items to price level 2 and DELIVERY key shifts the price level of items to price level 3.
Then, you will see the sales amount of;
Items sold by EAT IN are shown on the reports #51, 52 FULL PLU <a>.
Items sold by TAKE OUT are shown on the reports #53, 54 FULL PLU <b>.
Items sold by DELIVERY are shown on the reports #55, 56 FULL PLU <c>.
Warning message #99
User Text #107 for EAT IN
User Text #108 for TAKE OUT
User Text #112 for DELIVERY

40
Receipt Sample
------------------------------------------
TAKE OUT
------------------------------------------
PLU 3 2.80
PLU 4 3.80
-----------
MEDIA 08 6.60
TAKE OUT key shifts the price level of items to price level 2.
Report Sample (PLU price level 2 report)
X-53
-----------FULL PLU <b> REPORT------------
PLU 3
1.00 2.80
PLU 4
1.00 3.80
-----------
ALL PLUS
2.00 6.60
Note for EAT IN/TAKE OUT switching
When Eat In/Take Out/Delivery are linked with Price Level Shift by [SF-100.F-A, SF-107.C-A], the
change of modes is prohibited in a transaction.
If the same price level is used for all modes, then it is allowed to change Eat In, Take Out and Delivery
modes during a transaction. This is to prevent having different priced PLUs in the same transaction.
(Please note the last chosen mode is printed as the receipt header in the latter case.)
Program Options
[SF-100 - Take Out System <1>]
F - PRICE LEVEL SHIFT <EAT IN>
E - PRICE LEVEL SHIFT <EAT IN>
D - PRICE LEVEL SHIFT <EAT IN>
C - PRICE LEVEL SHIFT <TAKE OUT>
B - PRICE LEVEL SHIFT <TAKE OUT>
A - PRICE LEVEL SHIFT <TAKE OUT>
F,E,D/C,B,A=
[NNN] No shift (Price level follows the setting by SP-108 Price Level.)
[NNY] Price level 1
[NYN] Price level 2
[NYY] Price level 3
When EAT IN or TAKE OUT key is pressed, the price levels of items are shifted to programmed level.
[SF-107 - TAKE OUT SYSTEM <3>]
C - PRICE LEVEL SHIFT <DELIVERY>
B - PRICE LEVEL SHIFT <DELIVERY>
A - PRICE LEVEL SHIFT <DELIVERY>
C,B,A=
[N,N,N] NO SHIFT
[N,N,Y] PRICE LEVEL 1
[N,Y,N] PRICE LEVEL 2
[N,Y,Y] PRICE LEVEL 3

41
c) Eat in/Take out operation with Combo Menu
Combo menu can be programmed by using the chained link PLU function;
If you program a Look Up PLU key number to COND5 of a main PLU, all the PLUs assigned in the Look Up
PLU key are automatically registered when a main PLU is entered.
Combo Menu Setting Example
- Have a main PLU with zero price.
- Create a special Look Up PLU with all the components of a combo menu assigned, but with normal prices.
- Assign a coupon PLU to function as discount for a whole combo menu.
- Set "LINKED PLU IS CHAINED" [SF-20.E] to YES by SP-113 - System Function Flags.
Main PLU
Child's Pizza
Set main PLU price to zero by SP-122 - PLUs.
Set look up PLU key number (in this case "1") to COND 5 by SP-122.
Set PLU function flags:
[PF-01.G=YES] Zero price permitted
[PF-04.F=YES] Condiment group 5 is link
Look Up PLU 1 Assign following four link PLUs by SP-140 - Look Up PLUs.
(set this look up PLU number to condiment group 5 of main PLU setting)
Link PLU
Small Pizza
Set PLU price.
Set [PF-03.G=YES] Sold as condiment – chargeable
Link PLU
Medium Drink
Set PLU price.
Set [PF-03.G=YES] Sold as condiment – chargeable
Link PLU
Toy
Set PLU price.
Set [PF-03.G=YES] Sold as condiment – chargeable
Link PLU
Child Coupon
Set PLU price.
Set [PF-04.G=YES] Coupon PLU
Set [PF-03.G=YES] Sold as condiment – chargeable
Set [SF-71.G] when coupon PLUs are negative.
Receipt Sample
------------------------------------------
EAT IN
------------------------------------------
CHILD'S PIZZA
SMALL PIZZA 2.99
MEDIUM DRINK 1.29
TOY 0.99
CHILD COUPON -1.28
-----------
MEDIA 08 3.99
COUPON TOT 1.28
TOTAL 5.27
main PLU
link PLU
link PLU
link PLU
coupon PLU
Coupon total is printed by [SF-71.F=NO]
Printed by [SF-101.H=NO]
Total sales including coupon PLU sales printed. When
coupon PLU is not registered, this line is not printed.
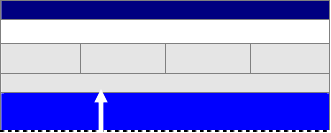
42
d) Mode selection for take-out system
< Per Machine >
When a clerk is signed on, ECR gets into one of selected modes automatically by [SF-101.B,A] selection.
CLERK 001
Std Prices
TABLE BILL SERVER PERSON
EAT IN Location
You can change the mode by pressing EAT IN, TAKE OUT or DELIVERY key only when the price levels for
Eat In, Take Out and Delivery are the same. Refer to "Note for EAT IN/TAKE OUT/DELIVERY switching" on
the previous page for details.
Note for Track Pick Up with EAT IN/TAKE OUT/DELIVERY mode
Temporarily closed tracks are picked up with the respective Eat In, Take Out or Delivery information.
However, after some items are entered under the programmed mode by [SF-101.B,A] and the
temporarily closed track is picked up, the mode previously assigned to the track is disregarded.
Program Options
[SF-101 - TAKE OUT SYSTEM <2>]
B - MACHINE SET AS
A - MACHINE SET AS
[B,A]=
[N,Y] Eat in mode, [Y,N] Take out mode, [Y,Y] Delivery mode, [N,N] Normal mode
< Per Clerk >
When clerk signs on, ECR automatically changes one of programmed Eat in/Take out/Delivery modes in Take
Out System by selecting [CF-2.C,B]. Also, the price level can be shifted automatically when the clerk signs on
by selecting [SF-100.F-A, SF-107.C-A].
Program Options
SP-123 Clerks
[CF-2 - Clerk Flag 2]
C, B - MODE FOR TAKE OUT SYSTEM [SF-100.H=YES, SF-101.B,A=NO,NO]
C, B =
[N,Y] Eat in mode, [Y,N] Take out mode, [Y,Y] Delivery mode, [N,N] Normal mode
Condition: In order to use this function, following flags must be selected.
[SF-100.H=YES] TAKE OUT SYSTEM
[SF-101.B,A=NO,NO] MACHINE SET AS: Normal mode
Note for Price Level Shift for Take Out System
When the following price level shift flags are also selected, the price level is shifted when the clerk signs on.
[SF-100 - Take Out System <1>]
F,E,D - PRICE LEVEL SHIFT <EAT IN>
C,B,A - PRICE LEVEL SHIFT <TAKE OUT>
[SF-107 - Take Out System <3>]
C,B,A - PRICE LEVEL SHIFT <DELIVERY>
[SF-101.B,A]=NO,YES
43
e) Kitchen Printer for take-out and delivery items
In addition to the normal KP selection, when items are entered in Take Out or Delivery mode and the transaction
is closed, they are automatically transferred to and printed on the KP programmed by [SF-108]. When [SF-108]
is set to NO, KP items in Take Out/Delivery mode printed on the normal KP selection. This function is not
available for the items in Eat In mode.
Note: When KP REDIRECT key is used to send the items to KP, the selection of [SF-108] is disregarded and
the items are printed on the different KP which programmed by "KP BACK UP" [SF-43,44].
Program Options
[SF-108 - TAKE OUT/DELIVERY KP REDIRECT]
H - KP 8 PRINTS TO BACK UP
G - KP 7 PRINTS TO BACK UP
F - KP 6 PRINTS TO BACK UP
E - KP 5 PRINTS TO BACK UP
D - KP 4 PRINTS TO BACK UP
C - KP 3 PRINTS TO BACK UP
B - KP 2 PRINTS TO BACK UP
A - KP 1 PRINTS TO BACK UP
YES = KP 1~8 items printed on back up KP programmed by [SF-43,44].
NO = KP 1~8 items printed on KP 1~8.

46
EAT-IN ([GF-2.G=NO] is selected for Food & Beverage)
------------------------------------------------
EAT IN
------------------------------------------------
COLA 2.00
7UP 2.00
BEER 3.00
POMMES 4.00
SALAD 5.00
STEAK 8.00
------------
MEDIA 08 24.00
TAX SALES1 20.69
TAX 1 3.31
taxable 1 [PF-1.D-A]
"
"
"
"
"
TAKE-OUT ([GF-2.F=YES] is selected for Food Item)
------------------------------------------------
TAKE OUT
------------------------------------------------
COLA 2.00
7UP 2.00
BEER 3.00
POMMES 4.00
SALAD 5.00
STEAK 8.00
------------
MEDIA 08 24.00
TAX SALES1 6.03
TAX 1 0.97
TAX SALES2 15.89
TAX 2 1.11
taxable 1 [PF-1.D-A]
"
"
taxable 2 [GF-2.D-A]
"
"
DELIVERY ([GF-2.E=YES] is selected for Food Item)
------------------------------------------------
DELIVERY
------------------------------------------------
COLA 2.00
7UP 2.00
BEER 3.00
POMMES 4.00
SALAD 5.00
STEAK 8.00
------------
MEDIA 08 24.00
TAX SALES1 6.03
TAX 1 0.97
TAX SALES2 15.89
TAX 2 1.11
taxable 1 [PF-1.D-A]
"
"
taxable 2 [GF-2.D-A]
"
"

47
h) Grouped PLU report used as Eat in/Take out/Delivery sales report
Eat in/Take out/Delivery sales can be printed on Grouped PLU (#47,48) and IRC grouped PLU (#8847,8848)
reports with the price level shift function [SF-100,107] and [SF-107.D].
Program Options
[SF-107 - TAKE OUT SYSTEM <3>]
D - X-47, 48 PLU NOT PRINT
YES = PLU contents are not printed on X-47,48.
When [D=YES] is set, Z-47/48 can not be taken because PLU contents are not printed. In order to clear PLU sales
data, take Z-41/42 PLU report instead.
Samples [SF-107.D=YES]
-----------------------------------------
EAT IN
-----------------------------------------
FOOD 5.00
DRINK 3.00
------------
SUBTOTAL 8.00
TAX SALES1 5.00
TAX 1 0.25
TAX SALES2 3.00
TAX 2 0.30
------------
SUBTOTAL 8.55
MEDIA 08 8.55
-----------------------------------------
TAKE OUT
-----------------------------------------
FOOD 4.50
DRINK 3.00
------------
SUBTOTAL 7.50
TAX SALES2 3.00
TAX 2 0.30
TAX SALES3 4.50
TAX 3 0.00
------------
SUBTOTAL 7.80
MEDIA 08 7.80
X-47
-----------GROUPED PLU REPORT-------------
FOOD GP01
Eat in <a> -- user text #44 (price level 1)
1.00 5.00
Take out <b> -- user text #45 (price level 2)
1.00 4.50
Delivery <c> -- user text #46 (price level 3)
1.00 5.00
----------
3.00 14.50
------------------------------------------
DRINK GP02
Eat in <a>
1.00 3.00
Take out <b>
1.00 3.00
Delivery <c>
1.00 3.00
----------
3.00 9.00
------------------------------------------
ALL GROUPS
Eat in <a>
2.00 8.00
Take out <b>
2.00 7.50
Delivery <c>
2.00 8.00
----------
6.00 23.50
-----------------------------------------
DELIVERY
-----------------------------------------
FOOD 5.00
DRINK 3.00
------------
SUBTOTAL 8.00
TAX SALES2 3.00
TAX 2 0.30
TAX SALES3 5.00
TAX 3 0.00
------------
SUBTOTAL 8.30
MEDIA 08 8.30
Price Level 1
Price Level 2
Price Level 3

48
PLU contents are printed on Grouped PLU report by [SF-107.D=NO].
X-47
-----------GROUPED PLU REPORT-------------
FOOD GP01
FOOD
1.00 5.00a
1.00 4.50b
1.00 5.00c
----------
3.00 14.50
----------
FOOD GP01
3.00 14.50
------------------------------------------
DRINK GP02
DRINK
1.00 3.00a
1.00 3.00b
1.00 3.00c
----------
3.00 9.00
----------
DRINK GP02
3.00 9.00
------------------------------------------
ALL GROUPS
Eat in <a> -- user text #44
2.00 8.00
Take out <b> -- user text #45
2.00 7.50
Delivery <c> -- user text #46
2.00 8.00
----------
6.00 23.50
PLU descriptor
PLU quantity, amount of price level 1
PLU quantity, amount of price level 2
PLU quantity, amount of price level 3
total quantity, amount of this PLU
total quantity, amount of PLUs linked to this group

50
b) Operation Samples
Type 1 : Buy x number of the same item and get one of those free.
Setting SP-146 Mix & Match Table
Select MIX & MATCH TABLE 1 in this example.
Set table name = ONE FREE.
Set TABLE TYPE = 1.
Set FACTOR = 2. -- the number of PLUs that must be sold to get one free
DISCOUNT is not used for this table type so leave it as 0.00.
SP-122 PLUs
Select PLU to be used for this offer. In this example BUDWEISER.
Scroll down to the end and enter the table number 1 for MIX & MATCH TABLE.
Operation Buy two Budweiser and pay only for one.
Turn the control key to R position and sell two BUDWEISERs.
You get mix and match table name on the next line, in this example ONE FREE, along with a
discount at the price of a BUDWEISER.
Screen
free item
Receipt
BUDWEISER 1.50
BUDWEISER 1.50
ONE FREE -1.50
------------
MEDIA 08 1.50
Rules for PLU reports The PLU preset amount is discounted from the PLU memory.
ENTER CLERK
Std Prices
TABLE BILL SERVER PERSON
Location
BUDWEISER 1.50
BUDWEISER 1.50
ONE FREE -1.50
MEDIA 08 1.50

51
Type 2 : Buy x number of different items (or the same) at the same price and get one of those free.
Setting SP-146 Mix & Match Table
Select MIX & MATCH TABLE 2 in this example.
Set table name = MULTISAVE.
Set TABLE TYPE = 2.
Set FACTOR = 3. -- the number of PLUs that must be sold to get one free
DISCOUNT is not used for this table type so leave it as 0.00.
SP-122 PLUs
Select PLU to be used for this offer. In this example BECKS.
Scroll down to the end and enter the table number 2 for MIX & MATCH TABLE.
Do exactly the same for PILS and COORS.
Operation Buy three, in any combination, of BECKS, PILS and COORS and pay only for
two.
Turn the control key to R position and sell BECKS, PILS and a COORS.
You get mix and match table name on the next line, in this example MULTISAVE, along with a
discount at the price of one of the bottles.
Screen Different Items Same Items
COORS is free item.
Last sold BECKS is free item.
Receipt
BECKS 1.50
PILS 1.50
COORS 1.50
MULTISAVE -1.50
------------
MEDIA 08 3.00
Rules for PLU reports The preset amount is discounted from the PLU memory of the last sold mix and match
PLU.
ENTER CLERK
Std Prices
TABLE BILL SERVER PERSON
Location
BECKS 1.50
PILS 1.50
COORS 1.50
MULTISAVE -1.50
MEDIA 08 3.00
ENTER CLERK
Std Prices
TABLE BILL SERVER PERSON
Location
BECKS 1.50
BECKS 1.50
BECKS 1.50
MULTISAVE -1.50
MEDIA 08 3.00

52
Type 3 : Buy x number of different items and get the lowest priced one of those free.
Attention: Mix and match type 3 items are prohibited for multiple entry.
Setting SP-146 Mix & Match Table
Select MIX & MATCH TABLE 3 in this example.
Set table name = MEAL OFFER.
Set TABLE TYPE = 3.
Set FACTOR = 2. -- the number of PLUs that must be sold to get one free
DISCOUNT is not used for this table type so leave it as 0.00.
SP-122 PLUs
Select PLU to be used for this offer. In this example SIRLOIN STEAK.
Scroll down to the end and enter the table number 3 for MIX & MATCH TABLE.
Do exactly the same for all other main course PLUs. In this example GAMMON.
Operation Buy two main meals and get the lowest priced one free.
Turn the control key to R position and sell a SIRLOIN STEAK (7.50) and GAMMON (4.50).
You get mix and match table name on the next line, in this example MEAL OFFER, along with a
discount at the price of the cheapest meal GAMMON (4.50).
Screen
Receipt
SIRLOIN STEAK 7.50
GAMMON 4.50
MEAL OFFER -4.50
------------
MEDIA 08 7.50
Rules for PLU reports The preset amount is discounted from the PLU memory of the lowest priced PLU.
ENTER CLERK
Std Prices
TABLE BILL SERVER PERSON
Location
SIRLOIN STEAK 7.50
GAMMON 4.50
MEAL OFFER -4.50
MEDIA 08 7.50

53
Type 4 : Buy x number of the same item and get a fixed amount discount.
Setting SP-146 Mix & Match Table
Select MIX & MATCH TABLE 4 in this example.
Set table name = 3 FOR 7.00.
Set TABLE TYPE = 4.
Set FACTOR = 3. -- the number of PLUs that must be sold to get a discount
Set DISCOUNT = 1.85. -- enter the amount that you want to deduct
SP-122 PLUs
Select PLU to be used for this offer. In this example GIN & TONIC.
Scroll down to the end and enter the table number 4 for MIX & MATCH TABLE.
Operation Buy three GIN & TONICs at 2.95 each and get a 1.85 discount. In other words,
buy three GIN & TONICs for 7.00.
Turn the control key to R position and sell three GIN & TONICs.
You get mix and match table name on the next line, in this example 3 FOR 7.00, along with a
programmed discount amount (1.85).
Screen
discounted item
programmed discount amount
Receipt
GIN & TONIC 2.95
GIN & TONIC 2.95
GIN & TONIC 2.95
3 FOR 7.00 -1.85
------------
MEDIA 08 7.00
Rules for PLU reports The programmed discount amount is discounted from the PLU memory.
ENTER CLERK
Std Prices
TABLE BILL SERVER PERSON
Location
GIN & TONIC 2.95
GIN & TONIC 2.95
GIN & TONIC 2.95
3 FOR 7.00 -1.85
MEDIA 08 7.00

54
Type 5 : Buy x number of different items (or the same) and get a fixed amount discount.
Setting SP-146 Mix & Match Table
Select MIX & MATCH TABLE 5 in this example.
Set table name = CKTL PROMO.
Set TABLE TYPE = 5.
Set FACTOR = 2. -- the number of PLUs that must be sold to get a discount
Set DISCOUNT = 1.90. -- enter the amount that you want to deduct
SP-122 PLUs
Select PLU to be used for this offer. In this example PINA COLADA.
Scroll down to the end and enter the table number 5 for MIX & MATCH TABLE.
Do exactly the same for MANHATTAN.
Operation Buy two cocktails at 3.95 each and get 1.90 discount. In other words, buy any two
cocktails for 6.00.
Turn the control key to R position and sell a PINA COLADA and a MANHATTAN.
You get mix and match table name on the next line, in this example CKTL PROMO, along with a
programmed discount amount (1.90).
Screen Different Items Same Items
Receipt
PINA COLADA 3.95
MANHATTAN 3.95
CKTL PROMO -1.90
------------
MEDIA 08 6.00
Rules for PLU reports The programmed discount amount is discounted from the PLU memory of the last sold
mix and match PLU.
ENTER CLERK
Std Prices
TABLE BILL SERVER PERSON
Location
PINA COLADA 3.95
MANHATTAN 3.95
CKTL PROMO -1.90
MEDIA 08 6.00
ENTER CLERK
Std Prices
TABLE BILL SERVER PERSON
Location
PINA COLADA 3.95
PINA COLADA 3.95
CKTL PROMO -1.90
MEDIA 08 6.00

57
c) Mix & Match Report
Full Report
1st level
X / Z1
2nd level
X / Z2
Mix and Match 69 70
Mix and Match Table report shows the total quantity and discount value of Mix and Match items (triggers) for
each table. A total of mix and match tables is also reported on X/Z-03 Full Transaction report.
Receipt
Type 1
Mix and Match Report
BUDWEISER 1.50
BUDWEISER 1.50
ONE FREE -1.50
------------
MEDIA 08 1.50
Type 2
BECKS 1.50
PILS 1.50
COORS 1.50
MULTISAVE -1.50
------------
MEDIA 08 3.00
Type 3
X-69
-----------MIX & MATCH TABLE REPORT-----------
ONE FREE
1 -1.50
MULTISAVE
1 -1.50
MEAL OFFER
1 -4.50
3 FOR 7.00
1 -1.85
CKTL PROMO
1 -1.90
MEAL DEAL
1 -0.34
MEAL DEAL
1 -0.34
------------
ALL MIX MATCH
7 -11.93
SIRLOIN STEAK 7.50
GAMMON 4.50
MEAL OFFER -4.50
------------
MEDIA 08 7.50
Full Transaction Report
Type 4
GIN & TONIC 2.95
GIN & TONIC 2.95
GIN & TONIC 2.95
3 FOR 7.00 -1.85
------------
MEDIA 08 7.00
Type 5
X-03
--------------FULL TRANS REPORT---------------
MEDIA 08
7 30.00
------------
TOTAL 30.00
TRANSACTIONS 7
ALL MIX MATCH
7 -11.93
CID 1 30.00
CID 2 0.00
PINA COLADA 3.95
MANHATTAN 3.95
CKTL PROMO -1.90
------------
MEDIA 08 6.00
Type 6
SANDWICH A 1.99
CRISPS A 0.36
DRINK A 0.49
MEAL DEAL -0.34
------------
MEDIA 08 2.50
Type 7
SANDWICH B 1.99
CRISPS B 0.36
DRINK B 0.49
MEAL DEAL -0.34
------------
MEDIA 08 2.50

58
All PLU reports contain a # symbol before the first character of any PLU names are programmed for Mix and
Match.
PLU Report
X-41
---------------FULL PLU REPORT---------------- # before the PLU descriptor shows they are programmed for
Mix and Match items.
#BUDWEISER
2.00 1.50a
------------
2.00 1.50
#BECKS
1.00 1.50a
------------
1.00 1.50
Type 1
Buy two Budweiser and pay only for one.
#PILS
1.00 1.50a
------------
1.00 1.50
#COORS
1.00 0.00a
------------
1.00 0.00
Type 2
Buy three, in any combination, of BECKS, PILS and COORS
and pay only for two.
#SIRLOIN STEAK
1.00 7.50a
------------
1.00 7.50
#GAMMON
1.00 0.00a
------------
1.00 0.00
Type 3
Buy two main meals and get the lowest priced one free.
#GIN & TONIC
3.00 7.00a
------------
3.00 7.00
Type 4
Buy three GIN & TONICs at 2.95 each and get a 1.85 discount.
In other words, buy three GIN & TONICs for 7.00.
#PINA COLADA
1.00 3.95a
------------
1.00 3.95
#MANHATTAN
1.00 2.05a
------------
1.00 2.05
Type 5
Buy two cocktails at 3.95 each and get 1.90 discount. In other
words, buy any two cocktails for 6.00.
#SANDWICH A
1.00 1.99a
------------
1.00 1.99
#CRISPS A
1.00 0.36a
------------
1.00 0.36
#DRINK A
1.00 0.16a
------------
1.00 0.16
Type 6
Buy three meals at 1.99, 0.36, 0.49 and get a 0.34 discount. In
other words, buy three meals for 2.50.
#SANDWICH B
1.00 1.88a
------------
1.00 1.88
#CRISPS B
1.00 0.25a
------------
1.00 0.25
#DRINK B
1.00 0.37a
------------
1.00 0.37
Type 7
Buy three meals at 1.99, 0.36, 0.49 (total 2.84) but sell for 2.50
----------------------------------------------
ALL PLUS
Std Prices <a>
18.00 30.00
------------
18.00 30.00

61
4-2. Item correction (CR)
CR key is used to remove a PLU from the current sale. It may be used to correct the last sold item, or if
permitted by programming, to correct a previous item. Corrections will show on the journal but not on receipts.
To correct the last sold item, press CR immediately after registering it.
CLERK 001
Std Prices
TABLE BILL SERVER PERSON
Location
PLU 1 1.00
PLU 2 2.00
PLU 3 CORRECTED
SUBTOTAL 3.00
R RECEIPT IS ON 23/08/2000 12:45
To correct a previous item, move SCROLL keys to the item you want to correct is highlighted, then press CR.
Program Options
[SF-10 - Functions in X or Z <1>]
H - ITEM CORRECT - Z ONLY
G - ITEM CORRECT - Z OR X
YES = Operations allowed in Z1/P position only or Z1/P and X positions.
NO = Operations allowed in R position.
[SF-39 - Correction]
H - CANNOT DELETE COOKING INSTRUCTIONS
G - CANNOT DELETE CONDIMENTS
F - ONLY LAST ITEM CAN BE CORRECTED IN REG
YES = Only the last item registered can be error corrected in R position. On attempting to correct further items the
warning message manager key required will appear. Further error corrections can only be done under X
position.
NO = Unlimited number of error corrections allowed.

62
4-3. Void
VOID key is used to void (correct) previously sold items. It is also used to reduce the number of persons. This
function can be restricted to work in the X or Z1/P key positions instead of R by programming. Voids will be
sent to the kitchen printer if programmed by [SF-42.G].
1. Sign on a clerk.
2. Press VOID key.
3. Register the items you wish to void. You can continue to void items until pressing VOID key again.
CLERK 001
Std Prices
TABLE BILL SERVER PERSON
VOID
θPLU 1 -1.00
θPLU 2 -2.00
SUBTOTAL - 3.00
R RECEIPT IS ON 23/08/2000 12:45
4. Finalize the sale, or continue normal operation by pressing VOID key again.
The second depression of VOID toggles out of the voiding mode.
Internal KP Receipt
----------------------------------------------
--> KP: 1
----------------------------------------------
PLU 1
↑↑↑↑↑↑↑↑↑↑↑↑↑↑↑↑↑↑↑↑↑↑ VOID ↑↑↑↑↑↑↑↑↑↑↑↑↑↑↑↑↑↑↑↑↑↑↑
PLU 2
↑↑↑↑↑↑↑↑↑↑↑↑↑↑↑↑↑↑↑↑↑↑ VOID ↑↑↑↑↑↑↑↑↑↑↑↑↑↑↑↑↑↑↑↑↑↑↑
************
* Your *
*
Receipt
*
*
Thank You
*
************
PLU 1 -1.00
↑↑↑↑↑↑↑↑↑↑↑↑↑↑↑↑↑↑↑↑↑ VOID ↑↑↑↑↑↑↑↑↑↑↑↑↑↑↑↑↑↑↑↑↑
PLU 2 -2.00
↑↑↑↑↑↑↑↑↑↑↑↑↑↑↑↑↑↑↑↑↑ VOID ↑↑↑↑↑↑↑↑↑↑↑↑↑↑↑↑↑↑↑↑↑
On the external KP, void items are fixed to print in red on TP-420/422/522 or in double-height and width characters on other
printers. Void message with arrows are printed in red or black according to [SF-42.A] selection.
Program Options
[SF-10 - Functions in X or Z <1>]
D - VOID - Z ONLY
C - VOID - Z OR X
[SF-42 - KP Control]
G - VOIDS GO TO KP
A - VOIDS / REFUNDS PRINT IN RED (TP-420/422/522)

65
4-6. Non-add number (Message Entry)
The non-add number can be used to print a manually entered message. Up to 16 characters can be entered. The
message will be printed either in the header or in the position within the order it was entered by [SF-77.D].
1. Sign on a clerk.
2. Press X or NON-ADD # key.
ENTER TEXT
TABLE BILL SERVER PERSON
Location
SUBTOTAL #<_ >
R RECEIPT IS ON 23/08/2000 12:45
3. Type in the characters (max. 16) by using these keys.
4. Press ENTER to accept the characters.
The message will display on the screen and be printed on the receipt.
CLERK 001
Std Prices
TABLE BILL SERVER PERSON
Location
ABCDEF#_______
SUBTOTAL
R RECEIPT IS ON 23/08/2000 12:45
Program Options
[SF-77 - KP Control <2>]
D - NON ADD INFO IN HEADER
YES = Non add message printed on the top of receipt, KP receipt and slip.
-----------------------------------------
ABCDEF
-----------------------------------------
Receipt Sample
************
* Your *
*
Receipt
*
*
Thank You
*
************
ABCDEF #

66
4-7. Tip
A tip amount given can be entered by using TIP key. The tip amount is shown on the transaction reports and
clerk reports. However, it is not added to the hourly sales and grand total.
1. Sign on a clerk.
2. Enter items.
3. Enter the tip amount and press TIP key.
4. Items can still be entered.
5. Press the media key to close the transaction.
Receipt Sample
TIP 1.00
-----------
SUBTOTAL 1.00
MEDIA 08 1.00
Program Options
[SF-75 - Invoice/Receipt]
B - SUBTOTAL BILL HAS TIP
YES = Blank tip line and blank subtotal line is printed following the normal subtotal line. This is not available for
instant subtotal bill. Adding a TIP after the subtotal bill print will cause a full bill to be printed following the
payment amount.
-----------------------------------------
BILL 1
-----------------------------------------
PLU 10 10.00
TIP 0.50
-----------
SUBTOTAL 10.50
TIP
-----------
SUBTOTAL
blank tip line
blank subtotal line

72
c) Special media
SPECIAL MEDIA key shows 20 media key list to select one of the media keys or the tendering amount list for
CASH/TTL 8 closing for a speed closing.
c)-1. 20 Media Key List [SF-105.C=NO]
1. Sign on a clerk.
2. Register the items.
3. Press SPECIAL MEDIA key.
Select one of media keys by using PAGE/SCROLL keys and press ENTER or designate by the number.
SELECT OPTION
TABLE BILL SERVER PERSON
Location
1 MEDIA 01
2 MEDIA 02
3 MEDIA 03
4 MEDIA 04
5 MEDIA 05
6 MEDIA 06
7 MEDIA 07
8 MEDIA 08
--- MORE ---
SUBTOTAL 5.00
R RECEIPT IS ON 23/08/2000 12:45
4. Enter amount and press SPECIAL MEDIA (not ENTER) key .
ENTER AMOUNT
MEDIA 02
TABLE BILL SERVER PERSON
Location
PLU 2 2.00
PLU 3 3.00
SUBTOTAL 5.00
R RECEIPT IS ON 23/08/2000 12:45
Produktspecifikationer
| Varumärke: | Uniwell |
| Kategori: | Kassaapparat |
| Modell: | SX-8000 |
Behöver du hjälp?
Om du behöver hjälp med Uniwell SX-8000 ställ en fråga nedan och andra användare kommer att svara dig
Kassaapparat Uniwell Manualer

7 September 2024
6 September 2024
6 September 2024
4 September 2024
30 Augusti 2024
29 Augusti 2024
29 Augusti 2024
27 Augusti 2024
25 Augusti 2024
24 Augusti 2024
Kassaapparat Manualer
- Kassaapparat Casio
- Kassaapparat Olympia
- Kassaapparat Towa
- Kassaapparat Digi
- Kassaapparat Samsung Sam4S
- Kassaapparat Settler Unitouch
- Kassaapparat Vectron
- Kassaapparat Toshiba TEC
- Kassaapparat Wings
Nyaste Kassaapparat Manualer

22 Oktober 2024
14 September 2024
14 September 2024
14 September 2024
14 September 2024
14 September 2024
14 September 2024
14 September 2024
14 September 2024
12 September 2024