Yamaha Clavinova CLP-635 Bruksanvisning

Yamaha Piano Clavinova CLP-635

Läs nedan 📖 manual på svenska för Yamaha Clavinova CLP-635 (144 sidor) i kategorin Piano. Denna guide var användbar för 4 personer och betygsatt med 4.5 stjärnor i genomsnitt av 2 användare

Sida 1/144
Owner’s Manual
Mode d’emploi
CLP-685
CLP-675
CLP-645
CLP-635
CLP-695GP
CLP-665GP
FR
EN
Nous vous remercions d’avoir choisi le Yamaha Clavinova.
Afin d’exploiter votre Clavinova au maximum de ses performances et de ses fonctions, lisez attentivement ce mode
d’emploi et conservez-le pour le consulter ultérieurement.
Avant d’utiliser l’instrument, lisez attentivement la section « PRÉCAUTIONS D’USAGE » aux pages 6 et 7.
Pour plus d’informations sur l’assemblage de l’instrument, reportez-vous aux instructions figurant à la fin de ce
manuel.
Thank you for choosing the Yamaha Clavinova.
In order to make the most of your Clavinova’s performance potential and features, please read this Owner’s Manual
thoroughly, and keep it in a safe place for later reference.
Before using the instrument, be sure to read “PRECAUTIONS” on pages 67.
For information on assembling the instrument, refer to the instructions at the end of this manual.
EnglishFrançais
SPECIAL MESSAGE SECTION
P
RODUCT SAFETY MARKINGS:
Yamaha electronic
products may have either labels similar to the graphics
shown below or molded/stamped facsimiles of these
graphics on the enclosure. The explanation of these
graphics appears on this page. Please observe all
cautions indicated on this page and those indicated in the
safety instruction section.
See bottom of Keyboard enclosure for graphic symbol markings.
The exclamation point within the
equilateral triangle is intended to alert
the user to the presence of important
operating and maintenance
(servicing) instructions in the
literature accompanying the product.
The lightning flash with arrowhead
symbol, within the equilateral
triangle, is intended to alert the user
to the presence of uninsulated
“dangerous voltage” within the
product’s enclosure that may be of
sufficient magnitude to constitute a
risk of electrical shock.
IMPORTANT NOTICE: All Yamaha electronic
products are tested and approved by an independent
safety testing laboratory in order that you may be sure
that when it is properly installed and used in its normal
and customary manner, all foreseeable risks have been
eliminated. DO NOT modify this unit or commission
others to do so unless specifically authorized by Yamaha.
Product performance and/or safety standards may be
diminished. Claims filed under the expressed warranty
may be denied if the unit is/has been modified. Implied
warranties may also be affected.
SPECIFICATIONS SUBJECT TO CHANGE: The
information contained in this manual is believed to be
correct at the time of printing. However, Yamaha
reserves the right to change or modify any of the
specifications without notice or obligation to update
existing units.
ENVIRONMENTAL ISSUES: Yamaha strives to
produce products that are both user safe and
environmentally friendly. We sincerely believe that our
products and the production methods used to produce
them, meet these goals. In keeping with both the letter
and the spirit of the law, we want you to be aware of the
following:
Battery Notice: This product MAY contain a small non-
rechargeable battery which (if applicable) is soldered in
place. The average life span of this type of battery is
approximately five years. When replacement becomes
necessary, contact a qualified service representative to
perform the replacement.
Warning: Do not attempt to recharge, disassemble, or
incinerate this type of battery. Keep all batteries away
from children. Dispose of used batteries promptly and as
regulated by applicable laws. Note: In some areas, the
servicer is required by law to return the defective parts.
However, you do have the option of having the servicer
dispose of these parts for you.
Disposal Notice: Should this product become damaged
beyond repair, or for some reason its useful life is
considered to be at an end, please observe all local, state,
and federal regulations that relate to the disposal of
products that contain lead, batteries, plastics, etc.
NOTICE: Service charges incurred due to lack of
knowledge relating to how a function or effect works
(when the unit is operating as designed) are not covered
by the manufacturer’s warranty, and are therefore the
owners responsibility. Please study this manual carefully
and consult your dealer before requesting service.
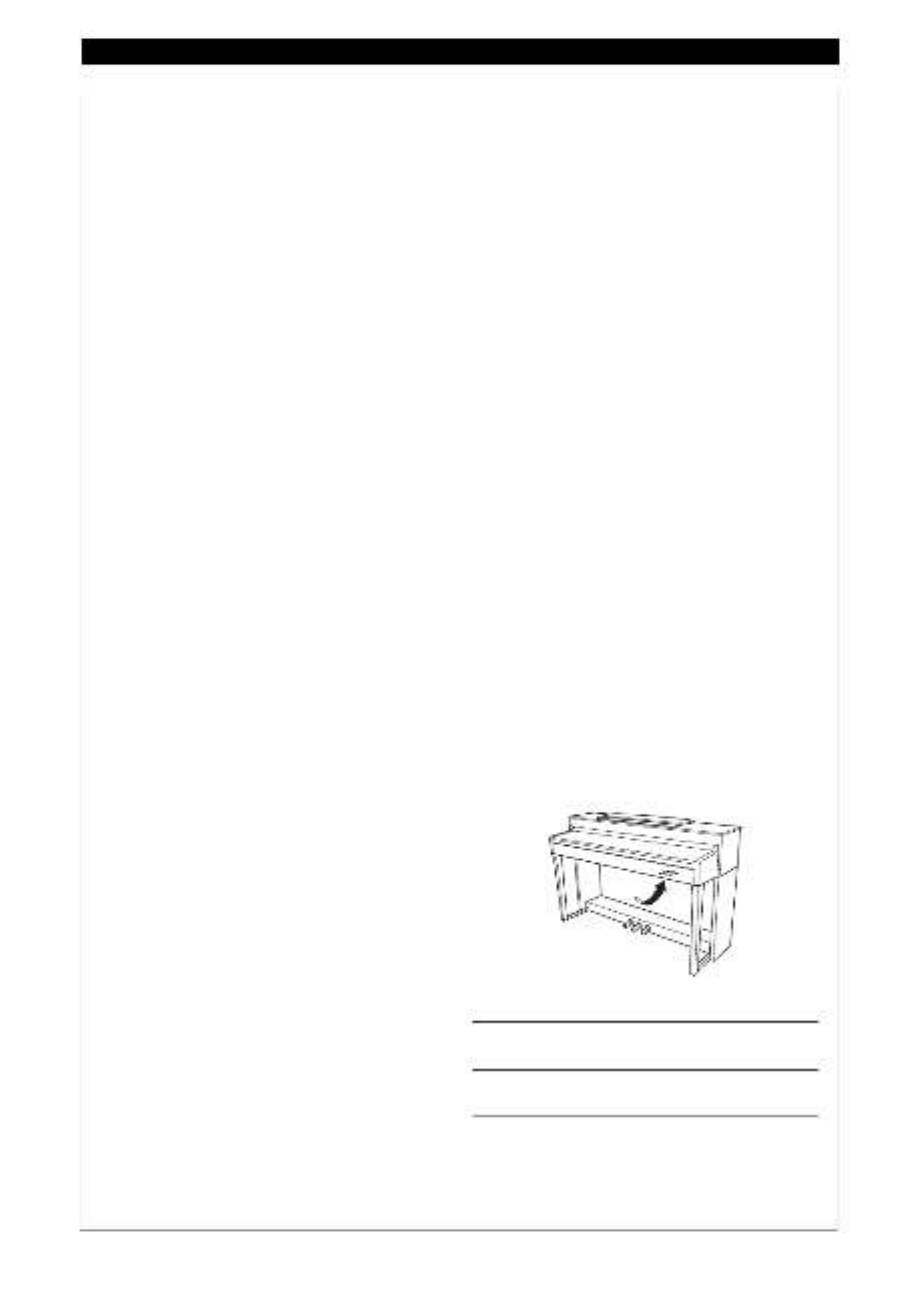
NAME PLATE LOCATION: The graphic below
indicates the location of the name plate. The model
number, serial number, power requirements, etc., are
located on this plate. You should record the model
number, serial number, and the date of purchase in the
spaces provided below and retain this manual as a
permanent record of your purchase.
Model
Serial No.
Purchase Date
CAUTION
RISK OF ELECTRIC SHOCK
DO NOT OPEN
CAUTION: TO REDUCE THE RISK OF ELECTRIC SHOCK.
DO NOT REMOVE COVER (OR BACK).
NO USER-SERVICEABLE PARTS INSIDE.
REFER SERVICING TO QUALIFIED SERVICE PERSONNEL.
92-469- 1 (bottom)
For CLP-685, CLP-675, CLP-645, CLP-695GP, CLP-665GP
SPECIAL MESSAGE SECTION
This product utilizes batteries or an external power
supply (adapter). DO NOT connect this product to any
power supply or adapter other than one described in
the manual, on the name plate, or specifically recom-
mended by Yamaha.
WARNING: Do not place this product in a position
where anyone could walk on, trip over, or roll anything
over power or connecting cords of any kind. The use of
an extension cord is not recommended! If you must
use an extension cord, the minimum wire size for a 25’
cord (or less) is 18 AWG. NOTE: The smaller the AWG
number, the larger the current handling capacity. For
longer extension cords, consult a local electrician.
This product should be used only with the components
supplied or; a cart, rack, or stand that is recommended
by Yamaha. If a cart, etc., is used, please observe all
safety markings and instructions that accompany the
accessory product.
SPECIFICATIONS SUBJECT TO
CHANGE:
The information contained in this manual is believed to
be correct at the time of printing. However, Yamaha
reserves the right to change or modify any of the spec-
ifications without notice or obligation to update existing
units.
This product, either alone or in combination with an
amplifier and headphones or speaker/s, may be capa-
ble of producing sound levels that could cause perma-
nent hearing loss. DO NOT operate for long periods of
time at a high volume level or at a level that is uncom-
fortable. If you experience any hearing loss or ringing
in the ears, you should consult an audiologist.
IMPORTANT: The louder the sound, the shorter the
time period before damage occurs.
Some Yamaha products may have benches and / or
accessory mounting fixtures that are either supplied
with the product or as optional accessories. Some of
these items are designed to be dealer assembled or
installed. Please make sure that benches are stable
and any optional fixtures (where applicable) are well
secured BEFORE using.
Benches supplied by Yamaha are designed for seating
only. No other uses are recommended.
NOTICE:
Service charges incurred due to a lack of knowledge
relating to how a function or effect works (when the unit
is operating as designed) are not covered by the manu-
facturer’s warranty, and are therefore the owners
responsibility. Please study this manual carefully and
consult your dealer before requesting service.
ENVIRONMENTAL ISSUES:
Yamaha strives to produce products that are both user
safe and environmentally friendly. We sincerely believe
that our products and the production methods used to
produce them, meet these goals. In keeping with both
the letter and the spirit of the law, we want you to be
aware of the following:
Battery Notice:
This product MAY contain a small non-rechargeable
battery which (if applicable) is soldered in place. The
average life span of this type of battery is approxi-
mately five years. When replacement becomes neces-
sary, contact a qualified service representative to
perform the replacement.
This product may also use “household” type batteries.
Some of these may be rechargeable. Make sure that
the battery being charged is a rechargeable type and
that the charger is intended for the battery being
charged.
When installing batteries, never mix old batteries with
new ones, and never mix different types of batteries.
Batteries MUST be installed correctly. Mismatches or
incorrect installation may result in overheating and bat-
tery case rupture.
Warning:
Do not attempt to disassemble, or incinerate any bat-
tery. Keep all batteries away from children. Dispose of
used batteries promptly and as regulated by the laws in
your area. Note: Check with any retailer of household
type batteries in your area for battery disposal informa-
tion.
Disposal Notice:
Should this product become damaged beyond repair,
or for some reason its useful life is considered to be at
an end, please observe all local, state, and federal reg-
ulations that relate to the disposal of products that con-
tain lead, batteries, plastics, etc. If your dealer is
unable to assist you, please contact Yamaha directly.
NAME PLATE LOCATION:
The name plate is located on the bottom of the product.
The model number, serial number, power require-
ments, etc., are located on this plate. You should
record the model number, serial number, and the date
of purchase in the spaces provided below and retain
this manual as a permanent record of your purchase.
Model
Serial No.
Purchase Date
PLEASE KEEP THIS MANUAL
92-BP (bottom)
For CLP-635
3
* This applies only to products distributed by YAMAHA CORPORATIO OF AMERICA.N(FCC DoC)
COMPLIANCE INFORMATION STATEMENT
(DECLARATION OF CONFORMITY PROCEDURE)
Responsible Party : Yamaha Corporation of America
Address : 6600 Orangethorpe Ave., Buena Park, Calif. 90620
Telephone : 714-522-9011
Type of Equipment : Digital Piano
Model Name : CLP-685, CLP-675, CLP-645, CLP-635, CLP-695GP, CLP-665GP
This device complies with Part 15 of the FCC Rules.
Operation is subject to the following two conditions:
1) this device may not cause harmful interference, and
2) this device must accept any interference received including interference that may cau use ndesired operation.
See user manual instructions if interference to radio reception is suspected.
For the instrument
For the instrument and the AC adaptor
1. IMPORTANT NOTICE: DO NOT MODIFY
THIS UNIT!
This product, when installed as indicated in the
instructions contained in this manual, meets FCC
requirements. Modifications not expressly approved
by Yamaha may void your authority, granted by the
FCC, to u use the prod ct.
2. IMPORTANT: When connecting this product to
accessories and/or another produ uct se only high
quality shielded cables. Cable/s su wpplied ith this
product MUST b ue sed. Follow all installation
instructions. Failure to follow instructions cou vld oid
your FCC authorization to se this produ uct in the
USA.
3. NOTE: This product has been tested and found to
comply with the requirements listed in FCC
Regulations, Part 15 for Class “B” digital devices.
Compliance with these requirements provides a
reasonable lev uel of ass rance that you ur se of this
product in a residential env wironment ill not result in
harmful interference with other electronic devices.
This equipment generates/uses radio frequencies
and, if not installed and used according to the
instructions found in the users manual, may cause
interference harmful to the operation of other
electronic devices. Compliance with FCC regulations
* This applies only to products distributed by YAMAHA CORPORATIO OF AMERICA. (class B)N
does not guarantee that interference will not occur in
all installations. If this product is found to e the b
source of interference, which can be determined by
turning the unit “OFF” and “ON, please try to
eliminate the problem by using one of the following
measures:
Relocate either this product or the device that is
being affected by the interference.
Utilize pow uer o tlets that are on different branch (circuit
breaker or fuse) circuits or install AC line filter/s.
In the case of radio or TV interference, relocate/
reorient the antenna. If the antenna lead-in is 300
ohm ribbon lead, change the lead-in to co-axial type
cable.
If these corrective measures do not produce
satisfactory results, please contact the local retailer
authorized to distribute this type of product. If you can
not locate the appropriate retailer, please contact
Yamaha Corporation of America, Electronic Service
Division, 6600 Orangethorpe Av ue, B ena Park,
CA90620
The ab vo e statements apply ONLY to those products
distributed by Yamaha Corporation of America or its
subsidiaries.
FCC INFORMATION (U.S.A.)
For the AC Adaptor
This device complies with Part 15 of the FCC Rules. Operation is subject to the following two conditions:
(1) this device may not cause harmful interference, and (2) this device must accept any interference received, includ-
ing interference that may cause undesired operation.
CAN ICES-3 (B)/NMB-3(B)
• This applies only to products distributed by Yamaha Canada Music Ltd.
• Ceci ne s’applique qu’aux produits distribués par Yamaha Canada Musique Ltée.
(can_b_01)
(fcc_sengen)
4CLP-685, CLP-675, CLP-645, CLP-635, CLP-695GP, CLP-665GP Owner’s Manual
The above warning is located on the bottom of the unit.
Explanation of Graphical Symbols
The lightning flash with arrowhead symbol
within an equilateral triangle is intended to
alert the user to the presence of uninsulated
“dangerous voltage” within the product’s
enclosure that may be of sufficient magnitude
to constitute a risk of electric shock to
persons.
The exclamation point within an equilateral
triangle is intended to alert the user to the
presence of important operating and
maintenance (servicing) instructions in the
literature accompanying the product.
IMPORTANT SAFETY INSTRUCTIONS
1 Read these instructions.
2 Keep these instructions.
3 Heed all warnings.
4 Follow all instructions.
5 Do not use this apparatus near water.
6 Clean only with dry cloth.
7 Do not block any ventilation openings. Install in
accordance with the manufacturer’s instructions.
8 Do not install near any heat sources such as
radiators, heat registers, stoves, or other
apparatus (including amplifiers) that produce
heat.
9 Do not defeat the safety purpose of the polarized
or grounding-type plug. A polarized plug has two
blades with one wider than the other. A
grounding type plug has two blades and a third
grounding prong. The wide blade or the third
prong are provided for your safety. If the provided
plug does not fit into your outlet, consult an
electrician for replacement of the obsolete outlet.
10 Protect the power cord from being walked on or
pinched particularly at plugs, convenience
receptacles, and the point where they exit from
the apparatus.
11 Only use attachments/accessories specified by
the manufacturer.
12 Use only with the cart, stand,
tripod, bracket, or table specified
by the manufacturer, or sold with
the apparatus. When a cart is
used, use caution when moving
the cart/apparatus combination
to avoid injury from tip-over.
13 Unplug this apparatus during lightning storms or
when unused for long periods of time.
14 Refer all servicing to qualified service personnel.
Servicing is required when the apparatus has
been damaged in any way, such as power-supply
cord or plug is damaged, liquid has been spilled
or objects have fallen into the apparatus, the
apparatus has been exposed to rain or moisture,
does not operate normally, or has been dropped.
CAUTION: TO REDUCE THE RISK OF
ELECTRIC SHOCK, DO NOT REMOVE
COVER (OR BACK). NO USER-SERVICEABLE
PARTS INSIDE. REFER SERVICING TO
QUALIFIED SERVICE PERSONNEL.
CAU TION
RISK OF ELECTRIC SHOCK
DO NOT OPEN
WARNING
TO REDUCE THE RISK OF FIRE OR ELECTRIC SHOCK, DO NOT EXPOSE THIS APPARATUS TO RAIN OR
MOISTURE.
(UL60065_03)
For the instrument (except CLP-635) and the AC adaptor
For the instrument (except CLP-635)
5
CLP-685, CLP-675, CLP-645, CLP-635, CLP-695GP, CLP-665GP Owner’s Manual
6CLP-685, CLP-675, CLP-645, CLP-635, CLP-695GP, CLP-665GP Owner’s Manual
PRECAUTIONS
PLEASE READ CAREFULLY BEFORE PROCEEDING
Please keep this manual in a safe and handy place for future reference.
WARNING
This AC adaptor is designed for use with only Yamaha electronic instruments. Do
not use for any other purpose.
Indoor use only. Do not use in any wet environments.
CAUTION
When setting up, make sure that the AC outlet is easily accessible. If some
trouble or malfunction occurs, immediately turn off the power switch of the
instrument and disconnect the AC adaptor from the outlet. When the AC adaptor
is connected to the AC outlet, keep in mind that electricity is flowing at the
minimum level, even if the power switch is turned off. When you are not using
the instrument for a long time, make sure to unplug the power cord from the wall
AC outlet.
WARNING
Always follow the basic precautions listed below to avoid the possibility of serious injury or even death from electrical
shock, short-circuiting, damages, fire or other hazards. These precautions include, but are not limited to, the
following:
Do not place the power cord near heat sources such as heaters or radiators. Also,
do not excessively bend or otherwise damage the cord, or place heavy objects on
it.
Only use the voltage specified as correct for the instrument. The required voltage
is printed on the name plate of the instrument.
(CLP-635) Use the specified adaptor (page 132) only. Using the wrong adaptor
can result in damage to the instrument or overheating.
Use only the supplied power cord/plug.
Check the electric plug periodically and remove any dirt or dust which may have
accumulated on it.
This instrument contains no user-serviceable parts. Do not open the instrument
or attempt to disassemble or modify the internal components in any way. If it
should appear to be malfunctioning, discontinue use immediately and have it
inspected by qualified Yamaha service personnel.
(For information on whether Bluetooth functionality is included or not, refer to
page 81.)
Radio waves may affect electro-medical devices.
- Do not use this product near medical devices or inside areas in which the use
of radio waves is restricted.
- Do not use this product within 15 cm (6 in.) of persons with a heart pacemaker
implant.
Do not expose the instrument to rain, use it near water or in damp or wet
conditions, or place on it any containers (such as vases, bottles or glasses)
containing liquids which might spill into any openings. If any liquid such as
water seeps into the instrument, turn off the power immediately and unplug the
power cord from the AC outlet. Then have the instrument inspected by qualified
Yamaha service personnel.
Never insert or remove an electric plug with wet hands.
Do not put burning items, such as candles, on the unit. A burning item may fall
over and cause a fire.
When one of the following problems occur, immediately turn off the power switch
and disconnect the electric plug from the outlet. Then have the device inspected
by Yamaha service personnel.
- The power cord or plug becomes frayed or damaged.
- It emits unusual smells or smoke.
- Some object has been dropped into the instrument.
- There is a sudden loss of sound during use of the instrument.
For AC adaptor (CLP-635)
For CLP-685, CLP-675, CLP-645, CLP-635, CLP-695GP, CLP-665GP
Water warning
Fire warning
If you notice any abnormality
DMI-5 1/2
7
CLP-685, CLP-675, CLP-645, CLP-635, CLP-695GP, CLP-665GP Owner’s Manual
CAUTION
Always follow the basic precautions listed below to avoid the possibility of physical injury to you or others, or damage
to the instrument or other property. These precautions include, but are not limited to, the following:
Do not connect the instrument to an electrical outlet using a multiple-connector.
Doing so can result in lower sound quality, or possibly cause overheating in the
outlet.
When removing the electric plug from the instrument or an outlet, always hold
the plug itself and not the cord. Pulling by the cord can damage it.
Remove the electric plug from the outlet when the instrument is not to be used for
extended periods of time, or during electrical storms.
Read carefully the attached documentation explaining the assembly process.
Failure to assemble the instrument in the proper sequence might result in
damage to the instrument or even injury.
Do not place the instrument in an unstable position where it might accidentally
fall over.
(CLP-685, CLP-675, CLP-645, CLP-635) When transporting or moving the
instrument, always use two or more people. Attempting to lift the instrument by
yourself may damage your back, result in other injury, or cause damage to the
instrument itself.
(CLP-695GP, CLP-665GP) Since this product is very heavy, make sure that a
sufficient number of people are on hand to help, so you can lift and move it safely
and easily. Attempting to lift or move the instrument by force may damage your
back, result in other injury, or cause damage to the instrument itself.
Before moving the instrument, remove all connected cables, to prevent damage
to the cables or injury to anyone who might trip over them.
When setting up the product, make sure that the AC outlet you are using is easily
accessible. If some trouble or malfunction occurs, immediately turn off the power
switch and disconnect the plug from the outlet. Even when the power switch is
turned off, electricity is still flowing to the product at the minimum level. When
you are not using the product for a long time, make sure to unplug the power
cord from the wall AC outlet.
Before connecting the instrument to other electronic components, turn off the
power for all components. Before turning the power on or off for all components,
set all volume levels to minimum.
Be sure to set the volumes of all components at their minimum levels and
gradually raise the volume controls while playing the instrument to set the
desired listening level.
Do not insert a finger or hand in any gaps on the key cover or instrument. Also
take care that the key cover does not pinch your finger.
(CLP-685) Do not apply excessive force when closing the key cover. A key cover
equipped with the SOFT-CLOSE™ mechanism closes the cover slowly. Applying
excessive force to the key cover when closing it could damage the SOFT-
CLOSE™ mechanism, and possibly result in injury to your hands and fingers
caught under the closing key cover.
Never insert or drop paper, metallic, or other objects into the gaps on the key
cover, panel or keyboard. This could cause physical injury to you or others,
damage to the instrument or other property, or operational failure.
Do not rest your weight on, or place heavy objects on the instrument, and do not
use excessive force on the buttons, switches or connectors.
Do not use the instrument/device or headphones for a long period of time at a
high or uncomfortable volume level, since this can cause permanent hearing
loss. If you experience any hearing loss or ringing in the ears, consult a
physician.
Do not place the bench in an unstable position where it might accidentally fall
over.
Do not play carelessly with or stand on the bench. Using it as a tool or stepladder
or for any other purpose might result in accident or injury.
Only one person should sit on the bench at a time, in order to prevent the
possibility of accident or injury.
For benches that can be adjusted, do not adjust the bench height while sitting on
the bench, since this can cause excessive force to be imposed on the adjustment
mechanism, possibly resulting in damage to the mechanism or even injury.
If the bench screws become loose due to extensive long-term use, tighten them
periodically using the specified tool in order to prevent the possibility of accident
or injury.
Keep special watch over any small children so that they don’t fall off the rear of
the bench. Since the bench does not have a backrest, unsupervised use may
result in accident or injury.
Always turn the power off when the instrument is not in use.
Even when the [ ] (Standby/On) switch is in standby status (power lamp is off), electricity is still flowing to the instrument at the minimum level.
When you are not using the instrument for a long time, make sure you unplug the power cord from the wall AC outlet.
Connections
Handling caution
Using the bench (If included)
Yamaha cannot be held responsible for damage caused by improper use or modifications to the instrument, or data that is lost or destroyed.
DMI-5 2/2
8CLP-685, CLP-675, CLP-645, CLP-635, CLP-695GP, CLP-665GP Owner’s Manual
NOTICE
To avoid the possibility of malfunction/ damage to the
product, damage to data, or damage to other property,
follow the notices below.
Handling
Do not use the instrument in the vicinity of a TV, radio, stereo
equipment, mobile phone, or other electric devices.
Otherwise, the instrument, TV, or radio may generate noise.
When you use the instrument along with a smart device, such
as an iPhone, iPad, etc., we recommend that you set that
devices “Airplane Mode to on and then the Wi-Fi/Bluetooth
setting to on in order to avoid noise caused by
communication.
Do not expose the instrument to excessive dust or vibrations,
or extreme cold or heat (such as in direct sunlight, near a
heater, or in a car during the day) to prevent the possibility of
panel disfiguration, damage to the internal components or
unstable operation. (Verified operating temperature range:
5° – 40°C, or 41° – 104°F.)
Do not place vinyl, plastic or rubber objects on the
instrument, since this might discolor the panel or keyboard.
In the case of a model with a polished finish, bumping the
surface of the instrument with metal, porcelain, or other hard
objects can cause the finish to crack or peel. Use caution.
Maintenance
When cleaning the instrument, use a soft and dry/slightly
damp cloth. Do not use paint thinners, solvents, alcohol,
cleaning fluids, or chemical-impregnated wiping cloths.
In the case of a model with a polished finish, gently remove
dust and dirt with a soft cloth. Do not wipe too hard since
small particles of dirt can scratch the instruments finish.
During extreme changes in temperature or humidity,
condensation may occur and water may collect on the surface
of the instrument. If water is left, the wooden parts may
absorb the water and be damaged. Make sure to wipe any
water off immediately with a soft cloth.
When cleaning the bench, use a soft and dry cloth (or, if
necessary, one that is slightly damp). Do not use paint
thinners, solvents, alcohol, cleaning fluids, or chemical-
impregnated wiping cloths.
Saving data
Some of the data of this instrument (page 100) and the Song
data saved to the internal memory of this instrument
(page 52) are retained when the power is turned off. However,
the saved data may be lost due to some failure, an operation
mistake, etc. Save the Song data to a USB flash drive or an
external device such as a computer (page 74). Before using a
USB flash drive, make sure to refer to page 72.
To protect against data loss through USB flash drive damage,
we recommend that you save your important data onto spare
USB flash drive or an external device such as a computer as
backup data.
Information
About copyrights
Copying of the commercially available musical data including
but not limited to MIDI data and/or audio data is strictly
prohibited except for your personal use.
This product incorporates and bundles contents in which
Yamaha owns copyrights or with respect to which Yamaha has
license to use others’ copyrights. Due to copyright laws and
other relevant laws, you are NOT allowed to distribute media
in which these contents are saved or recorded and remain
virtually the same or very similar to those in the product.
* The contents described above include a computer program,
Accompaniment Style data, MIDI data, WAVE data, voice
recording data, a score, score data, etc.
* You are allowed to distribute medium in which your
performance or music production using these contents is
recorded, and the permission of Yamaha Corporation is not
required in such cases.
About functions/data bundled with the
instrument
Some of the preset songs have been edited for length or
arrangement, and may not be exactly the same as the original.
This device is capable of using various types/formats of music
data by optimizing them to the proper format music data for
use with the device in advance. As a result, this device may
not play them back precisely as their producers or composers
originally intended.
The bitmap fonts used in this instrument have been provided
by and are the property of Ricoh Co., Ltd.
About this manual
The illustrations and LCD screens as shown in this manual
are for instructional purposes only, and may appear
somewhat different from those on your instrument.
Windows is a registered trademark of Microsoft® Corporation
in the United States and other countries.
iPhone, iPad, iPod touch are trademarks of Apple Inc.,
registered in the U.S. and other countries.
The company names and product names in this manual are
the trademarks or registered trademarks of their respective
companies.
Tuning
Unlike an acoustic piano, this instrument does not need to be
tuned by an expert (although the pitch can be user-adjusted to
match other instruments). This is because the pitch of digital
instruments is always maintained perfectly.
About Bluetooth
For information on handling Bluetooth communications,
refer to “About Bluetooth” on page 138.
9
CLP-685, CLP-675, CLP-645, CLP-635, CLP-695GP, CLP-665GP Owner’s Manual
Included Accessories
Owner’s Manual (this book)
Data List (CLP-685 and CLP-695GP only)
“50 Classical Music Masterpieces” (Music Book)
Online Member Product Registration
Power cord (except CLP-635)
Power cord*, AC adaptor* (CLP-635)
Bench*
Warranty*
* May not be included depending on your area. Check
with your Yamaha dealer.
About the Manuals
This instrument has the following documents and
instructional materials.
Included Documents
Owner’s Manual (this book)
This document explains how to use the
Clavinova.
• Introduction:
This section explains how to set up and start using your
Clavinova. Setup is so simple, you can start playing right
away.
Main Operations:
This section explains various functions useful for your
practice, such as Preset Song playback and Song
recording.
Detailed Settings:
This section explains how to make detailed settings for
the Clavinovas various functions. Refer to this section as
necessary.
• Appendix:
This section introduces Message List, a description of
Preset Voices, and other reference material.
Data List (CLP-685 and CLP-695GP only)
This document contains lists of XG Voices
and XG Drum Kit that can be selected on the
CLP-685 and CLP-695GP.
Online Materials (Downloadable from
the web)
iPhone/iPad Connection Manual
Explains how to connect the instrument to
smart devices, such as iPhone, iPad, etc.
Computer-related Operations
Includes instructions on connecting this
instrument to a computer, and operations
related to transferring song data.
MIDI Reference
Contains the MIDI-related information.
To obtain these manuals, access the Yamaha
Downloads, enter the model name for searching
the desired files.
Icons on this manual
Example:
This indicates that the relevant function is only
available on certain models. These icons indicate that
the function is available on the CLP-685 but not on
the CLP-675, CLP-645, CLP-635, CLP-695GP or
CLP-665GP.
Yamaha Downloads
http://download.yamaha.com/
Smart Device AppSmart Pianist”
Enjoy easy operation by connecting your smart
device. To use this, you'll need to install the “Smart
Pianist” app (free for download; see page 83).
685 675 645 635 695GP 665GP
(bottom_en_01)
The model nu bm er, serial nu bm er, power requirements, etc., may be fo nd on u
or near the name plate, which is at the bottom of the unit. You should note this
serial nu bm er in the space prov b wided elo and retain this manual as a
permanent record of your purchase to aid identification in the event of theft.
Model No.
Serial No.
The name plate
is located on the
bottom of the
unit.
12 CLP-685, CLP-675, CLP-645, CLP-635, CLP-695GP, CLP-665GP Owner’s Manual
Introduction
Panel Controls and Terminals
Control Panel
1[P] (Standby/On) switch....................page 15
For turning the power on or setting it to standby.
2[MASTER VOLUME] slider ............... page 19
For adjusting the overall volume.
3[u]/[d]/[<]/[>] buttons, display......... page 22
For selecting an item or setting a value using the
buttons corresponding to the display indication.
4[FUNCTION] button.......................... page 85
Pressing this button alternates the displays among
“Voice” menu, “Song” menu, “Metronome/Rhythm
menu, “Recording” menu and “System” menu, from
which you can make detailed settings for the related
functions.
(Bluetooth logo).............................. page 81
The models CLP-685, CLP-675, CLP-645, CLP-
695GP and CLP-665GP are equipped with Bluetooth
functionality; however, even these models may not
support Bluetooth, depending on the country in
which you purchased the product. If the Bluetooth
logo is printed on the control panel, this means that
the product is equipped with Bluetooth functionality.
5[EXIT] button ..................................... page 22
Pressing this button exits from the current display, or
returns to the Voice or Song display.
6[CFX GRAND] button........................page 24
For selecting the “CFX Grand” Voice.
7[BÖSENDORFER] button.................. page 24
For selecting the “Bösendorfer” Voice.
8[VOICE] button.................................. page 28
Calls up the Voice list display.
9[DUAL/SPLIT] button........................ page 32
For playing two Voices simultaneously, or different
Voices on the left- and right-hand sections of the
keyboard.
)[PIANO ROOM] button..................... page 25
Calls up the Piano Room display where you can
select an optimum piano sound and adjust the touch
response.
![SONG/DEMO] button ...................... page 39
Calls up Song List for selecting a demo Song or a
Song to playback or edit.
@[REC] button....................................... page 52
For recording your keyboard performance.
#[ /R K](Play/Pause) button.................. page 41
For alternately playing back and pausing the Preset
Songs or your recorded material.
$[METRONOME] button..................... page 36
For using the metronome functions.
%[RHYTHM] button............................. page 51
For using the rhythm functions.
^[TEMPO] button ................................ page 36
For setting the tempo.
A-1 B-1 C0 D0 E0 F0 G0 A0 B0 C1 D1 E1 F1 G1 A1 B1
5
7
)
6
8
3
9
9
9
9
9
#! @
@
@
@
@
^$ %
%
%
%
%
4
Each key has a note name; for example, the
lowest (farthest left) key on the keyboard
corresponds to A-1, and the highest
(farthest right) key to C7.
Panel Controls and Terminals
13
CLP-685, CLP-675, CLP-645, CLP-635, CLP-695GP, CLP-665GP Owner’s Manual
C2 D2 E2 F2 G2 A2 B2 C3 D3 E3 F3 G3 A3 B3 C4 D4 E4 F4 G4 A4 B4 C5 D5 E5 F5 G5 A5 B5 C6 D6 E6 F6 G6 A6 B6 C7
1
1
1
1
1
2
2
2
2
2
Key cover (page 15)
Music rest
(page 17)
Pedals
(page 21)
Music braces
(page 18)
Music rest
(page 18)
Key cover
(page 15)
Pedals
(page 21)
Terminal panel
(page 69)
Terminal panel
(page 69)
USB
[TO DEVICE]
terminal
(page 72)
USB
[TO DEVICE]
terminal
(page 72)
CLP-685 CLP-675, CLP-645, CLP-635
(CLP-675)
Terminal panel
(page 69)
[PHONES] jacks
(page 19)
[PHONES]
jacks
(page 19) (CLP-645/635)
Terminal panel
(page 69)
CLP-695GP, CLP-665GP
Music braces
(page 18)
Key cover (page 15)
[AC IN] connector (page 14)
Pedals (page 21)
[PHONES] jacks (page 19)
Lid (page 18)
Music rest
(page 18)
(CLP-665GP)
Terminal panels (page 69)
Music braces
(page 17)
[AC IN] connector
(page 14) (CLP-675)
[AC IN] connector
(page 14)
(CLP-635)
DC IN jack
(page 14)
(CLP-645)
[AC IN] connector
(page 14)
(CLP-695GP)
Terminal panel (page 69)
14 CLP-685, CLP-675, CLP-645, CLP-635, CLP-695GP, CLP-665GP Owner’s Manual
Getting Started — Playing the Clavinova
This section explains how to set up and start using your Clavinova. Setup is so
simple, you can start playing right away.
1. Connect the power cord and AC adaptor (CLP-635 only).
First insert the plug of the power cord into the AC connector on this
instrument, then plug the other end of the cord into a proper AC outlet on
the wall. In some areas a plug adaptor may be provided to match the pin
configuration of the AC wall outlets in your area.
For more information on connecting the power cord, refer to the assembly
instructions on pages 115, 119, 121, 126 or 129.
Connect the plugs of the AC adaptor in the order shown in the illustration.
Turning the Power On or Off
685 645 665GP675 635 695GP
1-1 1-2
The shape of the plug and outlet differ
depending on the particular locale.
[AC IN] connector
(page 13)
WARNING
Use only the AC power cord
supplied with your
instrument. If the supplied
cord is lost or damaged and
needs to be replaced,
contact your Yamaha
dealer. The use of an
inappropriate replacement
can pose a fire and shock
hazard!
The type of AC power cord
provided with your
instrument may be different
depending on the country
in which it is purchased. (In
some areas a plug adaptor
may be provided to match
the pin configuration of the
AC wall outlets in your
area.) Do NOT modify the
plug provided with your
instrument. If the plug does
not fit the outlet, have a
proper outlet installed by a
qualified electrician.
WARNING
Use the specified adaptor
(page 132) only. The use of
other adaptors may result in
irreparable damage to both
the adaptor and the
instrument.
NOTE
When disconnecting the power
cord/AC adaptor, first turn off
the power, then follow this
procedure in reverse order.
685 645 665GP675 635 695GP
AC
adaptor
AC outlet
DC IN jack (page 13)
Power cord
DC plug
AC plug
1-1
1-2
1-3
CAUTION
When setting up the product,
make sure that the AC outlet
you are using is easily
accessible. If some trouble or
malfunction occurs,
immediately turn off the
power switch and disconnect
the plug from the outlet.
15
CLP-685, CLP-675, CLP-645, CLP-635, CLP-695GP, CLP-665GP Owner’s Manual
Getting Started — Playing the Clavinova
2. Open the key cover.
2-1. With both hands, hold the hand grip, then lift and open the
key cover.
2-2. Fold down the top of the key cover.
Lift the cover slightly, then
push and slide it to the end.
3. Turn down the [MASTER VOLUME]
slider at the right end of the front panel
to “MIN.
4. Press the [P] (Standby/On) switch at the right end of the
front panel to turn the power on.
The display located at the left end of the front panel and the power indicator
located below the left end of the keyboard both light up.
685 645 665GP675 635 695GP
CAUTION
Do not place objects such
as pieces of paper or metal
on top of the key cover.
Small objects placed on
the key cover may fall
inside the unit when the
cover is opened and may
be nearly impossible to
remove. This could cause
electric shock, short
circuit, fire or other serious
damage to the instrument.
Hold the cover with both
hands when opening or
closing it. Do not release it
until it is fully opened or
closed. Be careful to avoid
catching fingers (yours or
others, especially
children’s) between the
cover and the unit.
2-2
Be careful to avoid catching your fingers
when opening or closing the cover.
CAUTION
2-1
Be careful to avoid catching your fingers
when opening or closing the cover.
CAUTION
685 645 665GP675 635 695GP
NOTICE
Press only the [P] (Standby/
On) switch when turning the
power on. Any other
operations, such as pressing
the keys, buttons or pedals may
cause the instrument to
malfunction.
[P] (Standby/On) switch
The power indicator
lights up.
16 CLP-685, CLP-675, CLP-645, CLP-635, CLP-695GP, CLP-665GP Owner’s Manual
Getting Started — Playing the Clavinova
5. Play the keyboard.
While playing the keyboard, adjust the volume level by using the [MASTER
VOLUME] slider. For details, refer to “Setting the volume — [MASTER
VOLUME]” on page 19.
6. After you use the instrument, press and hold the
[P] (Standby/On) switch for a second to turn the power
off.
The display and the power indicator are turned off.
7. Close the key cover.
7-1. If the music rest is unfolded,
fold it back.
7-2. With both hands, open the
folded top of the key cover,
and close it gently.
The key cover is equipped with the
special SOFT-CLOSE™ mechanism
which closes the cover slowly.
Slide the cover toward you
and gently lower the cover
over the keys.
CAUTION
Even when the instrument is
turned off, electricity is still
flowing to the instrument at
the minimum level. When you
are not using the instrument
for a long time or during
electrical storms, make sure
you unplug the AC power
plug from the wall AC outlet.
CAUTION
Do not apply excessive force
when closing the key cover.
Applying excessive force to
the key cover when closing it
could damage the SOFT-
CLOSE™ mechanism, and
possibly result in injury to
your hands and fingers
caught under the closing key
cover.
Be careful to avoid catching your fingers
w vhen opening or closing the co er.
CAUTION
685 645 665GP675 635 695GP
Be careful to avoid catching your fingers
when opening or closing the cover.
CAUTION
685 645 665GP675 635 695GP
17
CLP-685, CLP-675, CLP-645, CLP-635, CLP-695GP, CLP-665GP Owner’s Manual
Getting Started — Playing the Clavinova
Auto Power Off function
To prevent unnecessary power consumption, this instrument features an Auto
Power Off function that automatically turns the power off if the instrument is
not operated for a specified period of time. The amount of time that elapses
before the power is automatically turned off is approximately 30 minutes by
default; however, you can change the setting (page 99).
Unfold the music rest:
1. Unfold the music rest, which is on the inside of the key cover.
2. Unfold the music braces, which allow you to hold the pages of music
books in place.
Fold the music rest:
1. Fold the music braces if they are unfolded.
2. Fold the music rest before closing the key cover.
NOTICE
Any data which are not saved
w bill e lost if the power
automatically turns off. Make
sure to save your data before
this happens.
Depending on the instrument
status, the power may not
turn off automatically, even
after the specified period of
time elapses. Always turn off
the power manu wally hen the
instrument is not in use.
Disabling Auto Power Off (simple method)
Turn the power on while holding down the lowest key on the keyboard. An
Auto power off disabled” message appears briefly and Auto Power Off is
disabled.
Music Rest
+
The lowest key
685 645 665GP675 635 695GP
NOTE
Fold down the top of the key
cover (see step 2 on page 15.)
when using the music rest.
NOTICE
Do not put anything heavy on
the music rest for a long period
of time. Doing so may damage
the music rest.
12
Music brace
21
Music brace
18 CLP-685, CLP-675, CLP-645, CLP-635, CLP-695GP, CLP-665GP Owner’s Manual
Getting Started — Playing the Clavinova
To raise the music rest:
1.
Pull the music rest up and toward
yourself as far as it will go.
2. Flip down the two metal
supports at the left and right on
the rear of the music rest.
3. Lower the music rest so that the
metal supports latch into place.
Music braces allow you to hold the pages of music books in place.
To lower the music rest:
Close the Music braces if they are open,
and then lower the music rest by
following the instructions below.
1. Pull the music rest toward
yourself as far as it will go.
2. Raise the two metal supports
(at the rear of the music rest).
3. Gently lower the music rest backward until it is all the way down.
To open the lid:
1.
Raise and hold the right side of
the lid (viewed from the
keyboard end of the instrument).
2. Raise the lid stay and carefully
lower the lid so that the end of
the stay fits into the recess in
the lid.
To close the lid:
1. Hold the lid stay and carefully
raise the lid.
2. Hold the lid in its raised
position and lower the lid stay.
3. Carefully lower the lid.
685 645 665GP675 635 695GP
Music braces
CAUTION
Do not try to use the music
rest in a half-raised position.
Also, when raising or
lowering the music rest, do
not release your hands from
the music rest until it is all
the way up or down.
Lid
Music braces
685 645 665GP675 635 695GP
WARNING
Do not let children open or
close the lid. Also, be
careful to avoid catching
fingers (yours or others,
and especially those of
children) when raising or
lowering the lid.
Make sure that the end of
the stay fits securely in the
lid recess. If the stay is not
properly seated in the
recess, the lid may fall,
causing damage or injury.
Be careful that you or
others do not bump the
stay while the lid is raised.
The stay may be dislodged
from the lid recess causing
the lid to fall.
1
2
1
3
2
19
CLP-685, CLP-675, CLP-645, CLP-635, CLP-695GP, CLP-665GP Owner’s Manual
Getting Started — Playing the Clavinova
To adjust the volume, use the [MASTER VOLUME]
slider located at the right of the panel. Play the
keyboard to actually produce sound while you
adjust the volume.
Intelligent Acoustic Control (IAC)
IAC is a function which automatically adjusts and controls the sound quality
according to the overall volume of the instrument. Even when the volume is
low, it permits both low sounds and high sounds to be clearly heard.
IAC Control is effective only from the sound output of the instrument speakers.
You can set the IAC setting On or Off via the “System” menu display: Press the
[FUNCTION] button repeatedly to call up the “System” menu display →
Sound” “IAC.” The default setting for this function is “On.
Connect a pair of headphones to one of the [PHONES] jacks. When the headphones are plugged into either
of the [PHONES] jacks, the internal speaker system is automatically shut off. Two [PHONES] jacks are
provided. Two sets of standard stereo headphones can be plugged in. (If you are using only one pair of
headphones, you can plug them into either of these jacks.)
CAUTION
Do not use headphones at a high volume for an extended period of time. Doing so may cause hearing loss.
Setting the Volume — [MASTER VOLUME]
Decreases
the level.
Increases
the level.
Master Volume: The
volume level of the entire
keyboard sound.
Adjusting the [MASTER
VOLUME] slider also affects
the output level of the
[PHONES] jacks and the
output level of the AUX OUT
jacks.
CAUTION
Do not use the instrument at
a high volume level for a long
period of time, or your
hearing may be damaged.
NOTE
“System” menu display
(page 95)
Using Headphones
685 675 645 635 685 645 635695GP 665GP 675 695GP 665GP
Standard stereo
phone plug Standard stereo
phone plug
Underside of
keyboard
Underside of keyboard
685 645 635 665GP675 695GP
Underside of keyboard
Standard stereo
phone plug
20 CLP-685, CLP-675, CLP-645, CLP-635, CLP-695GP, CLP-665GP Owner’s Manual
Getting Started — Playing the Clavinova
Reproducing the Natural Sensation of Sound Distance
—Binaural Sampling and Stereophonic Optimizer
This instrument features two advanced technologies that allow you to enjoy
exceptionally realistic, natural sound, even when listening on headphones.
Binaural Sampling (“CFX Grand Voice only)
Binaural sampling is a method that uses two special microphones set at the ear
position of a performer and records the sound from a piano as it is. Listening to the
sound with this effect through headphones gives the impression of being immersed
in the sound, as if it was actually emanating from the piano. Moreover, you can
enjoy the sound naturally for a long time without ear strain. When the default voice,
CFX Grand” (page 24) is selected, connecting the headphones automatically
enables the binaural sampling sound.
Stereophonic Optimizer (Voices in the Piano group other than
CFX Grand”)
The Stereophonic Optimizer is an effect which reproduces natural sound distance
like the sound of binaural sampling even though you hear it on headphones. When
a Voice in the Piano group other than “CFX Grand” is selected, connecting the
headphones automatically enables the Stereophonic Optimizer.
Using the headphone hanger
You can conveniently hang the headphones on the instrument when not using
them. Install the headphone hanger by following the instruction at the end of
this manual (CLP-685: page 116, CLP-675: page 119, CLP-645/635: page 122,
CLP-695GP: page 126, CLP-665GP: page 129).
Sampling
A technology which records
the sounds of an acoustic
instrument then stores them to
the tone generator to be played
based on information received
from the keyboard.
NOTE
Voices in the Piano group are
those contained in the “Piano”
category in the Preset Voice
List (page 102). For details
about selecting Voices, refer to
page 24.
When headphones are connected, the Voices in the Piano group automatically
change to the sound of Binaural Sampling or the sound enhanced with the
Stereophonic Optimizer, by the default settings. Since these sounds are optimized for
listening with headphones, we recommend that you set this function toOFF” in the
following situations.
Playing the piano sound of this instrument with an external powered speaker
system, while monitoring the sound output from this instrument on connected
headphones.
Making an audio recording (page 52) and then playing that recorded audio Song
through speakers of this instrument. (Make sure to turn off these functions before
audio recording.)
You can set this setting On or Off via the “System” menu display. Press the
[FUNCTION] button repeatedly to call up the “System” menu display: “Sound
“Binaural” (page 96).
NOTICE
Do not hang anything other
than the headphones on the
hanger. Otherwise, the
instrument or the hanger may
be damaged.
NOTE
Before connecting an external
powered speaker system, be
sure to read “Connections”
(page 69).
21
CLP-685, CLP-675, CLP-645, CLP-635, CLP-695GP, CLP-665GP Owner’s Manual
Getting Started — Playing the Clavinova
This instrument is equipped with three foot pedals:
damper pedal (right), sostenuto pedal (center), and
soft pedal (left).
Damper pedal (right pedal)
When you press the damper pedal, the notes you play
have a longer sustain.
When you select a Voice in the Piano group, pressing
the damper pedal activates the VRM (page 26) to
accurately recreate the unique resonance of an acoustic
grand pianos soundboard and strings.
Sostenuto pedal (center pedal)
If you play a note or chord on the keyboard and press
the sostenuto pedal while holding the note(s), the
notes will sustain as long as the pedal is held. All
subsequent notes will not sustain.
Soft pedal (left pedal)
The soft pedal reduces the volume and slightly changes the timbre of notes played
while the pedal is pressed. The soft pedal will not affect notes that are already
playing when it is pressed. In order to apply this effect, play notes after pressing the
pedal.
Keep in mind that this pedal function will be changed from the Soft pedal
depending on the selected Voice. When the “Mellow Organ” is selected, pressing
and releasing this pedal switches between “fast” and “slow” of the Rotary Speaker
speed (“Rotary Speed on page 87). When the Vibraphone is selected, this pedal
switches Vibrato on and off (“VibeRotor” on page 87).
Using the Pedals
When you press the damper
pedal here, the notes you
play before you release the
pedal have a longer sustain.
NOTE
Voices in the Piano group are
those contained in the “Piano”
category in the Preset Voice
List (page 102). For details
about selecting Voices, refer to
page 24.
NOTE
You can assign other functions
to each pedal by using “Pedal
Assign” in “Voice” menu
display (page 88).
Half-pedal function
This instrument also has a Half-pedal function which allows you to use half-damper
techniques, in which the damper is pressed somewhere between all the way down and all
the way up. In this half-damper state (on a real piano), the damper felts only partially
mute the strings. The Half-pedal function on the Clavinova lets you delicately and
expressively control the damper muting, and create subtle nuances in your performance,
by finely controlling the point at which pressure on the pedal affects the damper muting.
This can be set via the “Systemmenu display: Press the [FUNCTION] button repeatedly
to call up the “System” menu display: “Pedal” Half Pedal Point” (page 96).
GP Responsive Damper Pedal
The damper pedal of the CLP-685, CLP-675 and CLP-695GP is the GP Responsive
Damper Pedal. This special pedal has been designed to provide enhanced tactile response
and, when pressed, is much closer in feel to the pedal of an actual grand piano. It makes it
easier to physically experience the half-pedal point and more easily apply the half-pedal
effect than other pedals. Since the pressing sensation may vary depending on the
situation, including the location where the instrument is installed, you should adjust the
half-pedal point described above to the desired setting.
685 675 645 635 695GP 665GP
NOTE
The pedals are covered with
vinyl covers when shipped
from the factory. If your
instrument features the GP
Responsive Damper Pedal,
remove the cover from the
damper pedal for optimum use
of the pedal effect.
When you press the sostenuto
pedal here while holding the
note(s), the notes will sustain as
long as you hold the pedal.
NOTE
While the sostenuto (center)
pedal is held, a sustained (non-
decaying) type of Voice such
as strings or organ may sound
continuously without decay
after the notes have been
released.
NOTE
The center pedal or left pedal
can also be used as a [R K/ ]
(Play/Pause) button. You can
assign this function via the
“System” menu display: Press
the [FUNCTION] button
repeatedly to call up the
“System” menu display:
“Pedal” “Play/Pause”
(page 96).
22 CLP-685, CLP-675, CLP-645, CLP-635, CLP-695GP, CLP-665GP Owner’s Manual
Basic Operations on Display
On the screen display, you can call up three main functions: Voice, Song and Demo. In addition, various
detailed settings can be made, for even greater playability and performance potential.
1.
1.
2.
2.
1.
2.
Select a Voice, Song or
Demo Song
When this is shown here,
you can scroll through the
display vertically.
Press the [EXIT] button to return to the Voice display or the Song display,
depending on which display was previously shown.
While the pop-up window is shown, pressing the [EXIT] button returns to
the previously shown display.
Select from the list, or change the display.
Selecting Voices
Press the [VOICE] button
to call up the Voice List
display.
Press the [u d] or [ ] button
to select a Voice group.
Selecting Song/Demo
When this is shown here,
you can scroll through the
display vertically.
Press the [SONG/DEMO]
button to call up the Song
category list.
Detailed Settings
Select from the list, or change the display.
Menu icon Menu name
Press the [u] or [d] button
to select a Song category.
Press the [FUNCTION]
button repeatedly to
select the desired menu.
Press the [u d] or [ ] button
to select a parameter of the
current menu.
Return to the Voice/Song display
Basic Operations on Display
23
CLP-685, CLP-675, CLP-645, CLP-635, CLP-695GP, CLP-665GP Owner’s Manual
Voice: Instrument sound for playing from the keyboard. In addition to the Piano sounds, a wide variety of other musical
instrument sounds are available.
Song: A piece of music for listening enjoyment or for playing back and practicing along with.
Demo: Voice Demos let you experience the characteristics of the Voices.
3. 4.
3.
3.
4.
4.
4.
Selecting a value from a list
[r] to select a Voice.
[l] to return.
[r] to select a Voice.
[u] to return.
This indicates the current
position in the Voice group.
Press the [
u
] or [
d
] button to select a Voice.
Press the [u d] and [ ] buttons simultaneously
to select the first Voice in the list.
Play the keyboard.
Press the [
l
] or [
r
] button to select the previous
or next Voice. Press the [
l
] and [
r
]
simultaneously to select the first Voice in the
Voice group.
Voice display
[r] to select a Song.
[l] to return.
[r] to select a Song.
[u] to return.
Press the [u] or [d] button to select
a Song.
When “Lesson” is selected, press the [u] or
[d] button to select a Lesson type.
Press the [R K/ ] (Play/Pause)
button to playback the Song.
Use the [l] or [r] button to select the
previous or next bars.
Song display
[r] to detailed
settings.
[EXIT] to return
to the prev uio s
display.
[r] to detailed settings.
[l] to return.
Adjusting the value on the
slider pop-up window
Press the [l] or [r] button to adjust the
value, press the [EXIT] button to close the
pop-up window.
To reset the default value, press the [
l
] and [
r
]
buttons simultaneously.
Press the [u] or [d]
button to select a
parameter.
A checkmark is
shown at the right of
the selection.
Use the [u][d] buttons or the [r] button
to select a setting.
Press the [l] button to return to the previous
display.
Note that the hierarchy depth
differs depending on the
selected parameter.
You can select the CFX Grand” and the “Bösendorfer” Voices
directly from the control panel buttons.
24 CLP-685, CLP-675, CLP-645, CLP-635, CLP-695GP, CLP-665GP Owner’s Manual
Main Operations
Enjoying the Piano Performance
This instrument puts the sounds of two renowned grand pianos, the Yamaha CFX and Bösendorfer
Imperial, as well as other piano sounds—each with its own distinctive appeal and sonic characteristics.
Simply select the particular piano sound desired, according to the music you intend to play or your
personal preferences.
1. Press the [CFX GRAND] button or the [BÖSENDORFER]
button to select the piano type.
A Voice is called up from the selected Voice button and its name appears
on the Voice display.
CFX Grand
Yamahas CFX concert grand piano sound with a wide dynamic range for
maximum expressive control. Suitable for playing in any music genre and
style.
Bösendorfer
The famed sound of the Vienna-made Bösendorfer Imperial concert
grand piano. Its spacious sound evokes the size of the instrument, and is
ideal for expressing tenderness in compositions.
2. Play the Keyboard.
Selecting two Grand Piano Voices from the panel directly
1
Voice display
Voice name
NOTE
You can hear and experience
the characteristics of the
Voices by listening to the Demo
Songs for each Voice
(page 40).
Selecting Other Piano Voices
Press the [l][r] buttons to select other piano Voices than “CFX Grand”
and “Bösendorfer.” You can also select the other Voices by pressing the
[VOICE] button (page 28).
25
CLP-685, CLP-675, CLP-645, CLP-635, CLP-695GP, CLP-665GP Owner’s Manual
Enjoying the Piano Performance
You can adjust the detailed settings of Voices in the Piano group in the Piano
Room. Try creating a custom piano sound by adjusting the various parameters
such as lid position, string resonance, damper resonance and so on.
1. Press the [PIANO ROOM] button to call up the Piano
Room display.
2. Press the [u d]/[ ] buttons to select items (page 26).
3. Press the [l r]/[ ] buttons to change the settings (page 26).
4. Press the [EXIT] button to exit from the Piano Room
display.
Customizing the Sound and the Touch Response of
Piano Voices (Piano Room)
2, 3
1
4
NOTE
If a Voice other than in the
Piano group is selected,
pressing the [PIANO ROOM]
button changes it to “CFX
Grand.”
NOTE
Pressing the [PIANO ROOM]
button disables the Dual/Split/
Duo functions.
Piano Room display
26 CLP-685, CLP-675, CLP-645, CLP-635, CLP-695GP, CLP-665GP Owner’s Manual
Enjoying the Piano Performance
What you can do in the Piano Room
Item Icon Descriptions Default
settings Setting Range
Lid Position Determines how much the Lid is opened. Full Full, Half, Close
Brightness Adjusts the brilliance of sound. Differs
depending on
the Voice.
0 – 10
Touch Determines how the sound responds to your playing
strength. You should adjust this setting according to the
specific Voice you’re playing or the particular Song you’re
performing, as desired.
Medium Soft2, Soft1,
Medium, Hard1,
Hard2, Fixed
Reverb Determines the Reverb type which is applied to all the entire
sound including the keyboard performance, Song playback
and MIDI data input from an external MIDI device.
Differs
depending on
the Voice.
Refer to the
Reverb Type
List (page 89)
Reverb
Depth
Adjusts the Reverb depth. When “Reverb” is set to “off” or a
value of “0,” no effect is produced.
Differs
depending on
the Voice.
0 – 127
Master Tune Fine tunes the pitch of the entire instrument. This function is
useful when you play this instrument along with other
instruments or CD music.
A3 = 440.0 Hz A3 = 414.8 Hz –
466.8 Hz
(approx. 0.2 Hz
steps)
VRM Turns the VRM effect on/off. For information about the VRM
function, refer to page 27. For details about the Piano Voices
compatible with VRM, refer to the “Preset Voice List” on
page 102.
Listening to the VRM Demo
You can hear the difference of
VRM On/Off by pressing the [R K/ ]
(Play/Pause) button while VRM On/
Off display is being displayed.
If you press the [R K/ ] (Play/Pause)
button while VRM is On, the Demo
Song of VRM On will play back. If you press the [R K/ ] (Play/
Pause) button while VRM Off, the Demo Song of VRM Off will
play back.
On On, Off
Damper Res. Determines the depth of the string resonance effect which is
applied when the damper pedal is pressed. This parameter
can be set when VRM is on.
5 0 – 10
String Res. Determines the depth of the string resonance effect which is
applied when a note on the keyboard is pressed. This
parameter can be set when VRM is on.
5 0 – 10
Aliquot Res. Adjusts the sympathetic vibrations of the Aliquot resonance
effect. For details about Aliquot, refer to “What is Aliquot?”
(page 27).
5 0 – 10
Body Res. Adjusts the resonance of the piano itself, i.e. soundboard, the
sides, the frame and so on. This parameter can be set when
VRM is on.
5 0 – 10
Key Off Sample Determines the volume of the key-off sound (the subtle sound
that occurs when you release a key) which is available only
for some Voices. For Voices to which this effect is applied,
refer to the Voice List (page 102).
5 0 – 10
Half Pedal Point Specify the point to which you must depress the right pedal
before the effect of “Sustain Continuously” begins to be
applied. This setting applies only to the “Sustain
Continuously” effect (page 89) that is assigned to the right
pedal.
0
-2 (effective with
the shallowest
press) – 0 – +4
(effective with the
deepest press)
27
CLP-685, CLP-675, CLP-645, CLP-635, CLP-695GP, CLP-665GP Owner’s Manual
Enjoying the Piano Performance
What is VRM?
The VRM (Virtual Resonance Modeling) function uses sophisticated physical
modeling to simulate the actual string resonance sound that occurs when the
damper pedal on a real piano is pressed or keys are played and held.
On an actual acoustic piano, if you press the damper pedal and play a key, not
only does the string of the pressed key vibrate, it also causes other strings and
the soundboard to vibrate, with each influencing the rest, creating a rich and
brilliant resonance that sustains and spreads. The VRM (Virtual Resonance
Modeling) technology featured in this instrument reproduces the complicated
interaction of both string and soundboard resonance faithfully using a virtual
musical instrument (physical modeling), and makes the sound more like a real
acoustic piano. Since instantaneous resonance is made at the moment according
to the state of the keyboard or pedal, you can vary the sound expressively by
changing the timing of your pressing the keys, and the timing and depth of your
pressing the pedal.
What is Aliquot?
Aliquot is a stringing method for pianos that uses extra, un-struck strings in the
upper octaves to enhance the tone. These strings sympathetically vibrate with
other strings in an acoustic piano, resonating with overtones, and adding
richness, brilliance and complex color to the sound. Since they do not have a
damper, they will continue sounding even after you release your hands from the
keyboard.
28 CLP-685, CLP-675, CLP-645, CLP-635, CLP-695GP, CLP-665GP Owner’s Manual
Playing Various Musical Instrument Sounds
(Voices)
In addition to the wonderfully realistic piano sounds, you can select and play other musical instrument
sounds (Voices), such as organ or stringed instruments.
The Voices of the instrument are conveniently divided into groups of
instrument types. Select a desired Voice and play the piano.
You can also select a Voice from the XG Voices (CLP-685 and CLP-695GP
only). For instructions, refer to page 29.
1. Press the [VOICE] button to call up the Voice List display.
Voice groups are listed in the display. The currently selected Voice is
highlighted.
2. Use the [u d]/[ ] buttons to select the Voice group.
Highlight the Voice group name you want to use.
Selecting Voices
NOTE
To hear and experience the
characteristics of the Voices,
listen to the Demo Songs for
each Voice (page 40).
NOTE
Touch Response (page 95) will
not be applied to some Voices.
For information about the
Voices to which Touch
Response can be applied,
refer to the “Preset Voice List”
on page 102.
XG
XG is a major enhancement of
the GM System level 1 format
(page 39), and was developed
by Yamaha specially to provide
more Voices and variations, as
well as greater expressive
control over Voices and effects,
and to ensure compatibility of
data well into the future.
NOTE
For information about the
Voices, refer to the “Preset
Voice List” (page 102).
2, 3, 4
1
Voice group
Voice List display
29
CLP-685, CLP-675, CLP-645, CLP-635, CLP-695GP, CLP-665GP Owner’s Manual
Playing Various Musical Instrument Sounds (Voices)
3. Press the [r] button.
The Voices in the selected group are listed in the display.
4. Use the [u d]/[ ] buttons to scroll through the Voice list,
and then press the [r] button to select the desired Voice.
The currently selected Voice name is shown in the display.
You can select other Voices in order using the [
l
]/[
r
] buttons via the
Voice display.
Press the [
u
] button to go back to the Voice List display.
5. Play the keyboard.
NOTE
Press the [<] button to return to
the Voice List for selecting the
Voice Group.
Voice
Voice display
NOTE
You can specify the Touch
Response (how the sound
responds to the way you play
the keys). You should adjust
this setting according to the
specific Voice you’re playing or
the particular Song you’re
performing, as desired. You
can make the settings via the
“System” menu display: Press
the [FUNCTION] button
repeatedly to select the
“System” menu display
“Keyboard” Touch”
(page 95). You can also adjust
the Touch Response for the
Voices in the Piano group from
the Piano Room display
(page 26).
Selecting XG Voices
If you want to select a Voice from the XG voices, select “XG” in step 2.
Because the XG Voice group has an extremely large number of Voices, the group
is divided into sub-groups. Press the [r] button to call up the Voice group list,
then select the desired Voice group from the list by using the [u d]/[ ] buttons.
After this, follow the procedure beginning with step 3 above.
*For details on XG Voices, refer to the “XG Voice list” in the separate Data List.
685 675 635 695GP645 665GP
Scroll to the bottom of the display
by pressing the [d] button.
30 CLP-685, CLP-675, CLP-645, CLP-635, CLP-695GP, CLP-665GP Owner’s Manual
Playing Various Musical Instrument Sounds (Voices)
Applying the following effects gives you greater and richer expressive
capabilities.
Brilliance
For adjusting the brightness of the sound. This setting is applied commonly to
all parts (keyboard Voices/Song/MIDI).
1. Press the [FUNCTION] button repeatedly to call up the
System” menu display, then select the highlighted item in
each display as illustrated below.
Use the [u]/[d] buttons to select the desired tonality in the Brilliance
display. To reset to the default setting, press the [u d] and [ ] buttons
simultaneously.
Mellow 1 – 3
Soft and mellow tone. The sound becomes more mellow and rounder as
the number increases.
• Normal
Standard tone.
Bright 1 – 3
Bright tone. The sound becomes brighter as the number increases.
Enhancing and Customizing the Sound
1
1
“System” menu display
1-1. Use the [u d]/[ ] buttons
to select “Sound.
1-2. Press the [>] button to
call up the next display.
1-3. Use the [u]/[d] buttons
to select “Brilliance.
1-4. Press the [>] button to
call up the next display.
1-5. Use the [u]/[d] buttons
to select the value.
Checkmark
Sound display Brilliance display
Default setting: Normal
NOTE
If you select Bright 1 – 3 as the
type of brilliance, the volume
level will increase slightly.
Under this condition, if you
raise the [MASTER VOLUME]
slider setting, the sound may
become distorted. If this
happens, lower the volume
accordingly.
31
CLP-685, CLP-675, CLP-645, CLP-635, CLP-695GP, CLP-665GP Owner’s Manual
Playing Various Musical Instrument Sounds (Voices)
Reverb
This control adds reverberation to the sound by simulating the natural
reverberation of a concert hall. The ideal Reverb type is automatically selected
whenever you select a Voice, but you can select any of the available Reverb types.
To select a desired Reverb type, use the “Voice” menu display: “Reverb
(page 86). You can also select the Reverb type for Voices in the Piano group
from the Piano Room display (page 26).
This setting is applied commonly to all parts (keyboard Voices/Song/MIDI).
Chorus
This control adds warmth and spaciousness to the sound. The ideal Chorus
type is automatically selected whenever you select a Voice, but you can select
any of the available Chorus types.
To select a desired Chorus type, use the “Voice” menu display: “Chorus”
(page 86).
This setting is applied commonly to all parts (keyboard Voices/Song/MIDI).
Effects
This instrument features a wide variety of Effects, letting you apply
enhancements such as Echo or Tremolo to the selected Voice for your keyboard
performance. You can select any of the available Effect types from the “Voice
menu display: “Voice Edit” “Effect” (page 87).
NOTE
You can adjust the Reverb
depth for the selected Voice
from the “Voice” menu display:
“Voice Edit” “Reverb Depth”
(page 87).
NOTE
You can adjust the Chorus
depth for the selected Voice
from the “Voice” menu display:
“Voice Edit” “Chorus Depth”
(page 87).
NOTE
When you want to apply the
Chorus effect to a Voice whose
Chorus type is set to off by
default, set the Chorus type to
something other than “Off,”
then set the Chorus depth
value as desired (greater than
“0”).
32 CLP-685, CLP-675, CLP-645, CLP-635, CLP-695GP, CLP-665GP Owner’s Manual
Playing Various Musical Instrument Sounds (Voices)
Two Voices can be played simultaneously. You can create warm and richly
textured Voices by using Voices from different groups simultaneously in a layer,
or by using Voices in the same group.
1. To enter the Dual mode, press the [DUAL/SPLIT] button
once so that the lamp lights in red.
The Voice which is displayed at top is Voice 1, and the one at bottom is
Voice 2.
2. Select the Voices for layering.
2-1. Use the [u]/[d] buttons to highlight (Voice 1) in the
display.
2-2. Use the [l]/[r] buttons or the [VOICE] button to select the
desired Voice.
If you use the [VOICE] button to call up the Voice List display, press the
[r] button to select a Voice, and then return to the previous display.
Use the [u d]/[ ] buttons to highlight (Voice 2), select a Voice in the
same way.
3. Play the keyboard.
4. To exit from the Dual mode, press the [DUAL/SPLIT]
button repeatedly to turn the lamp off.
Playing Two Voices Simultaneously (Dual)
2
21, 4
Voice 1
Voice 2
Lit in red
33
CLP-685, CLP-675, CLP-645, CLP-635, CLP-695GP, CLP-665GP Owner’s Manual
Playing Various Musical Instrument Sounds (Voices)
Split mode enables you to play two different Voices on the keyboard—one with
your left hand and another with your right.
1. To enter the Split mode, press the [DUAL/SPLIT] button
repeatedly to light it in green.
The Voice which is displayed at top is Voice R, and the one at bottom is
Voice L.
2. Select a Voice for the right-hand area and left-hand area.
2-1. Use the [u]/[d] buttons to highlight (Voice R) in the
display.
2-2. Use the [l]/[r] buttons or the [VOICE] button to select the
desired Voice.
If you use the [VOICE] button to call up the Voice List display, press the
[r] button to select a Voice, and then return to the previous display.
Use the [u d]/[ ] buttons to highlight (Voice L), and select a Voice in
the same way.
3. Play the keyboard.
Changing the Split Point
You can change the Split Point (the border between the right- and left-
hand ranges) from the default setting “F 2” to any other key. While in the
Split mode, hold down the [DUAL/SPLIT] button, and press the key you
wish to assign as the Split Point.
4. To exit from the Split mode, press the [DUAL/SPLIT]
button repeatedly so that the lamp turns off.
Splitting the Keyboard Range and Playing Two
Different Voices (Split Mode)
2
21, 3, 4
Voice R
Voice L
Lit in green
NOTE
The specified Split Point key is
included in the left-hand range
NOTE
The Split Point can also be set
via the “System” menu display:
Press the [FUNCTION] button
repeatedly to call up the
“System” menu display
“Keyboard” “Split Point”
(page 96).
Center “C”
34 CLP-685, CLP-675, CLP-645, CLP-635, CLP-695GP, CLP-665GP Owner’s Manual
Playing Various Musical Instrument Sounds (Voices)
1. To enter the Dual and Split modes simultaneously, press
the [DUAL/SPLIT] button repeatedly so that the lamp
lights in orange.
The Voice which is displayed at top is Voice R1, and the one in the middle
is Voice R2, and the one at bottom is Voice L.
2. Select the Voices for layering and for the left-hand area.
2-1. Use the [u]/[d] buttons to highlight (Voice R1) in the
display.
2-2. Use the [<]/[>] buttons or the [VOICE] button to select the
desired Voice.
If you use the [VOICE] button to call up the Voice List display, press the
[r] button to select a Voice, and then return to the previous display.
Use the [u d]/[ ] buttons to highlight (Voice R2) and (Voice L),
and select Voices in the same way.
3. Play the keyboard.
4. Press the [DUAL/SPLIT] button to exit from the Dual and
Split mode.
The lamp of the [DUAL/SPLIT] button turns off.
Using Dual and Split Simultaneously
2
21, 4
Voice R1
Voice R2
Lit in orange
Voice L
NOTE
The specified Split Point key is
included in the left-hand range.
NOTE
For the information on setting
the Split Point, refer to page 33.
36 CLP-685, CLP-675, CLP-645, CLP-635, CLP-695GP, CLP-665GP Owner’s Manual
Playing Various Musical Instrument Sounds (Voices)
2. Press the [EXIT] button to exit from the menu display.
When Duo is on, the [DUAL/SPLIT] button is lit in green and the [Duo]
is shown on the Voice display.
3. Play the keyboard.
The sound of left-hand range is emitted from the left, the sound of right-
hand range is emitted from the right.
4. Press the [DUAL/SPLIT] button to exit from the Duo
mode.
You can also exit from the Duo mode by following either of the
instructions below.
Press any of the [CFX GRAND], [BÖSENDORFER], [PIANO ROOM]
buttons.
Repeat the same procedure from step 1 to set it to “Off.
The instrument has a built-in metronome (a device that keeps an accurate
tempo)—a convenient tool for practice.
1. Press the [METRONOME] button to start the metronome.
This calls up the Tempo display, from which you can adjust the tempo.
For details, see next section.
2. Press the [METRONOME] button to stop the metronome.
To close the Tempo display, press the [EXIT] button.
Adjusting the Tempo
Using the Metronome
Lit in green
NOTE
You can set the metronome
volume, BPM and so on from
the “Metronome/Rhythm” menu
display (page 93).
2
3
1
Metronome
37
CLP-685, CLP-675, CLP-645, CLP-635, CLP-695GP, CLP-665GP Owner’s Manual
Playing Various Musical Instrument Sounds (Voices)
1. Press the [TEMPO] button to call up the Tempo display.
2. Use the [<]/[>] buttons to adjust the tempo.
You can adjust the tempo value (number of beats per minute) using the
[<]/[>] buttons. To reset the tempo to the default setting, press the [<]
and [>] buttons simultaneously.
3. Press the [EXIT] button to close the Tempo display.
Setting the metronome time signature
1. Press the [FUNCTION] button repeatedly to call up the
Metronome/Rhythm” menu display.
2. Use the [u d]/[ ] buttons to select “Time Sig.” and then
press the [r] button.
3. Use the [u d]/[ ] buttons to select the desired time
signature.
Setting range: 2/2, 1/4, 2/4, 3/4, 4/4, 5/4, 6/4, 7/4, 3/8, 6/8, 7/8, 9/8, 12/8
Default setting: 4/4 (Selecting a MIDI Song will change the tempo value to
that specified in the selected MIDI Song data.)
NOTE
For information on setting the
time signature, refer to
page 37.
Tempo value
2, 3
5
1
Time Signature
Time Signature display
38 CLP-685, CLP-675, CLP-645, CLP-635, CLP-695GP, CLP-665GP Owner’s Manual
Playing Various Musical Instrument Sounds (Voices)
Tempo indication and Setting range
Tempo is displayed as “note type=xxx” (For example: =120). Selecting
the Time Signature changes the available parameters as follows.
* When the tempo value of the selected MIDI Song is outside the setting range on the instrument,
the value will be changed to fit within the setting range.
* Note type will be fixed to quarter note as long as the “BPM” parameter in the “Metronome/Rhythm”
menu display is set to “Crotchet” regardless of the Time Signature you set.
4. Turn the “Bell” setting on.
For details, refer to “Bell” in the “Metronome/Rhythm” menu (page 93).
The Metronome plays back according to the selected Time Signature with
the Bell sound on the first beat of each measure.
5. Press the [EXIT] button to close the “Metronome/
Rhythm” menu display.
Note type Time Signature Setting range
2/2 3 – 250
1/4, 2/4, 3/4, 4/4, 5/4,6/4, 7/4 5 – 500
6/8, 9/8, 12/8 4 – 332 (even numbers only)
3/8, 7/8 10 – 998 (even numbers only)
and 999
Half note
Quarter note
Dotted quarter note
Eighth note
Note type
The length of one beat
Metronome detailed
settings
You can set the metronome
volume, BPM and so on from
the “Metronome/Rhythm” menu
display (page 93).
39
CLP-685, CLP-675, CLP-645, CLP-635, CLP-695GP, CLP-665GP Owner’s Manual
Playing Back Songs
This instrument can play Preset Songs, Songs you recorded on this instrument, or commercially available
Songs. In addition to listening to these Songs, you can play the keyboard as the Song plays back.
You can play back the following types of Songs in this instrument.
Preset Voice Demo Songs (Voice Demo).
• P
reset Songs: 50 classical Preset Songs (“50 Classics”) and 303 Lesson Songs
(“Lesson)
Your own recorded Songs (see page 52 for instructions on recording)
Commercially available MIDI Song data: SMF (Standard MIDI File)
The maximum size for playback on this instrument is approx. 500KB per single
MIDI Song.
Commercially available Audio Song data: Wav (file extension = .wav with
44.1 kHz sample rate, 16-bit resolution, stereo, and maximum 80 minutes length)
MIDI Songs and Audio Songs
There are two kinds of Songs that can be recorded and played back on this
instrument: MIDI Songs and Audio Songs.
A MIDI Song is comprised of your keyboard performance information and is not a
recording of the actual sound itself. The performance information refers to which
keys are played, at what timing, and at what strength—just as in a musical score.
Based on the recorded performance information, the tone generator (of the
Clavinova, etc.) outputs the corresponding sound. A MIDI Song uses a small amount
of data capacity in comparison to an Audio song, and allows you to easily change
aspects of the sound, such as Voices used, etc.
An Audio Song is a recording of the performed sound itself. This data is recorded in
the same way as that used in recording cassette tapes, or with voice recorders, etc.
This data can be played with a portable music player, etc., allowing you to easily let
other people hear your performance.
The CLP-685 and CLP-695GP are compatible with the following formats.
GM System Level 2
GM (General MIDI)” is one of the most common Voice allocation formats. “GM System Level
2” is a standard specification that enhances the original “GM” and improves Song data
compatibility. It provides for increased polyphony, greater Voice selection, expanded Voice
parameters, and integrated effect processing.
XG
XG is a major enhancement of the GM System Level 1 format, and was developed by Yamaha
specifically to provide more Voices and variations, as well as greater expressive control over
Voices and effects, and to ensure compatibility of data well into the future.
GS
GS was developed by the Roland Corporation. In the same way as Yamaha XG, GS is a major
enhancement of the GM specifically to provide more Voices and Drum kits and their
variations, as well as greater expressive control over Voices and effects.
Availability of functions differs between MIDI Songs and Audio Songs. In this chapter, the
following icons indicate whether or not the explanation applies to MIDI Songs or Audio Songs
individually.
Example:
685 675 635 695GP645 665GP
MIDI Audio Indicates explanation applies
only to MIDI Songs
40 CLP-685, CLP-675, CLP-645, CLP-635, CLP-695GP, CLP-665GP Owner’s Manual
Playing Back Songs
For each Voice group, the instrument contains several Demo recordings that
showcase the special characteristics of the corresponding Voices. For
information about the Voices which feature Demos that can be played back,
refer to the “Preset Voice List” on page 102.
1. Press the [SONG/DEMO] button to call up the Song list
display.
2. Use the [u d]/[ ] buttons to select “Demo,and then press
the [r] button to call up the next display.
3. Use the [u d]/[ ] buttons to select the desired Voice Demo,
and then press the [r] button to call up the Demo display.
The currently selected Voice Demo name is shown in the display.
4. Press the [R K/ ] (Play/Pause) button to start playback.
5. Press the [R K/ ] (Play/Pause) button again to stop
playback.
The Piano Demo stops automatically when Piano Demo playback reaches
the end.
Selecting Other Demos
Press the [u] button to return to the Song list display, then repeat steps 3
– 4 of this section.
Listening to the Voice Demos
14, 5
2, 3, 4
Demo display
NOTE
Recording operations cannot
be used during Voice Demo
playback.
41
CLP-685, CLP-675, CLP-645, CLP-635, CLP-695GP, CLP-665GP Owner’s Manual
Playing Back Songs
1. If you want to play back a Song in a USB flash drive,
connect the USB flash drive containing Song data to the
USB [TO DEVICE] terminal beforehand.
Audio files to be played must be on a USB flash drive.
2. Press the [SONG/DEMO] button to call up the Song List
display, then select the desired category using [u]/[d]
buttons.
Select the desired one from “50 Classics,” “Lesson,User” or “USB
referring to the category descriptions below.
Playback of Songs
MIDI Audio
NOTE
The instrument can
automatically select a Song file
saved in the root directory of
the USB flash drive as soon as
the USB flash drive is
connected. For instructions,
refer to “USB Autoload” on
page 98.
25, 6
2, 3, 4
NOTE
Before using a USB flash drive,
be sure to read “Connecting
USB Devices (USB [TO
DEVICE] terminal)” on
page 72.
Demo Voice Demos let you experience the characteristics of the Voices
(MIDI Song) (page 40).
50 Classics
50 classical Preset Songs (MIDI Songs). For these Songs, see the music
book “50 Classical Music Masterpieces,” included with this instrument.
For details, refer to the “Song List” on page 106.
Lesson
303 Preset Songs (MIDI Songs) ideal for practice, taken from “The Virtuoso
P
ianist” and others. For these Songs, refer to the Lesson Songs on
page 106.
Lesson Songs are divided into several folders depending on the
types.
User
MIDI Songs which have been recorded and saved to the instrument by
using the Record function (page 52), and MIDI Songs which have been
copied/moved to the instrument using File operations (page 63).
USB
MIDI/Audio Songs saved to the USB flash drive by recording them with this
instrument or Audio Songs converted from MIDI Songs (page 67), or MIDI/
Audio Songs saved to the USB flash drive.
Song category
[d] button
42 CLP-685, CLP-675, CLP-645, CLP-635, CLP-695GP, CLP-665GP Owner’s Manual
Playing Back Songs
3. Press the [>] button to display the Songs in the specified
category, and then select a desired Song using the [u]/[d]
buttons.
When “User” or “USB” category is selected, the icon indicating Song
types are shown to the left of the Song name.
Since the Lesson Songs are conveniently divided into specific folders,
select the desired folder, press the [>] button, and then select a Song.
To select a recorded Song saved to USB flash drive:
When you record a Song and save it to a USB flash drive, the recorded
Song will automatically be saved to the USER FILES folder on a USB flash
drive. If you want to select the Song from the USER FILES folder, select
USB in step 2, and USER FILES folder in step 3.
4. Press the [>] button to select the desired Song.
The Song display is shown letting you to see the currently selected Song
name and its category name.
5. Press the [R K/ ] (Play/Pause) button to start playback.
The current position of the Song playback will be shown.
You can play the keyboard along with Song playback. You can also change
the Voice for your keyboard performance. To adjust the volume balance
between your keyboard performance and MIDI Song playback, or to
adjust the Audio Volume, set the appropriate Volume parameters
individually in the “Song” menu display (page 48).
NOTE
Press the [<] button to return to
the category/folder.
Icon
Song List
icon Data format
Folder
MIDI Songs
Audio Songs
NOTE
“NoSong” will be shown in the
display when no data exists in
that folder.
When Songs cannot be
read from a USB flash drive
If the song cannot be read, you
may need to change the
Language setting for the Song
name in the “System” menu
display (page 99).
NOTE
Press the [u] button to return to
the Song list.
Song
name
Song display: MIDI Song Song display: Audio Song
Song
name
Category name Category name
NOTE
When the Song title is too long
to be displayed, press the [d]
button to see the full title.
Song display: MIDI Song Song display: Audio Song
Current position Current position
NOTE
If a Song has been selected,
the original tempo of the Song
is used, and the Metronome
setting (page 36) will be
ignored.
43
CLP-685, CLP-675, CLP-645, CLP-635, CLP-695GP, CLP-665GP Owner’s Manual
Playing Back Songs
6. Press the [R K/ ] (Play/Pause) button again to stop
playback.
Even if you dont press the [R K/ ] (Play/Pause) button, the Song stops
automatically when Song playback reaches the end.
Rewind/Fast forward
1. Use the [<] and [>] buttons to move back or forth through
the Song (in bars or seconds), while the Song display is
shown.
Holding one of the buttons scrolls backward/forward continuously.
Pressing the [<] and [>] buttons simultaneously returns to the top
position of the Song.
Adjusting the tempo
You can adjust the playback tempo of a Song.
1. Press the [TEMPO] button to call up the Tempo display.
For a MIDI Song, press the [TEMPO] button during Song playback or
while the Song display is shown. For an Audio Song, press the [TEMPO]
button during Song playback.
2. Change the Tempo value using the [<]/[>] buttons.
The original tempo of the current Song can be recalled by pressing the [<]
and [>] buttons simultaneously.
When a MIDI Song is selected, the tempo range differs depending on the
Time Signature for a selected Song. Available setting values may only
include even numbers (multiples of 2), depending on the Time Signature.
For more information, refer to page 37.
When an Audio Song is selected, the tempo range is between 75% –
125%. 100% is the original tempo value. Higher values result in a faster
tempo.
3. Press the [EXIT] button to exit from the Tempo display.
NOTE
Useful playback functions are
described on pages 44 – 50.
NOTE
Pressing the [<] and [>]
buttons simultaneously returns
to the top position of the Song.
Song display: MIDI Song Song display: Audio Song
Measure nu bm er Elapsed time
NOTE
Changing the tempo of an
Audio Song may change its
tonal characteristics.
MIDI Song Audio Song
Tempo Tempo
44 CLP-685, CLP-675, CLP-645, CLP-635, CLP-695GP, CLP-665GP Owner’s Manual
Playing Back Songs
Some MIDI Songs, such as Preset Songs, are divided into right-hand and left-
hand parts. By using such Song data, you can practice the left hand by turning
on only the right-hand part, and practice the right hand by turning on only the
left-hand part—allowing you to practice parts separately for easy mastery of
difficult material.
1. Select a Song for practicing.
For instructions, refer to page 41. Song categories “50 Classics” and
“Lessonare recommended for this.
2. Select a part you want to practice, then set the part to off.
Press the [FUNCTION] button repeatedly to call up the “Song” menu
display, then select the highlighted item in each display as illustrated
below.
In the “L/R display, select the part (track) you want to mute for
practicing. Select “R for practicing the right-hand part, or “L for the left-
hand part.
3. Use the [>] button to select “Off” for the selected part.
4. Press the [R K/ ] (Play/Pause) button to start playback.
Play and practice the part you just muted.
Playing a One-hand Part — Part Cancel
Function (MIDI Songs)
MIDI Audio
4, 5
2
2, 3
NOTE
The parts can be turned on or
off even during playback.
NOTE
Usually, Channel 1 is assigned
to “R,” Channel 2 is assigned
to “L,” and Channels 3 – 16 are
assigned to “Extra.” However,
the assignments may differ
depending on the particular
Song. Channels assigned to
“Extra” cannot be set to on or
off individually.
NOTE
Some songs in “50 Classics”
and “Lesson” categories are
duet songs. Refer to page 106
about part assignment for the
duet songs.
NOTE
Whenever you select another
MIDI Song, both parts are
automatically turned on.
“Song” menu display
2-1. Use the [u d]/[ ] buttons
to select “L/R.
2-2. Press the [>] button to
call up the next display.
2-3. Use the [u]/[d] buttons
to select desired track.
L/R display
45
CLP-685, CLP-675, CLP-645, CLP-635, CLP-695GP, CLP-665GP Owner’s Manual
Playing Back Songs
5. Press the [R K/ ] (Play/Pause) button again to stop
playback.
Even if you dont press the [R K/ ] (Play/Pause) button, the Song stops
automatically when Song playback reaches the end.
There are three Repeat items as follows. These are convenient for repeatedly
practicing difficult phrases. It is a good idea to use this function and the Part
Cancel function (above) for practicing difficult phrases, in the case of MIDI
Songs.
AB Repeat ............. Play a MIDI Song repeatedly by designating a specific
range within the Song.
Phrase Repeat...... Play a MIDI Song repeatedly by designating a phrase or
phrases within the Song.
Song Repeat.......... Play a MIDI/Audio Song repeatedly, or play all MIDI/
Audio Songs saved in a designated folder repeatedly in
order or in random order.
The explanations here apply only to AB Repeat and Song Repeat. For Phrase
Repeat, refer to page 90.
1. Select a Song to be played back.
For instructions, refer to page 41.
2. Call up the Repeat display.
Press the [FUNCTION] button repeatedly to call up the “Song” menu
display. Select “Repeat,” then press the [>] button.
Playing Back a Song Repeatedly
2
2, 3, 4
“Song” menu display Repeat display
46 CLP-685, CLP-675, CLP-645, CLP-635, CLP-695GP, CLP-665GP Owner’s Manual
Playing Back Songs
3. In the Repeat display, select a desired item using the [u]/
[d] buttons, then press the [>] button.
If you want to set AB Repeat, select “A – B.
If you want to set Song Repeat, selectSong.
4. Set in the appropriate setting display.
AB Repeat .................See below.
Song Repeat ...............See page 47.
AB Repeat setting
Specify the repeat range.
4-1. Press the [R K/ ] (Play/Pause) button to start Song
playback.
4-2. Press the [>] button at the starting point (A) of the range
to be repeated.
4-3. Press the [>] button again at the ending point (B).
After an automatic lead-in (to help guide you into the phrase), the
range from Point A to Point B is played back repeatedly.
5.
To turn off the Repeat function, press the [>] button
while “Repeat Off” is highlighted, or select another Song
.
MIDI Audio
A – B display
Specifying the top of a
Song as Point A
Specify Point A before starting
playback, then start playback
and specify Point B.
Specifying the end of a
Song as Point B
Specifying only Point A results
in repeat playback between
Point A and the Song end (as
Point B).
NOTE
You can also specify the repeat
range by the following
procedure.
1Highlight the measure
n mu ber using the [u] button,
then fast-forward the Song to
Point A using the [<]/[>]
buttons.
2Highlight “Set A using the
[d] button, then press the [>]
button.
After specifying Point A, the
display for specifying Point
B is called up.
3Specify Point B in the same
way as Point A.
48 CLP-685, CLP-675, CLP-645, CLP-635, CLP-695GP, CLP-665GP Owner’s Manual
Playing Back Songs
When a MIDI Song is selected, you can adjust the Volume balance between the
Song playback and the sound you are playing on the keyboard, or between the
Right and Left parts of the selected Song. When an Audio Song is selected, you
can adjust the Audio Song volume.
Select the desired Song beforehand. For instructions, refer to page 41.
1. Press the [FUNCTION] button repeatedly to call up the
Song” menu display. Select “Volume,” and then press the
[>] button.
2. When a MIDI Song is selected, select “Song – Keyboard”
or “Song L – Rusing the [u]/[d] buttons, then press the
[>] button to call up the setting display.
When an Audio Song is selected, use the [<]/[>] buttons to
set the Audio playback volume. After setting the value, go
on to step 4.
Song – Keyboard
Adjust the Volume balance between the MIDI Song playback and the
sound you are playing on the keyboard.
Song L – R
Adjust the Volume balance between the Right and Left parts of the
selected MIDI Song.
Adjusting the Volume Balance
MIDI Audio
4
1
1, 2, 3
“Song” menu display (When a MIDI Song is selected)
“Song” menu display (When an Audio Song is selected)
NOTE
Some commercially available
music data contain extremely
high volumes. When using
such data (MIDI Song), adjust
the “Song – Keyboard” setting.
49
CLP-685, CLP-675, CLP-645, CLP-635, CLP-695GP, CLP-665GP Owner’s Manual
Playing Back Songs
3. Adjust the Volume balance by using the [<]/[>] buttons.
In the case of “Song – Keyboard”:
In the case of “Song L – R”:
4. Press the [EXIT] button twice to exit from the “Song”
menu display.
Whenever you select another MIDI Song, the setting for “Song L – R is
restored to its default setting. As for “Song – Keyboard” and Audio
Volume, selecting another Song will not reset the value.
The Song playb v u wack ol me ill be lower.The volume of your playing e low bill wer.
R part volume will be lower. L part v u w bol me ill e lower.
NOTE
The selected parameters of
“Song – Keyboard” will be
maintained (Backup Setting)
even when the power is turned
off. Make sure not to set the
volume levels to minimum.
Otherwise the sound of
keyboard or songs will not be
played. You can change the
settings to maintain the
selected parameter or not. For
details, refer to “Backup
Setting” on page 100.
50 CLP-685, CLP-675, CLP-645, CLP-635, CLP-695GP, CLP-665GP Owner’s Manual
Playing Back Songs
Starting/pausing playback by using a pedal
You can assign the Song Play/Pause function (equivalent to the [R K/ ] (Play/
Pause) button) to the center or the left pedal in the “System” menu. Press the
[FUNCTION] button repeatedly to call up the “Systemmenu display, and then
select “Pedal” → “Play/Pause” to make the assignment.
This is convenient for starting or pausing playback when you are performing
and cant take your hands from the keyboard.
Transposing the pitch of a Song
You can shift the pitch of Song playback up or down in semitone intervals. You
can change the settings via the “Song” menu display: Press the [FUNCTION]
button repeatedly to call up the “Song” menu display → “Transpose” (page 90).
Useful Playback Functions
MIDI Audio
51
CLP-685, CLP-675, CLP-645, CLP-635, CLP-695GP, CLP-665GP Owner’s Manual
Playing the Keyboard along with Rhythm
Playback
This instrument features various rhythm patterns. In time with the Rhythm playback, you can enjoy your
keyboard performance.
1. Press the [RHYTHM] button to start Rhythm playback.
Intro playback starts followed by the Rhythm playback.
2. Use the [<]/[>] buttons to call up the desired Rhythm.
For details on the available Rhythms, refer to the Rhythm List (page 107).
3. Play the keyboard along with Rhythm playback.
4. To stop Rhythm playback, press the [RHYTHM] button
again.
The Rhythm will automatically stop after the Ending is played.
5. Press the [EXIT] button to exit from the Rhythm display.
1, 4
5
2
About the Rhythm Tempo
• The Rhythm tempo is
equivalent to that set for the
Metronome (page 36).
• Although you set the Rhythm
tempo, selecting a MIDI Song
will change the tempo value
to that specified in the
selected MIDI Song data.
Detailed Settings for the
Rhythm
From the “Metronome/Rhythm”
menu display (page 93), you
can set detailed parameters,
such as Rhythm volume and
Sync Start, with which pressing
a key will start Rhythm
playback.
NOTE
The Rhythm display cannot be
called up during the Song
playback or recording.
To set the Intro/Ending on
or off
“Intro” and “Ending” allow you
to vary the arrangement of the
accompaniment. You can set
“Intro” and “Ending” on/off via
“Intro” or “Ending” in the
“Metronome/Rhythm” menu
display (page 93).
52 CLP-685, CLP-675, CLP-645, CLP-635, CLP-695GP, CLP-665GP Owner’s Manual
Recording Your Performance
This instrument allows you to record your performance in the following two methods.
MIDI Recording
With this method, recorded performances are saved to the instrument or a USB flash drive as an SMF
(format 0) MIDI file. If you want to re-record a specific section or edit parameters such as Voice, use this
method. Also you can record your performance to each Track one by one. Since a MIDI Song can be
converted to an Audio Song after recording (page 67), you may want to use MIDI recording (with
overdubbing and multiple parts) to first create a complex arrangement you would not otherwise be able to
play live, then convert it to an Audio Song. This instrument allows you to record approximately 500 KB of
data per Song.
Audio Recording
With this method, recorded performances are saved to a USB flash drive as an Audio file. Recording is done
without designating the recorded part. Since it is saved in stereo WAV format of normal CD quality
resolution (44.1 kHz/16 bit) by default, it can be transmitted to and played on portable music players by
using a computer. Because audio signals, such as those from the [AUX IN] jack, are also recorded, you can
record your keyboard performance along with the performance sound of the connected CD player or
portable music players. This instrument allows you to record up to 80 minutes per single recording.
For details about the difference between MIDI Songs and Audio Songs, refer to page 39.
This chapter covers the following four methods. Note that the created data
format differs depending on the method, MIDI or Audio.
Quick MIDI Recording .......................................page 53
This method lets you start recording most quickly. Your performance will be
recorded and saved to the “User” category in this instrument’s internal
memory.
MIDI Recording — Independent Tracks ............ page 55
This lets you record the right, left and extra parts separately. Since you can
record the left part while playing back the right, this is useful for recording both
parts of a duet. Since you can record up to sixteen parts separately, record the
performance of each instrument part one by one and create fully orchestrated
compositions.
MIDI Recording to the USB Flash Drive ............page 57
This method is useful when you want to overwrite the already recorded MIDI
Song in the USB flash drive or create a New MIDI Song on the USB flash drive.
Audio Recording to the USB Flash Drive ...........page 58
This method lets you record your performance as Audio data to the USB flash
drive connected to the USB [TO DEVICE] terminal.
MIDI
Audio
Recording Methods
MIDI
MIDI
MIDI
Audio
53
CLP-685, CLP-675, CLP-645, CLP-635, CLP-695GP, CLP-665GP Owner’s Manual
Recording Your Performance
This method is the quickest way to start recording.
1. Make the necessary settings such as Voice selection and
time signature.
Before starting the Recording operation, select a Voice (page 28) for your
keyboard performance, turn Dual/Split/Duo on or off as desired, set the
time signature of the Metronome/Rhythm (page 36), then select a
Reverb/Chorus/Effect type as desired.
2. Press the [REC] (Record) button to enter the Recording
mode.
The blank new Song for recording is automatically set.
The [R K/ ] (Play/Pause) button will flash at the current tempo.
To exit from the Recording mode, press the [REC] (Record) button again.
3. Play the keyboard to start recording.
When you wish to record an empty section at the start of the Song, press
the [R K/ ] (Play/Pause) button to start recording.
Quick MIDI Recording
MIDI
3, 6
5
2, 4
NOTE
If you want to record the left-
hand and right-hand parts
individually, refer to “MIDI
Recording—independent
Tracks” (page 55), since the
Recording method here
assumes that both the left and
right parts are being recorded
together.
Using the Metronome/
Rhythm
You can use the Metronome/
Rhythm while recording. While
the Metronome sound cannot
be recorded, the Rhythm
sound can. Make sure to start
enter the Recording mode
before starting Rhythm
playback, since entering the
Recording mode during
playback of the Rhythm stops
its playback.
NOTE
The “Song Keyboard” Volume
Balance (page 48) will not be
recorded.
NOTE
With MIDI recording, the
performance will be recorded
to Track 1. However, in the
Dual/Split/Duo mode, the
tracks assigned for recording
and the tracks actually used for
recording are different. For
details refer to “Recording
Track Assignment” on page 55.
Mode:
A mode is a status under which
you can execute a certain
function. In Recording mode,
you can record Songs.
NOTE
Pressing and holding the [REC]
button for a second will call up
the display which lists the
Recording Target Songs. In this
case, select “New Song” then
press the [>] button referring to
the table on page 57.
To start recording as soon
as a Rhythm starts:
When a Rhythm (page 51) is
selected, press the [RHYTHM]
button to start Rhythm
playback and MIDI recording
simultaneously.
Measure nu bm er
REC display
REC display (during recording)
54 CLP-685, CLP-675, CLP-645, CLP-635, CLP-695GP, CLP-665GP Owner’s Manual
Recording Your Performance
4. After you finish your performance, press the [REC]
(Record) button again to stop recording.
This operation exits from the Recording mode and calls up the display for
saving the recorded performance data.
5. If you want to save the recorded performance, press the [>]
button to execute the Save operation while “Save” is
highlighted.
After the Save operation is completed, the display shows “Save
Completed” then returns to the Song display. The recorded Song will be
named “USERSONGxxx” (xxx: number) and saved in the “User”
category.
If you are not satisfied with your performance and want to record
again, highlight “Retry” then press the [>] button. Try recording again
from step 3.
If you do not want to save the recorded data, highlight “Cancel” then
press the [>] button.
6. To hear the recorded performance, press the [R K/ ] (Play/
Pause) button.
NOTICE
The recorded MIDI Song will be
lost if you change to another
Song or you u t rn the power off
w uitho t executing the Save
operation.
Renaming the recorded
Song
The recorded Songs are
named automatically, but you
can rename Songs as you like
(page 68).
Data that can be recorded to MIDI Songs
Data for each Track
Note data (your keyboard performance)
Voice selection
Pedal operations (Damper/Soft/Sostenuto)
Reverb Depth
Chorus Depth
Effect Depth
Sound brightness — “Brightness
Resonance effect setting — “HarmonicContent
• Octave
Volume setting for each Voice — “Volume
Pan for each Voice
• Detune
Touch Sensitivity
Data commonly for all
Tracks
• Scale
• Tempo
Time Signature
Reverb Type
Chorus Type
Effect Type
NOTE
Parameter settings other than
Voice and Tempo, such as note
data, pedal (Damper/Soft/
Sostenuto) data, octave setting
and time signature, cannot be
changed after recording.
55
CLP-685, CLP-675, CLP-645, CLP-635, CLP-695GP, CLP-665GP Owner’s Manual
Recording Your Performance
With MIDI Recording, you can create a MIDI Song consisting of 16 tracks by
recording your performance to each track one by one. In recording a piano
piece, for example, you can record the right-hand part to Track 1 then record
the left-hand part to Track 2, allowing you create a complete piece which may
be difficult to play live with both hands together. To record a performance with
Rhythm playback, for example, record Rhythm playback to Tracks 9 – 10, then
record melodies to Track 1 while listening to the already recorded Rhythm
playback. In this way, you can create an entire Song which would otherwise be
difficult, or even impossible, to play live.
1. Execute the same operations as in step 1 and step 2 on
page 53 to enter the Recording mode with a new blank
Song selected.
2. Use the [<]/[>] buttons to select a Recording Track.
When you want to record the right-hand part, highlight “R” (Track 1).
When you want to record the left-hand part, highlight “L” (Track 2).
Alternately, when you want to record your performance to Tracks 3 – 16,
call up the desired one by pressing the [<]/[>] buttons repeatedly.
3. Play the keyboard to start recording.
4. After you finish your performance, press the [REC]
(Record) button to stop recording.
This operation exits from the Recording mode and calls up the display for
saving the recorded performance data.
MIDI Recording — Independent Tracks
MIDI
NOTE
If you want to record your
performance to the USB flash
drive or you want to add the
recording to the MIDI Song in
the USB flash drive, refer to
“MIDI Recording to the USB
flash drive” (page 57).
NOTE
Rhythm cannot be added to a
recorded Song. When you want
to record Rhythm, make sure to
record the Rhythm playback
first.
When you want to record a new track of an already recorded
MIDI Song:
After selecting the target MIDI Song (steps 1 – 4 on pages 41 – 42), press and hold
the [REC] (Record) button for a second to call up the display which lists the
Recording Target Songs, select the 4th item (the selected MIDI Song), press the [>]
button, then go to step 2 described on this page.
1 2 3 4 5 6 7 8 9 10 11 12 13 14 15 16
Example:
Right-hand part
Left-hand part
NOTE
If you record your performance
with both hands to R then to L,
both are played back at the
same time as a single Song.
Recording Track
Assignment
When Dual/Split/Duo is on, only
the R1 Voice performance will
be recorded to the selected
Track, and the R2 Voice
performance will be recorded
to the Track number which is 6
plus the selected Track, and
the L Voice performance of
Split/Duo will be recorded to
the Track number which is 3
plus the selected Track.
Rhythm playback will be
recorded to Tracks 9/10.
NOTICE
Note that recording your
performance to a Track
containing data will overwrite
the prev uio sly recorded data.
Recording Track
Track Data Status
Contains data.
Contains no data.
57
CLP-685, CLP-675, CLP-645, CLP-635, CLP-695GP, CLP-665GP Owner’s Manual
Recording Your Performance
These instructions describe how to overwrite an already recorded MIDI Song
in the USB flash drive or how to create a New MIDI Song on the USB flash
drive.
1. Connect the USB flash drive to the USB [TO DEVICE]
terminal.
2. Select a MIDI Song as Recording target, then enter the
Recording mode.
2-1. If you want to record an additional Track to the already
recorded MIDI Song, select the desired MIDI Song in the USB
flash drive. If you want to record from scratch, skip this step.
2-2. Press and hold the [REC] (Record) button for a second to call
up the display which lists the Recording Target Songs.
2-3. From the Recording Target Songs, select “New Song (USB)”
or the MIDI Song selected in step 2-1 (4th item below) using
the [u d]/[ ] buttons, then press the [>] button to enter the
Recording mode.
* Can be selected only when the USB flash drive is connected to the USB [TO DEVICE]
terminal.
** Will not be shown when an already recorded MIDI Song is not selected in step 2-1 above,
or when a Preset Song or Protected Song is selected in step 2-1.
MIDI Recording to the USB Flash Drive
MIDI
NOTE
To connect a USB flash drive,
be sure to read the section
“Connecting USB Devices
(USB [TO DEVICE] terminal)
on page 72.
NOTE
Before starting the Recording
operation, check the remaining
memory capacity of the USB
flash drive. “System” menu:
“Utility” “USB Properties”
(page 98).
Recording Target
Song Description
New Song Select this when you want to record your performance to a
blank MIDI Song and save to “User” category in this
instrument’s internal memory.
New Song (USB)* Select this when you want to record your performance to a
blank MIDI Song and save to the USB flash drive.
New Audio (USB)* Select this when you want to record your performance to
blank audio data and save to the USB flash drive.
xxxxx (MIDI Song
selected in step 2-1
above)**
Select this when you want to record additionally to/overwrite
the currently selected MIDI Song.
58 CLP-685, CLP-675, CLP-645, CLP-635, CLP-695GP, CLP-665GP Owner’s Manual
Recording Your Performance
3. Execute the Recording operation, then save the recorded
performance.
When you want to record additionally to the currently
selected MIDI Song, or record to a specified track on a
blank MIDI Song:
Execute steps 2 – 8 in “MIDI Recording—Independent Tracks” on
page 55.
When you want to quick record to a blank MIDI Song:
Execute steps 3 – 6 inQuick MIDI Recording” on page 53.
These instructions describe how to record your performance as audio data.
Note that an audio file to which your performance is to be recorded can be
saved only to a USB flash drive. This is why you should prepare your USB flash
drive device before starting the Recording operation.
1. Connect the USB flash drive to the USB [TO DEVICE]
terminal.
2. Press and hold the [REC] (Record) button for a second to
call up the display which lists the Recording Target Songs.
3. Use the [u d]/[ ] buttons to select “New Audio (USB)” then
press the [>] button.
4. Execute steps 3 – 6 in “Quick MIDI Recording” (page 53).
Unlike with MIDI Recording, the elapsed time is shown on the display
while Audio Recording is being executed.
NOTICE
Note that recording your
performance to a Track
containing data will overwrite
the prev uio sly recorded data.
NOTE
The time signature and tempo
cannot be changed when
replacing the part of an
existing MIDI Song.
Audio Recording to the USB Flash Drive
Audio
NOTE
To connect a USB flash drive,
be sure to read the section
“Connecting USB Devices
(USB [TO DEVICE] terminal)
on page 72.
NOTE
Before starting the Recording
operation, check the remaining
memory capacity of the USB
flash drive. “System” menu:
“Utility” “USB Properties”
(page 98).
NOTE
With Audio recording, distorted
sound may be produced if the
Voice Volume is set to the value
higher than the default setting.
Make sure to set the Voice
Volume to the default value or
less before recording from the
“Voice” menu display: “Voice
Edit “Volume” (page 87).
NOTE
With Audio recording, audio
signals such as those from the
[AUX IN] jack are also
recorded.
59
CLP-685, CLP-675, CLP-645, CLP-635, CLP-695GP, CLP-665GP Owner’s Manual
Recording Your Performance
Re-recording a MIDI Song in parts
You can re-record a specific range of the MIDI Song.
1. Set the parameters which determine how recording starts
and stops.
1-1. Press the [FUNCTION] button repeatedly to call up the
“Recording” menu display.
1-2. Use the [u]/[d] buttons to select “RecStart,” then select the
value which determines how recording starts by using the [>]
button.
• Normal
The already recorded data will be replaced with the new one as soon
as recording starts.
KeyOn
The already recorded data will be maintained until you press a key,
and actual recording starts as soon as you press a key.
1-3. Use the [u]/[d] buttons to select “RecEnd,” then select the
value which determines how recording stops by using the [>]
button.
• Replace
The data after the point you stop recording will also be erased.
PunchOut
The data after the point you stop recording will remain.
Other Recording Techniques
MIDI
4, 7, 10
1
1, 4, 5, 6
2
5, 8
60 CLP-685, CLP-675, CLP-645, CLP-635, CLP-695GP, CLP-665GP Owner’s Manual
Recording Your Performance
2. Press the [SONG/DEMO] button to call up the Song List
display.
3. Select the desired MIDI Song.
For instructions, refer to page 41.
4. Specify the start point you wish to re-record.
Use the [<]/[>] buttons to move the playback position (measure number)
to the desired point. Alternately, press the [R K/ ] (Play/Pause) button to
start playback, then press the [R K/ ] button again slightly prior to the
desired point.
If necessary, select the settings (Voice and other parameters).
Select the desired settings, if you wish to change the previous ones.
5. Press and hold the [REC] (Record) button for a second to
call up the display which lists the Recording Target Songs,
then select the 4th item (Song selected in step 3), then
press the [>] button to enter the recording mode.
6. Use the [<]/[>] buttons to select a Track for re-recording.
7. Play the keyboard or press the [R K/ ] (Play/Pause) button
to start recording.
8. Press the [REC] (Record) button to stop recording.
9. Save the recorded performance by following step 5 on
page 56.
10.To hear the recorded performance, press the [R/K] (Play/
Pause) button.
NOTE
The time signature cannot be
changed when replacing the
part of an existing Song.
61
CLP-685, CLP-675, CLP-645, CLP-635, CLP-695GP, CLP-665GP Owner’s Manual
Recording Your Performance
Changing the tempo or the Voice of a previously
recorded MIDI Song
For MIDI Songs, you can change the tempo and Voice after recording to change
a feel or to set a more suitable tempo.
To change the tempo:
1. Select the MIDI Song you wish to change.
For instructions, refer to page 41.
2. Press the [TEMPO] button to call up the Tempo display,
then set the desired Tempo.
For instructions, refer to page 36.
3. Press the [FUNCTION] button repeatedly to call up the
Song” menu display, then select the highlighted item in
each display as illustrated below.
4. Apply the selected Tempo value to the current MIDI Song
data.
Press the [d] button to highlight “Execute,” then press the [>] button to
apply the new Tempo value to the current MIDI Song data.
MIDI
3
2
5
3, 4
“Song” menu display
3-1. Use the [u d]/[ ] buttons
to select “Edit.
3-2. Press the [>] button to
call up the next display.
3-3. Use the [u]/[d] buttons
to select “Tempo Change.
3-4. Press the [>] button to call up
the next display.
Edit display Tempo Change display
62 CLP-685, CLP-675, CLP-645, CLP-635, CLP-695GP, CLP-665GP Owner’s Manual
Recording Your Performance
When this operation is completed, “Completed” is shown on the display,
and the Tempo Change display will be restored after a while.
5. Press the [EXIT] button to exit from the “Song” menu
display.
To change the Voice:
1. Select the MIDI Song you wish to change.
For instructions, refer to page 41.
2. Select the desired Voice.
For instructions, refer to page 28.
3. Press the [FUNCTION] button repeatedly to call up the
“Song” menu display, then select the highlighted item in
each display as illustrated below.
4.
Press the [>] button to call up the setting display, then select
the desired Track using the [
u
]/[
d
] buttons.
5. Apply the Voice selected in step 2 for the Track selected in
step 4 to the current MIDI Song data.
Press the [<] button to return to the Voice Change display. Press the [d]
button to highlight “Execute, then press the [>] button to apply the new
Voice to the current MIDI Song data.
When this operation is completed, “Completed” is shown on the display,
and the Voice Change display will be restored after a while.
6. Press the [EXIT] button to exit from the “Song” menu
display.
“Song” menu display
3-1. Use the [u]/[d] buttons
to select “Edit.
3-2. Press the [>] button to
call up the next display.
3-3. Use the [u]/[d] buttons
to select “Voice Change.
3-4. Press the [>] button to
call up the next display.
Edit display Voice Change display

Produktspecifikationer

Varumärke: Yamaha
Kategori: Piano
Modell: Clavinova CLP-635

Behöver du hjälp?

Om du behöver hjälp med Yamaha Clavinova CLP-635 ställ en fråga nedan och andra användare kommer att svara dig