Canon D340 Bruksanvisning
Canon
Kopieringsmaskin
D340
Läs nedan 📖 manual på svenska för Canon D340 (8 sidor) i kategorin Kopieringsmaskin. Denna guide var användbar för 2 personer och betygsatt med 4.5 stjärnor i genomsnitt av 2 användare
Sida 1/8

Setup Sheet
Setup Sheet
Thank you for purchasing the Canon imageCLASS D340.
To get your machine ready for use, please follow the instructions in this Setup Sheet before referring to any
other documentation.
Unpack the machine and its components.
Check that you have the following:
IMPORTANT
• Save your sales receipt for proof of purchase in case your machine requires warranty
service.
NOTE
• A printer cable is not included.You need a USB cable (less than 16.4ft./5m) to connect your
machine to a computer.
●Machine
● Document feeder tray ●Canon S35 Cartridge
●Cassette/Multi-purpose tray
●POWER CORD
●DOCUMENTATION
(Setup Sheet, Basic Guide, Registration Card, Limited Warranty Card)
●CD-ROM

Removing Shipping Materials
1Place the machine on a flat surface.
2Remove the shipping tapes on the machine and cassette/multi-purpose tray.
NOTE
• DO NOT remove the transparent USB label
at this stage
3Open the ADF to remove the shipping material , then open the platen
glass cover to remove the inner protection sheet .
Installing the Cassette and Document Feeder Tray
1Raise the cassette slightly toward the machine, and align the hooks on both
sides of the cassette with the guides in the machine, then install the cassette
into the machine as far as it will go 1.Then gently lower the cassette 2.
2Insert the tabs on the document feeder tray into the holes on the document
feeder until it clicks.
12
NOTE
• Install the cassette so that there is no space between the cassette and the feeding slot.
1
2
Transparent
USB label
Left side view
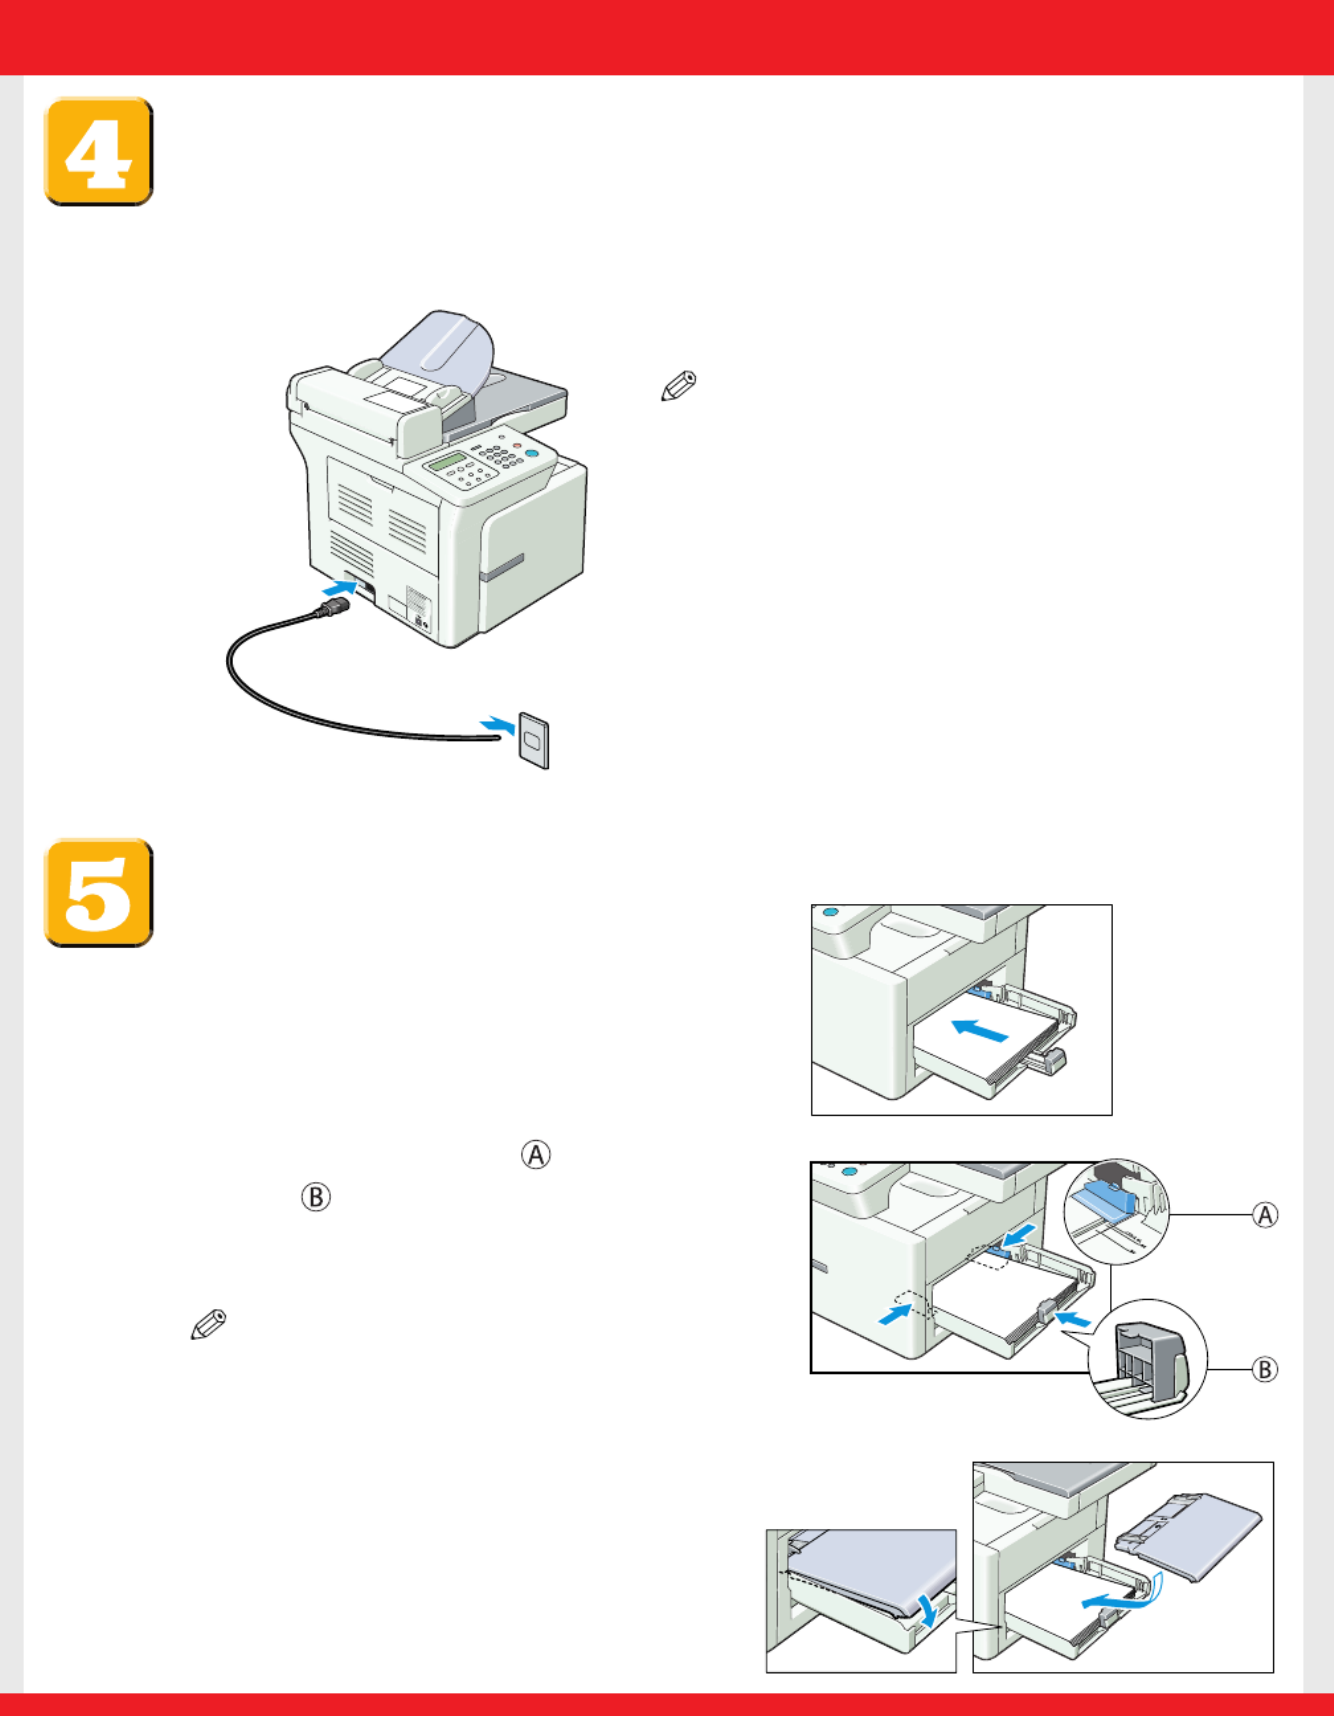
Connecting the Power Cord
When the power cord is plugged into the machine and into the wall outlet, the machine is turned on.
There is no separate ON/OFF power switch. Once connected,the machine needs to warm up before
you can use it.The LCD displays PLEASE WAIT, then INSTALL CARTRIDGE.The LCD returns to the
standby display when you install the cartridge and load paper in the cassette or multi-purpose tray.
Loading Paper in the Cassette
1Load the paper stack in the cassette.
• Insert the paper stack into the cassette
as far as it will go.
2Slide the width guides and the length
guide to fit the size of the paper stack.
• Adjust the guides so that there is no space
between the guides and the paper.
NOTE
• Make sure the paper stack does not exceed the
width and length guides’ claws.
3Set the multi-purpose tray on top of the
cassette.
NOTE
• Insert the power cord straight into the power cord
connector on the left side of the machine.
Do not insert it at an angle. Otherwise, the machine
may not be properly connected to the power source
and may not turn on. If this happens, disconnect the
power cord, and reconnect it correctly after a minute
or more.
• When disconnecting or connecting the power cord, be
sure to unplug or plug the power cord from the wall
outlet, not from the power cord connector on the
machine.
Produktspecifikationer
| Varumärke: | Canon |
| Kategori: | Kopieringsmaskin |
| Modell: | D340 |
Behöver du hjälp?
Om du behöver hjälp med Canon D340 ställ en fråga nedan och andra användare kommer att svara dig
Kopieringsmaskin Canon Manualer

24 Augusti 2024
13 Augusti 2024
21 Juli 2024
Kopieringsmaskin Manualer
- Kopieringsmaskin HP
- Kopieringsmaskin Panasonic
- Kopieringsmaskin Xerox
- Kopieringsmaskin Brother
- Kopieringsmaskin Sharp
- Kopieringsmaskin Ricoh
- Kopieringsmaskin Olivetti
- Kopieringsmaskin Kyocera
Nyaste Kopieringsmaskin Manualer
20 Oktober 2024
17 September 2024
16 September 2024
13 September 2024
11 September 2024
8 September 2024
7 September 2024
27 Augusti 2024
26 Augusti 2024

24 Augusti 2024