Netgear MBR1210 Bruksanvisning
Läs nedan 📖 manual på svenska för Netgear MBR1210 (201 sidor) i kategorin Router. Denna guide var användbar för 4 personer och betygsatt med 4.5 stjärnor i genomsnitt av 2 användare
Sida 1/201

350 East Plumeria Drive
San Jose, CA 95134
USA
October 2010
202-10734-03
v1.0
Mobile Broadband 11n
Wireless Router MBR1210
User Guide
ENGLISH
Routeur sans fil MBR1210 11n
à haut débit mobile
Guide d’utilisation
FRANÇAIS

2 |
Mobile Broadband 11n Wireless Router MBR1210 User Manual
©2010 NETGEAR, Inc. All rights reserved.
No part of this publication may be reproduced, transmitted, transcribed, stored in a retrieval system, or translated
into any language in any form or by any means without the written permission of NETGEAR, Inc.
Technical Support
Thank you for choosing NETGEAR. To register your product, get the latest product updates, or get support online,
visit us at . http://support.netgear.com
Phone (US & Canada only): 1-888-NETGEAR
Phone (Other Countries): See Support information card.
Trademarks
NETGEAR, the NETGEAR logo, ReadyNAS, ProSafe, Smart Wizard, Auto Uplink, X-RAID2, and NeoTV are
trademarks or registered trademarks of NETGEAR, Inc. Microsoft, Windows, Windows NT, and Vista are
registered trademarks of Microsoft Corporation. Other brand and product names are registered trademarks or
trademarks of their respective holders.
Statement of Conditions
To improve internal design, operational function, and/or reliability, NETGEAR reserves the right to make changes
to the products described in this document without notice. NETGEAR does not assume any liability that may occur
due to the use, or application of, the product(s) or circuit layout(s) described herein.
Revision History
Publication Part Number Publish Date CommentsVersion
202-10734-0 v1.0 ber 2010 irst publication3 Octo F

Table of Contents | 3
Table of Contents
ENGLISH
Chapter 1 Connecting to the Internet
Hardware Features. . . . . . . . . . . . . . . . . . . . . . . . . . . . . . . . . . . . . . . . . . . .7
Router Stand . . . . . . . . . . . . . . . . . . . . . . . . . . . . . . . . . . . . . . . . . . . . . .7
Router Front Panel . . . . . . . . . . . . . . . . . . . . . . . . . . . . . . . . . . . . . . . . . .8
Router Back Panel . . . . . . . . . . . . . . . . . . . . . . . . . . . . . . . . . . . . . . . . .10
Router Label. . . . . . . . . . . . . . . . . . . . . . . . . . . . . . . . . . . . . . . . . . . . . .10
Log In to Your Router . . . . . . . . . . . . . . . . . . . . . . . . . . . . . . . . . . . . . . . . .11
Access the Configuration Assistant after Installation . . . . . . . . . . . . . . . . . 13
Manually Configure Your Internet Settings. . . . . . . . . . . . . . . . . . . . . . . . . 14
Broadband Settings . . . . . . . . . . . . . . . . . . . . . . . . . . . . . . . . . . . . . . . .14
Mobile Broadband Settings . . . . . . . . . . . . . . . . . . . . . . . . . . . . . . . . . .16
Ethernet Broadband Settings . . . . . . . . . . . . . . . . . . . . . . . . . . . . . . . . .18
Chapter 2 Wireless Network Configuration
Planning Your Wireless Network . . . . . . . . . . . . . . . . . . . . . . . . . . . . . . . .25
Wireless Placement and Range Guidelines . . . . . . . . . . . . . . . . . . . . . .25
Wireless Security Options . . . . . . . . . . . . . . . . . . . . . . . . . . . . . . . . . . .26
Manually Configure Your Wireless Settings . . . . . . . . . . . . . . . . . . . . . . . .27
Configuring WEP . . . . . . . . . . . . . . . . . . . . . . . . . . . . . . . . . . . . . . . . . .28
Configuring WPA, WPA2, or WPA + WPA2 . . . . . . . . . . . . . . . . . . . . . .30
Use Push 'N' Connect (WPS) to Configure Your Wireless Network. . . . . .31
WPS Button . . . . . . . . . . . . . . . . . . . . . . . . . . . . . . . . . . . . . . . . . . . . . .31
WPS PIN Entry. . . . . . . . . . . . . . . . . . . . . . . . . . . . . . . . . . . . . . . . . . . . 33
Add Wireless Computers That Do Not Support WPS. . . . . . . . . . . . . . . 34
SIM Card PIN Code . . . . . . . . . . . . . . . . . . . . . . . . . . . . . . . . . . . . . . . .35
SIM Card Modem Unlock Code . . . . . . . . . . . . . . . . . . . . . . . . . . . . . . .36
Chapter 3 Content Filtering
Viewing, Selecting, and Saving Logged Information . . . . . . . . . . . . . . . . .38
Log Message Examples . . . . . . . . . . . . . . . . . . . . . . . . . . . . . . . . . . . . .40
Blocking Sites and Keywords . . . . . . . . . . . . . . . . . . . . . . . . . . . . . . . . . . .41
Blocking Services . . . . . . . . . . . . . . . . . . . . . . . . . . . . . . . . . . . . . . . . . . . .43
Scheduling . . . . . . . . . . . . . . . . . . . . . . . . . . . . . . . . . . . . . . . . . . . . . . . . .44
Setting Your Time Zone . . . . . . . . . . . . . . . . . . . . . . . . . . . . . . . . . . . . .44
Scheduling Firewall Services . . . . . . . . . . . . . . . . . . . . . . . . . . . . . . . . .44
Enabling Security Event Email Notification. . . . . . . . . . . . . . . . . . . . . . . . .45
Chapter 4 Managing Your Network

4 | Table of Contents
Mobile Broadband 11n Wireless Router MBR1210 User Manual
Router Status . . . . . . . . . . . . . . . . . . . . . . . . . . . . . . . . . . . . . . . . . . . . . . . 47
Showing Statistics . . . . . . . . . . . . . . . . . . . . . . . . . . . . . . . . . . . . . . . . .49
Connection Status . . . . . . . . . . . . . . . . . . . . . . . . . . . . . . . . . . . . . . . . . 50
Viewing Attached Devices . . . . . . . . . . . . . . . . . . . . . . . . . . . . . . . . . . . . . 51
Backing Up, Restoring, or Erasing Your Settings. . . . . . . . . . . . . . . . . . . . 52
Backing Up the Configuration to a File . . . . . . . . . . . . . . . . . . . . . . . . . . 52
Restoring the Configuration from a File . . . . . . . . . . . . . . . . . . . . . . . . . 52
Erasing the Configuration . . . . . . . . . . . . . . . . . . . . . . . . . . . . . . . . . . . . 53
Protecting Access to Your Router . . . . . . . . . . . . . . . . . . . . . . . . . . . . . . .54
Changing the Built-In Password . . . . . . . . . . . . . . . . . . . . . . . . . . . . . . . 54
Changing the Administrator Login Time-Out . . . . . . . . . . . . . . . . . . . . . 55
Running Diagnostic Utilities and Rebooting the Router . . . . . . . . . . . . . . . 56
Upgrading the Router Firmware . . . . . . . . . . . . . . . . . . . . . . . . . . . . . . . . . 57
Chapter 5 Advanced
SIM Settings . . . . . . . . . . . . . . . . . . . . . . . . . . . . . . . . . . . . . . . . . . . . . . . . 59
Advanced Wireless Settings. . . . . . . . . . . . . . . . . . . . . . . . . . . . . . . . . . . . 60
Wireless Station Access Control . . . . . . . . . . . . . . . . . . . . . . . . . . . . . . 61
Restricting Access by MAC Address . . . . . . . . . . . . . . . . . . . . . . . . . . . 61
Wireless Repeating Function . . . . . . . . . . . . . . . . . . . . . . . . . . . . . . . . . . . 63
Port Forwarding and Port Triggering . . . . . . . . . . . . . . . . . . . . . . . . . . . . . 64
Port Forwarding . . . . . . . . . . . . . . . . . . . . . . . . . . . . . . . . . . . . . . . . . . . 64
Port Triggering . . . . . . . . . . . . . . . . . . . . . . . . . . . . . . . . . . . . . . . . . . . . 65
WAN Setup. . . . . . . . . . . . . . . . . . . . . . . . . . . . . . . . . . . . . . . . . . . . . . . . . 66
Setting Up a Default DMZ Server . . . . . . . . . . . . . . . . . . . . . . . . . . . . . . 67
LAN Setup . . . . . . . . . . . . . . . . . . . . . . . . . . . . . . . . . . . . . . . . . . . . . . . . . 68
DHCP Settings . . . . . . . . . . . . . . . . . . . . . . . . . . . . . . . . . . . . . . . . . . . .69
Reserved IP Addresses . . . . . . . . . . . . . . . . . . . . . . . . . . . . . . . . . . . . . 70
QoS Setup . . . . . . . . . . . . . . . . . . . . . . . . . . . . . . . . . . . . . . . . . . . . . . . . . 71
QoS Priority Rule List . . . . . . . . . . . . . . . . . . . . . . . . . . . . . . . . . . . . . . . 72
QoS Priority Rules . . . . . . . . . . . . . . . . . . . . . . . . . . . . . . . . . . . . . . . . . 73
Dynamic DNS. . . . . . . . . . . . . . . . . . . . . . . . . . . . . . . . . . . . . . . . . . . . . . .76
Using Static Routes . . . . . . . . . . . . . . . . . . . . . . . . . . . . . . . . . . . . . . . . . .77
Static Route Example . . . . . . . . . . . . . . . . . . . . . . . . . . . . . . . . . . . . . . . 77
Enabling Remote Management . . . . . . . . . . . . . . . . . . . . . . . . . . . . . . . . .79
Universal Plug and Play . . . . . . . . . . . . . . . . . . . . . . . . . . . . . . . . . . . . . . . 80
Traffic Meter . . . . . . . . . . . . . . . . . . . . . . . . . . . . . . . . . . . . . . . . . . . . . . . .81
Chapter 6 Troubleshooting
Basic Functioning . . . . . . . . . . . . . . . . . . . . . . . . . . . . . . . . . . . . . . . . . . . . 83
Troubleshooting Access to the Router Main Menu . . . . . . . . . . . . . . . . . . 85
Troubleshooting the ISP Connection . . . . . . . . . . . . . . . . . . . . . . . . . . . . . 86
Connecting to the Internet . . . . . . . . . . . . . . . . . . . . . . . . . . . . . . . . . . . 86
Troubleshooting Internet Browsing. . . . . . . . . . . . . . . . . . . . . . . . . . . . . 87
Troubleshooting a TCP/IP Network Using the Ping Utility . . . . . . . . . . . . .88
Testing the LAN Path to Your Router . . . . . . . . . . . . . . . . . . . . . . . . . . . 88
Testing the Path from Your Computer to a Remote Device . . . . . . . . . .89

Table of Contents | 5
Mobile Broadband 11n Wireless Router MBR1210 User Manual
Problems with Date and Time . . . . . . . . . . . . . . . . . . . . . . . . . . . . . . . . . .90
Restoring the Default Configuration and Password . . . . . . . . . . . . . . . . . .90
Appendix A Supplemental Information
Factory Default Settings . . . . . . . . . . . . . . . . . . . . . . . . . . . . . . . . . . . . . . .93
Technical Specifications . . . . . . . . . . . . . . . . . . . . . . . . . . . . . . . . . . . . . . .95
Related Documents . . . . . . . . . . . . . . . . . . . . . . . . . . . . . . . . . . . . . . . . . .96
Appendix B Compliance Notification
Index

Chapter 1. Connecting to the Internet | 6
1
1. Connecting to the Internet
This chapter describes how to configure your Routeur sans fil MBR1210 11n à haut débit mobile
Internet connection.
• Hardware Features
• Log In to Your Router
• Access the Configuration Assistant after Installation
• Manually Configure Your Internet Settings
Note: For help with installation, see the Mobile Broadband 11n Wireless
Router MBR1210 Installation Guide.
Chapter 1. Connecting to the Internet | 7
Mobile Broadband 11n Wireless Router MBR1210 User Manual
Hardware Features
This section outlines the physical aspects of your Mobile Broadband 11n Wireless Router.
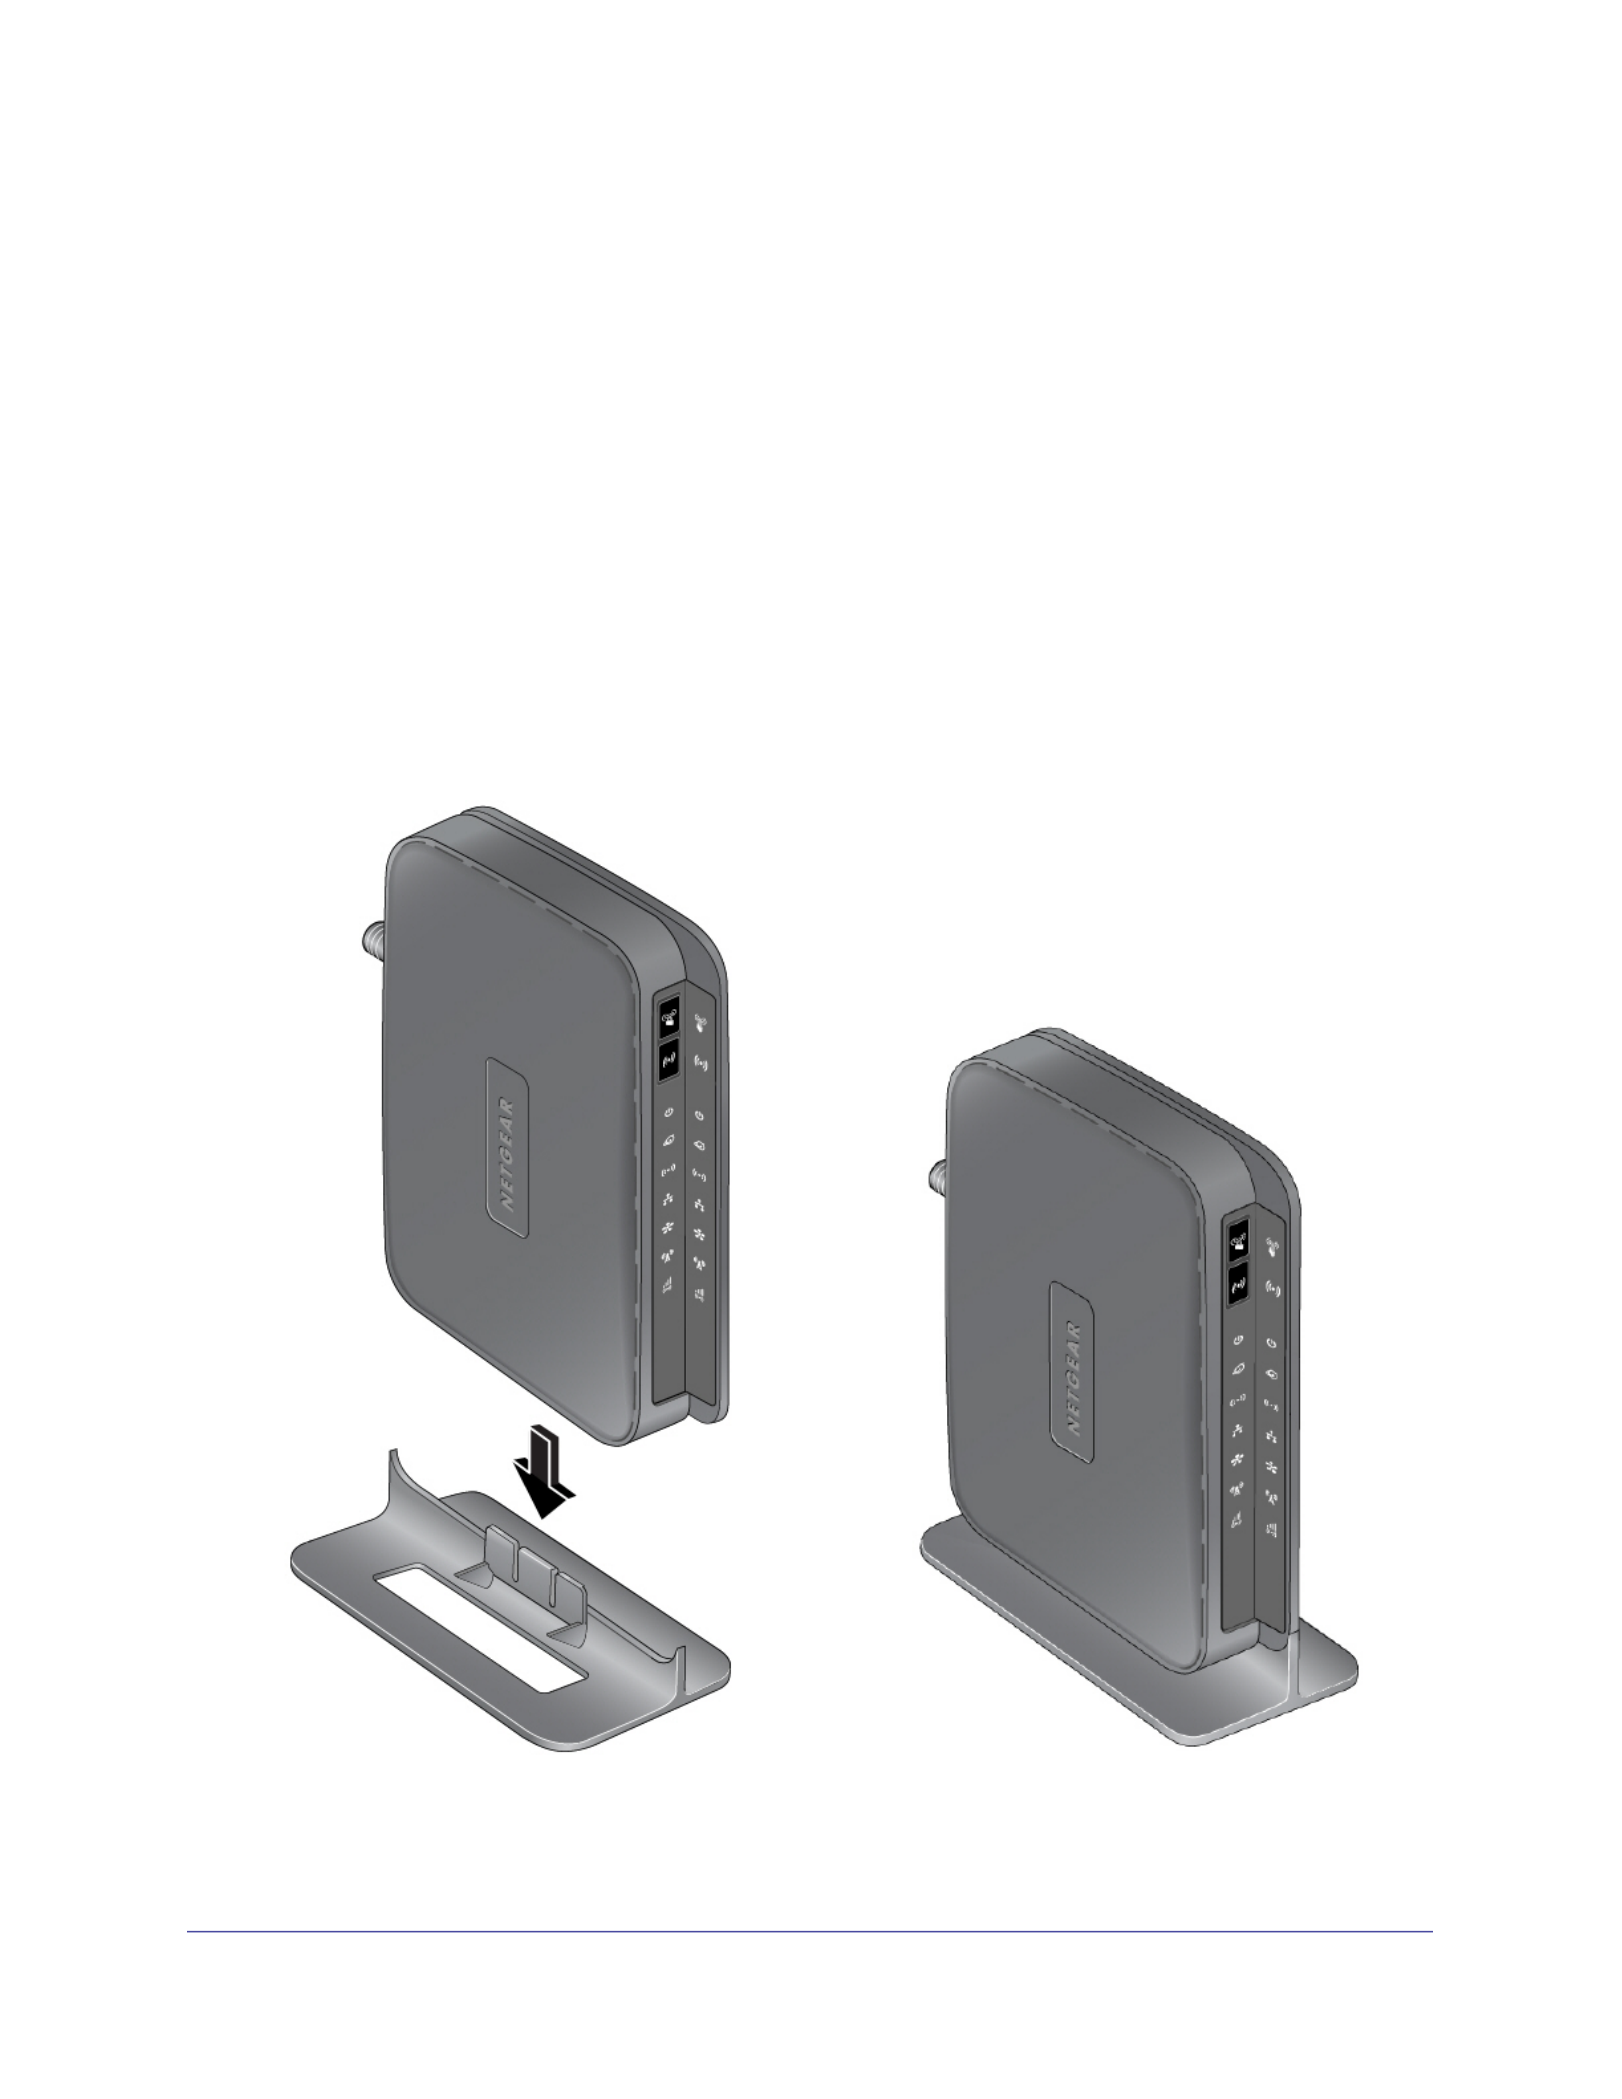
Router Stand
Since the Mobile Broadband 11n Wireless Router is a vertical-only device, use the stand to
position your router upright.
1. Insert the tabs on the stand into the slot on the bottom of your router.
2. Place your router near an AC power outlet in a location where you can connect the cables
you need for your home network.
The router must also be located where you can receive a strong mobile broadband signal
while indoors if you are planning to connect to the Internet using mobile broadband.
Figure 1.

8 | Chapter 1. Connecting to the Internet
Mobile Broadband 11n Wireless Router MBR1210 User Manual
Router Front Panel
The router front panel contains control buttons and status LEDs. Use the LEDs to verify
status and connections.
Power
Signal Quality
Wi-Fi
2G/3G
WPS
Internet
LAN
Ethernet WAN
Mobile Broadband/Wi-Fi On/Off
Figure 2.
Table 1 describes each LED and button located on the front panel of the router.
Table 1. LED Descriptions
LED Activity Description
WPS Press the WPS button to open a 2-minute window for the router to connect with other
WPS-enabled devices. For more information about this function, see Use Push 'N' Connect
(WPS) to Configure Your Wireless Network on page 32.
Wi-Fi This button can be used to control the WiFi radio or both the WiFi radio and mobile broadband
radio. Use the router interface to select the options. The default is set for Wi-Fi radio only.

Chapter 1. Connecting to the Internet | 9
Mobile Broadband 11n Wireless Router MBR1210 User Manual
Power Solid green The router is turned on and operating normally.
Solid amber POST (power-on self-test) in progress.
Off Power is not supplied to the router.
Internet Port Solid green There is an Internet session.
Solid amber Traffic meter limit has been reached, traffic is blocked.
Blinking green Data is being transmitted over the Internet connection.
Blinking amber Traffic meter limit has been reached, but traffic not blocked.
Blinking green and amber Failover from WAN to Mobile Broadband.
Off No Internet connection detected.
Wi-Fi Solid blue The Wi-Fi local port is initialized.
Blinking blue Data is being transmitted or received over the Wi-Fi link.
Off The wireless access point is turned off.
LAN Ports Solid green The local Ethernet ports have detected wired links with PCs.
Blinking Data is being transmitted or received.
Off No link is detected on these ports.
WAN Port Solid green The Ethernet WAN port has detected an active link.
Blinking Data is being transmitted or received.
Off No link is detected on these ports.
2G/3G Solid blue Indicates the router is in 3G+ coverage.
Solid green Indicates the router is in 2G coverage.
Off No coverage is detected.
Signal Quality Solid blue Excellent coverage detected.
Solid green Good coverage detected.
Solid amber Marginal coverage detected.
Off No coverage detected.
Restore Factory
Settings
Locate the small hole outlined in red on the back of the router. Insert a paperclip into the hole
and push for 6 seconds. Depressing the reset button causes the LED to blink briefly. After the
button is held down for more than 6 seconds, the LED will flash AMBER, and then turn green
as the router resets to the factory defaults. See
Table 1. LED Descriptions
LED Activity Description

10 | Chapter 1. Connecting to the Internet
Mobile Broadband 11n Wireless Router MBR1210 User Manual
Router Back Panel
The back panel of the router contains port connections.
Ethernet LAN ports
Power On/Off button
Power adapter input
WAN port
Connector for optional external antenna
Slot for SIM card (if required by ISP)
Router Label
The label on the left side of the router shows the router’s MAC address, serial number,
security PIN, IMEI or ESN number, and factory default login information. It also contains the
SSID and passphrase that is unique to each router.
Restore
Factory
Router label
Router information
- Default access address
- Default user name and password
- Security PIN
- IMEI or ESN number
- Serial number
- MAC address
Direction of SIM card insertion
with unique
SSID and
passphrase
Settings:
Press for
6 seconds.
Chapter 1. Connecting to the Internet | 11
Mobile Broadband 11n Wireless Router MBR1210 User Manual
Log In to Your Router
When you first connect to your router during installation, a Setup Wizard displays. For help
using the Setup Wizard to configure your Internet and wireless network, see the Mobile
Broadband 11n Wireless Router MBR1210 Installation Guide.
After the initial configuration, you can use your Web browser to log in to the router to view or
change its settings. Links to Knowledge Base and documentation are also available on the
router main menu.
Note: Your computer must be configured for DHCP. For help configuring
DHCP, refer to the documentation that came with your computer, or
see the link to the online document in Preparing Your Network in
Appendix A.
When you have logged in, if you do not click Logout, after 5 minutes of no activity the router
automatically logs you out.
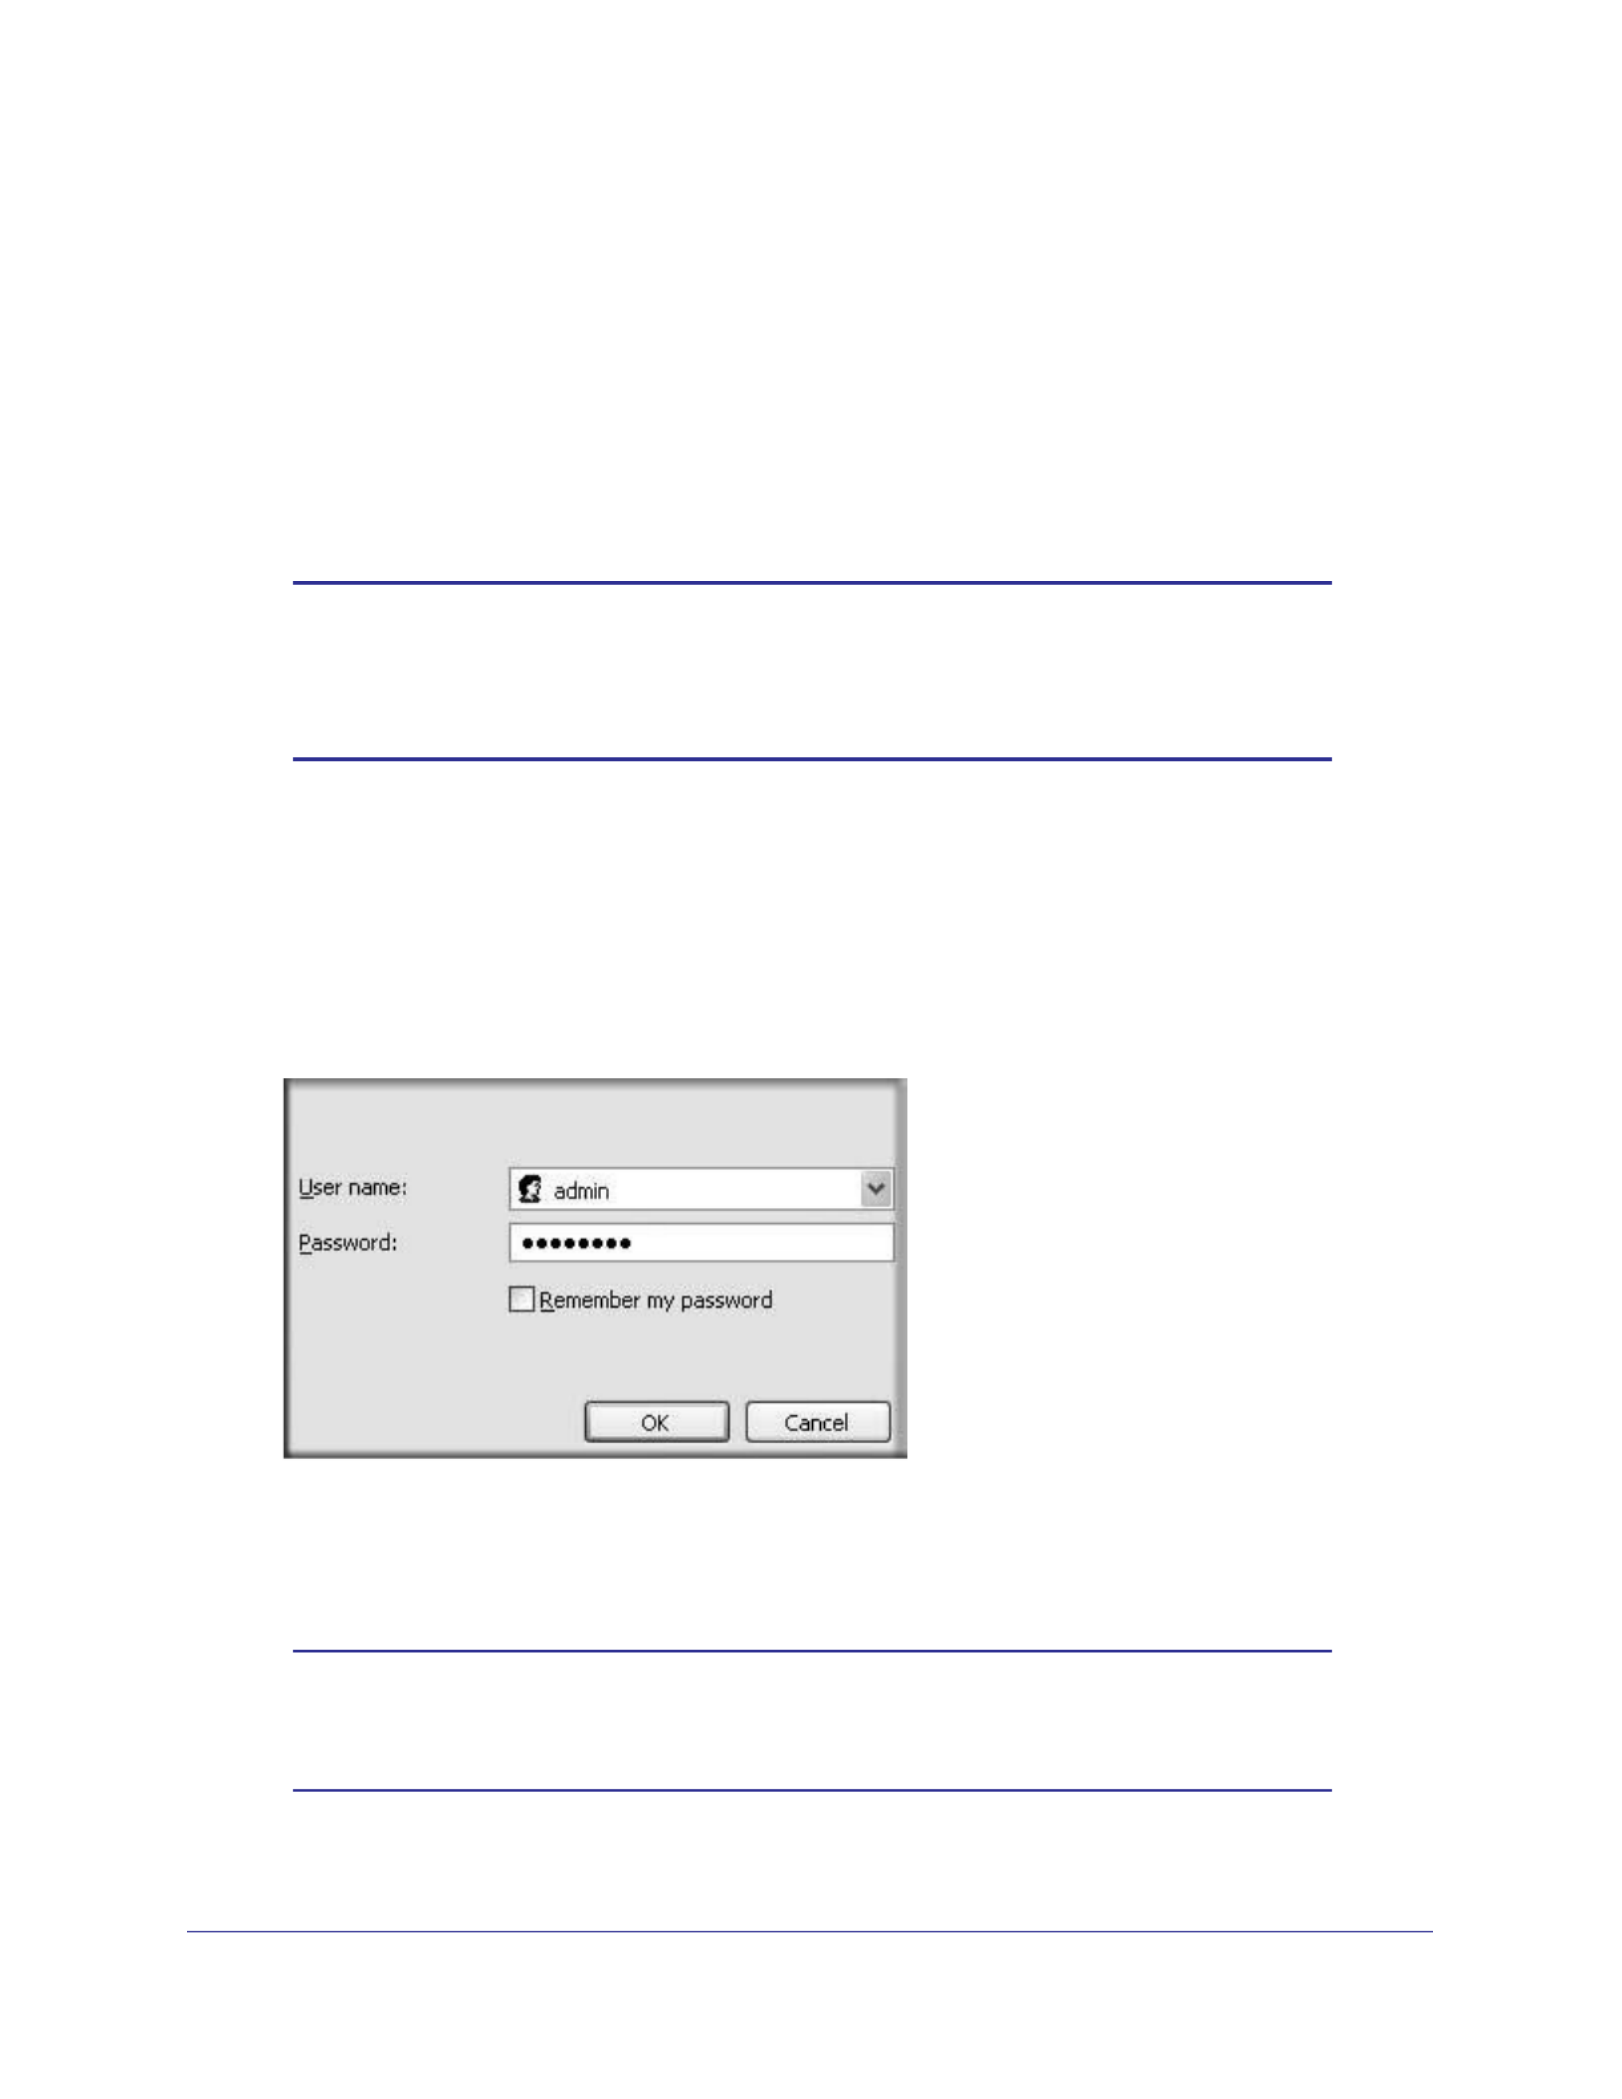
To log in to the router:
1. Type http://www.routerlogin.net in the address field of your browser, and then press
enter to display the login window.
2. Enter admin for the user name and your password (or the default, password).
For information about how to change the password, see Changing the Built-In Password
on page 55.
Note: If you do not remember your password, you can restore the router to
its factory default settings, which will reset the password. See
Factory Default Settings on page 93.

12 | Chapter 1. Connecting to the Internet
Mobile Broadband 11n Wireless Router MBR1210 User Manual
3. If the router has not been configured, the Smart Wizard screen displays. After the router has
been configured, one of the following screens appears:
• Firmware Upgrade Assistant screen. After initial setup, the Firmware Upgrade
Assistant screen displays unless the Check for Updated Firmware Upon Log-in
check box is cleared.
Note: You can disable this automatic checking and updating feature during
future log ins by clearing the Check for Updated Firmware Upon
Log-in check box, but NETGEAR recommends that you keep this
feature enabled to ensure your router is using the latest updated
firmware.
• Router Status screen. The Router Status screen displays the current router
connection status. See on page 48. Router Status
4. You can use different methods to configure your router.
• Select Setup Wizard from the router menu to set up your Internet connection and
wireless network configuration. See Access the Configuration Assistant after
Installation on page 14.
• You can manually configure the router settings. See Manually Configure Your Internet
Settings on page 15.

Chapter 1. Connecting to the Internet | 13
Mobile Broadband 11n Wireless Router MBR1210 User Manual
Access the Configuration Assistant after Installation
1. Log in to the router as described in on pageLog In to Your Router 12.
The Configuration Assistant opens.
2. Click Next.
The Configuration Assistant prompts you to set up your Internet connection and wireless
network as described in the Mobile Broadband 11n Wireless Router MBR1210
Installation Guide.
a. Select your Internet connection mode:
• Use Ethernet first and if fail use mobile broadband connection
• Always use mobile broadband connection
• Always use Ethernet connection
b. Click Next.
c. countrySelect your and then your Internet Service Provider.
d. Click Done.

14 | Chapter 1. Connecting to the Internet
Mobile Broadband 11n Wireless Router MBR1210 User Manual
Manually Configure Your Internet Settings
For you to connect to the network, an active broadband service account is required. Contact
your ISP for your user name, password, and the network name. You must also configure
some or all of the settings described in the following sections, depending on how you have
chosen to connect to the Internet:
• Broadband Settings on page 15.
• Mobile Broadband Settings on page 17 (not required if using Ethernet connection only).
• Ethernet Broadband Settings on page 19 (not required if using mobile broadband
connection only).
Broadband Settings
To manually configure your broadband Internet settings:
1. Log in to the router as described in Log In to Your Router on page 12.
2. From the main menu, select Broadband Settings.

Chapter 1. Connecting to the Internet | 15
Mobile Broadband 11n Wireless Router MBR1210 User Manual
3. Adjust the settings as needed based on your Internet connection. The fields in this screen
are described in Table 2.
4. The following buttons are available:
• Apply. Apply the changes that you made.
• Cancel. Discard changes.
Table 2. Internet Connection Settings
Fields and Check Boxes Description
Internet Connection Mode The choices are:
• Always use an Ethernet connection (default)
• Use Ethernet first and if it fails use mobile broadband connection
• Always use mobile broadband connection
Failover Detection Method 1
1 This field is available only when the Internet Connection Mode is Use Ethernet first and if fail use 3G mobile
connection.
Select the failover method and enter the related information:
• DNS lookup using WAN DNS Server
• Perform a DNS lookup by a hostname
• Ping this IP address
Retry Interval is 1 Enter the retry interval.
Failover after 1 Enter how many retry attempts to make before failing over.
Resume after 1 Enter how long to wait for primary link is stabilized before resuming to
use the primary link.
Enable Hardware link detection Enter when to failover when the Ethernet link is dropped. This is
independent of the DNS / Ping detection methods.

16 | Chapter 1. Connecting to the Internet
Mobile Broadband 11n Wireless Router MBR1210 User Manual
Mobile Broadband Settings
To manually configure your mobile broadband Internet settings:
1. Log in to the router as described in Log In to Your Router on page 12.
2. From the main menu, select Mobile Broadband Settings.
3. Adjust the settings as needed based on your Internet connection. The fields in this screen
are described in Table 3.
4. Available buttons are:
• Connect. Manually connect to the network.
• Disconnect. Disconnect from the current network.
• Apply. Apply the changes that you made.
• Cancel. Discard changes.
• Refresh. Update the connection status

Table 3. Settings
Fields and Check Boxes Description
User Name Internet account login user name.
Password Internet account password for authentication.
Country Select your country from the drop-down list.
Internet Service Provider Select your Internet Service Provider from the drop-down list.
Access Number The remote site's phone number.
PIN code Pin code of the SIM card, where applicable.
APN Access point name.
PDP type Select the type of packet data protocol:
• IP
• PDP-IP
• PPP
• PPP-IP
Connect automatically at startup When this check box is selected, the modem automatically connects
to the network when powered up. This should be selected after login
information is provided.
Reconnect automatically when
connection is lost
When this check box is selected, the modem will attempt to
reconnect to the network when the connection is lost. Under normal
situations, this setting should be selected.
Roaming automatically When this check box is checked, the unit might roam to any available
operator in range and might incur roaming charges.
Use internal antenna If this check box is selected, the router will use the internal antenna
rather than the external antenna.
Wireless Button Configuration Select the option to determine the behavior of the WPS push button
on the front panel when pressed.
• Control Wi-Fi Only : Pressing the push button toggles the Wi-Fi
function. If Wi-Fi is turned on, pressing the push button turns off the
Wi-Fi. Pressing it again will turn on the Wi-Fi. This function is
available only if the Wi-Fi function is enabled. The Wireless
Broadband function is unaffected.
• Control Both Wi-Fi and Wireless Broadband: Pressing the push
button toggles both the Wi-Fi function and wireless broadband at
the same time. If Wi-Fi is turned on, pressing the push button turns
off the Wi-Fi. At the same time, the wireless broadband connection
is disconnected. If you press the push button again, Wi-Fi is turned
on and the router attempts to re-establish the wireless broadband
connection. Depending on the coverage, wireless broadband
coverage might or might not be connected successfully.
Connection status Current WAN port status.
Chapter 1. Connecting to the Internet | 17
Mobile Broadband 11n Wireless Router MBR1210 User Manual
18 | Chapter 1. Connecting to the Internet
Mobile Broadband 11n Wireless Router MBR1210 User Manual
Ethernet Broadband Settings
To manually configure your Ethernet Broadband Internet settings:
1. Log in to the router as described in Log In to Your Router on page 12.
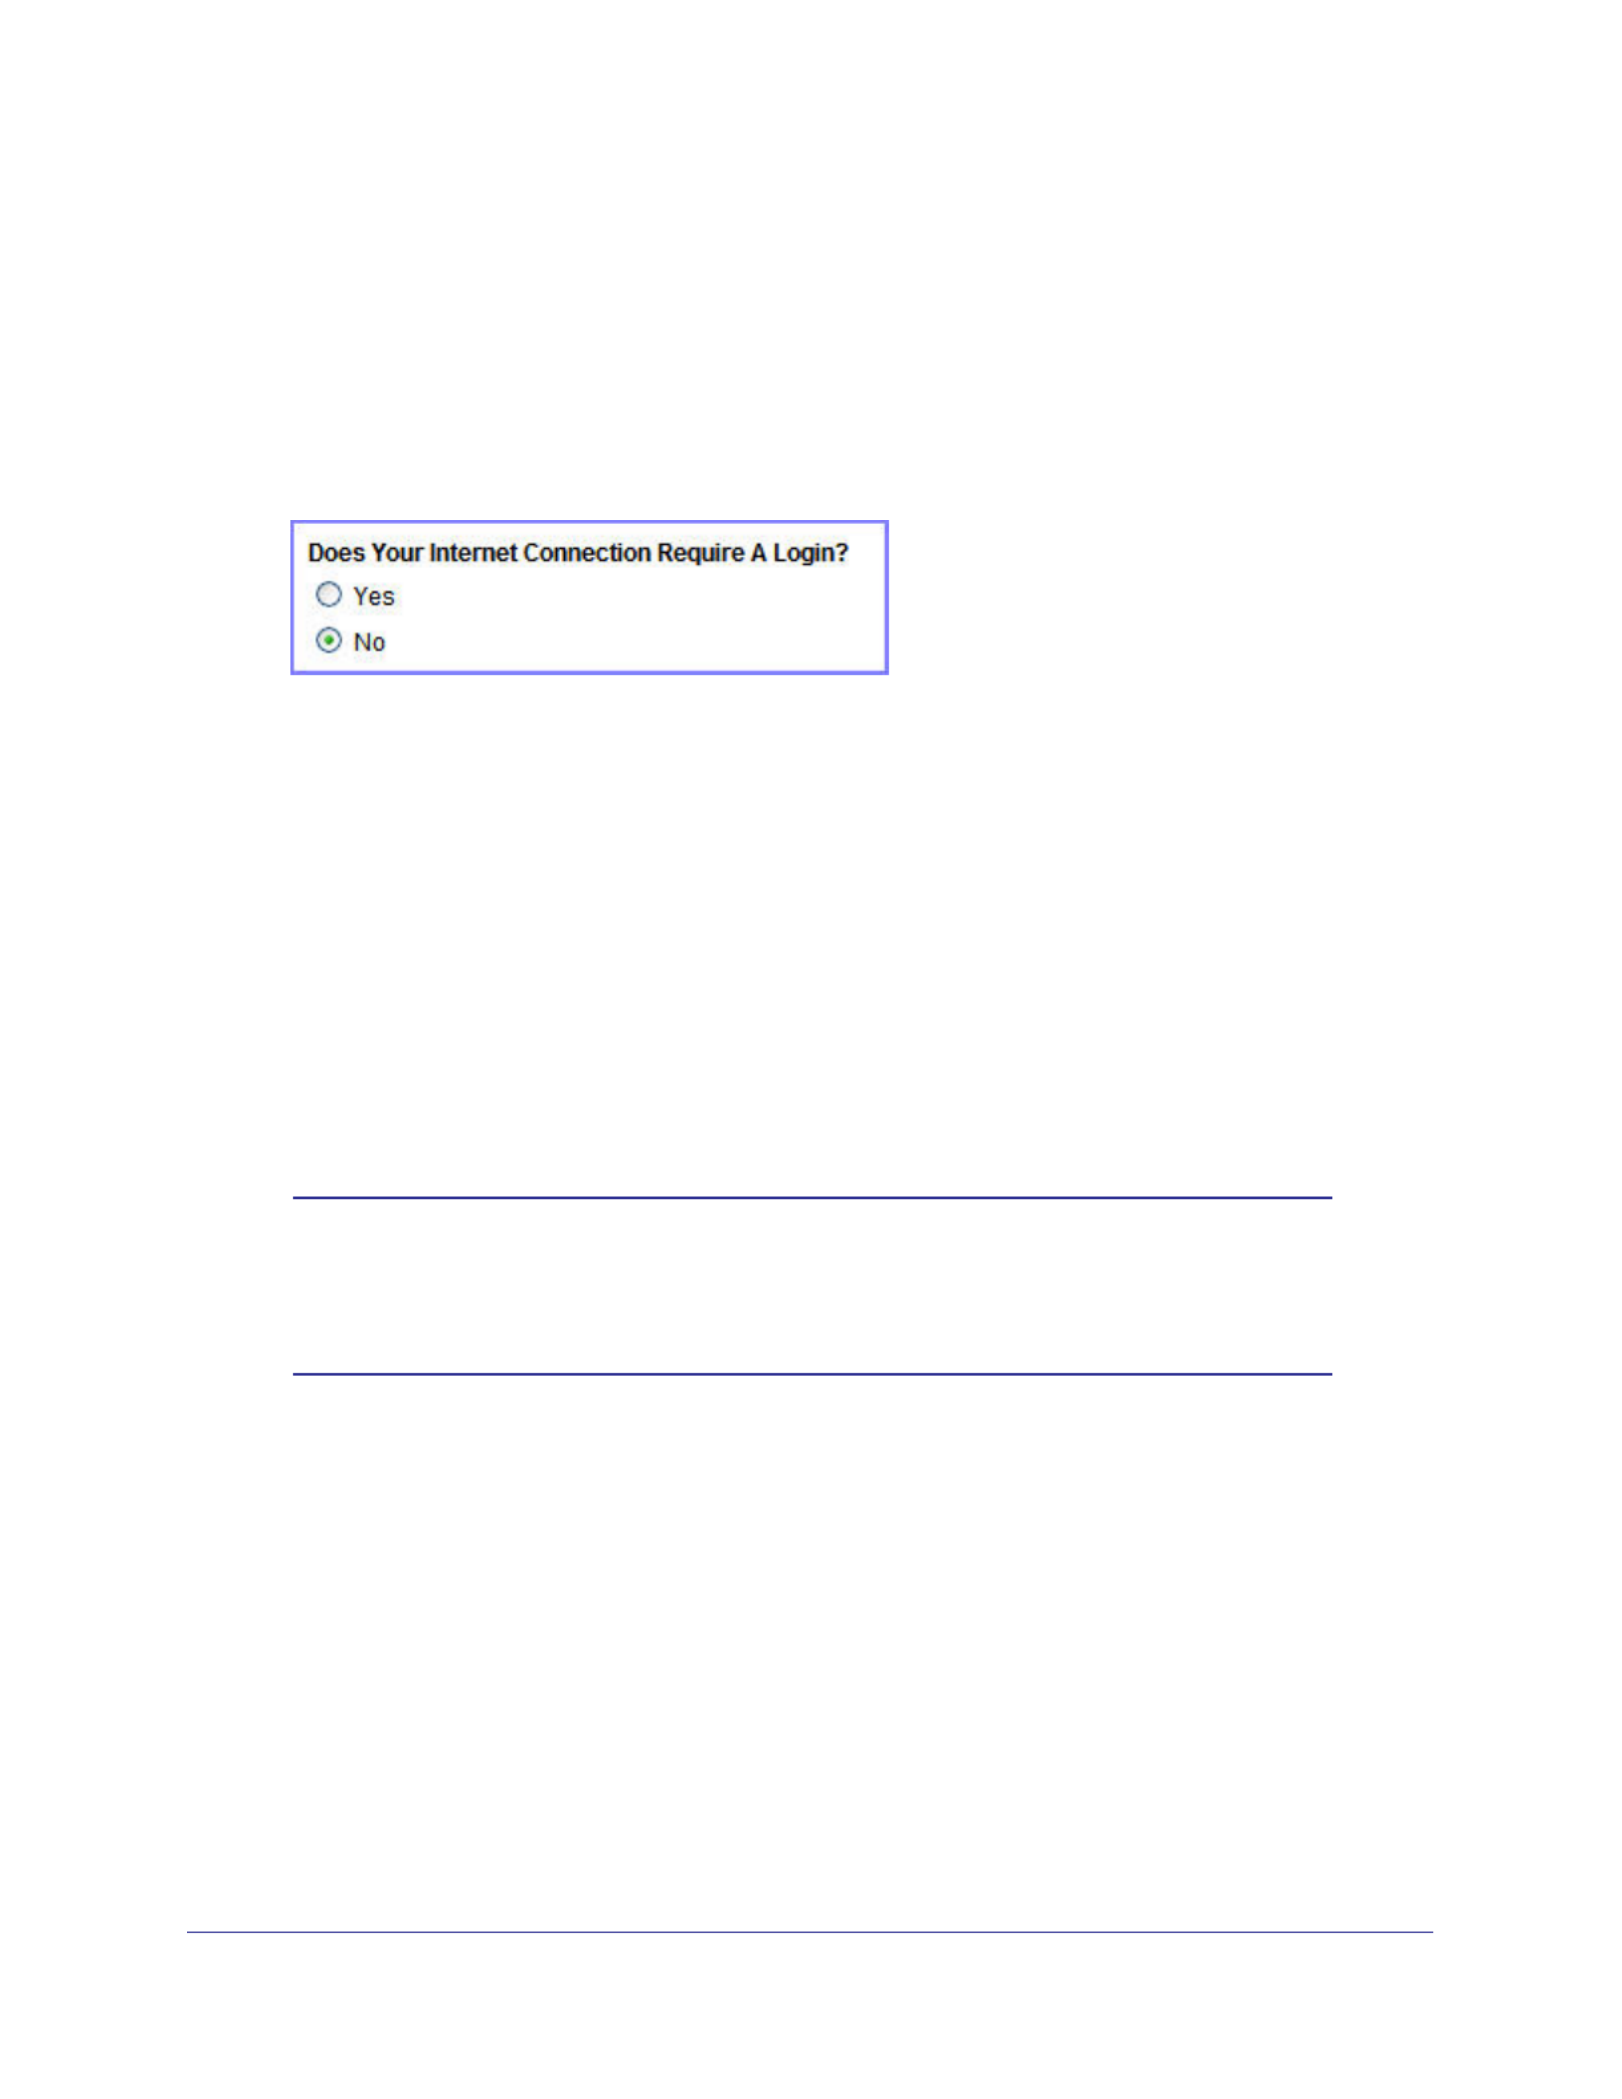
2. From the main menu, select Ethernet Broadband Settings.
The following question displays at the top of the screen:
Select the option based on the type of account you have with your ISP.
• If you need to enter login information every time you connect to the Internet, or you
have a PPPoE account with your ISP, select Yes.
• Otherwise, select . No
Then fill out the appropriate screen.
For details, see:
step a, Login required on page 20
or
step b, Login not required on page 22.
Note: If you have installed PPP software such as WinPoET (from
Earthlink) or Enternet (from PacBell), then you have PPPoE. Select
Yes Yes. After selecting and configuring your router, you do not
need to run the PPP software on your PC to connect to the Internet.

Chapter 1. Connecting to the Internet | 19
Mobile Broadband 11n Wireless Router MBR1210 User Manual
a. Login required
Adjust the settings as needed based on your Internet connection. The fields in this
screen are described in .Table 4
Table 4. Ethernet Broadband Settings When Login Required
Fields and Checkboxes Description
Internet Service Provider Select the service provided by your ISP.
• Other (PPPoE) is the most common.
• PPTP is used in Austria and other European countries.
• Telstra BigPond is for Australia only.
Login This is usually the name that you use in your email address. For example,
if your main mail account is JerAB@ISP.com, then put JerAB in this field.
Some ISPs (such as Mindspring, Earthlink, and T-DSL) require that you
use your full email address when you log in. If your ISP requires your full
email address, then type it in the field. Login

20 | Chapter 1. Connecting to the Internet
Mobile Broadband 11n Wireless Router MBR1210 User Manual
Password Type the password that you use to log in to your ISP.
Service Name (If Required) If your ISP provided a service name, enter it here. Otherwise, this can be
left blank.
Connection Mode Set the connection mode to , , or Dial on Demand Always On Manually
Connect.
• With the default setting, Dial on Demand , a PPPoE connection
automatically starts when there is outbound traffic to the Internet, and it
automatically terminates if the connection is idle based on the value in
the Idle Timeout field.
• When the connection mode is set to Always On , the PPPoE
connection automatically starts when the computer boots up, but the
connection does not time out. The router will keep trying to bring up the
connection if it is disconnected for some reason.
• If you select Manually Connect , you must go to the Router Status
screen and click the Connect button to connect to the Internet. The
manual connection does not time out, and you have to click the
Disconnect button on the Router Status screen to disconnect it.
Idle Timeout (In Minutes) An idle Internet connection will be terminated after this time period. If this
value is zero (0), then the router will keep the connection alive by
reconnecting immediately whenever the connection is lost.
Internet IP Address If you log in to your service or your ISP did not provide you with a fixed IP
address, the router finds an IP address for you automatically when you
connect. Select . Get Dynamically from ISP
If you have a fixed (static, permanent) IP address, your ISP has provided
you with an IP address. Select Use Static IP Address and type in the IP
address.
Domain Name Server
(DNS) Address
The DNS server is used to look up site addresses based on their names.
• If your ISP gave you one or two DNS addresses, select Use These
DNS Servers and type the primary and secondary addresses.
• Otherwise, select Get Automatically From ISP .
Note: If you get “Address not found” errors when you go to a website, it is
likely that your DNS servers are not set up correctly. You should contact
your ISP to get DNS server addresses.
Table 4. Ethernet Broadband Settings When Login Required
Fields and Checkboxes Description

Chapter 1. Connecting to the Internet | 21
Mobile Broadband 11n Wireless Router MBR1210 User Manual
b. Login not required
Adjust the settings as needed based on your Internet connection. The fields in this
screen are described in .Table 5

Table 5. Ethernet Broadband Settings Fields When Login Not Required
Fields and Check Boxes Description
Account Name (If Required) This is also known as the host name or system name.
For most users, type your account name or user name in this field. For
example, if your main mail account is JerAB@ISP.com, then put JerAB
in this field.
If your ISP has given you a specific host name, then type it (for
example, CCA7324-A).
Domain Name (If Required) For most users, you can leave this field blank, unless required by your
ISP. You can type the domain name of your ISP. For example, if your
ISP's mail server is mail.xxx.yyy.zzz, you would type xxx.yyy.zzz as the
domain name.
If you have a domain name given to you by your ISP, type it in this field.
(For example, Earthlink Cable might require a host name of home, and
Comcast sometimes supplies a domain name.)
If you have a cable modem, this is usually the workgroup name.
Internet IP Address If you log in to your service or your ISP did not provide you with a fixed
IP address, the router finds an IP address for you automatically when
you connect. Select . Get Dynamically From ISP
If you have a fixed (or static IP) address, your ISP has provided you
with the required information. Select and type Use Static IP Address
the IP address, subnet mask and gateway IP address into the correct
fields.
For example:
• IP Address . 24.218.156.183
• Subnet Mask . 255.255.255.0
• Gateway IP Address . 24.218.156.1
Domain Name Server (DNS)
Address
The DNS server is used to look up site addresses based on their
names.
• If your ISP gave you one or two DNS addresses, select Use These
DNS Servers and type the primary and secondary addresses.
• Otherwise, select Get Automatically From ISP .
Note: If you get “Address not found” errors when you go to a website, it
is likely that your DNS servers are not set up correctly. You should
contact your ISP to get DNS server addresses.
Router MAC Address Your computer's local address is its unique address on your network.
This is also referred to as the computer's MAC (Media Access Control)
address.
• Usually, select Use Default MAC Address .
• If your ISP requires MAC authentication, then select either Use
Computer MAC Address to disguise the router's MAC address with
the computer's own MAC address, or Use This MAC Address to
manually type the MAC address for a different computer.
The format for the MAC address is XX:XX:XX:XX:XX:XX. This value
might be changed if is selected once a Use Computer MAC Address
value has already been set in the selection. Use This MAC Address
22 | Chapter 1. Connecting to the Internet
Mobile Broadband 11n Wireless Router MBR1210 User Manual

Chapter 1. Connecting to the Internet | 23
Mobile Broadband 11n Wireless Router MBR1210 User Manual
3. The following buttons are available:
• Apply. Apply the changes that you made.
• Cancel. Discard changes.
• Test. Connect to the NETGEAR website. If you connect successfully, your settings
work, and you can click to exit these screens.Logout

Chapter 2. Wireless Network Configuration | 24
2
2.
For a wireless connection, the SSID, (also known as the wireless network name), and the
wireless security settings must be the same for the router and wireless computers or wireless
adapters. NETGEAR strongly recommends that you use wireless security.
The router is pre-configured with WPA-PSK/WPA2-PSK mixed mode and uses a unique SSID
and passphrase. This information is printed on the label on the bottom of the router. Use this
information to setup your WiFi computer and devices.
This chapter addresses the following:
• Planning Your Wireless Network
• Manually Configure Your Wireless Settings
• Use Push 'N' Connect (WPS) to Configure Your Wireless Network
Note: Computers can connect wirelessly at a range of several hundred
feet. If you do not use wireless security, this can allow others outside
your immediate area to access your network.

26 | Chapter 2. Wireless Network Configuration
Mobile Broadband 11n Wireless Router MBR1210 User Manual
Wireless Security Options
Indoors, computers can connect over 802.11n wireless networks at a maximum range of up
to 300 feet. Such distances can allow others outside your immediate area to access your
network.
Unlike wired network data, your wireless data transmissions can extend beyond your walls
and can be received by anyone with a compatible adapter. For this reason, use the security
features of your wireless equipment. The Mobile Broadband 11n Wireless Router provides
highly effective security features, which are covered in detail in this chapter. Deploy the
security features appropriate to your needs.
Each router is preconfigured for WPA-PSK/WPA2-PSK mixed-mode, and comes with a
unique SSID and passphrase for each router.
There are several ways you can enhance the security of your wireless network:
Figure 1. Wireless Security
• Restrict access based on MAC address. You can allow only trusted PCs to connect so
that unknown PCs cannot wirelessly connect to the router. Restricting access by MAC
address adds an obstacle against unwanted access to your network, but the data
broadcast over the wireless link is fully exposed.
• Turn off the broadcast of the wireless network name (SSID). If you disable broadcast
of the SSID, only devices that have the correct SSID can connect. This nullifies wireless
network “discovery” feature of some products, such as Windows XP, but the data is still
exposed.
• WEP. Wired Equivalent Privacy (WEP) data encryption provides data security. WEP
Shared Key authentication and WEP data encryption block all but the most determined
eavesdropper. This data encryption mode has been superseded by WPA-PSK and
WPA2-PSK.
• WPA-PSK (TKIP), WPA2-PSK (AES). Wi-Fi Protected Access (WPA) using a pre-shared
key to perform authentication and generate the initial data encryption keys. The very
strong authentication along with dynamic per frame re-keying of WPA makes it virtually
impossible to compromise.
For more information about wireless technology, click the link to the online document
Wireless Networking Basics in Appendix A.

Chapter 2. Wireless Network Configuration | 27
Mobile Broadband 11n Wireless Router MBR1210 User Manual
Manually Configure Your Wireless Settings
Note: If you use a wireless computer to change the wireless network
name (SSID) or wireless security, you will be disconnected when
you click Apply. To avoid this occurrence, connect your computer
directly to the router with an Ethernet cable while you are making
changes.
To view or manually configure the wireless settings:
1. Log in to the router as described in on pageLog In to Your Router 12.
2. Select Wireless Settings from the main menu.
The settings for this screen are explained in
Table 6.
3. Select the region in which the router will
operate.
4. For initial configuration and test, leave the other
settings unchanged.
5. To save your changes, click Apply.
6. Configure and test your computers for wireless
connectivity.
Set up your wireless computers with the
same SSID and wireless security settings as your router. Check that they have a wireless
link and are able to obtain an IP address by DHCP from the router. If there is interference,
adjust the channel.
Table 1.
Settings Description
Wireless
Network
Name (SSID) The SSID is also known as the wireless network name. Enter a
32-character (maximum) name in this field. This field is
case-sensitive.
When there is more than one wireless network, SSIDs provide a
means for separating the traffic. To join a network, a wireless
computer or device must use the SSID.
Region The location where the router is used.
Channel .The wireless channel used by the gateway. The default is Auto
Do not change the channel unless you experience interference
(shown by lost connections or slow data transfers). If this happens,
you might need to try different channels to see which works best.
Mode The default is Up to 145 Mbps.

28 | Chapter 2. Wireless Network Configuration
Mobile Broadband 11n Wireless Router MBR1210 User Manual
Configuring WEP
Note: If you use a wireless computer to configure wireless security
settings, you will be disconnected when you click . Apply
Reconfigure your wireless computer to match the new settings, or
access the router from a wired computer to make further changes.
To configure WEP data encryption:
1. Log in to the router as described in Log In to Your Router on page 12.
2. From the main menu, select Wireless Settings to display the Wireless Settings screen.
Security Options None Use this setting to establish wireless connectivity before
implementing wireless security. NETGEAR strongly recommends that
you implement wireless security.
WEP Use encryption keys and data encryption for data security. You can
select 64-bit or 128-bit encryption. See Configuring WEP on page 29.
WPA-PSK (TKIP) Allow only computers configured with WPA to connect to the router.
See on page 31.Configuring WPA, WPA2, or WPA + WPA2
WPA2-PSK (AES) Allow only computers configured with WPA2 to connect to the router.
See on page 31. Configuring WPA, WPA2, or WPA + WPA2
WPA-PSK (TKIP) +
WPA2-PSK (AES)
Allow computers configured with either WPA-PSK or WPA2-PSK
security to connect to the router. See Configuring WPA, WPA2, or
WPA + WPA2 on page 31.
Table 1.
Settings Description

Chapter 2. Wireless Network Configuration | 29
Mobile Broadband 11n Wireless Router MBR1210 User Manual
3. In the Security Options section, select the WEP
(Wired Equivalent Privacy) radio button:
4. Select the Authentication Type setting:
Automatic, Open System Shared Key, or . The
default is Open System.
Note: The authentication is separate from the
data encryption. You can select authentication
that requires a shared key, but still leaves data
transmissions unencrypted. Security is stronger
if you use both the Shared Key and WEP
encryption settings.
5. Select the Encryption Strength setting:
• 64-bit. Enter 10 hexadecimal digits (any
combination of 0–9, a–f, or A–F).
• 128-bit. Enter 26 hexadecimal digits (any combination of 0–9, a–f, or A–F).
6. Enter the encryption keys. You can manually or automatically program the four data
encryption keys. These values must be identical on all computers and access points in your
network:
• Passphrase. To use a passphrase to generate the keys, enter a passphrase, and
click . This automatically creates the keys. Wireless stations must use the Generate
passphrase or keys to access the router.
Note: Not all wireless adapters support passphrase key generation.
• Key 1–Key4. These values are not case-sensitive. You can manually enter the four
data encryption keys. These values must be identical on all computers and access
points in your network. Enter 10 hexadecimal digits (any combination of 0 – –9, a f, or
A–F).
7. Select which of the four keys will be the default.
Data transmissions are always encrypted using the default key. The other keys can be
used only to decrypt received data. The four entries are disabled if WPA-PSK or WPA
authentication is selected.
8. Click Apply to save your settings.

30 | Chapter 2. Wireless Network Configuration
Mobile Broadband 11n Wireless Router MBR1210 User Manual
Configuring WPA, WPA2, or WPA + WPA2
Both WPA and WPA2 provide strong data security. WPA with TKIP is a software
implementation that can be used on Windows systems with Service Pack 2 or later; WPA2
with AES is a hardware implementation; see your device documentation before implementing
it. Consult the product documentation for your wireless adapter for instructions for configuring
WPA settings.
Note: If you use a wireless computer to configure wireless security
settings, you will be disconnected when you click . If this Apply
happens, reconfigure your wireless computer to match the new
settings, or access the router from a wired computer to make further
changes.
To configure WPA or WPA2 in the router:
1. Log in to the router as described in Log In to Your Router on page 12.
2. Select Wireless Settings from the main menu.
3. On the Wireless Setting screen, select the radio button for the WPA or WPA2 option of your
choice.
4. For WPA-PSK or WPA2-PSK, enter the passphrase.
5. To save your settings, click Apply.

32 | Chapter 2. Wireless Network Configuration
Mobile Broadband 11n Wireless Router MBR1210 User Manual
The router WPS screen displays a
message confirming that the client was
added to the wireless network. The router
generates an SSID, and implements
WPA/WPA2 wireless security. The router
will keep these wireless settings unless
you change them, or you clear the Keep
Existing Wireless Settings check box in
the Advanced Wireless Settings/WPS
Settings screen.
6. Note the new SSID and WPA/WPA2
password for the wireless network. You can
view these settings in the Wireless Settings
screen. See Manually Configure Your
Wireless Settings on page .28
To access the Internet from any computer connected to your router, launch a browser such
as Microsoft Internet Explorer or Mozilla Firefox. You should see the router’s Internet LED
blink, indicating communication to the ISP.
Note: If no WPS-capable client devices are located during the 2-minute
time frame, the SSID does not change, and no security is set up.

Chapter 2. Wireless Network Configuration | 33
Mobile Broadband 11n Wireless Router MBR1210 User Manual
WPS PIN Entry
Any wireless computer or device that will connect to the router wirelessly is a client. The
client must support a WPS PIN, and must have a WPS configuration utility, such as the
NETGEAR Smart Wizard or Atheros Jumpstart.
The first time you add a WPS client, make sure that the Keep Existing Wireless Settings
check box on the WPS Settings screen is cleared. This is the default setting for the router,
and allows it to generate the SSID and WPA/WPA2 security settings when it implements
WPS. After WPS is implemented, the router automatically selects this check box so that your
SSID and wireless security settings stay the same if other WPS devices are added later.
To use a PIN to add a WPS client:
1. Log in to the router as described in on pageLog In to Your Router 12.
2. On the router main menu, select Add WPS
Client (computers that will connect
wirelessly to the router are clients), and
then click Next. The Add WPS Client
screen displays.
3. Select the PIN Number radio button.
4. Go to the client wireless computer. Run a
WPS configuration utility. Follow the utility’s
instructions to generate a PIN. Take note of the client PIN.
5. In the router Add WPS Client screen, enter the client PIN number, and then click Next.
• The router tries to communicate with the client for 4 minutes. If no WPS clients
connect during this time, the router wireless settings do not change.
• The router WPS screen confirms that the client was added to the wireless network.
The router generates an SSID, and implements WPA/WPA2 wireless security.
6. Note the new SSID and WPA/WPA2 password for the wireless network. You can view these
settings in the Wireless Settings screen. See Manually Configure Your Wireless Settings on
page .28
To access the Internet from any computer connected to your router, launch an Internet
browser such as Mozilla Firefox. You should see the router’s Internet LED blink.

34 | Chapter 2. Wireless Network Configuration
Mobile Broadband 11n Wireless Router MBR1210 User Manual
Add Wireless Computers That Do Not Support WPS
If you set up your network with WPS, and now you want to add a computer that does not
support WPS, you must manually configure that computer. For information about how to view
the wireless settings for the router, see on Manually Configure Your Wireless Settings
page 28.
Because WPA randomly creates the SSID and WPA/WPA2 keys, they might be difficult to
type or remember (that is one reason why the network is so secure). You can change the
wireless settings so that they are easier for you to remember. If you do that, then you will
need to set up the WPS-compatible computers again.
Note: Making these changes will cause all wireless computers to be
disconnected from network. You will then have to set them up with
the new wireless settings.
To change wireless settings for the network:
1. Use an Ethernet cable to connect a computer to the router. That way you will not get
disconnected when you change the wireless settings.
2. Log in to the router and select Wireless Settings (see Manually Configure Your Wireless
Settings on page 28).
3. Make the following changes:
• Change the wireless network name (SSID) to a meaningful name.
• On the WPA/PSK + WPA2/PSK screen, select a passphrase.
• Make sure that the check box is selected in the WPS Keep Wireless Settings
Settings screen so that your new settings will not be erased if you use WPS.
4. Click Apply so that your changes take effect. Write down your settings.
All existing wireless clients are disassociated and disconnected from the router.
5. For the non-WPS devices that you want to connect, open the networking utility and follow
the utility’s instructions to enter the security settings that you selected in Step 3 (the SSID,
WPA/PSK + WPA2/PSK security method, and passphrase).
6. For the WPS devices that you want to connect, follow the procedure WPS Button on
page 32 or WPS PIN Entry on page .34
The settings that you configured in Step 3 are broadcast to the WPS devices so that they
can connect to the router.

Chapter 3. Content Filtering | 37
3
3.
This chapter describes how to use the basic firewall features of the router to protect your
network.
• Viewing, Selecting, and Saving Logged Information
• Blocking Sites and Keywords
• Blocking Services
• Scheduling
• Enabling Security Event Email Notification
Note: For information about the advanced content filtering features port
forwarding and port triggering, see Port Forwarding and Port
Triggering on page 65.

Chapter 3. Content Filtering | 39
Mobile Broadband 11n Wireless Router MBR1210 User Manual
Log entries and action buttons are described in the .Table 7
Table 1.
Field or Button Description
Current time The date and time the log entry was recorded.
Description or action The type of event and what action was taken, if any.
Source IP The IP address of the initiating device for this log entry.
Source port and interface The service port number of the initiating device, and whether it
originated from the LAN or WAN.
Destination The name or IP address of the destination device or website.
Destination port and interface The service port number of the destination device, and whether it is
on the LAN or WAN.
Refresh button Refresh the log screen.
Clear Log button Clear the log entries.
Send Log button Email the log immediately.
Apply button Apply the current settings.
Cancel button Clear the current settings.
Selecting Which Information to Log
Besides the standard information listed previously, you can choose to log additional
information. Those optional selections are as follows:
• Attempted access to blocked site
• Connections to the router menu
• Router operation (start up, get time, and so on)
• Known DoS attacks and port scans
Saving Log Files on a Server
You can choose to write the logs to a computer running a syslog program. To activate this
feature, select to the radio button, or enter the IP address of the server Broadcast on LAN
where the syslog file will be written.

40 | Chapter 3. Content Filtering
Mobile Broadband 11n Wireless Router MBR1210 User Manual
Log Message Examples
Following are examples of log messages. In all cases, the log entry shows the time stamp as
Day, Year-Month-Date Hour:Minute:Second.
Activation and Administration
Tue, 2002-05-21 18:48:39 - NETGEAR activated
This entry indicates a power-up or reboot with initial time entry.
Tue, 2002-05-21 18:55:00 - Administrator login successful - IP:192.168.0.2
Thu, 2002-05-21 18:56:58 - Administrator logout - IP:192.168.0.2
This entry shows an administrator logging in to and out from IP address 192.168.0.2.
Tue, 2002-05-21 19:00:06 - Login screen timed out - IP:192.168.0.2
This entry shows a time-out of the administrator login.
Wed, 2002-05-22 22:00:19 - Log emailed
This entry shows when the log was emailed.
Dropped Packets
Wed, 2002-05-22 07:15:15 - TCP packet dropped - Source:64.12.47.28,4787,WAN -
Destination:134.177.0.11,21,LAN - [Inbound Default rule match]
Sun, 2002-05-22 12:50:33 - UDP packet dropped - Source:64.12.47.28,10714,WAN -
Destination:134.177.0.11,6970,LAN - [Inbound Default rule match]
Sun, 2002-05-22 21:02:53 - ICMP packet dropped - Source:64.12.47.28,0,WAN -
Destination:134.177.0.11,0,LAN - [Inbound Default rule match]
These entries show an inbound FTP (port 21) packet, User Datagram Protocol (UDP) packet
(port 6970), and Internet Control Message Protocol (ICMP) packet (port 0) being dropped as
a result of the default inbound rule, which states that all inbound packets are denied.

42 | Chapter 3. Content Filtering
Mobile Broadband 11n Wireless Router MBR1210 User Manual
Some examples of keyword applications are shown in the following chart.
Table 2.
Keyword Result
XXX Block the URL http://www.badstuf.com/xxx.html.
.com Only websites with other domain suffixes (such as .edu or .gov) can be viewed.
. ( a period) Block all Internet browsing access.
Up to 32 entries are supported in the Keyword list.
Note: If you block sites, you can set up the router to log attempts to access
them. See on Viewing, Selecting, and Saving Logged Information
page 39.
5. To delete a keyword or domain, select it from the list, click Delete Keyword, and then click
Apply.
6. To specify a trusted user, enter that computer’s IP address in the Trusted IP Address field,
and then click Apply.
You can specify one trusted user, which is a computer that will be exempt from blocking
and logging. Since the trusted user will be identified by an IP address, you should
configure that computer with a fixed IP address.
7. Click Apply to save your settings.

Chapter 4. Managing Your Network | 46
4
4. Managing Your Network
This chapter describes how to perform network management tasks with your Mobile Broadband
11n Wireless Router.
• Router Status
• Backing Up, Restoring, or Erasing Your Settings
• Protecting Access to Your Router
• Running Diagnostic Utilities and Rebooting the Router
• Upgrading the Router Firmware

Chapter 4. Managing Your Network | 47
Mobile Broadband 11n Wireless Router MBR1210 User Manual
Router Status
From the main menu, under Maintenance, select Router Status to view this screen.
You can use this screen to view the status of the router, to show statistics, or to view the
connection status.
• For information about the fields on this screen, see Table 9.
• See Showing Statistics on page 50 for information about statistics.
• For information about the Internet connection, see Connection Status on page 51.

50 | Chapter 4. Managing Your Network
Mobile Broadband 11n Wireless Router MBR1210 User Manual
Connection Status
Click the button on the Router Status screen:Connection Status
This screen shows the following statistics:
Table 3.
Field Description
Mobile Broadband
Service
Connection Status The status of the Internet connection.
• Scanning. The modem is scanning for broadband wireless
networks in your area.
• Connected. The router is connected to the Internet.
• No USB Device Attached . The router does not detect a
USB modem connected to its USB port. Either the modem is
disconnected, or it is not correctly seated. To correct the
problem remove the modem and reinsert it into the port.
Received Signal Quality
(in dBm)
Modem radio reception. A small, negative number indicates
good signal quality.
Bytes Transmitted The number of bytes transmitted in the most recent connection
session.
Bytes Received The number of bytes received in the most recent connection
session.
Tx B/s The transmission rate.
Rx B/s The receiving rate.
System Uptime Time elapsed since the last reboot.
Produktspecifikationer
| Varumärke: | Netgear |
| Kategori: | Router |
| Modell: | MBR1210 |
Behöver du hjälp?
Om du behöver hjälp med Netgear MBR1210 ställ en fråga nedan och andra användare kommer att svara dig
Router Netgear Manualer

8 Januari 2025
27 Oktober 2024
15 Oktober 2024
11 Oktober 2024
11 Oktober 2024
8 Oktober 2024
3 Oktober 2024
28 September 2024
26 September 2024
26 September 2024
Router Manualer
- Router Xiaomi
- Router Bosch
- Router Huawei
- Router HP
- Router DeWalt
- Router Motorola
- Router Nokia
- Router Siemens
- Router Topcom
- Router VTech
- Router Alcatel
- Router Allnet
- Router Alfa
- Router Allied Telesis
- Router Airlive
- Router Anker
- Router Silverline
- Router Edimax
- Router Strong
- Router Hikvision
- Router Proximus
- Router Arris
- Router BenQ
- Router Gude
- Router Makita
- Router Hitachi
- Router Thomson
- Router Gembird
- Router Black And Decker
- Router Asus
- Router Skil
- Router Eminent
- Router Renkforce
- Router Vivanco
- Router Festool
- Router Sitecom
- Router Metabo
- Router TP Link
- Router Manhattan
- Router Ezviz
- Router Black Box
- Router Trust
- Router Milwaukee
- Router Hikoki
- Router Sagem
- Router Roland
- Router ZTE
- Router Nilox
- Router Einhell
- Router Hama
- Router Sonos
- Router AVM
- Router TCL
- Router Gigabyte
- Router Nec
- Router Techly
- Router Totolink
- Router Cisco
- Router Engenius
- Router KPN
- Router IFM
- Router Netis
- Router Envivo
- Router Digitus
- Router Kathrein
- Router Draytek
- Router Belkin
- Router Devolo
- Router Linksys
- Router Barco
- Router Buffalo
- Router Powerplus
- Router Porter-Cable
- Router Dahua Technology
- Router Cotech
- Router Nest
- Router LevelOne
- Router BT
- Router QNAP
- Router Vodafone
- Router Sigma
- Router ICIDU
- Router Dell
- Router Mercusys
- Router Milan
- Router Planet
- Router ZyXEL
- Router Western Digital
- Router Clas Ohlson
- Router Konig
- Router AT&T
- Router Sweex
- Router MSI
- Router Foscam
- Router Zebra
- Router D-Link
- Router Aruba
- Router Tenda
- Router Phicomm
- Router Kyocera
- Router Teltonika
- Router Ubiquiti Networks
- Router Zoom
- Router Marshall Electronics
- Router Thrustmaster
- Router Jung
- Router Technicolor
- Router Synology
- Router Trendnet
- Router Blackmagic Design
- Router Mikrotik
- Router ATen
- Router Digi
- Router Verizon
- Router Billion
- Router T-Mobile
- Router Conceptronic
- Router RGBlink
- Router Gefen
- Router RAVPower
- Router Hawking Technologies
- Router Kopul
- Router Nexxt
- Router Beafon
- Router Kraun
- Router Zolid
- Router Sagemcom
- Router Toolcraft
- Router Telstra
- Router SPL
- Router Logilink
- Router Moxa
- Router Smart-AVI
- Router StarTech.com
- Router Holzmann
- Router SIIG
- Router Eero
- Router Advantech
- Router Mercku
- Router IOGEAR
- Router Hercules
- Router Xantech
- Router KanexPro
- Router Intelix
- Router Blustream
- Router Intellinet
- Router Lancom
- Router Arcadyan
- Router ModeCom
- Router Digiconnect
- Router Ubee
- Router SMC
- Router Tele 2
- Router Vimar
- Router Kogan
- Router Ocean Matrix
- Router Peak
- Router CradlePoint
- Router Davolink
- Router Sixnet
- Router Kramer
- Router 7inova
- Router Media-tech
- Router AVPro Edge
- Router Cudy
- Router Lindy
- Router F-Secure
- Router Rosewill
- Router Digicom
- Router Sabrent
- Router On Networks
- Router Atlona
- Router AVMATRIX
- Router PENTAGRAM
- Router Leoxsys
- Router Readynet
- Router OneAccess
- Router Accelerated
- Router Nexaira
- Router FSR
- Router Hamlet
- Router Approx
- Router T-com
- Router Alfatron
- Router Amped Wireless
- Router Key Digital
- Router Cambium Networks
- Router 3Com
- Router I-Tec
- Router Avenview
- Router United Telecom
- Router BZBGear
- Router WyreStorm
- Router Rocstor
- Router Ruckus Wireless
- Router Dovado
- Router Mach Power
- Router MuxLab
- Router EXSYS
- Router NetComm
- Router Juniper
- Router Comtrend
- Router Premiertek
- Router Bea-fon
- Router GL.iNet
- Router A-NeuVideo
- Router Shinybow
- Router Edgewater
- Router Atlantis Land
- Router Lantronix
- Router Lumantek
- Router Keenetic
- Router Starlink
- Router Keewifi
- Router Milesight
- Router PulseAudio
- Router Wisetiger
- Router Predator
- Router Evolution
- Router Comprehensive
- Router Digitalinx
- Router Luxul
- Router DVDO
- Router StarIink
- Router Silentwind
- Router Keezel
- Router VigilLink
- Router Digital Forecast
Nyaste Router Manualer
9 April 2025
9 April 2025
8 April 2025
3 April 2025
1 April 2025
30 Mars 2025
30 Mars 2025
30 Mars 2025
30 Mars 2025
30 Mars 2025